With its ability to flatten wide stock quickly and effortlessly, one of the things that my planer sled design has enabled is a little more flexibility and ease when I need to glue up something wide. Ironically (or perhaps not so much), the jack plane often comes into play here. A quick treatment with everyone’s favorite “rough ‘n ready” sometimes saves even more time.
By way of example, I’m working with a bunch of suboptimal cedar at the moment. I need 10-inch (~255mm) stock, and I don’t have any. So I glued up sections of three (crummy) 4-inch stock, first roughing out the stock on the bandsaw, then planing slightly “sprung” edges using a jointer plane. I didn’t make the edges perfectly square to the sides because the sides were rough and uneven from the bandsaw (and the thicknessses varied anyway)–all I cared about was getting edges that would join together.
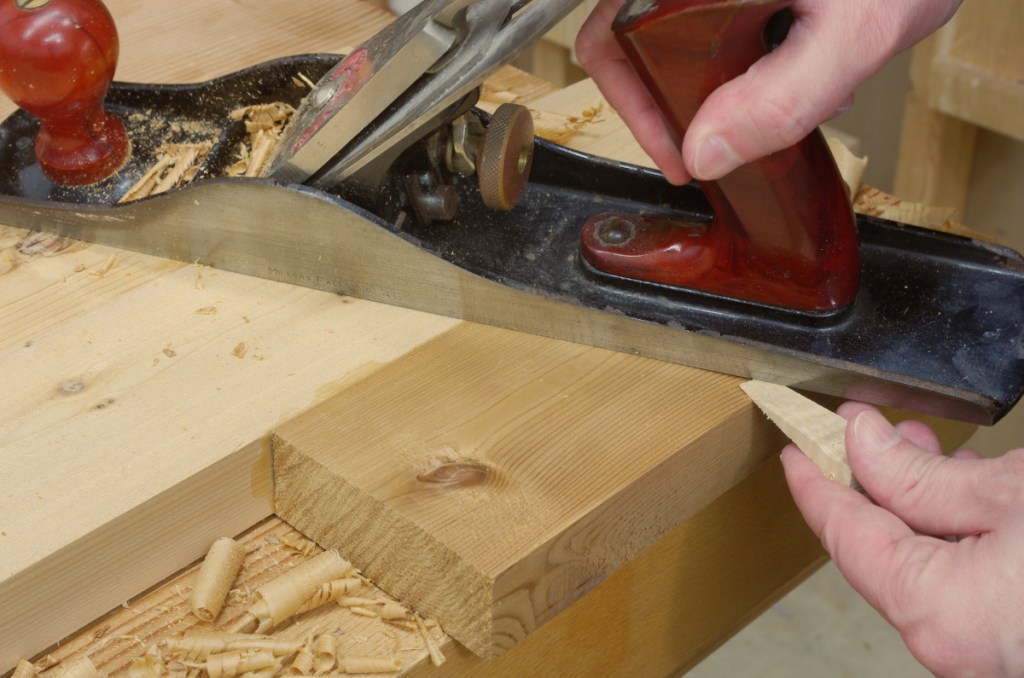
When doing something like that, you end up with a glued-up board resembling something from the Cubist style, for which the conformist cries out to flatten. And we oblige. For the planer sled to work correctly, you want the face you put on the bottom to be “roughly” convex, but there’s no particularly exacting standard. So you can grab a jack plane to (effortlessly) knock off a bit from the sides near the edges:
Wedge shows the part that I planed off.
Now, you can flip it over, pull out the planer sled, and fix the whole mess in place:
Yes, this is a strangely-shaped piece.
And just like that, you’re ready to feed the whole mess into the thickness planer and flatten it in one shot. The process of knocking off the edges, fixing in the planer sled, and flattening with the thickness planer only takes a few minutes (I spent a lot more time taking the photos and writing up this post).
Perhaps there’s a need for a “moral of the story” trope-ish thing in here, so here you go: The jack plane is invaluable. Even though I don’t need to use it nearly as much as I did in my prep-stock-by-hand days, I’d still be lost without it.
Shop time has been limited, yet nonzero, in the last couple of weeks. Other than a bunch of cleaning up down there (which has gotten much easier as I find better ways to organize), I finally set out something to do about the plane that I use for shooting. I’ve been using a low-angle block plane for a while, but have wanted to try out something with a little more heft.
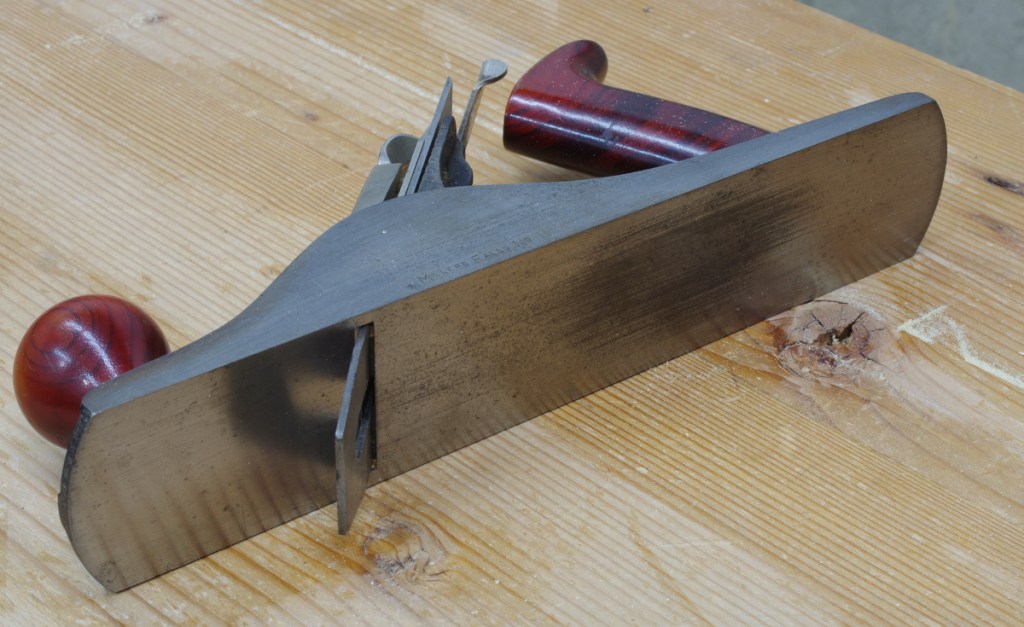
While doing some of the aforementioned cleaning, I came across a Millers Falls No. 18 (Stanley #6 equivalent) that I bought years ago but never did anything with. The sides were already nicely square to the sole, so I decided that maybe I could try it out with the shooting board.
It was was fairly rusty and completely filthy. A couple of hours spread over a few days with rust remover dealt with that. The iron was badly pitted, so I dug out a Hock replacement that I had on hand. And so somewhat surprisingly, everything went together fairly quickly today:
No one’s going to mistake this thing for a completely restored plane, of course. And it may not be one of those neat specialized planes with the low-angle skewed blade, but it has the advantage of being available for service right now. We’ll see how it goes.
With a decade and a half on this blog’s odometer, I got to wondering if I really have any more of a clue now than I did 15 years ago. Recall that I started this blog when I started woodworking.
Then asked a question that felt odd: How much does having a “clue” actually matter?
And how do we define “clue?” Through some way or another, I have managed to build a bunch of stuff for the house. It gets done, but I’m not very quick at it. By contrast, many of the publications that we read about woodworking are written by or influenced by professionals. It’s natural, when reading Nancy Hiller’s work, to feel a bit discouraged when she writes of the pace that keeps her business going.
But I thought of something: Hey, wait, I’m a hobbyist woodworker. This is not my day job. I don’t want it to be.
Perhaps there are advantages to that. Maybe there are more options available and there isn’t much point to emulating a professional if it makes no sense. Sure, you want your dovetails to fit and everything, but here’s something to ponder: You actually have the option to do hand-cut dovetails on your own work; you can make those mortise-and-tenon joints the way you want to. A professional may not have these options if the budget does not suit the project.
Traditional nailed dovetail joinery. Hey, those fancy cut nails really are better.
And if you screw up, you can always just go back to the drawing board.
Then there are techniques and equipment. Professionals almost universally use jointer machines to flatten their boards. They have to in order to survive. But I used hand planes for years; I didn’t have the space for any machines at first. Then I took my time and designed a planer sled that might actually be worthwhile. Though I don’t think the sled is particularly suited for the professional (except for wider stock, maybe), it’s been great for me, the hobbyist. I have different constraints: I want to keep the size and number of machines in my shop to a (bare) minimum, I’d like something a bit safer than a jointer, and I don’t mind a minute or two extra setup time.
This does not, however, mean that you need to be a Frank Sinatra. We’re fortunate to have a lot of good instructional material that shows plenty of traditional and “contemporary” ways of doing stuff. Deviating wildly from standard practice might not yield the results that you want.
Or be a Frank Sinatra if you like; it won’t make any difference to me unless you show up on my doorstep and start crooning.
Being Shopless and “The Lifestyle Question”
A related advantage to being a hobbyist is that you can put it down if necessary, or if you just want to take a break. Before moving to my current digs, I spent a few years in places that had inadequate or otherwise nonexistent shop space (yes, even worse than the apartment in San Francisco). To tell the truth, I wasn’t thinking much about woodworking then. I knew that I couldn’t set up my shop, so my mind moved to other things, such as bicycling.
But the woodworking experience, being able to make my own stuff, did change my perspective on certain lifestyle choices. During one of these shopless times, I wasn’t able to find a cycling cap that fit me correctly. I started to wonder if I could make my own, and, well, it turns out that you can. I decided see if I could learn to sew, because SHMBO had a sewing machine that she’d never even opened the box of.
And boom, just like that, I was off on another crazy craft before I knew it. But I digress.
OK, So, Do I Have More of a Clue Now?
I think it’s safe to say that I’ve learned a thing or two about woodworking in the past 15 years. Really, maybe just one or two things. I still consider myself fairly clueless, and there’s a fairly simple reason. I don’t talk about it much here, but I am a victim of grad school. One thing you learn there (at least if you’re paying attention, which admittedly has never been my strong suit) is how much you don’t know. Even in a field as new as computer science, the amount of related knowledge is so vast that it boggles the mind.
That the old-timers were so strong that they could bore with a brace all day long, this boggles the mind.
It seems that every day, I learn about some kind of woodworking that I’ve never touched, such as the crazy Hakone yosegi-zaiku marquetry, and that I’ll likely never get to try. I don’t know what to make of this.
About Those Videos
I have a few videos out now. I made the first one because I had to teach something (unrelated to woodworking) and wanted to practice presentation after nearly two decades of hiding. The second came along because I wanted a way to share the planer sled design outside of this blog. The most recent… eh, I dunno, I just had the idea, wrote it up, and made it.
This is likely not going to become much of a habit. Videos are extremely time-consuming to produce, and offer little in return. I don’t currently make anything from them, and even if I did manage to get enough subscribers to monetize, it wouldn’t generate much. I’m not a performer, no Roy Underhill, no Nick Offerman. At best, words stumble off my tongue and litter the floor. I could probably train it, but I probably don’t want to. And that is OK.
Handplane techniques video test shot. You gotta put it down on the side; otherwise, it gets dull.
What’s Next?
I have a lot of furniture projects lined up that are in the same spirit of past projects. Part of that means frame-construction pieces, sometimes with drawers. But I’ve also been doing some stuff with staked construction lately. I fuss over these things way too much, but I’ve also gotten a little more confident with it. My end goal in that area is to make stick chairs. I’ve been fascinated with them for a while, how they manage to hold together despite using joints that really ought to be dodgy.
What I eventually want to do with stick chairs is explore the aesthetics a bit more. I came late to this. When I first saw Windsor chairs, I didn’t like them much. The construction is kind of neat, but there’s just something about the lines (and excess ornamentation) that I have never cared for. I never saw a Welsh stick chair until popularized by a C.S., though, and I have to admit that seeing those really changed my mind about stick chairs. I’m not sure if I’m a huge fan of the way that most of those look, but there’s a flexibility there that makes me think that it’s worth a shot.
And that about sums it up, until I change my mind again.
After a while working on the bench-on-bench, I decided to make a fairly brief video describing my experience with it. I did this because although there are a lot of videos that show building one of these things, there aren’t many that say what they’re good for. I also wanted to highlight a few things about my design that I’ve found helpful.
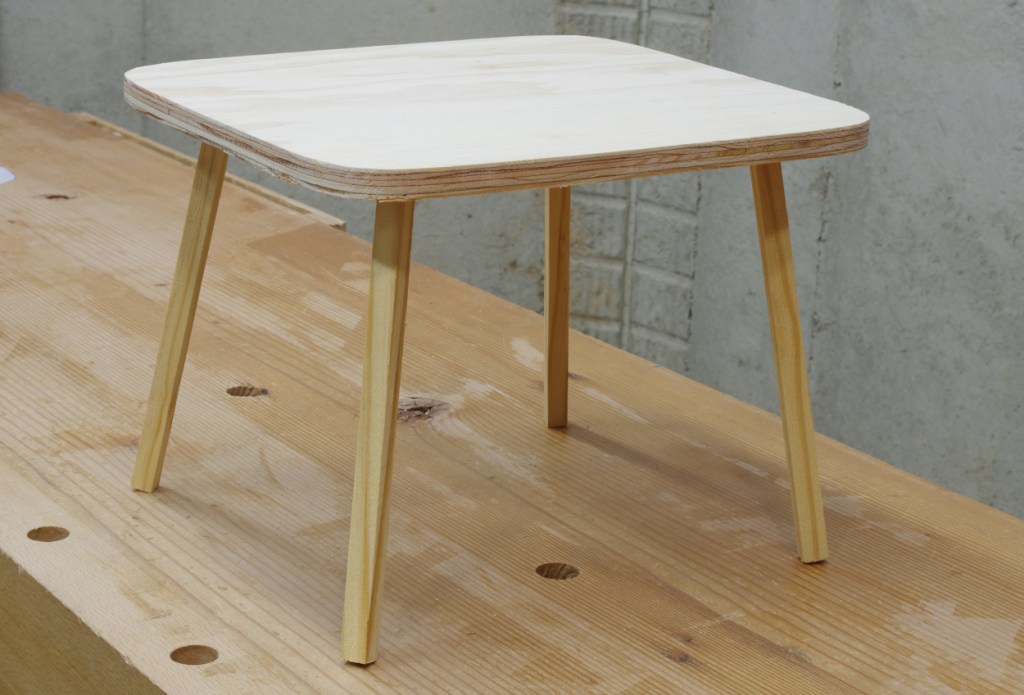
I finally found the time and motivation to perform the final steps on the side table:
Smooth and sand the legs
Plane and sand the top
Make the wedges
Kerf the tenons, glue tenons into mortises, bang wedges home
Trim tenons
Trim/level legs
Apply the finish
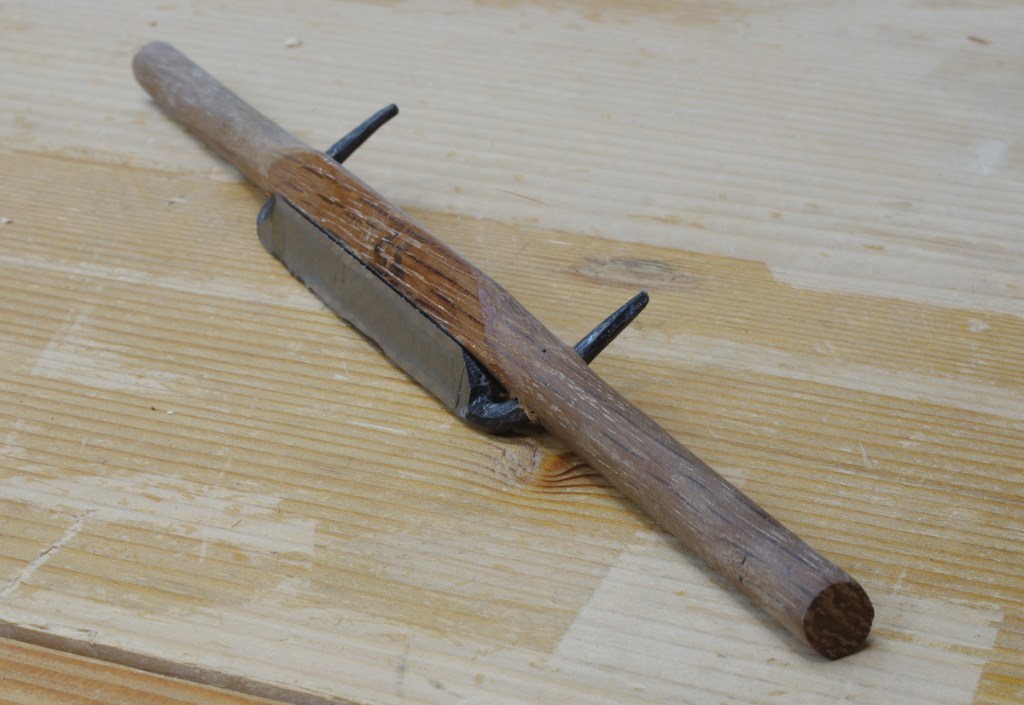
There’s nothing too complicated about any of this. The only noteworthy thing is that for the legs, I used my Taiwanese spokeshave to smooth out the legs instead of really coarse sandpaper:
I’m not a big spokeshave user, and I finally realized why I hadn’t really used this one yet: I hadn’t sharpened it. I’d been putting this off because I suspected that it would be difficult, but with the new sharpening station, I figured I’d give it a shot. It turned out to be a little tricky until I got the hang of it. The cutting edge of this shave is similar to what you’d find on a Japanese chisel–a very hard piece of steel (likely Japanese) forge-welded to a softer backing/body. The face has a hollow, making it easy to smooth, but the bevel is rough because there’s such a difference in hardness between the cutting edge and the rest.
Because you don’t have much leverage when sharpening, it’s too easy just to end up mostly rubbing the soft part on the stone, instead of honing the cutting edge. I finally figured out that if you push on the tangs when sharpening, it’s a lot more effective.
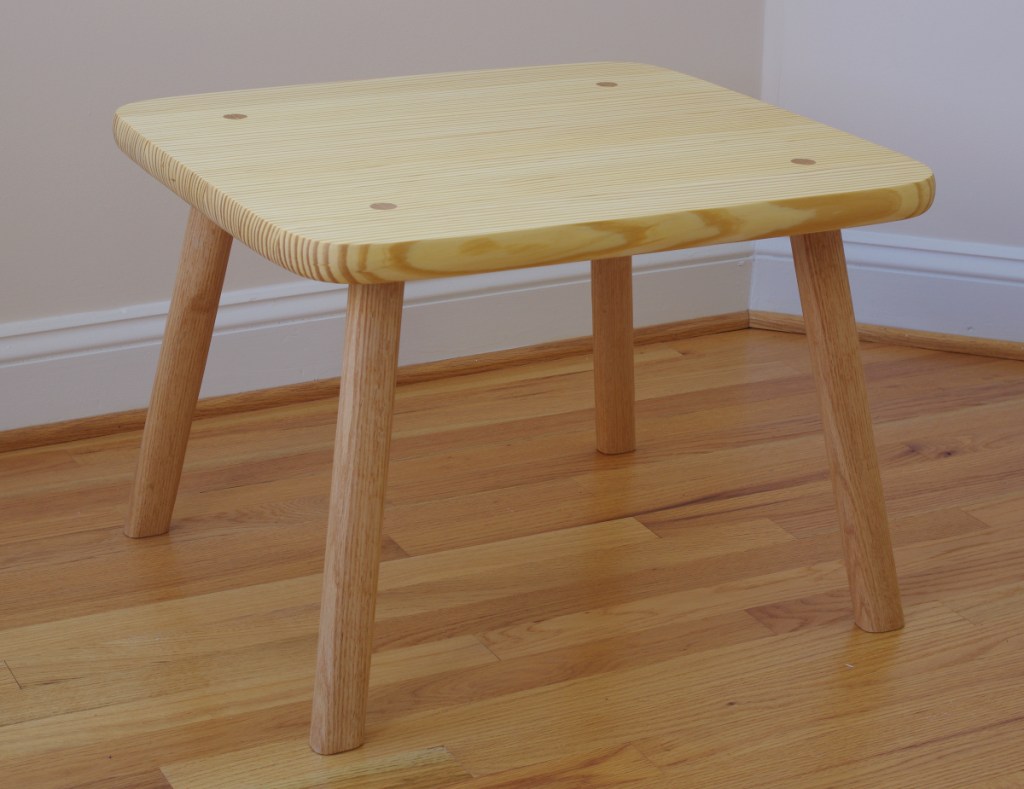
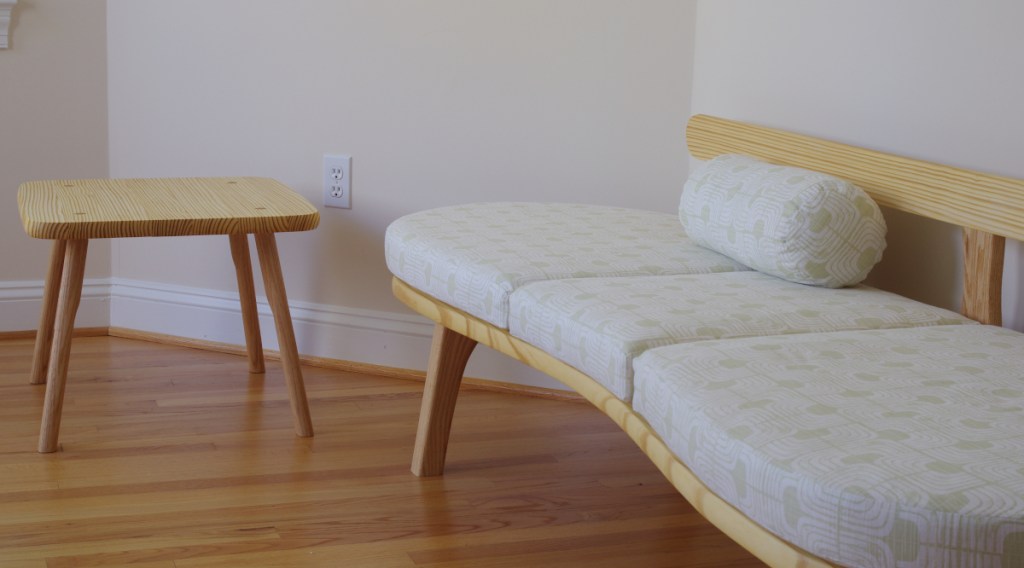
In any case, with everything assembled, the table looks like, well, a table:
Last time, I mentioned that I’d cut the first leg incorrectly, 90 degrees to what I wanted. But it turns out that the first one was actually “correct,” and I messed up the other four. The growth rings of the oak are oriented 90 degrees to the yellow pine, and they’re supposed to be parallel. For this application (not being a chair), I don’t think it’s going to matter, though that’s still a little bit annoying. I got the wedges in the correct orientation, which is a lot more important.
This might not be the final arrangement, but the two pieces are meant to go together. The legs and tops are meant to complement each other. The table’s top is in the profile of the daybed legs, and the table’s legs have a more oval profile, like the platform and rear support of the daybed. Both sets of legs have a sort of single-step taper.
The table might need another application of finish (tung oil/varnish blend), but I’ll make that call later.
Of course, this project is long past due. Part of the delay has been uneasiness regarding reaming the mortises into the top, which I had to practice again in order to get a proper result, part of it was cutting out the top in the first place, part of it was not knowing how I would approach the legs, but most of it was just not having the time or motivation to go down to the shop and get something done.
Eventually, I figured out what I wanted to do with the legs, which are sort of a “one-stepped taper thingie” in order to complement the daybed legs. I started with octagon-profile legs, and then cut it down to this:
I’ve improved my efficiency on these. After getting two adjacent sides flat (not necessarily square), I can do almost all of the rest of the initial work on the bandsaw. Getting down to the octagon is easy; first you get a rough square profile, then use the V-track thing to help knock off the corners.
Then, for the tapered tenon, adjust the bandsaw so that you can cut near the sides of cylinder that encloses the tenon. The bandsaw is great because you can cut partway, pull out, rotate to the next facet, then cut the next one. After sawing off the sides, I use a rasp to make the profile round and to final size, and then it’s ready for the tenon cutter. This might sound a little complicated, but it’s easy in practice. Perhaps I could make a video of it.
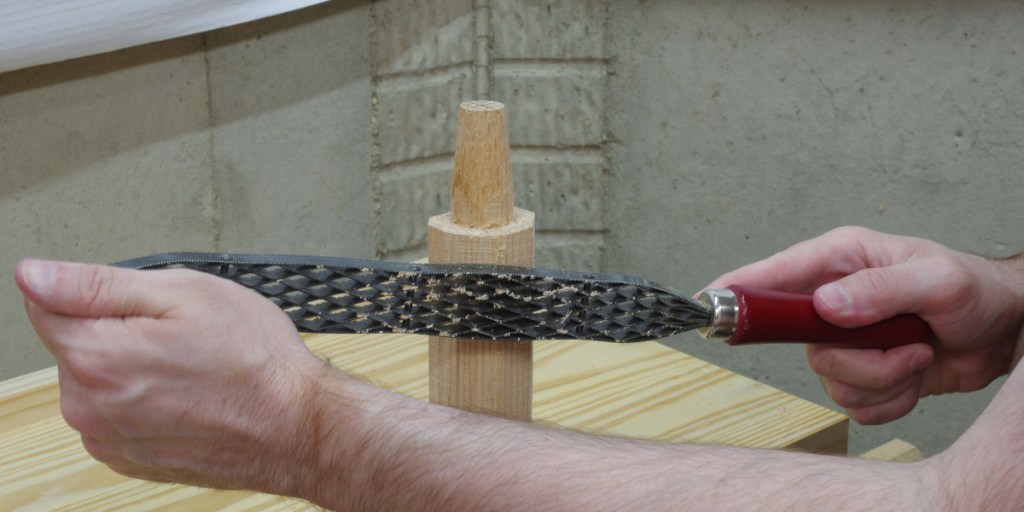
In any case, once I have the initial piece above, I put it in the vise and go to down with the rasp:
Of course, I don’t use just any rasp for this rough work–I use the Shinto saw rasp for most of it.
I use a big English chisel to cut the step between the thicker and thinner parts:
I guess I could make a shaving horse and do this work with the drawknife and spokeshave, but I wonder if it would save me any time. It takes me 10-15 minutes to shape a leg like this, which seems pretty acceptable for a hobbyist like myself.
Of course, I managed to screw up the first leg that I shaped (by cutting the shape 90 degrees to what it was supposed to be relative to the growth rings). I hemmed and hawed a bit over what to do there, but in the end, I decided to remake the leg. It didn’t me much time.
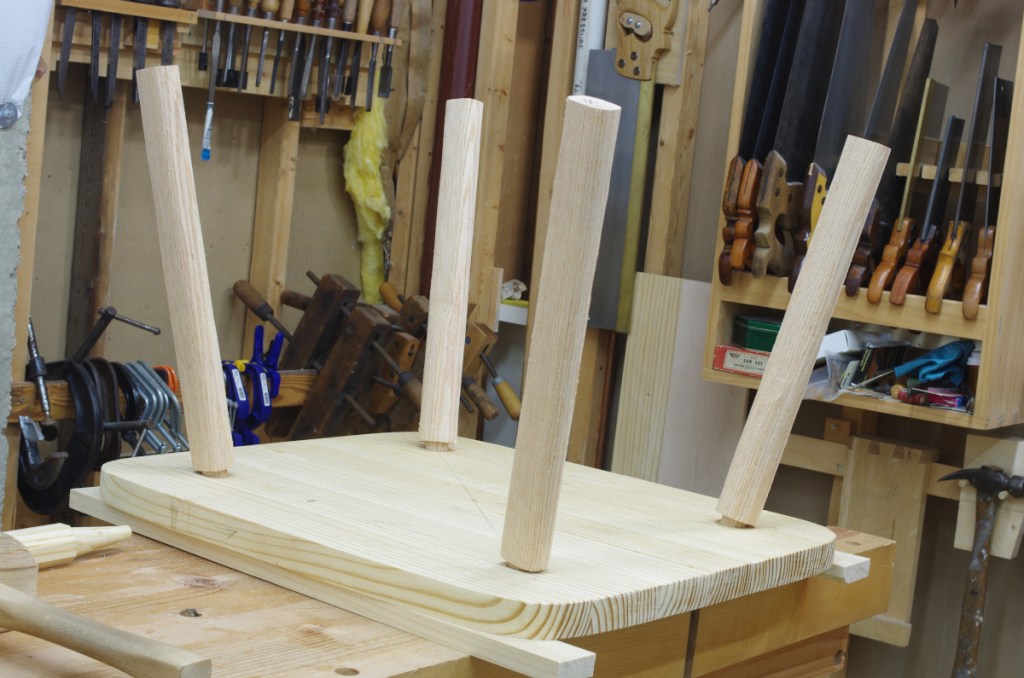
So the legs are shaped and fitted, and the top is also to rough shape:
In theory, this project is almost done. I need to shape the edge of the top, smooth off the legs, glue and wedge in the legs, apply finish, and cut the legs to length. That’s pretty standard stuff, with no problem-solving (figuring out methods and shapes and such).
I’m looking forward to being done with this. I have another video lined up and ready to shoot, but I don’t think I should do that until this is at least in the finishing stage.
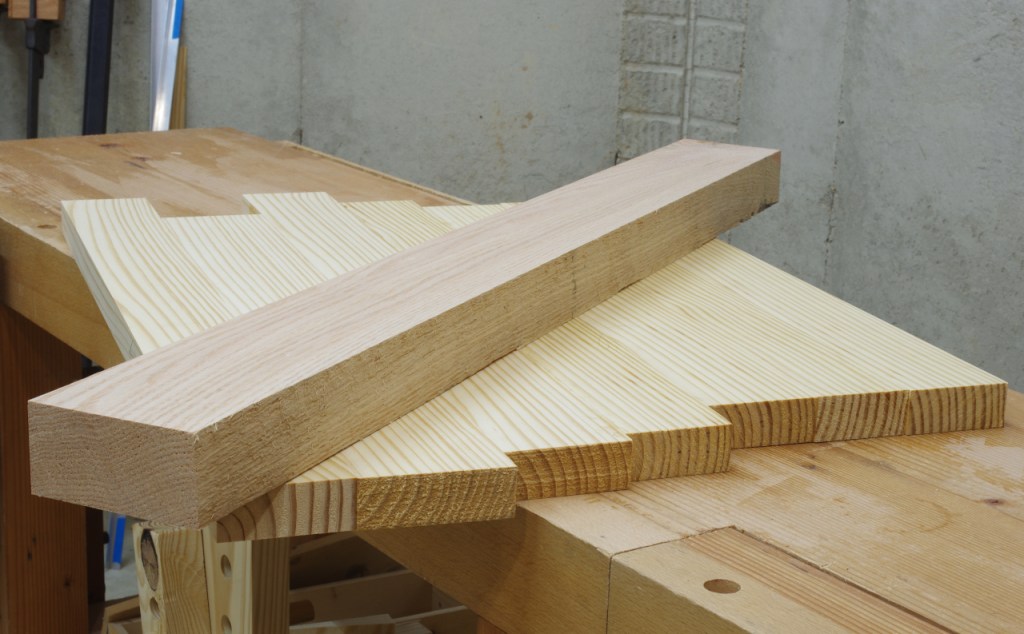
“It’s been a slow couple of weeks in the shop,” as many blog posts would say. My current project is theoretically a quick one: A simple staked side table to accompany the daybed. In true half-slacker fashion, I already have the top glued up and the board for the legs milled:
(Yes, I used the multiwedge to flatten both halves of the top, and have not yet touched the top again with a plane since glue-up.)
I have a design, and even made a half-scale model/mockup to see if it was reasonable:
I also have a full-size template for the top that I just need to tape up and trace to cut out the top.
So, in theory, there’s just a little bit of measuring, gauging, cutting shapes, leg-making, reaming, and tapering to do before this can be called done. I really don’t know why I’ve been dragging this one out. It’s mostly been a matter of not finding the impetus to go down to the shop.
There seem to be several little camps when it comes to stock preparation methods. There are those who rive arrow-straight oak with a froe and plane it down, the hand plane exclusivity evangelists, the hand plane to flatten/thickness planer on rest, the “hmm, maybe hand planes and a big bandsaw” types, the machine heads who won’t use anything but jointers and planers, the various router sled types, and then, of course, the people who mostly do hand work, but keep a huge jointer in a separate area as a dirty secret. You know who you are.
Doing it completely by hand taught me a lot of things, and switching to a hybrid approach with a thickness planer saved me some time. I’ve never really been religious about stock preparation, so this discussion might start to seem a little out of place on this blog, which is mostly about hand work.
But something inside of me wasn’t satisfied with a few things. First, I wasn’t thrilled about flattening stuff by hand anymore. Second, I didn’t want a jointer. Finally, I wasn’t enthusiastic about my thickness planer being such a one-trick pony. I’d read about planer sleds that could flatten boards, but when I looked into them, I wasn’t too impressed. There was one overriding problem: Holding the work conveniently, yet securely.
Still, the sled idea sat in the back of my mind. I kept thinking to myself that there must be a reasonable way to get a board to stay in place, and that some sort of traditional approach to workholding might work. Maybe double wedges? But how? Finally, about a year and a half ago, something went off in my head and I had a basic design. I built a prototype. Surprisingly, it worked. I was then able to refine it some more.
So without further ado, here is my video describing the multiwedge planer sled.
A video might seem a little unusual for me, but I really felt that it was the best way to illustrate the sled.
I really hope it will be useful to someone else as well. It’s been great for me.
Sharpening has been a sore point ever since I moved into the current shop. I had a good spot next to a sink in the shop, but didn’t have any kind of stand or surface to put the stones. So I ended up putting them on a counter on the near-opposite side of the house. This was an unfortunate situation, not just because I’d have to ramble all the way over there every time I wanted to sharpen something. The lighting was bad, the mess I made over there was atrocious, and its temporary nature made me unwilling to organize further.
I had originally intended to make a freestanding sharpening station to put next to the shop sink, but every stand that I made ended up unscrupulously co-opted. Finally, I realized that instead of a stand, I could just put some strong shelf-like brackets into the wall there, making it more of a built-in. It would theoretically be less work than another stand. Then I gave myself some additional “motivation,” saying that I would not sharpen another tool until the sharpening station was in its rightful spot, though I am unsure if this was a good idea or not.
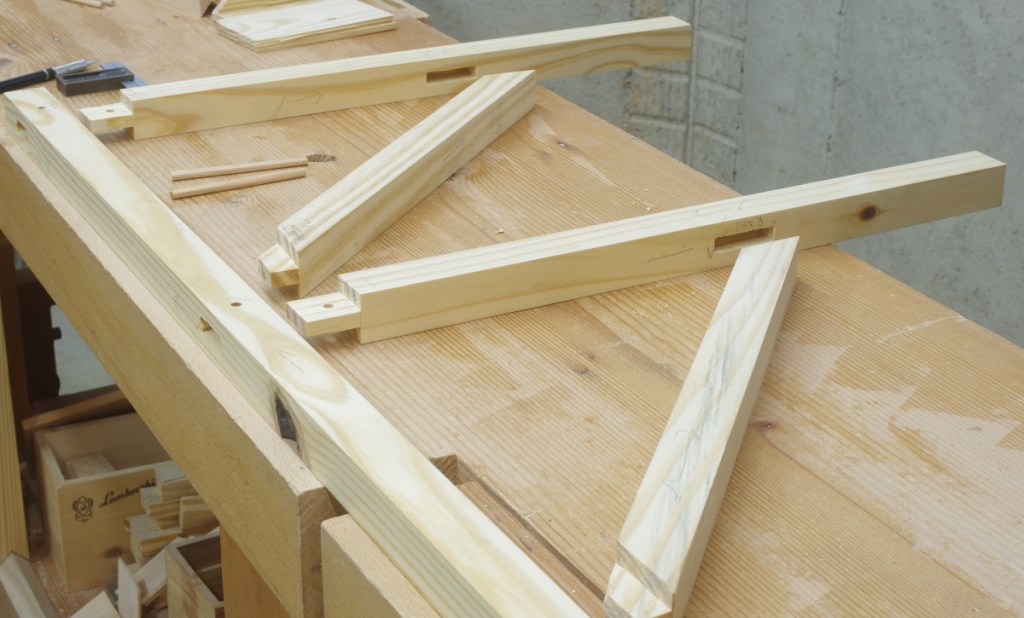
I started by installing a sheet of drywall into the wall framing (it was bare before), and painting it white so that it would reflect light. Then I got to making the brackets themselves:
These are sort of mini-timberframe-like things in southern yellow pine. I decided to use drawbores for the shelf support joints, but didn’t bother on the brace joints. (I do not want to talk about how long I spent making those pegs.) There are two stiles, each with upper and lower shelf supports.
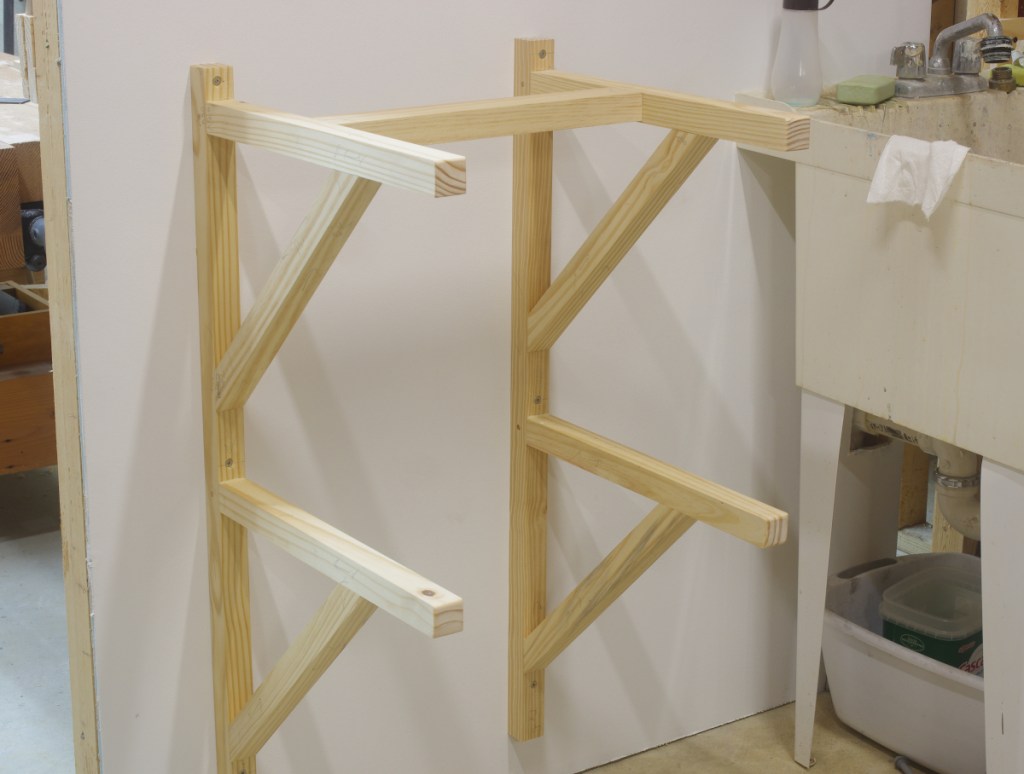
I made a stretcher to go between the upper supports so that the upper shelf would be very strong and resistant to movement and racking (this is, after all, where the work would be done). When I glued and drawbored everything into place, it looked like this:
I was somewhat unsure of how easily it would install on the wall, but it turned out to be easy enough when I used double wedges off of a support on the floor to get the stiles plumb and the brackets level:
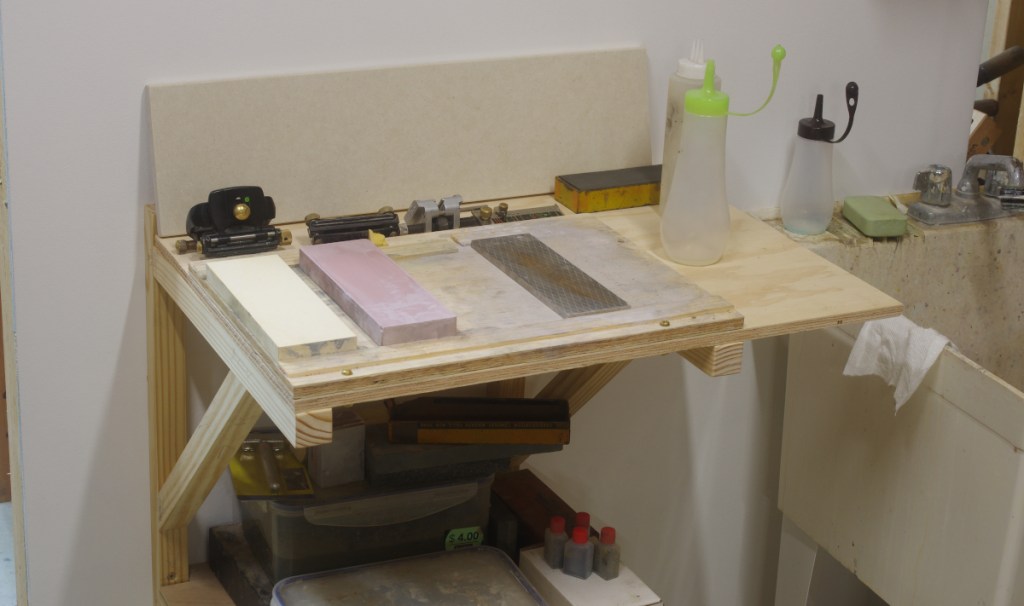
Each stile is screwed directly into a stud behind the drywall in three spots. After a bit of stress-testing, I was satisfied that the top brackets were up to the task, so I added some crappy plywood shelves, put my stone holder and other stuff on the top, infrequently-used supplies (or otherwise questionable purchases) below, and called it done:
The stone holder is attached to the upper shelf, which is in turn screwed onto the brackets. This should eliminate any kind of slippage without the need for anti-skid pads. Bottles with water and camellia oil are on the overhang to the right, and my two honing guides are behind the stones. There’s even a faux-backsplash that’s nothing more than a leftover piece from a home renovation project.
Then I sharpened a chisel quickly to make sure that I had a functional setup. Anticlimactic, as intended.
My plan for the small chest project was to try to be like the cool kids and paint it with milk paint. I figured that it would just take a few days for the paint, then I could put down the varnish topcoats and maybe be done with it in, say two weeks. Since it’s now two months later, you can probably guess that it didn’t really go as planned.
I’ve now figured out that I need to either practice more with milk paint, or just not use it at all and use alkyds or acrylics, which I know a lot better. I kept freaking out about all of the weird stuff that milk paint does, and tried to use water in the same way that you’d use a thinner for varnish and oil paint. I did manage to get the chest body done in the first shot, but I screwed up the lid so badly that I decided to sand down and start again. That didn’t work out as planned, because although I knew that milk paint was really tough, I didn’t quite understand how tough. Eventually, I got it smooth enough and fumbled my way through the lid again. (Detailed descriptions of my sulking sessions have been omitted.) Perhaps I would have liked the lid to come out perhaps a little bit better, but this thing will wear anyway.
With that behind me, I attached the lid and loaded it up with my desk crap:
This includes rulers, shears, letter opener, a usb drive, and a screwdriver in the top till, most frequently-used camera stuff in the lower till, with chargers, cables, and who-knows-what-else in the bottom. In this respect, it is a success; this is exactly what this thing was supposed to hold, and my desk has a lot more space now.
I did not decorate the underside of the lid. I probably don’t care.
Closed, it looks fairly humdrum. Perhaps a lighter paint than “driftwood” would have made it pop out a little more (and made it easier to paint).
I haven’t bothered to put on any handles. This is small enough that you can grab it by the lower dust seals on either end without much difficulty. If this gets annoying, I’ll add handles. Also, no lock. I’m a little torn about this one. A lock would be traditional, but wouldn’t have much purpose, and I’d probably lose the key and have to watch a bunch of lockpicking videos to open it. A latch might be better.
It doesn’t have a stay chain or cord. However, keeping in mind that the built-in stops at the rear of the upper dust seal can get mangled with use (there’s a Fitzian blog post on Lost Art Press about that), I glued a cork/rubber pad to the impacted end:
This is just a leftover scrap of the “crubber” that came with my Benchcrafted Moxon Vise hardware. This might not actually work, but I figured that it wouldn’t hurt to try.
So that’s done and it’s doing what it’s supposed to do. Come to think of it, I recently finished my latest book and wrapped up a couple of other projects. But let’s not call it completion season just yet. I have at least three other active projects that are in the “overdue” category.