Bench-On-Bench: It’s On

[Edit: I’ve now made a video explaining this bench.]

I’ve been interested in the idea of a so-called “Moxon” vise or bench-on-bench setup for a while, but there have been many other projects that have taken precedence. The idea of a higher sawing position for smaller cuts just seems like a good idea. Over the summer, I asked a group of woodworking pals what they thought of it, and I got some feedback including “just do it, you won’t be sorry.” Also included was a bookbinder’s finishing press treatise/rant from our friendly neighborhood bookbinder who stated that (among other things) if I really wanted to make something specialized for woodworking, I should go for bench-on-bench. Since there’s a near-zero chance of me wanting to get into bookbinding (sorry, Tom), I decided to go for bench-on-bench.

Unlike Joe’s elegantly-finished vise, I decided to go with the ever-sturdy southern yellow pine for most of the construction, and ordered the Benchcrafted hardware. As usual, the hardware sat for several months while I dealt with other projects.

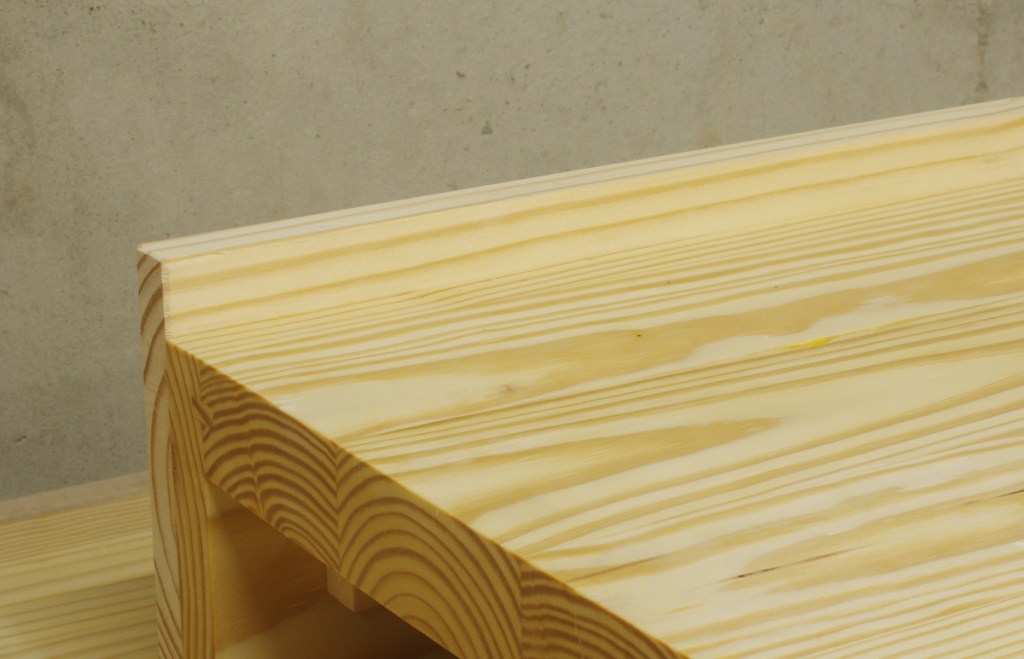
There doesn’t seem to be much consensus on the construction of bench-on-bench, so I decided that I would stick to the “every one of these is different” rule and make a solid inverted “U” shape for the top and front/back, with some stretchers along the bottom. The stretchers are not for support, but to provide a way to clamp it down. Here are the parts ready for final glue-up:

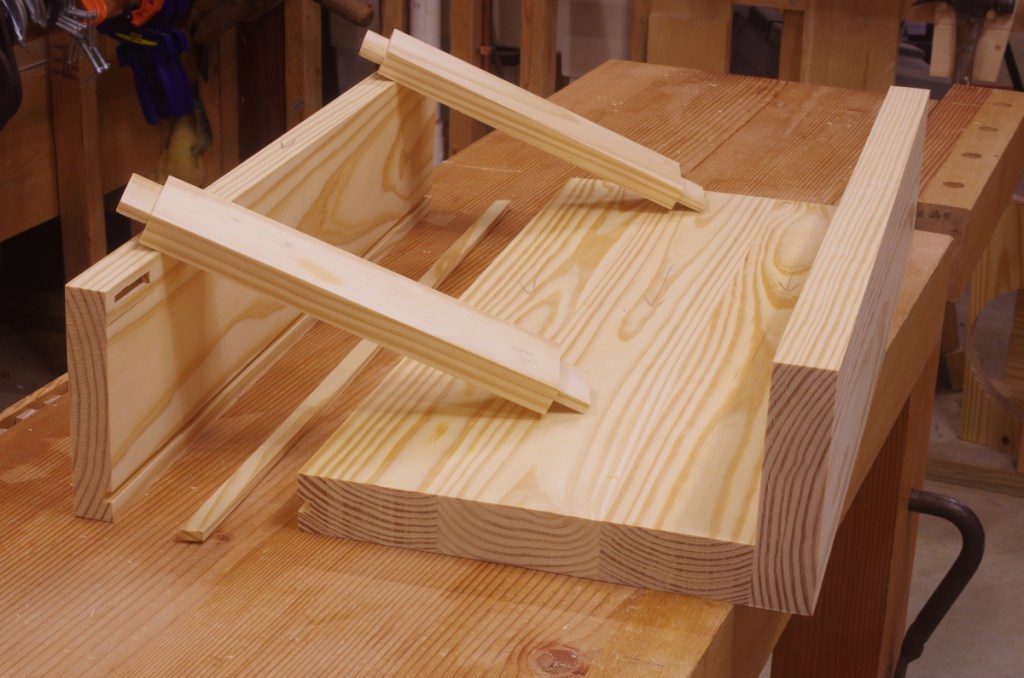
This is, of course, upside-down. I waited to glue on the rear because I felt the need to do that along with the stretchers. In addition, I used a loose tongue there (with the appropriate diagonal-grain configuration) not for strength, but to keep the top aligned with the rear during glue-up. This might be the first time that I’ve used this kind of joint.

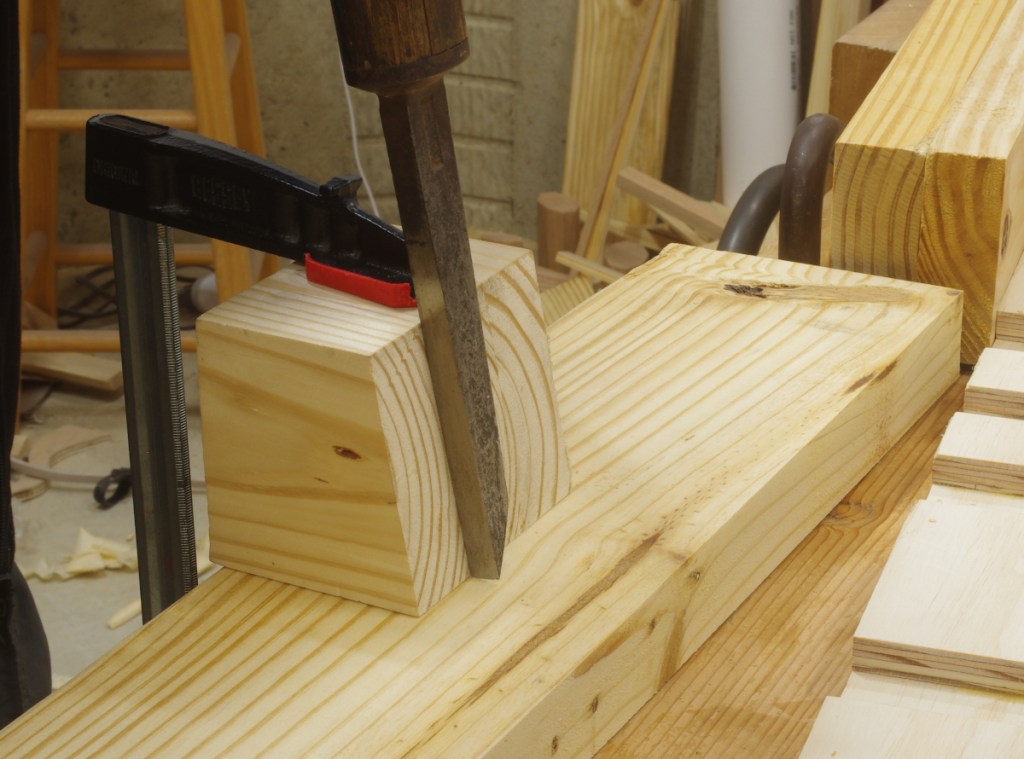
There wasn’t too much to do after that. The next step was fitting the chop:

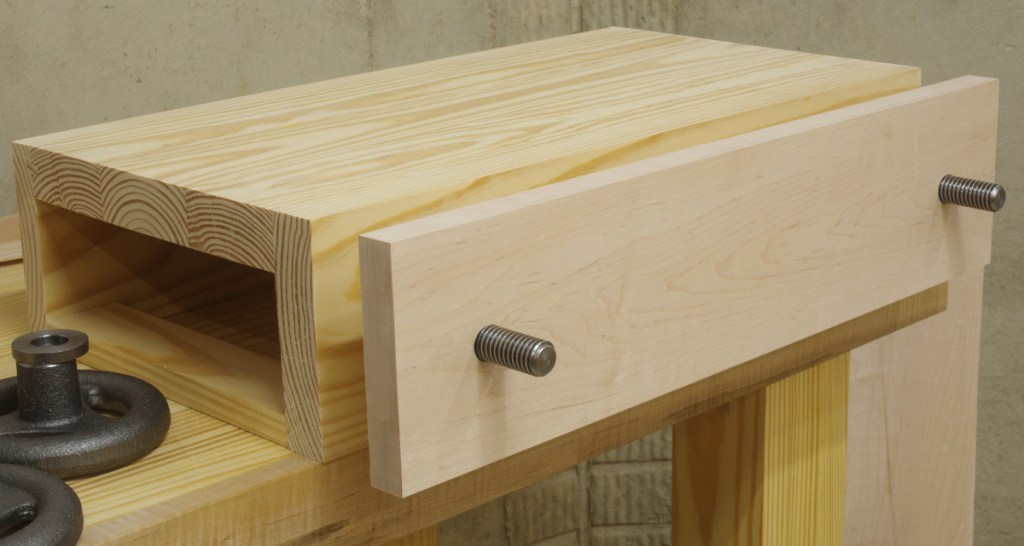
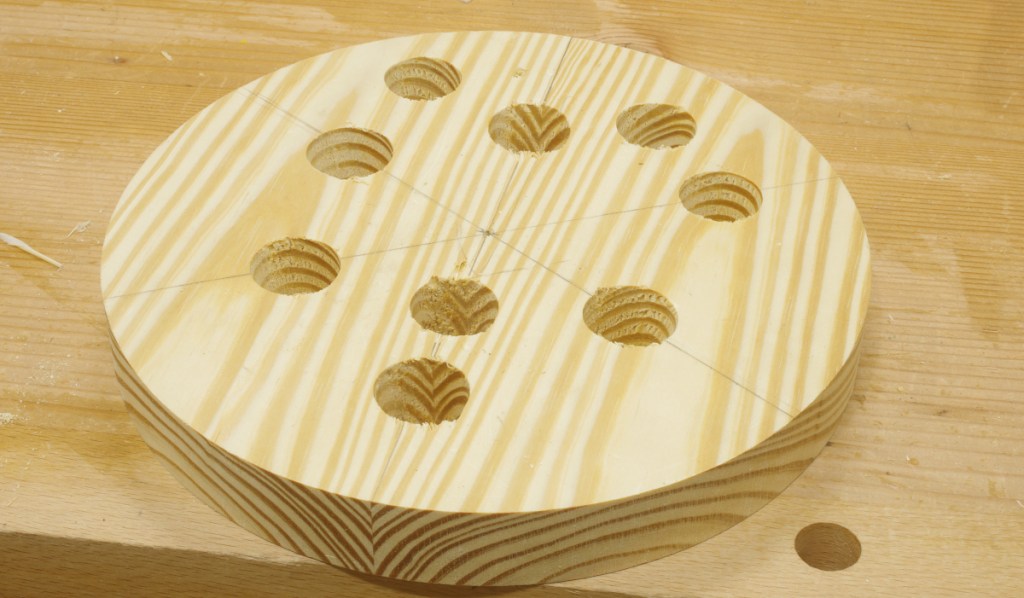
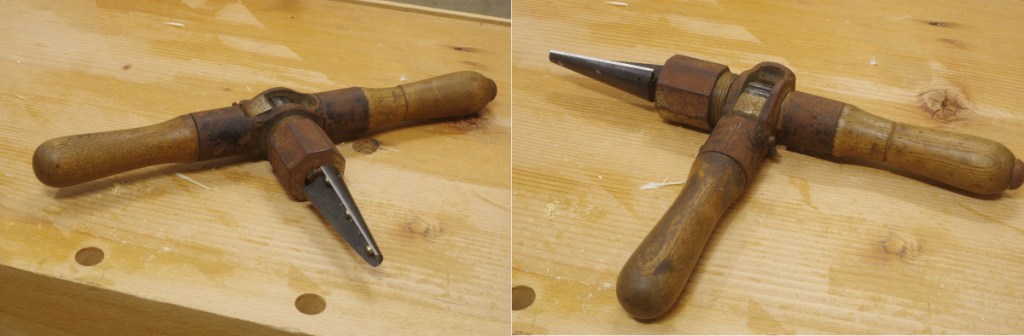
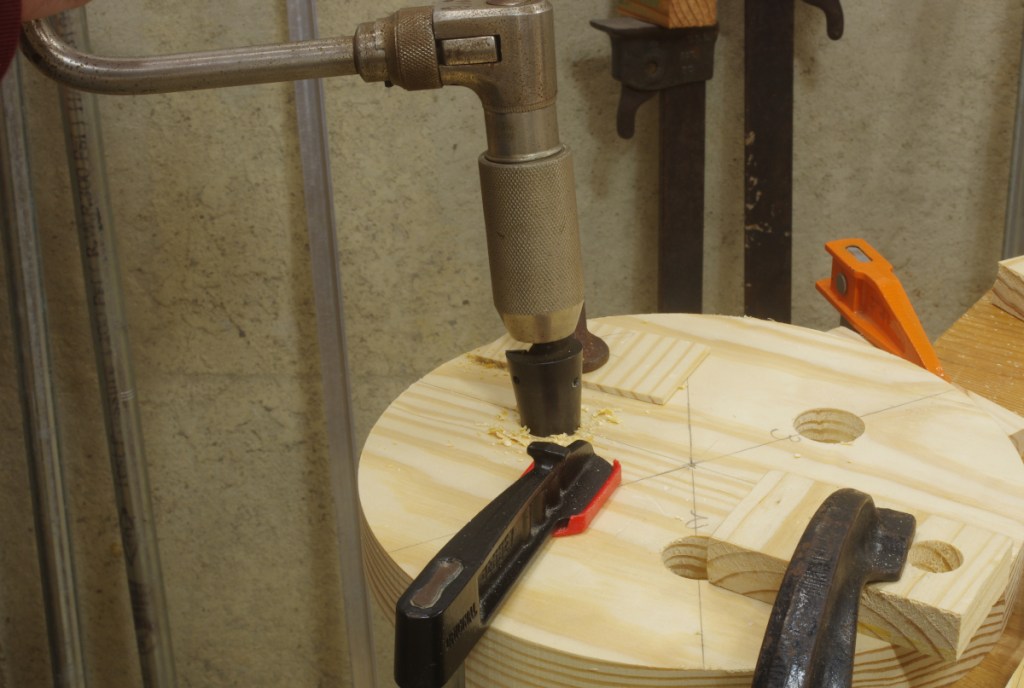
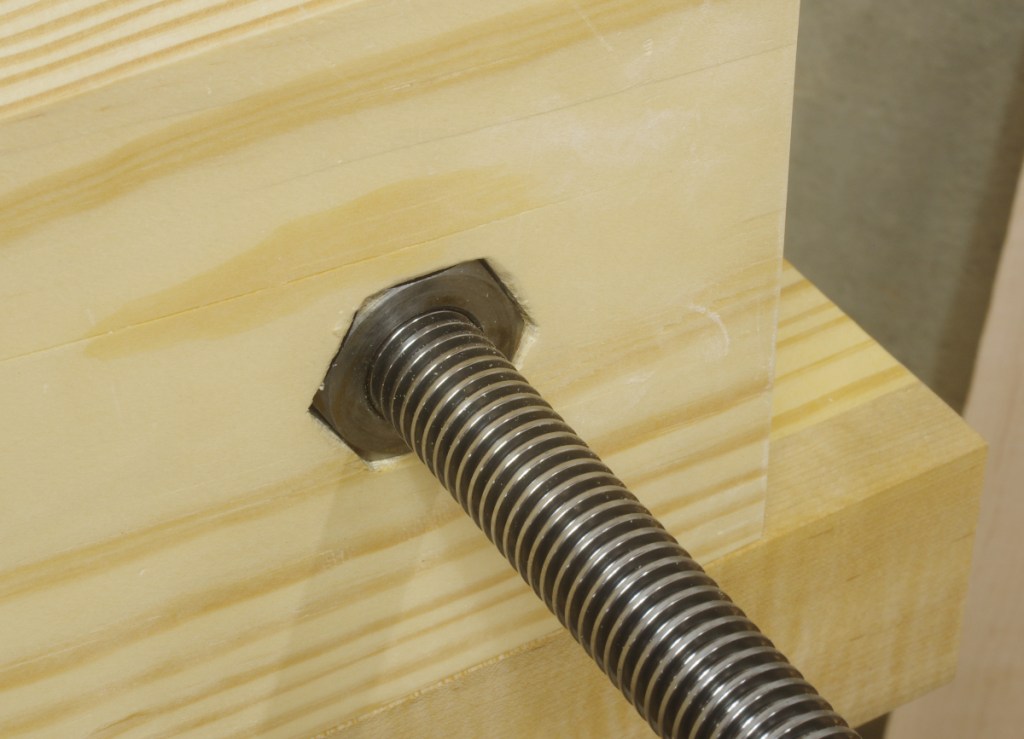
The chop is a 4/4 piece of soft maple. The Benchcrafted instructions suggest a configuration with the vise nuts for the fixed chop recessed inside, so for no good reason (other than stupidly not doing it the quicker way on the drill press before gluing the front on), I traced the nuts on, and chopped out the waste:

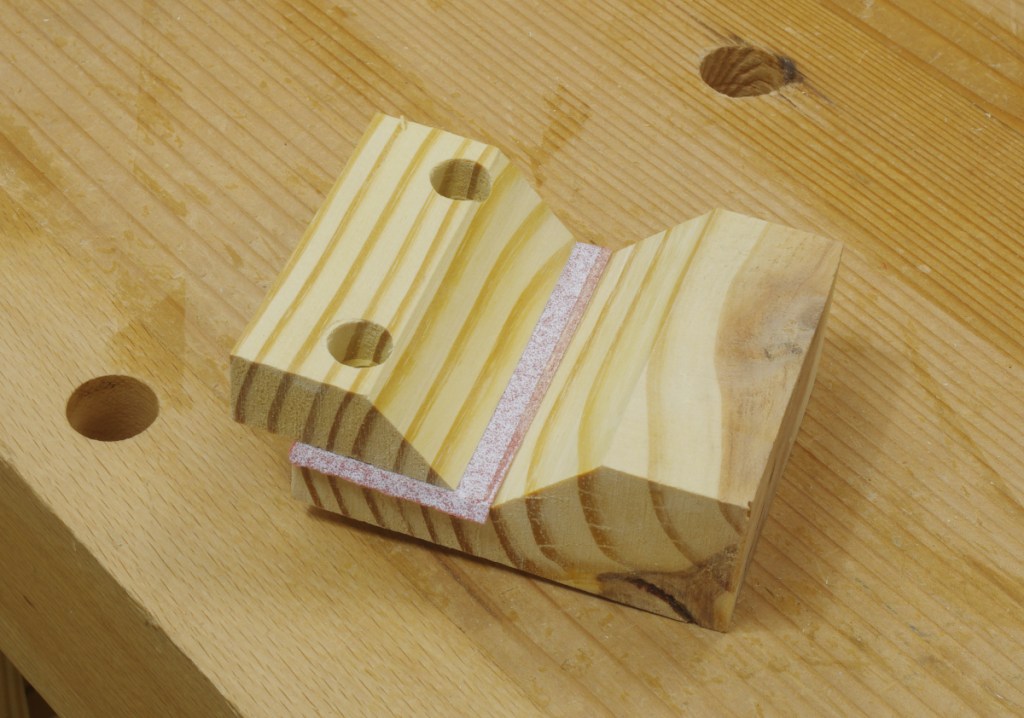
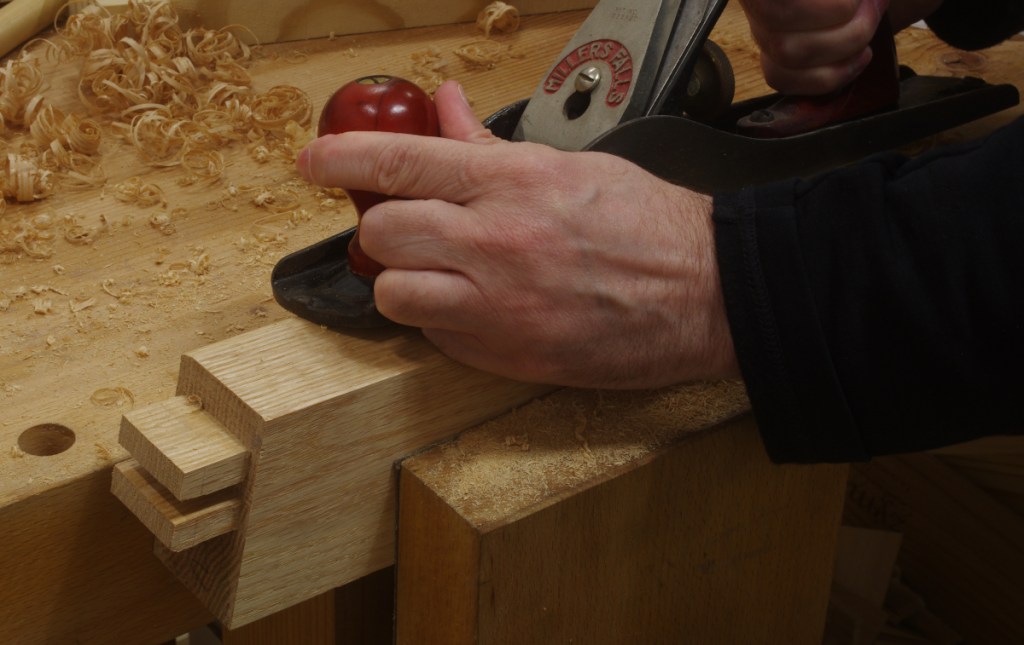
Then, I chamfered the top of the front chop, added the “crubber” (the cork/rubber gasket material that BC includes with the hardware), and did a quick rubdown with some tung oil:

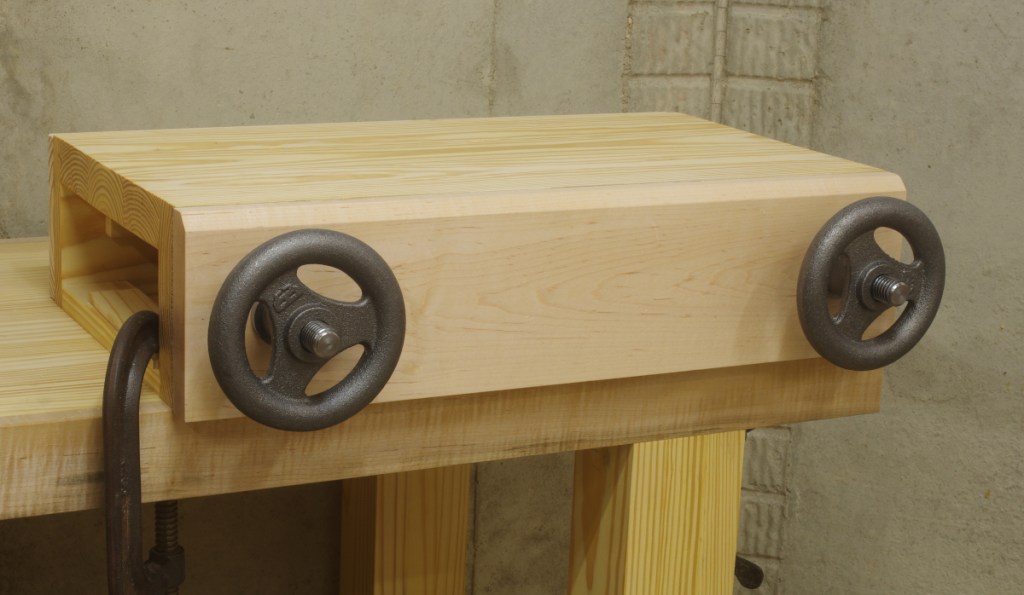
You can see that this is currently clamped to the bench with C-clamps on the stretchers. I suppose that I could add dog holes in the bench and use a threaded rod or something. but this seems OK for now.

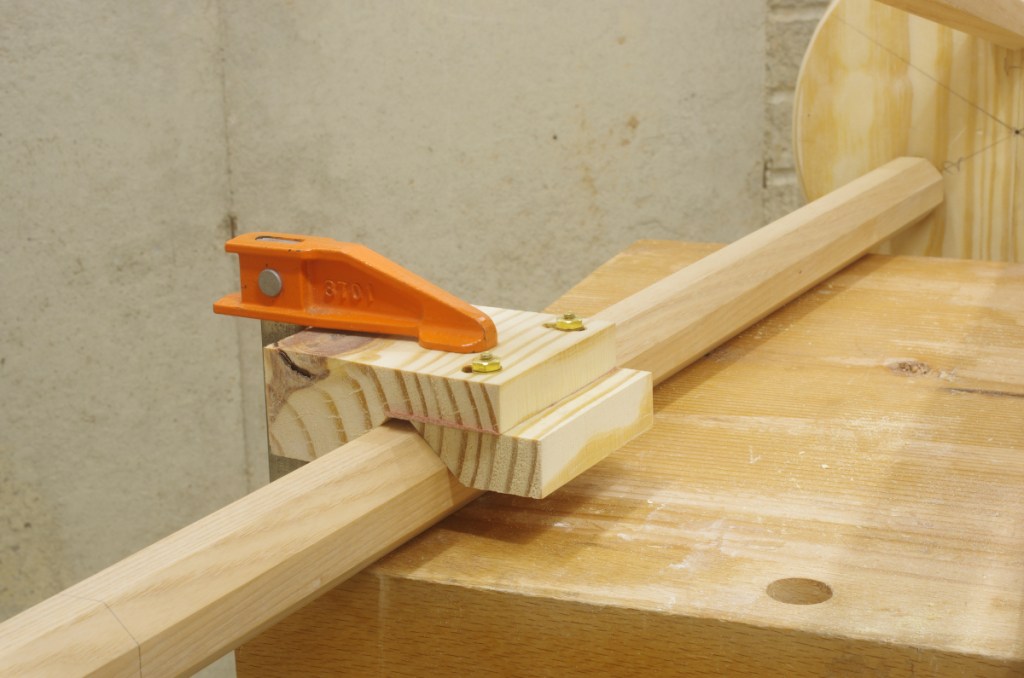
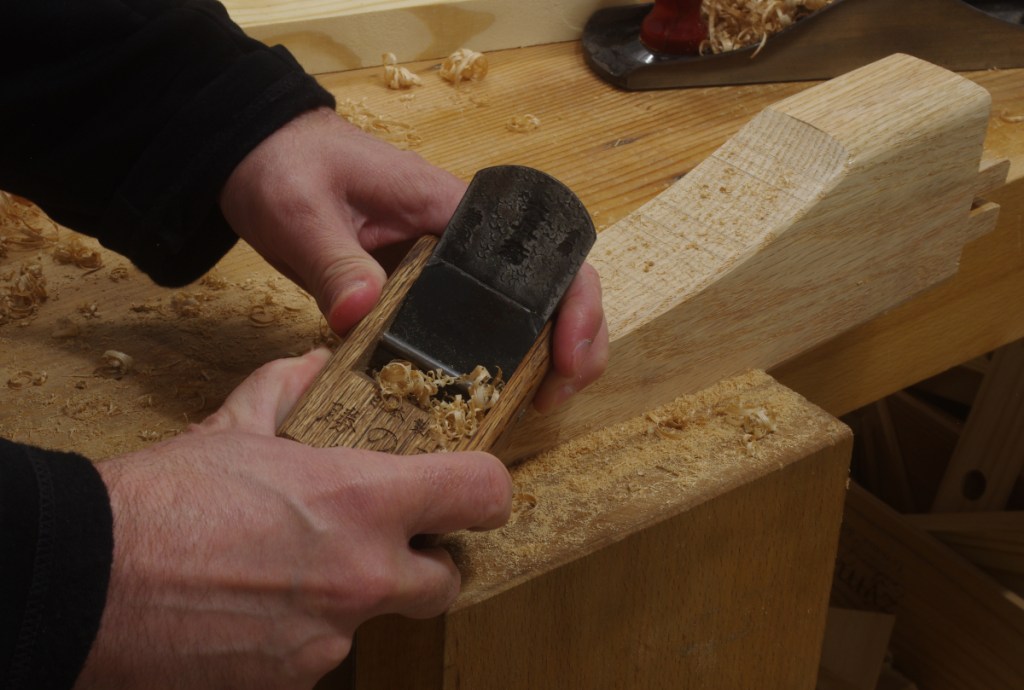
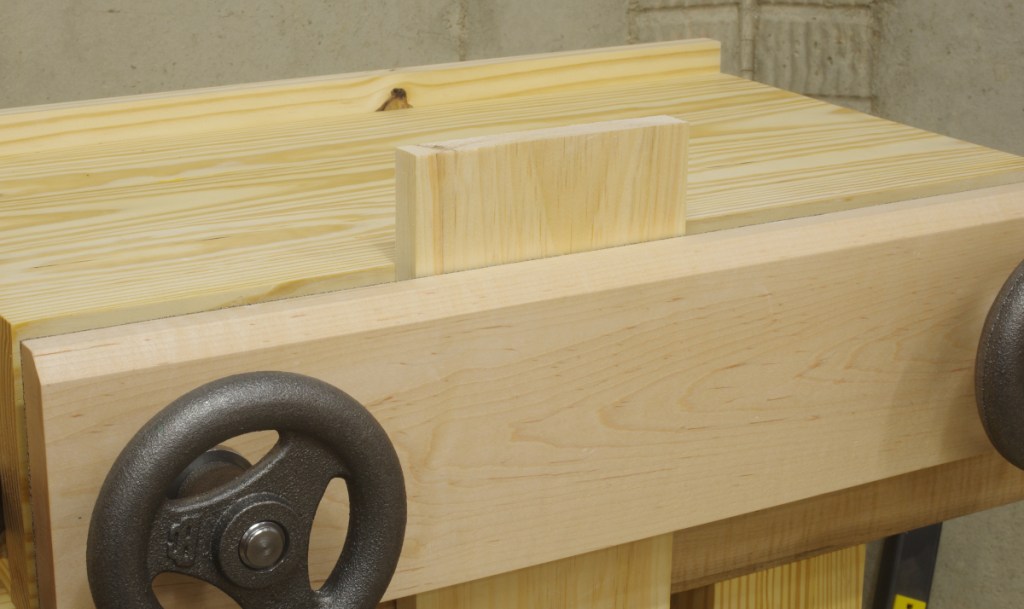
I added one more component: a slide-up stop at the rear. Here’s how that looks in the “partway up” position:

It can extend higher, and is held in place with a couple of threaded levers. I’m not sure if adding this was a good idea or not, but the main reason I put it there was to try to get some bench hook functionality. For example, when doing the crosscuts to remove the waste from tenons, I thought it might be handy to take the work out of the vise and lay it along the back. Ditto for using it to stop a piece when cutting a small groove leading to a knife line with a chisel.

At worst, if the stop doesn’t prove to be useful, I can just stow or remove it.

Here’s one final view, with the vise holding a board in “dovetailing” configuration:

This seems to hold securely. I did several test cuts and nothing appeared out of the ordinary. It does seem much more comfortable than stooping down to my (low) main bench to cut stuff. The auxiliary bench that I’m using here might be a little on the top-heavy side now; I do want to add more weight to the bottom. Happily, this should be soon, with one upcoming project that will use this new tool.

(Not So) Quickie: Stand

Several months ago, as I was starting the daybed project, I also decided to do another project in parallel: a stand for some decorative object that’s to go in the living room. I figured that it wouldn’t take much time; it would have three tapered-tenon legs, so all I needed to do was make a quick model to figure out what angles would be appropriate, and just do a little work.

I’d already made the model (leading to this). For the top, I glued up a really nice chunk of yellow pine and sawed it into a disc on the bandsaw. I made the legs and the tapered tenons on those. So all I had to do was ream the mortises and I was as good as done. Shouldn’t take more than a few days, right?

That’s when disaster occurred. For the life of me, I couldn’t keep the angle consistent when reaming with the brace. I failed immediately, reaming too far on the first one. Having ruined the top, I figured that I could learn just what I did wrong, so I tried the other two. I failed at those as well. Then I just tried a bunch more and failed at all of them by hand:

I was just having too much trouble controlling the reamer. It wobbled too much in the brace, and I couldn’t feel anything. Furthermore, because this is on the thin side, I was having trouble making adjustments without overcompensating. If I were more experienced, I might have been able to do it. Then I tried with a power drill. I was able to do some decently using that.

Sitting back, I wondered what I could do about this situation. I’d speculated before that I suspected that the reamer I was using was just meant to go into a chuck on a power tool, and this reinforced it.

Note: Chris Schwarz says in an old post that this “standard” reamer, sold by Lee Valley, is made in Canada and fits well in a brace. The former is NOT true (maybe it was back then), and as for the latter… maybe it fits better in a Spofford brace? I dunno. The shank is very soft, which caused me a lot of trouble in the brace.

What to do? I figured that I had four options:

  1. Use a handheld power drill to do it.
  2. Make the “banjo jig” to do it on my drill press.
  3. See if I would have better results with a reamer with a square-taper shank that’s meant to go into a brace.
  4. Sulk.

Door number four is never a bad choice, and I did a fair amount of that (especially considering how nicely the rings were arranged in the glue-up of the top that I ruined), so I thought, well, I’ve never really been too comfortable with my power drill; I’m don’t have the steadiest hands. Perhaps I could make the banjo jig?

But I also thought, well, I like hand work, and I don’t like the idea of another jig lying around. Maybe I could be lame and blame the tool, try a different reamer, one with a square-taper shank? I ordered the Veritas “Pro” Reamer. It was on backorder for a week or so. That became a few weeks. Then the expected date was shifted to January. This was not a cause for optimism. Much sulking ensued. But just as I was thinking, okay, well, time to build the banjo jig, mine shipped around the end of November.

To make a long story short, I am far happier with this reamer. Other than the proper shank, there are two things in particular that I like: First, there is a single blade, which seems to make it easier to control with a brace. Second, the blade is adjustable: You can set how much it protrudes (different amounts for different woods), and you can adjust the included angle slightly with set screws.

Great. My first “genius” idea was that maybe I’d try to use the thing in my T-handle in the “inline handle” configuration (or whatever it’s called; it’s the configuration on the right):

That worked, but it was really slow. So I first went at it with my largest-sweep brace:

This was quite effective. I was able to get down to near the depth I wanted quickly and at the correct resultant angle. I admit that I did switch back over to the T-handle when almost done to go more slowly when finishing up, but I think I probably didn’t need to do that.

Then it was time to chamfer the bottom edge. It’s weird to do that a curved surface. C.S. did this on a similar project in the ADB with the bandsaw, and I probably should have done that as well. Instead, I first went at it with a block plane chamfer attachment, which did not work terribly well, but got me to a certain point. Then I made this stupid thing to go the rest of the way:

It’s essentially an adjustable chamfer block with a piece of sandpaper clamped down at the bottom. This worked, but not very quickly. It loads up too much. I think it would have gone much faster with 60-grit paper instead of the 110-grit here, but eh. This might work really well with a milled-tooth file wedged down in there. I think I know how to do that, but have no need right now.

In any case, it got done. I glued and wedged in the legs next. This left me with the final cutting task: getting the legs to length. I marked them with the “slide block of wood with pencil taped on” method, but then I needed a good way to clamp the octagonal legs to the bench to actually saw them. I was thinking about making some kind of custom caul, and then I just grabbed the above stupid tool and clamped with that:

It was far more effective at this task, so the futility was diminished somewhat.

After sanding, I finished it with tung oil. Here it is in its intended location, without the object that will sit on top:

Aside from the top being southern yellow pine, the legs are ash; one of them was seen in this post. A project that I thought would get me a few quick XP instead dragged on without much action for a couple of months. At least I no longer need to sulk over this one.

Additional: I have a plan for that initial ruined top. I do not know when I’ll be able to act on it.

Daybed: Finished

The only remaining task after gluing in the daybed legs was to glue in the railing, which brought us to this point:

It’s hard to notice, but the rail has a slight concavity on top, to echo off the front of the platform.

Well, that’s all fine and good, but almost no one wants to lounge around on a slab of wood, right? I haven’t really mentioned anything about the cushions, except that I’d finished them. I don’t have any photos of that process. It’s not exactly woodworking, and I don’t approach sewing projects in the same way that I do woodworking. So you’ll just have to settle for me sewing together two scraps of the cushion fabric:

Grayscale to make it look more “old-timey-looking,” when in reality, I was just too lazy to deal with the white balance down there.

Levity aside, I’d like to thank The Funky Little Chair for making a great video showing how to make cushions. I’ve never done anything like that before.

I could have made my life easier if I’d done square cushions first instead of a curved thing with weird little cutouts in the back. But I managed, so here’s the final piece:

Strangely, even though I’d only made a very rough drawing of this before starting, it came out almost exactly as I envisioned it. That doesn’t seem like it should happen very often.

To recap, this is southern yellow pine with red oak legs and railing supports. The raw material cost wasn’t terribly high; I think the foam might have been the biggest single-ticket item. The main problem with materials is finding what you want. The wood is one thing, but if you’ve never shopped for fabric before (while trying to get your spouse to agree on a selection), there’s a whole new world of fun waiting.

Daybed: Legs

I’d originally intended the daybed project to have tapered-tenon legs and railings, but after I thought about the design a bit and what I wanted to accomplish (and with the help of a spectacular failure with the tapered reamer), I decided to use normal mortise-and-tenon joints. Well, sort of normal–I decided to use angled twin tenons.

I don’t have many photos of the process of making these, but the biggest difference is that, because the mortises are the weirdest part of this, I cut the tenons first. I marked the tenon thicknesses using the width of my mortise chisel–something that I almost never do. Then I marked one side of the “outer” mortise” and use a block cut at an angle (10 degrees) to guide the chisel. Here is a simulation of how that worked:

With the first mortise made, I then inserted the tip of one of the “outer” twin tenon into the mortise, and gave the end of a leg a good whack. This put an indentation of the other tenon into the platform, and then I knew where to line up the block to chop the second mortise. Surprisingly, this worked; I was not terribly optimistic about it.

In any case, with the legs made, it was time to shape them. I cut out the rough shape on my bandsaw because when you have one, that’s what you do. Then it was time to do the medium-grade shaping. Doing the “front sides” was easy because those are straight; I just used a jack plane like this:

I followed that up with a smoothing plane. Hmm, look at that, you can actually see the twin tenons in this photo.

In any case, the rear sides of the legs were to have concave curves, which excluded the jack plane. However, I did have a small compass plane that I got in Taiwan several years ago (Japanese blade, Taiwanese body), and was able to use that for much of the work:

But once that reached its limit, it was rasp time. The shaped legs looked like this:

The next steps were to sand the legs smooth and finish them. I don’t have any photos of that. I used a tung oil/varnish blend.

After that, they sat for a long time until today, when I glued them into the platform of the bed:

This project is almost done. The other wooden component is the railing, which is done but not glued on. Otherwise, there are three cushions that go on the top, which I’ve also completed but won’t address in this post.