
I finally found the time and motivation to perform the final steps on the side table:
- Smooth and sand the legs
- Plane and sand the top
- Make the wedges
- Kerf the tenons, glue tenons into mortises, bang wedges home
- Trim tenons
- Trim/level legs
- Apply the finish
There’s nothing too complicated about any of this. The only noteworthy thing is that for the legs, I used my Taiwanese spokeshave to smooth out the legs instead of really coarse sandpaper:
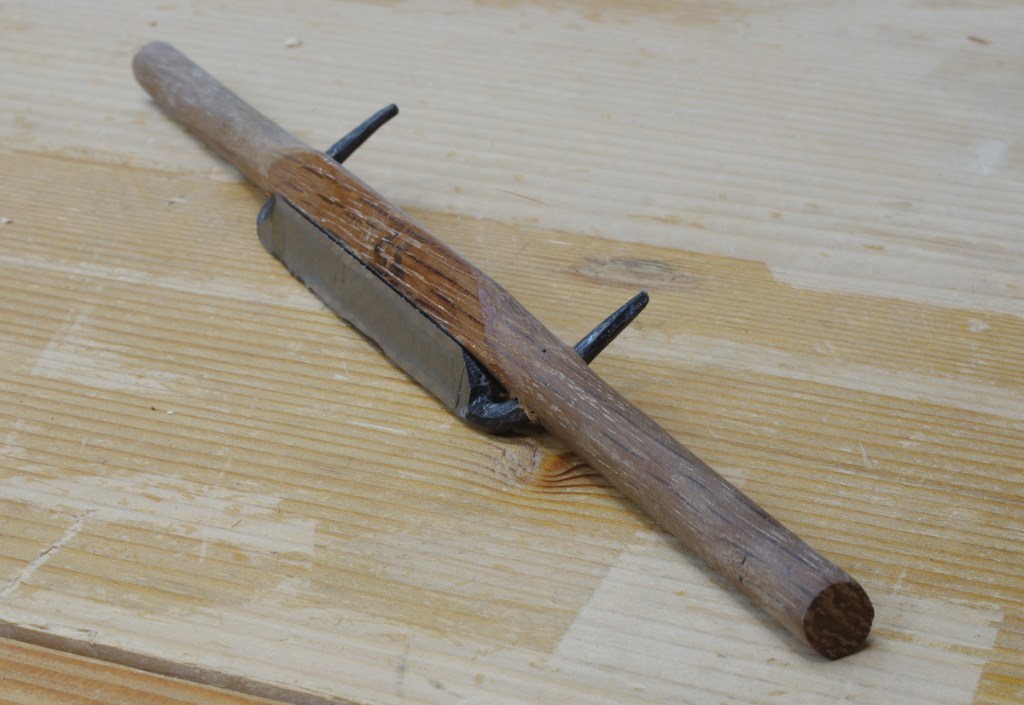
I’m not a big spokeshave user, and I finally realized why I hadn’t really used this one yet: I hadn’t sharpened it. I’d been putting this off because I suspected that it would be difficult, but with the new sharpening station, I figured I’d give it a shot. It turned out to be a little tricky until I got the hang of it. The cutting edge of this shave is similar to what you’d find on a Japanese chisel–a very hard piece of steel (likely Japanese) forge-welded to a softer backing/body. The face has a hollow, making it easy to smooth, but the bevel is rough because there’s such a difference in hardness between the cutting edge and the rest.
Because you don’t have much leverage when sharpening, it’s too easy just to end up mostly rubbing the soft part on the stone, instead of honing the cutting edge. I finally figured out that if you push on the tangs when sharpening, it’s a lot more effective.
In any case, with everything assembled, the table looks like, well, a table:
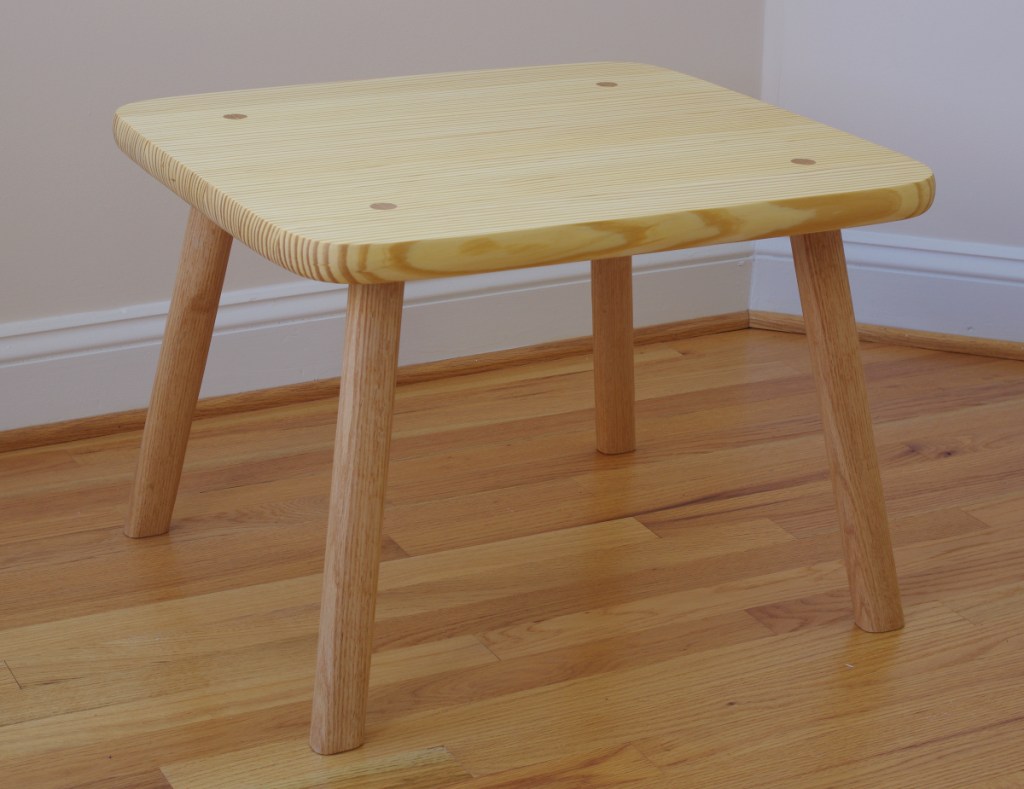
Last time, I mentioned that I’d cut the first leg incorrectly, 90 degrees to what I wanted. But it turns out that the first one was actually “correct,” and I messed up the other four. The growth rings of the oak are oriented 90 degrees to the yellow pine, and they’re supposed to be parallel. For this application (not being a chair), I don’t think it’s going to matter, though that’s still a little bit annoying. I got the wedges in the correct orientation, which is a lot more important.
So here’s the table next to the daybed:
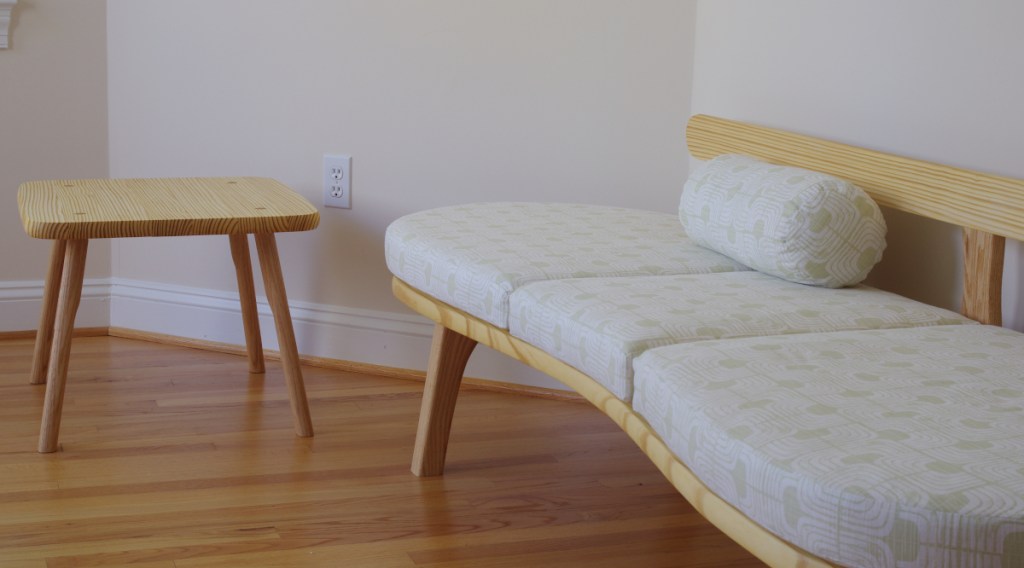
This might not be the final arrangement, but the two pieces are meant to go together. The legs and tops are meant to complement each other. The table’s top is in the profile of the daybed legs, and the table’s legs have a more oval profile, like the platform and rear support of the daybed. Both sets of legs have a sort of single-step taper.
The table might need another application of finish (tung oil/varnish blend), but I’ll make that call later.

I like the look of the table. Very simple and elegant. But I have a question where you said, “The growth rings of the oak are oriented 90 degrees to the yellow pine, and they’re supposed to be parallel.” I’m no expert, but my thinking is that if the growth rings on the legs are in line with the grain direction of the top, then expansion / contraction of the legs and top will be in opposite directions, thereby loosening them up over time. I would have thought you want the growth rings of the legs to be perpendicular to the grain of the top, thereby having both legs and top expand / contract in the same direction. Can you comment?
LikeLike
I think you might be confusing grain direction with ring orientation. The grain of the legs is perpendicular to the top’s because it is the nature of the joint.
But the rings themselves can be parallel, perpendicular, or something else, depending on how you rotate the leg in its mortise. When you view the joint from the top, you see the leg’s growth rings in its transverse plane (the end grain), and the top’s rings in the radial plane (it’s radial in my case because they are quartersawn, but it could be tangential if the top were cut a different way). See Figure 1.11 of Hoadley’s “Understanding Wood.”
The idea is that you’re supposed to line up those rings, even though the grain will be perpendicular. That way, the radial plane in the leg will expand in the same direction as the radial plane in the top, and the tangential plane’s expansion will go up against the grain direction of the top. You’re already putting a lot of pressure in that direction with the wedges.
The idea is that because the tangential plane expands and contracts at a greater rate than the radial plane, you’d rather have the less-volatile radial plane of the legs go up against the weaker (and theoretically similarly-moving) wood in the top that could get pulled apart. (Plus, the radial direction is a little more pliable in oaks because of the large pores.) So I screwed up in making the tangential plane go in that direction instead of the radial plane.
Sources (such as p67 of the updated “Anarchist’s Design Book”) say to cut the kerf in the leg tenons perpendicular to the rings in the legs when viewed in the transverse. When your legs are round or octagonal in profile, it’s not a problem to simply rotate them around to the desired orientation. But when the legs have a particular orientation, as mine did here, you want to plan that out from the start. I did, but got it “wrong.” So I was forced to saw the wedge kerfs parallel to the rings, or else I would have risked the wedges splitting the top apart.
In the end, I doubt it will make a whole lot of a difference, but I don’t intend to make the mistake again.
LikeLike
OK, this is more clear. Thanks for taking the time.
LikeLike