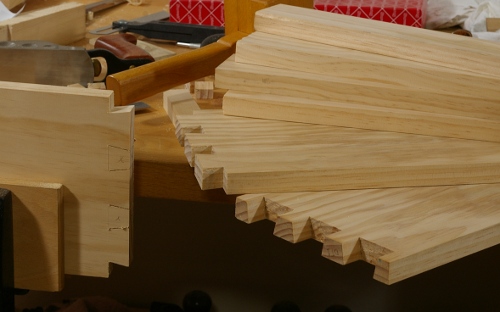
Saw Till: Starting through tenons

The saw till is coming along now. I finished the dovetails before I left for my trip, but didn’t have a chance to work on anything else until I got back and started to get over the stupid cold I managed to get while I was in PA.

Yesterday, I had some extra time, so first, I reworked the shape on my mortise chisel because it was a little skew. Being laminated, it is easy to shape despite its huge size. Then I got down to business, making the first through mortise ever with that chisel:

Hey, that didn’t turn out so bad at all. Admittedly, I was a little more careful in setting up the mortise marking gauge this time. A little more care is in order for this wood, because it’s so soft that you can really dent it up if you’re not careful. Otherwise, you just do it the way everyone tells you to: Mark on both sides, chop halfway through, turn around, and chop the other half. And don’t chop the ends until you’re about finished.

With mortise angst out of the way, it was time to move on to tenon angst. The first one on a stretcher is easy. The second one is a little harder because you have to get the stretcher length just right. I marked the baseline from the dovetail pinboard (rather than measuring):
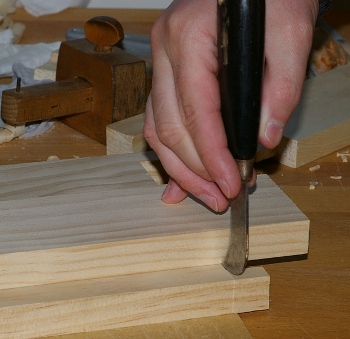
Yep, that’s the humiliating marking knife again. Not too optimal for this particular mark, but at least it worked.

(I also marked the mortise locations on the second board from the first, it seemed a lot more reliable than measuring.)

Then it’s off to the races with my new tenon saw:
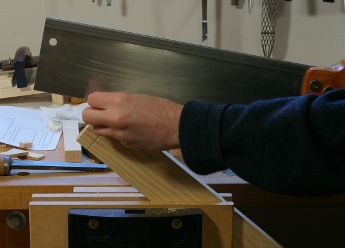
Holy cow, look at how much camera time my hands are getting in their debut photo shoot. Well, I always told myself that if all my usual career options were dead, I’d still have the hand model option to fall back on.

With one stretcher done, it was time to do a test fitting of the pieces completed so far to make sure that everything was square and decent-looking. Shockingly, it was.
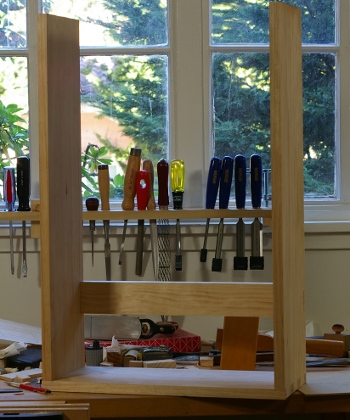
Woo, check out those stylin’ plastic-handled chisels. Well, I’m not sure how I feel about this. I know I need a few more chisels and I really like a lot of the old ones I’ve tried, but the ones I have work fine for now, especially the yellow Lee Valley ones. I even have a few old ones that I like, they just need handles and sharpening, but I’ve just been too lazy to get them in order.

Pennsylvania Fall

Lately, I’ve been trying to visit PA every fall, when the weather is nice and the leaves look good. This year, the weather was not so great most of the time, but there were some nice spots and we did get to do some hiking around. This hiking, it’s fun not only because the leaves look really nice, but you also get to see the trees where your wood comes from.

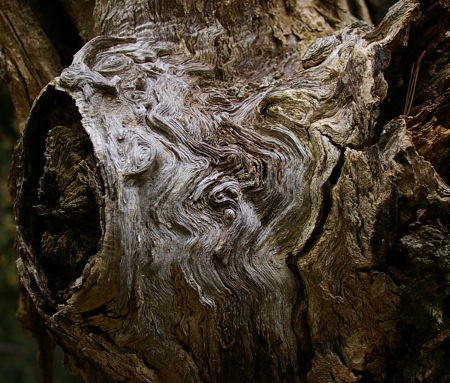
One of the more interesting places was David’s Vista up on the Jackson Trail by Pine Grove Mills (near State College). It was there where this tree shows how a ridgetop tree weathers:

There wasn’t really much burl here, but the cambium layer has definitely been twisted around the crotch area between two branches. Talk about reversing grain! As to what kind of tree it is, there was a red oak growing out the side of this, if I recall, so that might be a good guess (even though everything else in the background was a pine).

Other sights from the trip include the vista itself, some leaves collected on Mt. Nittany, and leaves from one of the chestnuts growing on Mt. Nittany:

And now it’s time to get back to work here at home.

Saw Till: Dovetail joints, pieces

While waiting for the first coat of finish on the shoe rack to cure, I milled the pieces for the saw till down to size in preparation for the joinery. So far, I’ve only had time to finish one through dovetail joint, and get part of the way through the tailboard on the second:

The completed dovetail joints are on the bottom right (pinboard on the bottom, tailboard above it), and the new tailboard-in-progress is on the left. The other four pieces on the upper right are for the stretchers.

The pinboard (which will form the lower shelf) presented a small problem before I started out. I hadn’t noticed before, but it wasn’t really flat. So I thought about it, and flattened just one face square to the edges with my jack and jointer planes. In theory, the joint will be fine because the inside face is now flat–that’s the one you need to be square to the sides.

I cleaned off all of the surfaces with my smoother plane as well. I felt that it was probably a good idea to do that work on the inside faces before cutting the dovetail joints. I should have probably waited on the others, because I’ll probably need to do them again after I cut everything, but oh well.

It’s been a little hard to gauge my progress with these dovetail joints. I’m managing to cut them precisely, requiring practically no paring, but I feel that I may be cutting them rather slowly. It’s also been hard to find the time to work; I’ll only get 20-30 minutes at a time to work, then I have to do something else, like go to the unfortunate day job.

This wood, whatever it is, is pleasant to work with. I guess it’s Ponderosa Pine. Working is similar to Yellow-poplar. I’d like to find a good source of it, I think. My recent experiences with softwoods have been positive, which is interesting, because I never imagined myself using them much. They present challenges for your tools, sure, but they also seem to have a lot to offer.

This almost certainly won’t be done by the time I leave for a short trip to Pennsylvania this week. But the good news is that I’m going to Pennsylvania!

Saw Till: Plan

Eventually, everyone seems to build their own saw till, and I’m no exception, because that’s what I’ve been thinking about as I finish up the shoe rack. So after the requisite internet research (think Dan and company), and taking a million measurements of my saws, I have a plan for my own. It’s nothing fancy, but it is at least less silly than my tool rack:

These are the side and front views here, I suppose. The rest of the drawing, not shown, contains labeled component parts. I must apologize for how little this looks like a three-dimensional piece; I know how it’s supposed to look because I drew it, but that doesn’t help you much. Unfortunately, Google SketchUp isn’t available for Linux, so I’m using Inkscape. Oh well.

[Update: Here is the SVG file for the plans. You can download it; Illustrator, Inkscape, and other programs will edit it. You can view it in Firefox.]

Some of the features here include:

  • Open top, in case I get a 38″ King-Kong-sized saw or something.
  • Shelf on the bottom, for saw sets or dust.
  • Dovetailed bottom.
  • Wedged through tenons. I was on the fence about this, until I realized that I’d never done through tenons before, and that this would be a great project to screw them up on.
  • Optional small panel for the shelf.
  • Design requires just seven components.
  • Possible use of hardware for interchangeable slots.

I’ve got the side sections to width and length already.

A D-8 named Sawthra

The last saw to be complete from the pile o’ handles I refinished a while back was a 28″ Disston D-8. The plan was to make it a replacement for the 7 TPI D-7 that I’d been using for a rip saw.

When I first got the D-8, I was somewhat ecstatic. The blade was pretty clean, reasonably straight, and even had its etch. So all I needed to do was refinish the handle, clean off the blade, and sharpen. Easy, right?

Well, I got to sharpening, and about halfway through from the heel to toe, my file started to make strange noises and didn’t want to cut the metal. Huh. It turns out that there was a roughly 8-inch length where someone had done something unholy to the teeth. They were hard, very hard. We’re talking “breaks the teeth off your file” hard here.

I wasn’t going to let a saw make a monkey out of me, though, and managed to work through the hard metal. It seemed to go about 1/8″ deep into the blade. After this, I was tired. Very tired. I thought, well, maybe I should name this thing “Sawzilla,” but quick research indicated that it wasn’t a terribly original name. So here is Sawthra, named after the slightly more obscure Mothra:

The Disston D-8 brings me to another thought I’d been having lately, namely, “wouldn’t it be great to have a brand-new D-8?” Then at Bagathon, I made a rather unusual deal with Larry that brought me this saw:

Notice anything familiar about this 24-inch Pax “No 1” panel saw? Like, maybe, that it’s a total copy of the Disston D-8, even down to the handle and the screw arrangement?

So I really do have a practically brand-new D-8 now. It makes sense, I suppose. The Flinn company tends to catch a lot of flak about its saws, in particular, that the handles aren’t as nice as century-old handles. But they do at least reproduce a true classic handsaw. The blade is taper-ground, for whatever that’s worth. Although I wouldn’t characterize the teeth on this thing as “sharp” (my little carcase saw currently cuts faster than this thing at the moment), they don’t look too bad, and probably need a little touch-up. I’ll wax the blade, like I always do.

The handle? Well, I’m not sure if I want to make a new one or not. To be honest, the handle isn’t that bad. But I always seem to end up making handles.