I thought I would be posting about the glue-up on the current twin nightstand project at this point, but there was one remaining thing that was really bugging me.
It turns out that I’d carelessly torn out the sides of a couple of grooves when I was cutting them, and although it wasn’t severe, with the panels fit, the shadow there would stick out like a sore thumb whenever I saw it. Unfortunately, I did it in a prominent area, and at the exact same place on each of the nightstands. So I wouldn’t be able to hide from it, and since I plan to use these things for a long time, I’d have a constant reminder of when I messed that up. Something needed to be done.
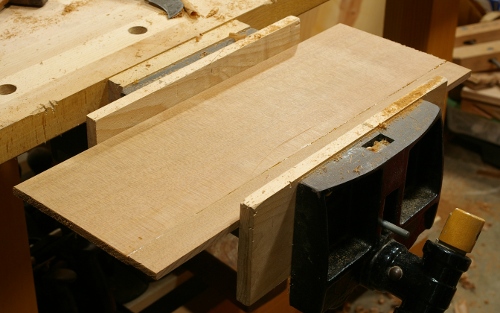
I started by marking out the repair area with a cutting gauge. In the following photo, the tearout isn’t easy to spot at first (it’s on the near edge of the groove), but if you look closely, it will be apparent.


Note also that I’m taking all of these photos with a macro lens so that you can see everything a bit better. For reference, that’s a 1/4″ groove.
Then I clamped a flat piece of stock right up against the mark I’d just made and started wasting out the repair area. You have to do this really carefully–use a small chisel diagonally (or a gouge) to avoid tearing out your repair area when you’re starting.
The photo below shows the last part of the wasting step–registering the chisel back against the scrap and paring out the last little bit.
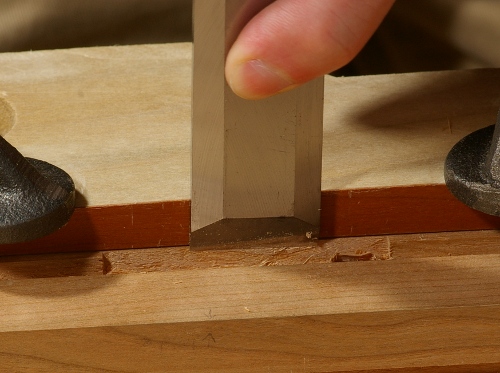
Your chisel has to be very sharp and the back must be flat for this to work properly. For most chisel operations, the back may not need to be flat, but this is an exception.
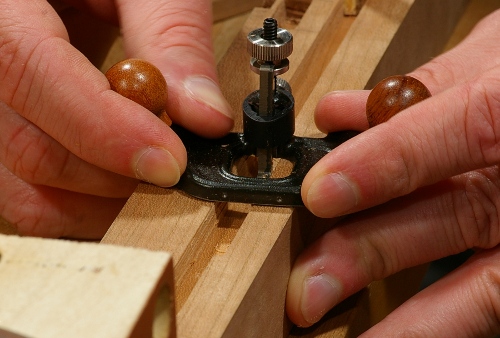
I also gratuitously used my new Veritas miniature router plane in the repair area. It probably wasn’t necessary.
Now at this point, I was lucky enough to have not made it look any worse than it did at the beginning, so I carefully milled a small piece of wood two-square and pared down the length until it was the length of the repair area. I also made sure that this piece would have the same grain direction as the wood in the original. If I’d been smarter, I would have also matched the vector of the medullary rays, but I wasn’t, so I didn’t.
I glued it in place and banged in a couple of pine wedges to “clamp” it:

After letting it dry overnight, I pulled out the wedges and removed most of the material on the repair that was proud of the surface and groove (again, carefully).
For the final touches, I used planes. This was the very first time I got to use the side rabbet plane that I got from Veritas when they first released it:
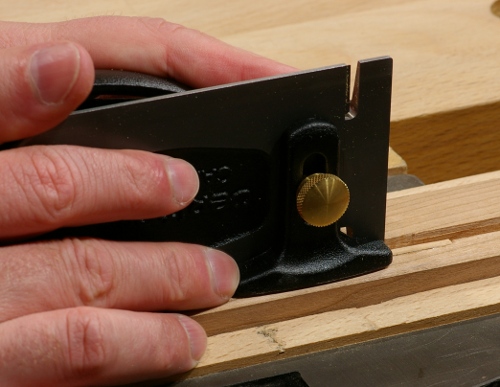
It was very handy for this, but as they say, it’s a plane you don’t want to have to use.
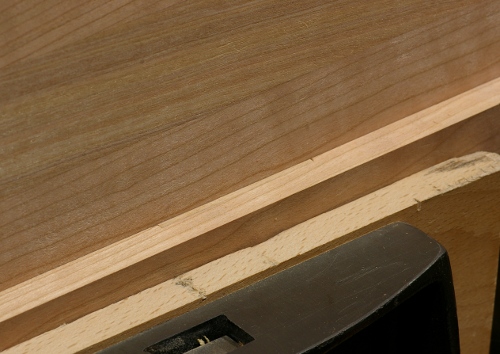
After doing the sides, I planed off the top and the repair was complete:

There’s a tiny little nick at the top of this one where I accidentally dented the edge of the repair area, but I can live with that. I’ll only notice it every now and then and it’s something that I should notice occasionally. The important part is how it looks with its panel in place, and that seems to be OK:
The moral of the story? Don’t ever have to do this. I had thought that I was careful enough when I made the grooves; I’d marked the grain with a mortise gauge and worked the area with a chisel beforehand. But I still tore it up with my router plane because I was just too ham-fisted. If I’d spent an extra 30 seconds total being just a bit more careful, this would have never happened and I would have saved the hour that it took to do these repairs.