Saw handle: Back mortise and screw holes

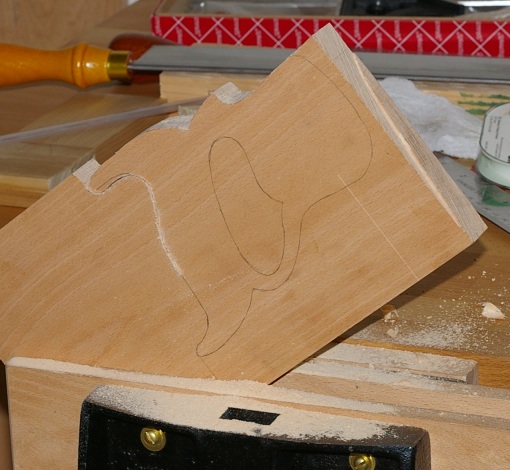
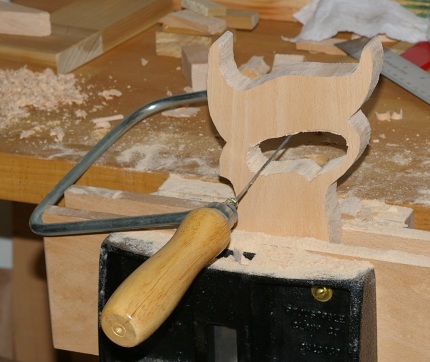
The mortise for the blade’s back was pretty much a piece of cake. I marked it off with a marking gauge on both sides, sawed down the lines, and chiseled it out.

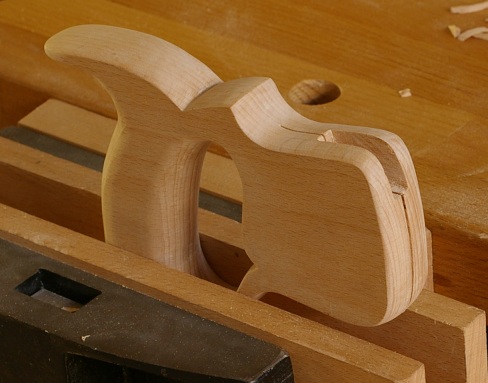
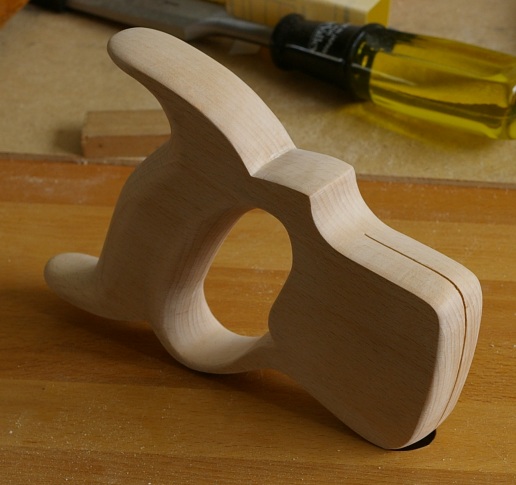
After verifying that everything fit, it was time to drill and shape the holes for the saw screws and nuts. This was sort of a complicated operation, because there are several different sizes of recesses to cut. I started with some small pilot holes in the correct locations. Amazingly, I got them straight working freehand:

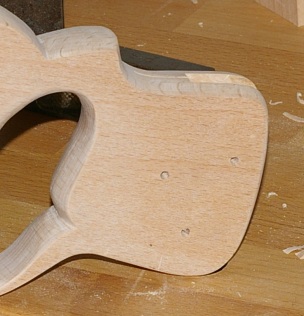
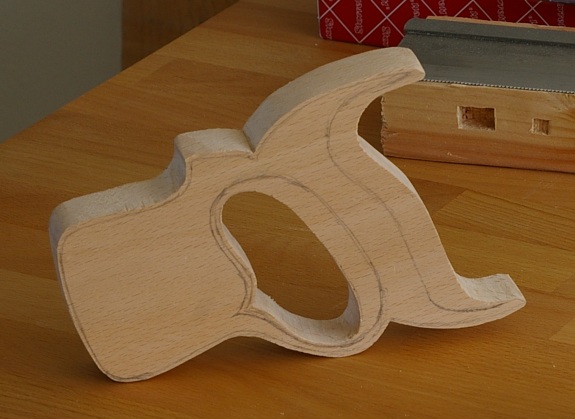
The fun part was next, because I got to use both of my braces and two auger bits to cut the recesses for the screws and nuts. Most of the shallow ones are 1/2″ in diameter, but the one for the medallion was 3/4″.

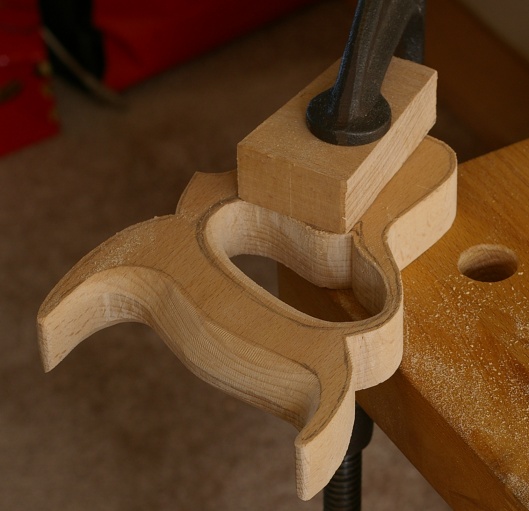
Then I had more holes to drill, because the nuts require one size, the screws another size, and the screw with the medallion needed yet another size. I did a sloppy job with the holes for the nuts, but that doesn’t matter, because it’s actually not a bad idea if they have a lot of slop anyway. I was much more careful on the side for the screws, and that turned out fine:

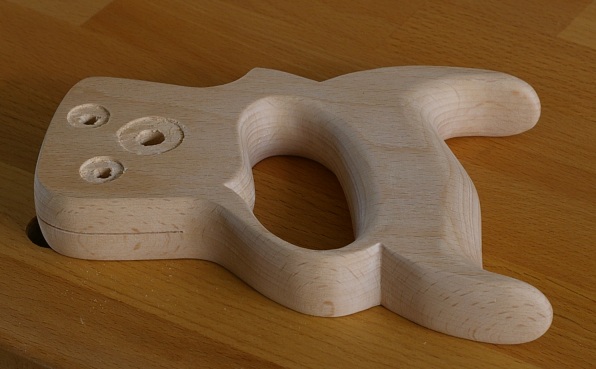
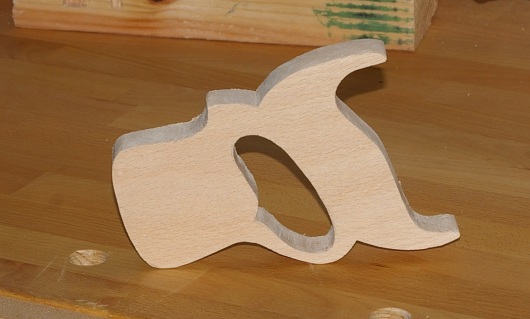
I test-fit everything. It’s all good. So it’s done except for the finish. I washcoated it this morning. Hopefully this time, the finish won’t take forever.

Saw handle: Cutting the blade slot

Sooner or later, I had to cut the slot for the blade, and I wasn’t looking forward to it. There is a method of cheating at this in a Lee Valley newsletter article [ed: link updated in 2021], but the only appropriate saw I have for doing this is my dovetail saw, which wasn’t gonna work.

So that meant cutting it “freehand.” And I’m really supposed to be able to do this sooner or later, anyway, because it’s the same as sawing a tenon cheek. Unfortunately, I haven’t been very good at that.

I decided that it would probably be a good idea to practice. So I marked out a bunch of lines on some scrap and sawed away:

The first tries were not encouraging. In fact, at first, I screwed up about seven times versus one instance where it wasn’t that bad. Eventually, though, I managed to relax and let the saw do the work instead of holding with a death grip. I did three good ones in a row. It seemed time.

It took what seemed to be an eternity, but once I had established the kerf (approaching from both sides), it was a cakewalk.

I managed to split the marking line. I hope that this means better tenons in the future.

Next up is cutting the mortise for the back and the holes for the saw screws and nuts. It’s starting to occur to me that this saw handle is now far better than the beat-up saw blade that it’s going to go on.

Saw handle: Shaping

The first step in shaping a saw handle is to mark out the inner lines that you’ll shape up to.

Then it’s time to break out the rasp and file and wish you had a better rasp:

I didn’t use a center line along the edge of the handle this time. I just cut alternately from each side until they met in the center. I kept them even by measuring the depth with my double square. That tool should be dragged out back and shot for being so handy.

When it was all mostly said and done, except for final sanding, it looked like this (shown next to the old handle):

The next steps are to cut the holes for the screws and the slot/mortise for the blade. I am not looking forward to the slot. It’s where I can really screw up the whole thing in one simple, easy step.

Saw handle: Cut out cleaned

Instead of starting to shape tonight, I decided to clean up the rough saw marks made by cutting out the handle.

That’ll be it for tonight. Somehow I came up lacking in the energy department.

There was some question about “purity” somewhere or other, or in other words, “would I have used a scrollsaw or bandsaw to make this if I had one?” Well, yeah, probably. Remember that Disston wasn’t shy about using machinery to make all of those beautiful early 1900s saws. They weren’t stupid, and they sure had room for some bandsaws.

Saw handle: Cutting

The worst part of making handles seems to be cutting out the handle. I’m still using a coping saw for this. I should probably wax the blade. In any case, beech does not cooperate much.

It didn’t take terribly long. The grip is maybe 1/32nd thinner than the original, which is probably okay. I’m not going to bother to even it up tonight. I’ll do that when I go to shape the handle.

Saw handle for Jackson backsaw

The handle on my old beat-up Jackson backsaw looks really sad and has a lot of nasty rot and gunk in it. In preparation for the handles on my other backsaws, I thought it might be a good idea to start with the old one, just so I can continue to mess around with a saw that isn’t worth very much.

I finally got my stupid scanner working and scanned the old handle. Then I used Inkscape to trace the outline, and finally, today, I cleaned it up a little. I got this thing:

This seems reasonable, and the dimensions also appear to be correct. I didn’t try to make it pretty or add extra flair. The “holes” are almost certainly inaccurate, but I don’t care, since I’ll be transferring them from the blade and not the drawing.

It’s a somewhat “urgent” project now. I put new teeth on another one of those cheap Craftsman dovetail saws this weekend, so I have the “urge” to put a real handle on the ones I have. This time I went for 14tpi rip, and I used a worn 5″ x-slim taper to cut the initial teeth. That went a lot faster this time.

The saw works perfectly… as a dovetail saw, that is. This is or is not unfortunate, depending on how you look at it. I wasn’t intending to make a saw that cut as well as this one, I just wanted something that was faster than my current 20tpi dovetail saw. This cuts so well that I might just try it for stuff that I used the dovetail saw on before.

So I’ll probably be getting yet another one of those cheapie saws. This time, I’ll file it to something like 10 or 11tpi rip. That ought to do what I want it to. Except that maybe I wanted to make a panel saw? Eh, I guess it doesn’t hurt to have a few.