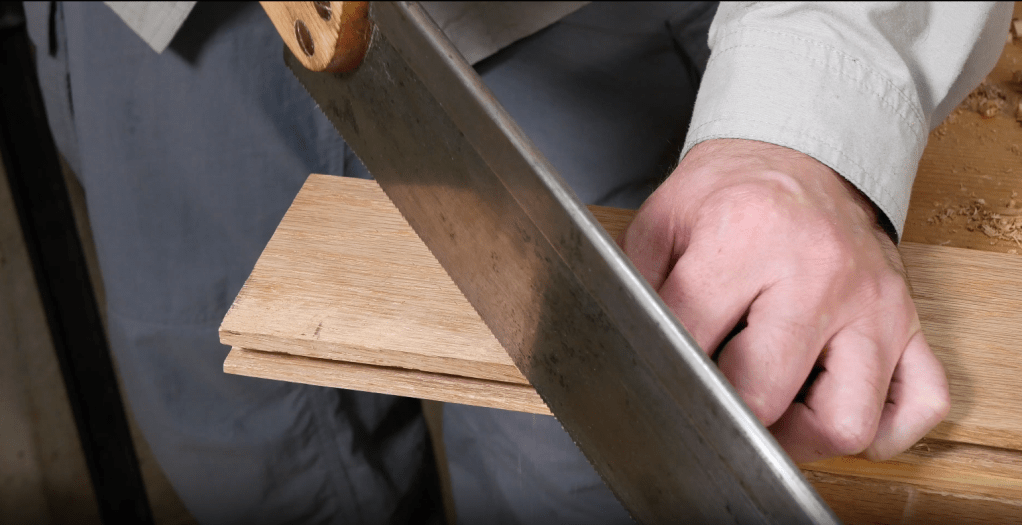
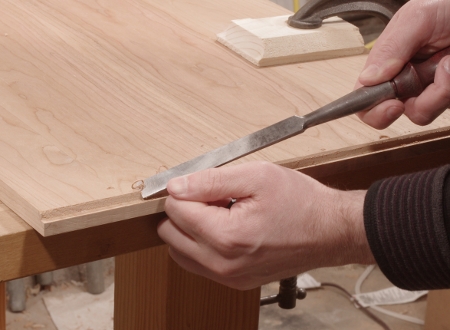
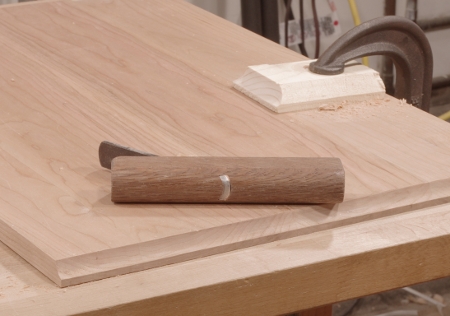
I posted a new video of the hand-tool work done while making a replacement stair nose for my porch. It features probably way too many tools for its sub-4-minute length.
This project and video, like most things lately, is on the short side and was done as time permitted. There just hasn’t been room for longer projects lately.
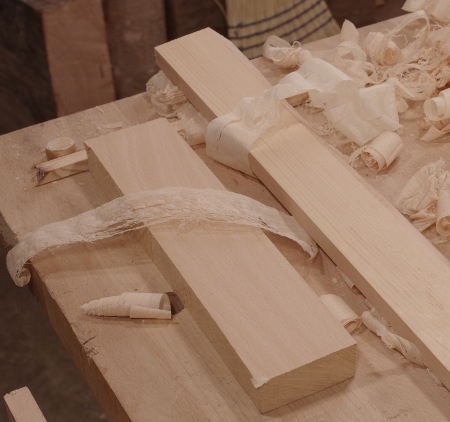
Squaring up small workpieces has been a pain for me as long as I can remember. It’s not unique to me; several old publications also mention the problem as well as making a longer shooting board for just this thing.
So I made a prototype. It got the job done, but it wasn’t easy to set up, and I had trouble keeping the longer pieces held in place with one hand as I was planing with the other.
It seemed to me like there were things that they don’t tell you, and perhaps not coincidentally, there is an article in The Woodworker (C.H. Years) Volume II (pp. 497-498) titled “Things They Don’t Tell You: Shooting Board Technique.” Does it address the above question? Well, no, but that’s not to say that it’s useless; I’ll get back to that in bit.
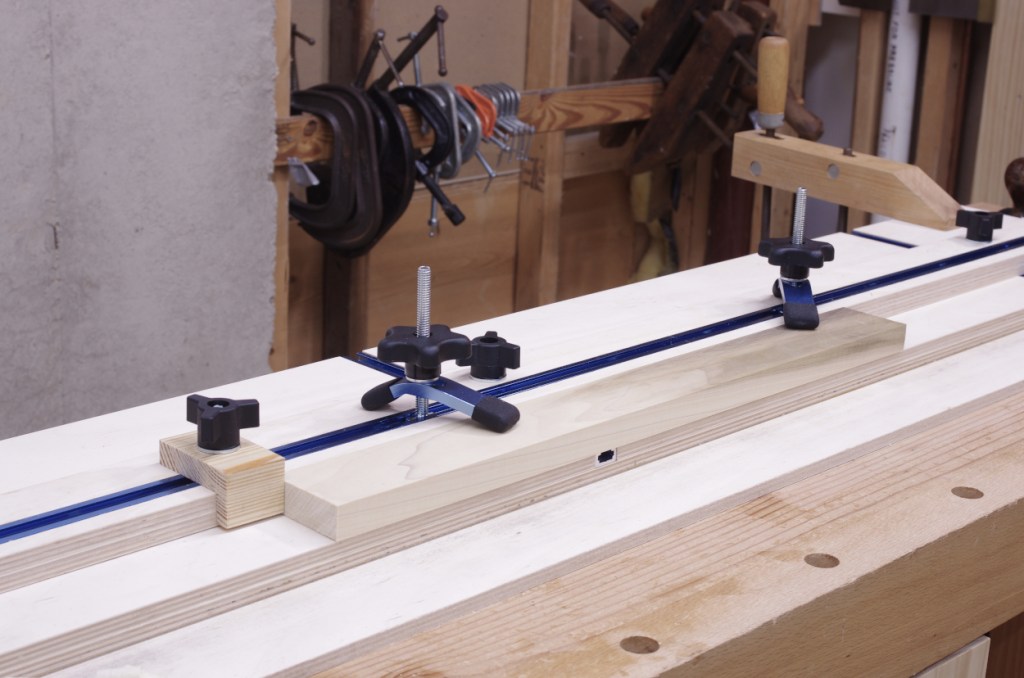
After several months of consideration, I made a new long shooting board that is a bit less traditional than my usual fare:
That’s right: Plywood, T-tracks, jig hardware. Knobs and screws and stuff. You know, standard fare in the realm of power-tool fanatics. But other than my bandsaw and drill press for a few odd jobs, I used hand tools to make it.
I made a video as I was building, also explaining where I got some of the ideas, and how it works in practice, so if that sounds like something you want to know, here you go:
Essentially, I got the idea of a modified tapering jig in my head, and it wasn’t going to leave until I built something.
There are a couple of tidbits that I didn’t put into the video because they were not terribly captivating (or, at least, I am not yet talented enough to make them appear so), but if you’re interested and literate, here we go:
The Fence Angle
I gave the fence a very slight overhang. When I say “very slight,” I mean it:
This is to discourage stuff from slipping and riding up the fence. There isn’t anything special about the angle, I just didn’t want it to be tilted in the other direction. There are probably other options, such as lining that edge with sandpaper.
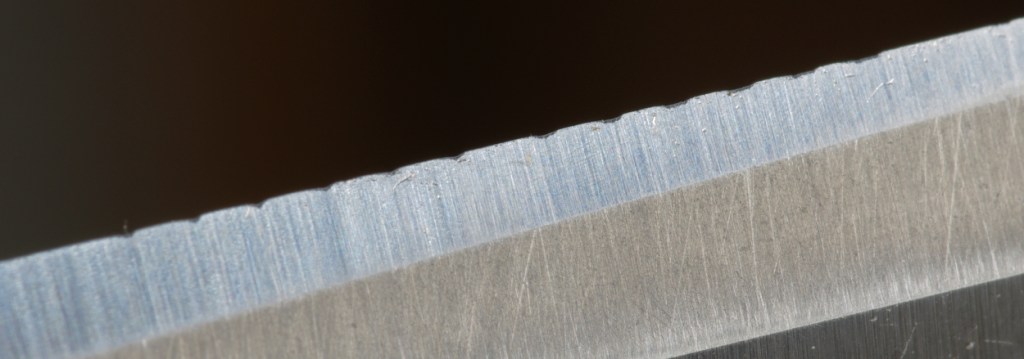
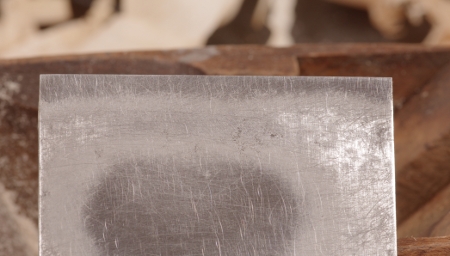
You might be wondering why the fence edge seems to undulate a little. This is because the glue in plywood can be murder on edge tools:
I mention this in the video; obviously, you don’t want to make a regular habit of subjecting your blades to this kind of abuse. Really, if you have to use plywood all the time, just get a track saw or something. But for a one-off like this, you can just go back to your coarse stone, raise your burr, hone, and get on with your life (possibly with a little bit of cringing in the interim).
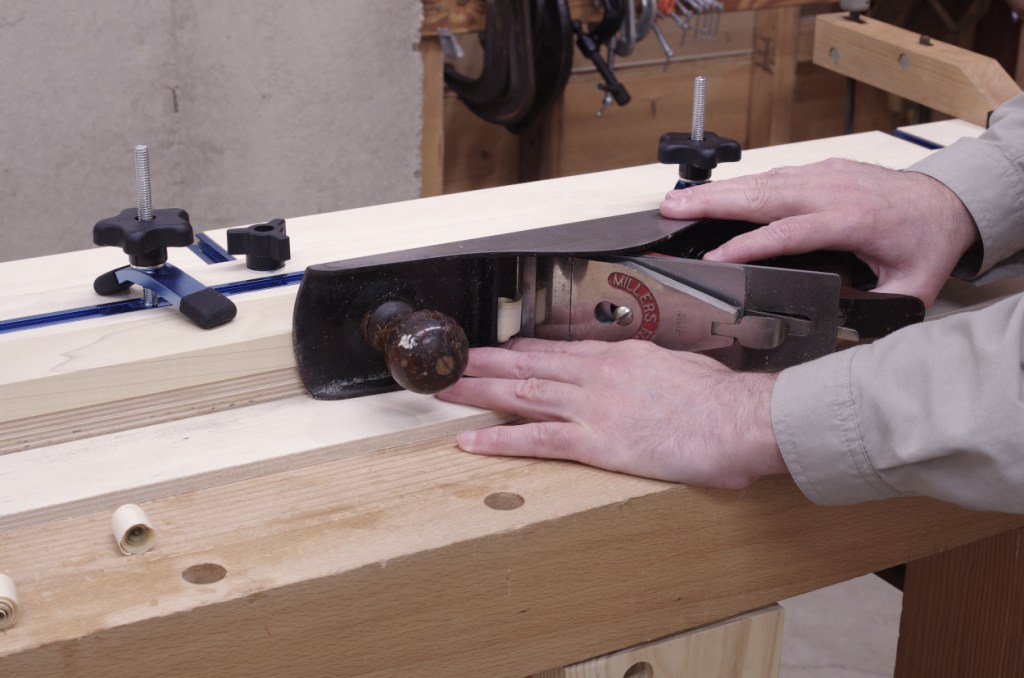
The Plane
I’m using a Millers Falls No. 18, a Stanley #6-equivalent that I wrote about a while back. Another possibility would have been a #5-size jack plane.
However, this brings us back to the Things They Don’t Tell You article (let’s call this TTDTY:SBT). It states that plane soles are usually not square to their sides. This would have applied to almost any kind of Bailey-style plane of times past, and mine is no exception. So you can’t just set the plane for an even cut and expect it to cut square in a shooting board. The article doesn’t give any rectifying advice than the usual blurb of “oh, if you’re edge-jointing, just flip the other board for the supplementary angle effect” (and hope the grain runs in the correct direction, which is a TTDTY).
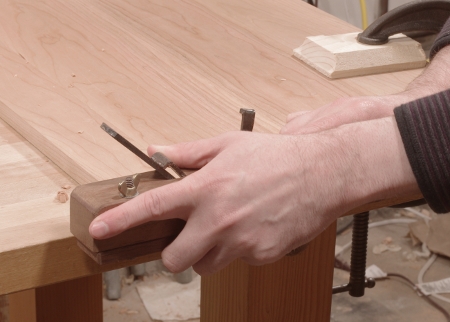
There’s a simple solution for most metal planes: The lateral adjust lever. Put the plane on its side, put a square next to it, and adjust until square.
But what if I were really obsessed about the square sides thing?
Other Planes
So let’s say that I had all of the money in the world and could get another plane for this shooting board. What would I get?
You might think that I’d go for one of the contemporary versions of the Stanley #51, like the Lie-Nielsen No. 51 or the Veritas Shooting Plane. But I’m not so sure. For one, they are made in left-and right-handed versions. You need the left-handed version to go from right to left, which is what I found felt the most natural with the long board (as a right-hander). A normal bench plane like mine can just be flipped on either side to go in either direction.
The other thing about those planes is that they are really meant for shooting end grain; their blades have very low angles achieved by skewing the blade. If you happen to hit an unlucky grain direction, crazy stuff could happen.
Incidentally, TTDTY:SBT says that a low-angle block plane works well for end grain, with photos illustrating bench planes for edges.
I think that just the usual #5 or #6 bench planes from Lie-Nielsen or Veritas would be just fine for an extravagance. Perhaps the best plane would be some sort of crazy 16″ mitre plane, which doesn’t really exist.
Another idea is that if a normal bench plane could be conveniently attached to a wooden base with a couple of nice ergonomic handles, it would slide really nicely and feel a little less weird. But this is not enough of a problem for me to matter.
Straight, Flat Cuts
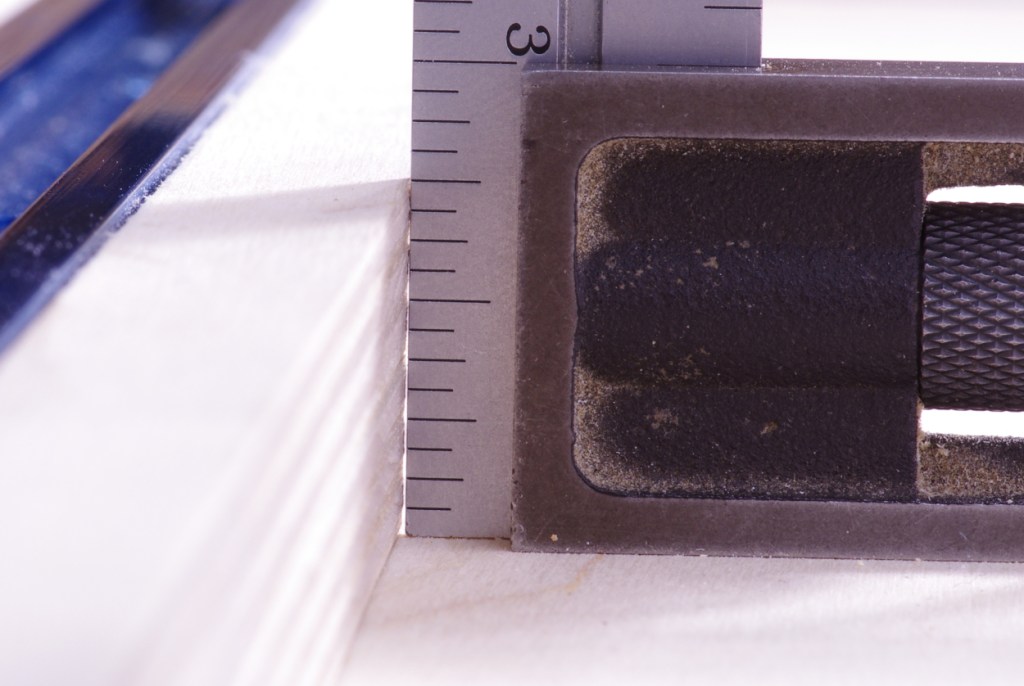
TTDTY:SBT describes differences between shooting an edge with the grain versus endgrain. It asserts that when shooting with the grain, you want the workpiece to overhang a bit, and let the plane’s sole do the work of getting the edge straight. You are not expected to run the cut until the plane stops (presumably because the guiding edge of the shooting board is not expected to be straight).
However, with the plywood, I was able to get the guiding edge reasonably straight, and I demonstrate that in the video. As long as it stays that way, I don’t see any reason why I can’t use that for most purposes.
But for edge jointing, I likely will not do it this way. In the video, I also go through the process of planing down to a line. For edge joints, I’ll want something more along the lines of so-called sprung joints, and that’s easy enough on the shooting board.
Other Fence Ideas
I had originally played with the idea of trying to lock down a thin, wide panel by putting it on top of the fence. That didn’t work; the plywood fence was too flexible.
But I don’t want to give up on this idea. I think that perhaps I can just make a simple half-length fence out of a piece of bowed solid wood, and it might be able to lock down a panel (or a piece of veneer, or whatever) with relative ease. Maybe I could put a piece of sandpaper on the underside, too.
Plywood.
Having used plywood to make a few shop appliances in the past year, you might wonder if I’ve gone plywood-gaga. I hope not. I was even thinking about making this out of quartersawn southern yellow pine, but I didn’t have enough of that on hand. Eventually, practicality won out: I made the shooting board (plus a tapering jig and a drill press table) out of a single 5×5′ piece of 3/8″ baltic birch plywood.
With this project, I think I’m done with plywood for a while.
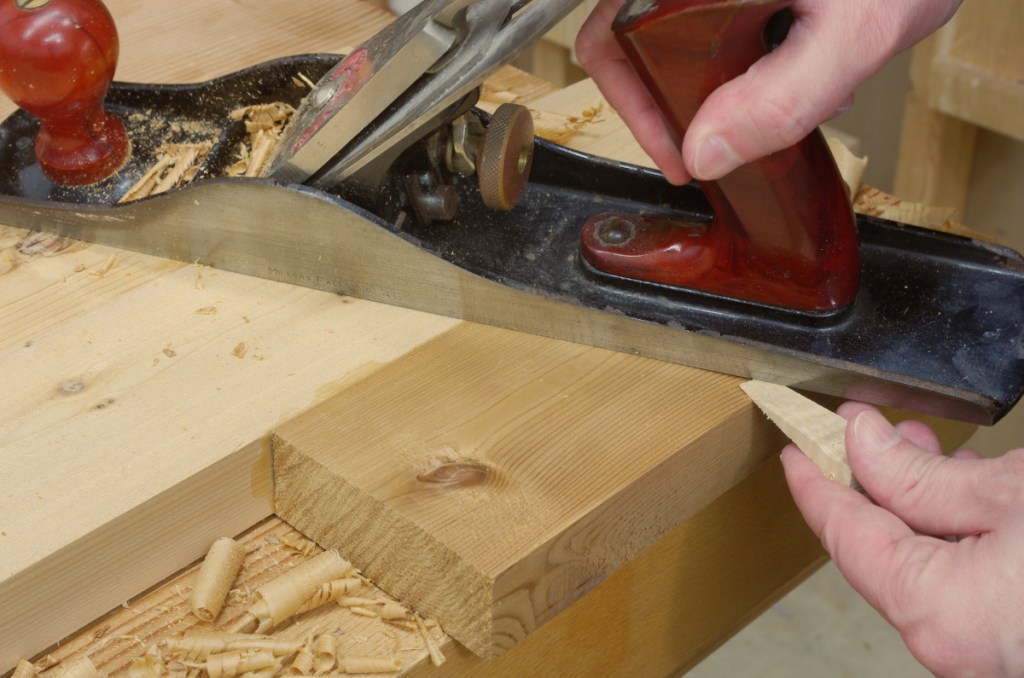
With its ability to flatten wide stock quickly and effortlessly, one of the things that my planer sled design has enabled is a little more flexibility and ease when I need to glue up something wide. Ironically (or perhaps not so much), the jack plane often comes into play here. A quick treatment with everyone’s favorite “rough ‘n ready” sometimes saves even more time.
By way of example, I’m working with a bunch of suboptimal cedar at the moment. I need 10-inch (~255mm) stock, and I don’t have any. So I glued up sections of three (crummy) 4-inch stock, first roughing out the stock on the bandsaw, then planing slightly “sprung” edges using a jointer plane. I didn’t make the edges perfectly square to the sides because the sides were rough and uneven from the bandsaw (and the thicknessses varied anyway)–all I cared about was getting edges that would join together.
When doing something like that, you end up with a glued-up board resembling something from the Cubist style, for which the conformist cries out to flatten. And we oblige. For the planer sled to work correctly, you want the face you put on the bottom to be “roughly” convex, but there’s no particularly exacting standard. So you can grab a jack plane to (effortlessly) knock off a bit from the sides near the edges:
Wedge shows the part that I planed off.
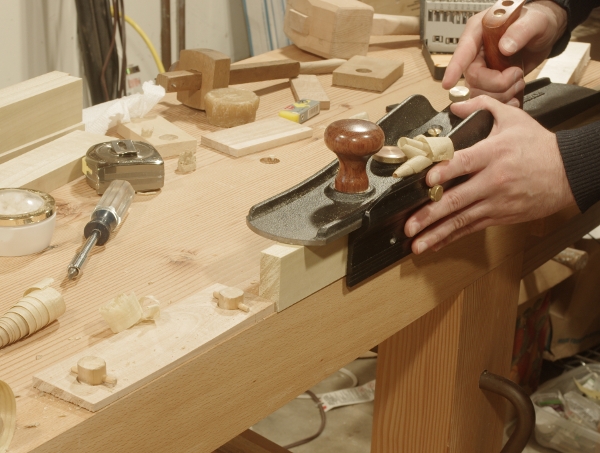
Now, you can flip it over, pull out the planer sled, and fix the whole mess in place:
Yes, this is a strangely-shaped piece.
And just like that, you’re ready to feed the whole mess into the thickness planer and flatten it in one shot. The process of knocking off the edges, fixing in the planer sled, and flattening with the thickness planer only takes a few minutes (I spent a lot more time taking the photos and writing up this post).
Perhaps there’s a need for a “moral of the story” trope-ish thing in here, so here you go: The jack plane is invaluable. Even though I don’t need to use it nearly as much as I did in my prep-stock-by-hand days, I’d still be lost without it.
Shop time has been limited, yet nonzero, in the last couple of weeks. Other than a bunch of cleaning up down there (which has gotten much easier as I find better ways to organize), I finally set out something to do about the plane that I use for shooting. I’ve been using a low-angle block plane for a while, but have wanted to try out something with a little more heft.
While doing some of the aforementioned cleaning, I came across a Millers Falls No. 18 (Stanley #6 equivalent) that I bought years ago but never did anything with. The sides were already nicely square to the sole, so I decided that maybe I could try it out with the shooting board.
It was was fairly rusty and completely filthy. A couple of hours spread over a few days with rust remover dealt with that. The iron was badly pitted, so I dug out a Hock replacement that I had on hand. And so somewhat surprisingly, everything went together fairly quickly today:
No one’s going to mistake this thing for a completely restored plane, of course. And it may not be one of those neat specialized planes with the low-angle skewed blade, but it has the advantage of being available for service right now. We’ll see how it goes.
I decided that the break-in project for my new workbench would be a bookshelf. Because the bench can handle six-foot boards, and I can still reach things that are six feet high, I decided to make the shelves six feet high.
Two workholding problems popped up in the course of the project. One was an oldie, and the other one was new. Let’s start with the old one.
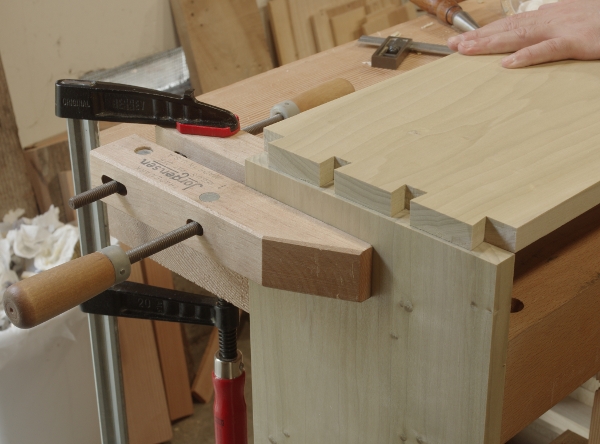
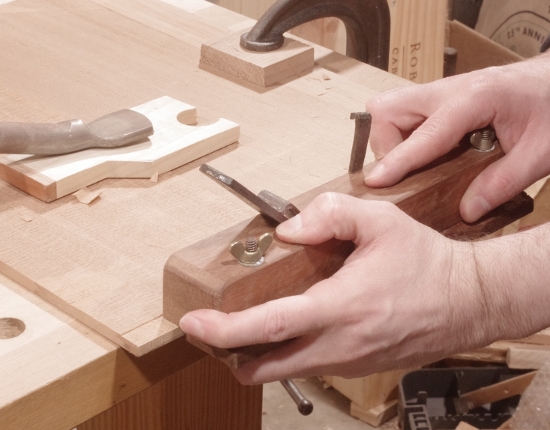
I’ve found it annoying to joint narrow boards because I usually have to make a lot of them. I have a jointer fence for my Veritas jointer, but if a board just isn’t wide enough, something always obstructs the fence because it projects below the opposite edge being planed. For some time, I’ve dreamed of being able to secure a board on the edge of the bench so that I could use my jointer fence on it. I’d been scheming on accessorizing my bench dogs a little more, and yesterday, I finally did it:
This stop is nothing more than a piece of a panel that I’ve bored two 3/4″ holes in, and stuffed two of my bench dogs through and into the holes on the bench. There’s another one with two more holes and two more dogs in the tail vise on the other end of the board. Notice how the board is slightly proud of the edge of the bench.
The whole idea is to keep the stop from rotating around in a hole. I didn’t really expect this to work–I thought that the weight of the jointer would tip the board over. But it did work. I had to ease up the rear hole a little (with a half-round rasp) to keep the front of the stop from lifting off the bench.
What’s kind of funny about this is that Lee Valley released something similar to this for planing panels today, except theirs is supposed to be used perpendicular to the way this one sits on the bench. But I’m happy with my low-profile bench dogs for planing panels.
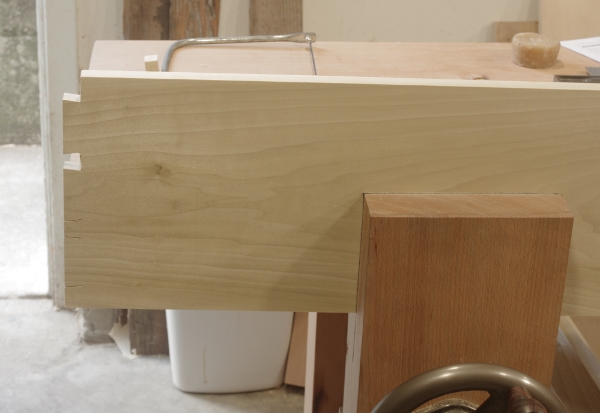
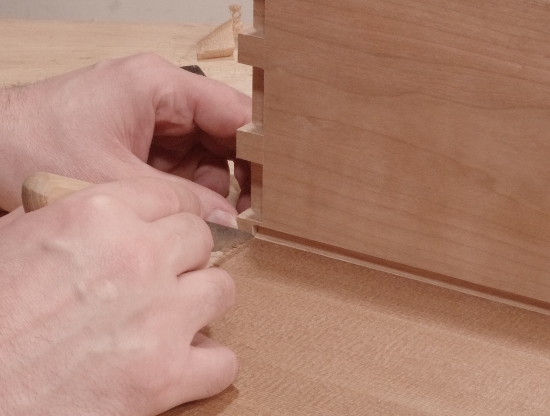
The other difficult situation I ran into was dealing with a dovetail joint on the end of a six-foot board. To cut the tails, I extended the board off the edge of the bench, marked it, and sawed:
Then I put it in the leg vise (supported on the other side by a holdfast in the other leg) and sawed/pared the tails to completion:
Then I had to mark the pinboard. After a bit of fussing around, I came up with this:
Warning: What I talk about in this post is not considered standard practice in any way, shape, or form, and may be completely wrong.
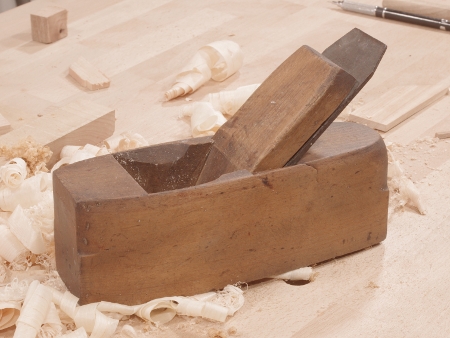
I’ve been wanting an old wooden western-style smoothing plane for a while, and a couple of months back, I picked up an Ogontz/Sandusky coffin-style smoothing plane at the Alameda flea. It’s nothing special–beech body and a big laminated blade a little more than 2″ wide.
It had been used to a certain extent, and the most annoying thing about it was the way the blade face had been sharpened–it was rounded over. It was the “ruler trick” gone mad, I suppose. It may have been done with a grinder. A lot of old blades turn out this way and they’re not particularly easy to sharpen when in this condition. Because there’s often no set angle you can use on the stone, you can’t register it on anything. In this case, it was especially bad because it was quite convex, both across and up and down the face. Oh yeah, and it was pitted, too. Yuck.
I didn’t have time to deal with it, so it sat on the shelf until recently, when something occurred to me. Because the blade is thick and laminated like that of a Japanese plane, it might be possible to use the technique of “tapping out” to create a new flat for the face edge. I recently had to do this to a couple of blades and it seemed to me that it might be worth a try.
The problem is that I’ve never heard of anyone doing this to a Western blade. It could be just totally wrong.
So I tried it first on a blade from a big jointer that was suffering from a similar situation. To my surprise, it worked. But that was a large, brutish plane that I don’t use for delicate tasks, and I didn’t want to go blabbering about it until I’d tried it on something else, such as the smoother.
I’m not going to describe the process of tapping out because Wilbur Pan has already done that. I used a small ball-peen hammer and the silly anvil on the back of my cheap machinist’s vise (I tried tapping on a block of wood at first, but that didn’t work–I might speculate that the soft steel in an old western blade is harder than the (typically) wrought iron used in the Japanese blades). Because the blade was rounded along the complete width, I had to tap it nearly all of the way to the sides. The result was that the high spots on the face were now the edge (as desired), as well as a spot in the center (we’ll see that later).
Before getting any further, I must give you this warning: If you’re interested in tapping something out, don’t try it on a thin Bailey/Stanley-style blade, or any blade that’s solid hardened tool steel. It will most likely crack or chip, because steel that takes an edge and is designed to cut wood is brittle. I’m going to guess that if you’re really crazy about the idea, you might be able to temper the blade first, then tap it out, then harden it again.
Now it was time to sharpen the blade and see if it worked. The bevel was in terrible shape, and there was a big nick, so I had to take it to my (horrible) grinder first. Then it was off to my Sigma Power #120 stone. First I worked the face to what I thought was a pretty good surface, then I put the thing in a honing guide, reformed the bevel at 25 degrees, and finally worked my way up through the grits on both sides. Thinking that the blade seemed sharp enough, I tested it out.
That first test did not go particularly well. I couldn’t manage to take a thin shaving, shavings kept getting jammed in the throat, and the surface left behind was ridged, not smooth. Much not to my amusement, the edge also seemed to have gotten kind of messed up.
I found the shaving thickness problem pretty quickly; the bottom of the plane wasn’t even remotely flat (it was bumpy). A couple of passes with my Veritas jointer fixed that, and I was able to get a good shaving. I popped out a little crud in the mouth, and that fixed the jams. But the surface on the planed wood was still crummy.
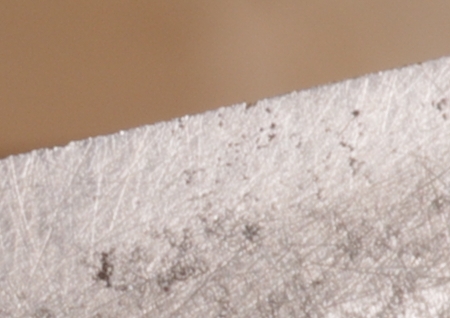
Perhaps my sharpening job wasn’t as good as I’d hoped it was. I took a photo with my macro lens; here is about 3/8″ of the edge:
Basically, the edge wasn’t really sharp to begin with in some spots, and there was still some pitting across the edge.
So I hit the Sigma Power #120 again to remove the pitting, and also to try to get a better bevel shape. I ended up with this after working through my stones:
There was still a very tiny nick-like thing for that one deep pit in there, but would it matter? Well, of course it would sometime, but at this point, I was more interested in seeing if all of this wasn’t a waste of my time, so I put the blade into the plane and tried it out:
Bingo. Translucent shavings, polished surface, yadda yadda. The wood on the left is beech, and the one on the right is some mystery softwood (spruce or fir, most likely). The softwood actually had some figure that the plane brought out:
Yeah, that’s a little birdseye that’s trying to come out. Strangely, I didn’t find the ridge from that little nick in the edge, but I’m sure I will sometime, so I still have to take care of that.
In the end, the face of the blade looks like this:
So in the center, it’s kind of the opposite of a Japanese blade–whereas those have the hollow in the center and are high on the edges, this one has a big annoying high spot in the center. However, that spot still gives you something to register upon when honing the face. It’s as easy to sharpen as a Japanese blade, too, because there’s much less surface area to float on top of the stone.
Well, we’ll see how this works out. As I hinted at the beginning of the post, this could possibly be one of the most idiotic things I’ve done to a tool.
The second nightstand project is lumbering and stuttering forward, this time with the tops. I glued up the tops a few weeks ago, smoothed them off, and cut the left sides even and square. I’d been debating what to do about the edges for a while, but then I got the order that they ought not to be “so plain.” Emboldened by a somewhat recent episode of The Woodwright’s Shop with St. Roy hosting Bill Anderson, I thought that perhaps I’d be able to do a simple single ellipsoidal curve.
After fooling around a bit on some scrap, I got a profile that I liked, and was satisfied that I sort of had the idea. So I moved to one of the tops. I started by marking the profile into the sides, and then marking the lines for a rabbet to remove a good portion of the waste:
I should note here that I used a surprisingly large number of marking gauges for this–four (two for the rabbet, two for the edges). Because I wanted to use the same profile on six sides, and all six sides were not ready for marking from the very start, I kept the gauges on their settings so that I’d be ready to mark when able and not have to figure out everything again.
Then I started on the cross-grain side and cut the rabbet:
This plane doesn’t have a depth stop and I didn’t need one (as seen on the show). Then, also like the show, I used a chisel to knock off a bit more of the waste from the edges of the rabbet:
Later on, I switched to a narrow rabbet plane; for this small amount, it worked a bit faster than the chisel.
Finally, I hit it with a simple Taiwanese round and completed the shaping:
So there you have it, my first moulding. I followed this with the moulding on the opposite side, doing the same cross-grain cut. Then I did the one on the front. The cuts on that one went with the grain and was consequently much easier.
It’s been so long since I talked about the second nightstand project that I sometimes wonder if I’m making any progress. So I looked back at that last post and realized that since then, I’ve done the following:
Made the rest of the cabinet components.
Glued up the cabinets.
Made all of the drawer sides, fronts, and backs.
Resawed and milled the pieces for the drawer bottoms.
Milled half of the tops and roughed out the other half.
The drawer sides and backs were a pain because for some bizarre reason, I chose birch to be my secondary wood. Don’t do this. Use yellow-poplar, pine, or something that people who should know better would use. The stock I had a ridiculous number of grain reversals, leading to a lot of tearout when planing, so milling this stuff took forever. It also dulled my plane blades quickly, so I was constantly resharpening. But even after I milled it, the dovetails took longer than they should have because it seemed like I needed to sharpen my chisels after every couple of swipes.
So it took forever, but I finished, and that left the drawer bottoms. I haven’t really talked much about how I’ve been making drawer bottoms, though I did one particular post that kind of touched on panels in the tool cabinet. So I figure I could post something on that.
First, I mill the wood to thickness, preferably a little thicker than the grooves that they’ll fit in. I always need to glue them together.
Next, I saw the glued-up panel to rough depth–about a half-inch wider than it will eventually be. In the following photo, I ran out of wood in one board of western redcedar and had to use another very differently-colored board for the last little bit at the end. The rip panel saw that I use is on top.
Now I plane the top of the panel to remove excess glue and get a finished surface. I do this after trimming the depth because I often use the cutoff somewhere else, so I want that cutoff to be as thick as possible to start.
I used a Taiwanese plane for this because it was sharp and the blade is nice and wide.
With the surface planing done, I trim one of the sides square to the front with a plane. I used a Milllers Falls #11 (this is like a Stanley 5 1/4) because it’s easy to control (and its blade happened to be sharp).
Then I take the drawer front and mark off the width:
I mark this side square to the front as well, and after verifying that it is in fact square, I trim it off as well.
As I mentioned earlier, the panels are typically a little thicker than the grooves that will house them. I don’t measure them because I care only about the face side being reasonably flat. Now it’s time to get three of the edges to fit into the grooves.
To do this, I make a rabbet. I was thrilled to be able to use my new Taiwanese rabbet plane so soon:
I start with the sides, going across the grain. Every so often, I check the thickness by seeing if the rabbeted edge fits in the groove that I’ve plowed in the drawer side. When going across the grain, it definitely helps to take out a little bit of the end of the rabbet with a chisel so that you don’t blow out the grain.
I then make an identical rabbet on the other side, and then do it for the front edge, this time checking against the groove in the front drawer.
Now it’s time to trim the panel/bottom to final depth. I assemble the drawer front and sides without the back, and slip the panel in. (This is also a good time to verify that the panel isn’t too long.) I make sure that the panel goes all the way into the groove on the drawer front. Then, I mark off where I think I should cut the panel:
I make marks on both sides, draw a line between them, and then saw and/or plane to that line. Then I test-fit the panel into the 3/4 assembly again, and measure the depth with my double square:
With the square set, I drop this end into the groove on the rear of the drawer to see how close I am to the bottom:
You can see the gap; you want a gap so that the panel has room to expand in the groove. I usually go for somewhere around 1/16″-3/32″, but it’s never exact, just the kind of thing you know when you see it.
With the final depth trimmed with a plane, I rabbet the underside of the rear panel edge like I did earlier for the sides and front.
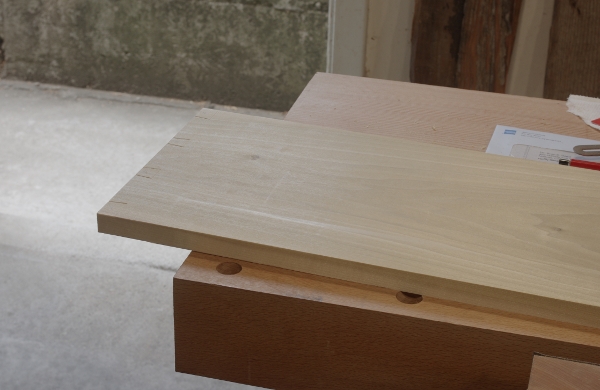
Then, the final test-fit comes; here’s the view inside showing the face surface:
and here’s the underside that no one sees, with the rabbets and saw marks that I’m too lazy to clean up:
So there are the drawer bottoms. I have two done and I’ll do the other two when I get back from the ski trip I’m on now.
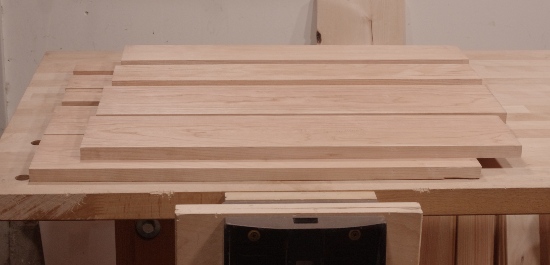
I’m also making some progress with the tops. Here are the pieces that will form the tops. I had to do a lot of sawing around defects to get to this point:
This year’s annual transpacific trip included Japan as well as Taiwan. Unfortunately, I didn’t get to see too much in the way of wood/woodworking stuff; there was just too much on the agenda.
However, I did get to go to the Meiji Jingu shrine, and the second gate (torii) on the path there is one of the largest wooden ones around, and happens to be made of Taiwan Yellow Cypress:
(The sign says “hinoki from Taiwan”–They consider the wood to be interchangeable.)
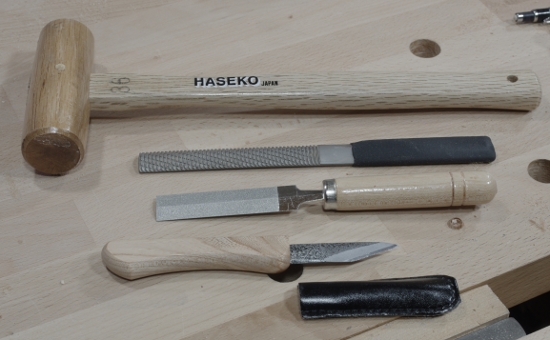
I didn’t have enough time to research tool shops in Japan, much less visit them, so I limited tool-buying to the home center-style stuff. To be honest, little odds and ends are all I really need right now. That’s a lucky thing, too, because the tools you get at the home center there are about a million times better than the ones you get in the US. Here’s the first batch:
At the top, a small mallet (wanted to see what it would do as a plane adjuster, plus I break the Thagomizer on a regular basis now–need to make another). Then there’s one of those milled-tooth files, that I’m going to try out as a half-round complement to the Shinto saw rasp that I like so much. Next is a diamond feather-edge file, because it looked like it might come in handy. And on the bottom is a general-purpose knife that I’m going to try out in my seemingly endless search for a marking knife that I like. That knife is nothing special, just the kind that a schoolkid might have used for sharpening pencils as described in Odate’s book.
Next is a couple of small squares:
The 4″ Lee Valley double square is at the top for size comparison. The 10x5cm square seemed like a handy size to me, and the tiny try square (made in Sanjo City) was too cute to resist. Note that even though these tools were not bought from a specialty shop, their accuracy is still guaranteed, and indeed, both are right on. You just can’t get that kind of thing from a home center in the US, and the price of these squares really isn’t excessive. We’re talking about $10 here.
I wish I could have gotten one of those larger framing squares that have the beveled face, but it would have not survived the airport baggage-handling gorillas. I suppose I can get those here, anyway.
Next up is a couple of sharpening implements:
I really have no idea what that thing on the top is, but it was cheap and it’s really coarse, so I figured that if nothing else, it could maybe be used to rough up the surface of my Sigma Power #120. I got the diamond plate on the bottom primarily for conditioning my waterstones.
Oh yeah, I got some shoji paper, too.
After leaving Japan, I went to the now-familiar tool shop in Taipei, and it turned out that I wasn’t quite done with Japan yet. I decided to buy my first Japanese chisel there for the hell of it (and to make Wilbur Pan gloat or something):
And I was looking for a smallish/medium smoothing plane, and got this typical Japanese-blade/Taiwanese body hybrid:
Annoyingly, the face of the blade on this thing was not flat when I got it–it had a very (very) slight convexity on one half of the edge. For those of you familiar with this kind of steel, though, you know that lapping it away is basically an exercise in futility, and it took me an embarrassingly long time to remember this.
So I tapped it out. I’d never done that before, and it was as nerve-wracking as everyone says it is, but I have to say that it worked like a charm.
Finally, the tool I was most looking forward to buying was a plain-jane Taiwanese-made rabbet plane:
Why? Because I’m fed up with my Stanley #78–a torturer of left hands since 1885. The one here doesn’t have a depth stop, though I could make one or clamp one on. And it seems that the convexity demon from the blade on the preceding plane infected this one, too. So I tapped out this one, too, this time with a little more confidence. Yay!
The maybe-not-so-strange thing about this plane is that it’s designed to be used left-to-right. I’m not sure it’s going to make much of a difference, but it might give me an excuse to buy an antique Western rabbet plane to complement it.
It’s been five years since I made my first post on this blog. At that time, it was on Livejournal, and I was doing it just because it seemed like a good idea at the time. Apparently, I’m still posting, so because it’s been a nice “even” number of years since I started, I figure I ought to do a review post because I have nothing better to do.
(You won’t see too many of these posts on this blog, so bear with me.)
Before starting, I should mention something about the name of the blog. It doesn’t mean anything. It was just something that rolled off my tongue. It is a dippy name, it’s difficult to remember, and I’ve always been open to changing it. Unfortunately, I couldn’t think of anything better at the time, and that condition persists to this day.
The first post is my introduction, but perhaps there’s a little more that I can add to it. At that point, I had never done anything resembling semi-advanced woodworking. In hindsight, this was a natural time for me to start because I’d finally gotten some measure of stability in my life after years of grad school, moving across the country, working in crazy environments, and living in cramped places. I’d moved into that particular San Francisco apartment not too long before. It was nice and roomy, I lived alone, and I finally had some extra time. Sure, I’d like to have started earlier in life. I didn’t, so there’s no point in thinking about that.
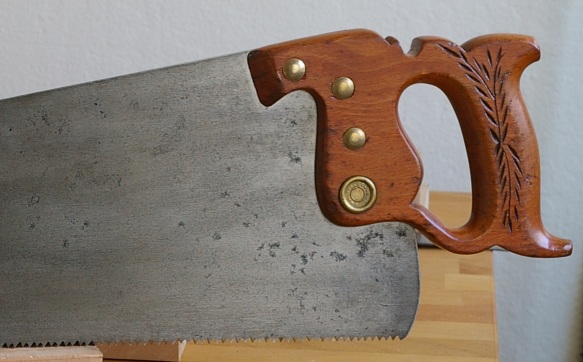
Regarding tools: I don’t know what was going on in my mind, but I must have been researching old tools quite a bit. For example, how did I know that I needed to sharpen my own saws at that time? My initial tool list wasn’t too far-off. I still haven’t bought a shoulder plane unless you want to count the mini Veritas version. And although I have a miter box, I haven’t used it (I haven’t even sharpened the saw). But I had one special tool right-on, and that was the Winchester handsaw I’d picked up (but never used) in 2003, three years before starting. It was a long time before I actually sharpened that thing, but ever since, it’s really been one of my favorite tools.
That a very common style of saw is special to me may provide some insight into the type of woodworking that I like to do now. I feel that I went after too many planes in the beginning, and did not realize the amount of work that saws do. In time, I began to appreciate saws more and more, and even made a few of my own.
I thought that I would be very project-oriented when I first started. I had the idea to make bookshelves–perhaps I believed that I’d make them within a year? I was wrong. I still haven’t made a set of bookshelves (I did make a prototype). What I did instead was learn the process of milling wood and basic joints. The first larger thing that I put together was my workbench, followed by tools such as my mallet and scrub plane.
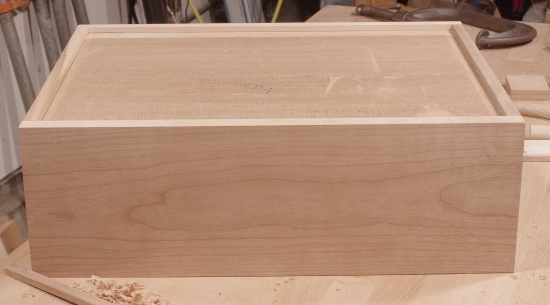
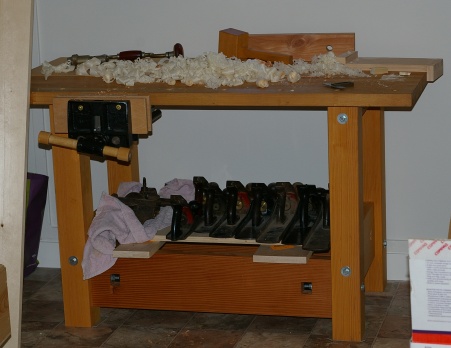
But about a year and a half into the process, I slowly made a dovetailed box, and that got things rolling. Though I didn’t have much time to work on it, that box went together more smoothly than I expected, and I still use it. By this time, things were changing in my life, and soon enough, I moved from the apartment to a house that actually had room for a shop. I spent the first few months trying to get organized there:
Then I started to build projects in earnest. The first big one was the shoe rack, which took some time but ultimately was a success. That was followed by the prototype bookshelf, the stool, and the first nightstand–I did all three of those projects in less than a year. At the same time, I made some shop improvements such as the saw till.
Incidentally, I switched the blog to the galoototron.com domain about a half-year after I moved to this shop. It was September 2009, and this shoe rack post was the first on the new domain. Before the switch, no one other than some family and friends knew about the blog, but then I started to tell a few more people (such as Luke Townsley at unpluggedshop.com) about it. Suddenly a lot more people than I really ever expected were reading this thing. That’s about as far as I ever went to promote it, though, and I don’t have plans to change that. I do appreciate all of the comments that I get from fellow woodworkers.
In retrospect, the two years I had in that shop were pivotal. I went from dorking around with tools and wood on a somewhat irregular basis to building projects. I gained speed and confidence in my joinery. The shop itself had a lot to do with this. No longer did I have to be completely fastidious about cleaning up after each session–I could leave a small amount of shavings or sawdust on the floor and it didn’t matter. Because I had enough room, I could put down my work at any time and pick it up again whenever I had the chance. This helped me establish a work pattern; I’d come home from work and have fun with a project for as little as 10 minutes or as much as an hour and a half before finishing for the day. I could even do a little in the morning before I went to work.
Of the projects I built in that shop, the nightstand seems like an obvious choice for a favorite, and it is. However, the little stool is a co-favorite:
The nightstand was the last project I completed there. Then, in the span of a few months, life got really busy, and after that, I moved again.
The new place also had room for a shop but it was more “raw”–as part of a garage, I really had to work to define the space. The old shop had room for me to put tools on tables all over the place. It was mostly disorganized, but I sort of knew where everything was, so I managed. There was no room for that in the new shop. To make up for it, I was allowed to hang cabinets, racks, and hooks on the walls and ceiling to my heart’s desire.
Unfortunately, I wasn’t able to get the new shop organized quickly enough for my taste. Part of this was a chicken-and-egg problem; the tool cabinet is an example of this. My first task in the new shop was to get some of the tools on the walls, and I had to finish the cabinet so that I could put tools in there. Unfortunately, my tools were all packed away in boxes (from the move) that surrounded the workbench. I really had no idea where anything in particular was and I didn’t have places to put them temporarily.
At the same time, I also had more furniture to make. The second nightstand project kicked off this year, and it turned out to be far more complicated and time-consuming than I expected. (And I’m still working on it, but I’m almost done.)
Every now and then, I add to the wall storage in the shop. That situation isn’t fully resolved (see below), but it is much better. Things are getting done, and I have to say that I prefer the new shop to the old one.
Also, I’m making a concerted effort to work out some of the annoying little stumbling blocks that I have to deal with from time to time. The two biggest problems I come across are tool and project storage (both temporary and permanent) and workholding. I have plans to solve those soon.
Going forward with projects, I have a long list in front of me. The most pressing, according to those in the know, is an entertainment center. We’re also looking at the rest of the living room–coffee table, bookshelves, who knows what. With the exception of our couch, the living room furniture is crap and it makes sense to concentrate on that room. Whatever I do, I’ve decided that I’m not going to make anything as brutally complicated as the second nightstand project(s) for a while.
But then again, I may just make more complicated things. Here’s how.
The title of this blog is no lie. Everything I do is by hand, and that includes stock preparation. I didn’t go down this road out of principle or some other similarly silly reason. I did it primarily out of interest and necessity–the apartment I once lived in was no place for power tools.
Unfortunately, it turns out that flattening, thicknessing, and resawing by hand is a lot of work. A large majority of my time and effort goes into stock preparation. That’s not even mentioning how much time I spend sharpening plane blades as I go. It’s getting out of hand. I can flatten a board quickly now (and wow am I glad I learned), resawing isn’t so incredibly horrible when you keep your saw blade sharp, but that last step of getting down to final thickness is totally bogus when you have to repeat it dozens of times, even with my scrub plane that can take off 1/16″ at a time.
So I think I’m going to get myself a stupid lunchbox-style thickness planer sometime in the new year. I’ll continue to flatten stuff by hand–it’s a great way to get to know the wood and the board that you’re about to use–but when it comes to getting that other side down to something reasonable, I won’t think twice about feeding it to a machine. I’ve got furniture to build and I do not have the time to lollygag.
However, the blog remains the same. The preceding paragraph (I hope) will be the only mention. I don’t plan to write about it when it happens, and I’ll continue to do all joinery by hand.
At this point, it would be remiss not to mention that I’ve had help. Schwarz says that the modern woodworker works alone and I think he’s wrong. Even if one never meets another woodworker in person, and even if one never takes part on a discussion forum online, the modern woodworker has an incredible resource mass available. It’s sometimes easy to overlook that a person wrote what’s on your screen, and when you learn something from someone, that person is very much with you in spirit as you work.
And wow, have a lot of people been working with me in spirit in my shop. There are just too many to list, but I’d really like to thank anyone who’s written anything that I’ve learned from or even read.
Also, there are the BAGs (Bay Area Galoots). Several of you have really helped me out in more direct ways–lending me tools, giving advice, being generally cool, that sort of thing.
Now, back to the work on the new nightstand projects. Progress has been (inexplicably) made.