Mallet, touch-up

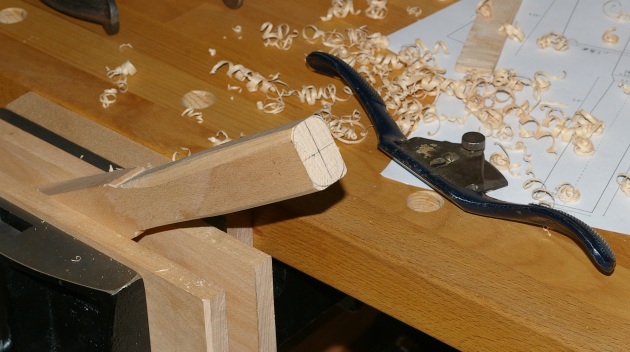
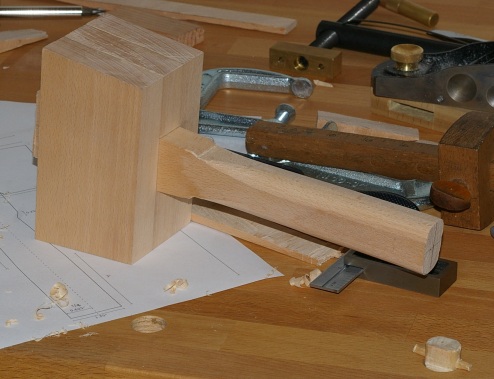
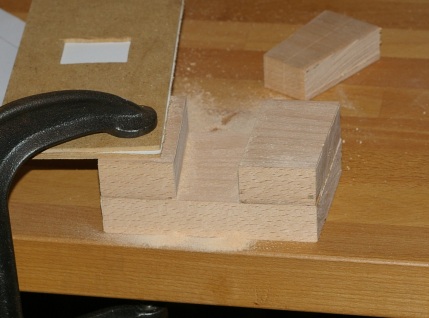
This morning, I took out the chamfering attachment to my low-angle block plane and set to work on the head. This was relatively easy work, and soon I had moved to the handle. I tried to work out some funny stuff that was going on in the handle, but wasn’t altogether successful. This is okay, because this (and one flaw on the head) does not affect the operational aspects of the tool.

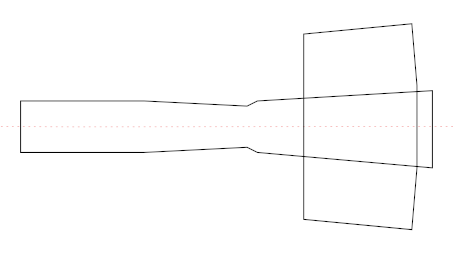
When it was all said and done, I had this:

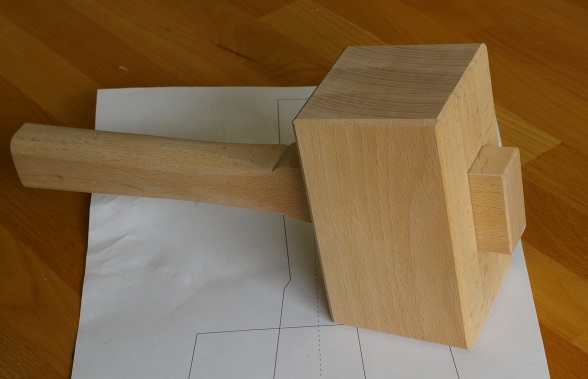
Groovy. I tested its grip and balance a little. It’s mostly to my liking; when I make the next one, I may put a thicker handle on it.

That left the finish. I went to the local hardware store and found nothing that I could stand. So I decided to use the same oil/varnish blend (“danish oil”) that I put on the workbench. This means that the mallet will show camouflage with the bench (because it’s made of the same wood), but this is okay.

I was a little disappointed at having to use the same finish as earlier because I really want to get started with varnishes. What I will probably do, however, is apply clear non-gloss polyurethane on top once the oil/varnish cures. This should provide a lot more protection against sweat and grime.

Mallet handle

I cut out the handle with a combination of a dovetail saw, a coping saw, a chisel, and a low-angle block plane. I would do a few things differently when marking next time, but it’s not like it’s a big deal.

The mallet components now looked like this:

Not bad. The handle fits the head, and it definitely feels like something you can whack stuff with. Except for those nasty sharp edges. I marked out the cross-section on the end of the handle and set about it with a spokeshave:

This was the first time I used a spokeshave! That was fun. Though I might want to try getting my Stanley #151 in working shape. It’s not easy to adjust the depth on the #51 I was using, but then again, it wasn’t that bad.

There was the very edge of a knot on one side of the handle, so that made it difficult to avoid tearout. So I used a little sandpaper to even out that part, and now we’re getting somewhere:

Still left to do is chamfer some edges, even up the head faces, and apply a finish. I have decided against an additional bevel on the top of the head, partly because I like the ray-fleck pattern, and partly because I feel lazy.

Mallet head, Part 2

After waiting a day for the glue to cure, I removed the clamps and set out to remove the center of mallet head. It was a piece of cake with that small tenon saw:

Then it was time to glue and clamp the third piece of the head:

Then there would be another day of waiting. Well, I did mark out the piece for the handle before calling it a day, but that’s not much work.

Mallet head, Part 1

I marked out three sections of the milled lumber in the shape of the mallet head and cut them out. Except that I didn’t do the top bevel; I figure that I can do it after I glued the thing up.

I picked out a piece for the center and marked out the part where the handle will go through. After paring to the knife edge, I sawed partway down the sides. Finally, I knocked out a little bit off the top area between the saw kerfs so that it ended up looking like this:

The reason for removing that piece was that my plan was to glue that face to another piece like this:

The theory is that when the glue is dry, I’ll be able to saw from the other side, remove the center (where the handle will eventually go), clean it up, then glue on the last piece. The center will now comprise of two parts, perfectly in-line. Well, I hope I used enough glue.

Mallet design

I sat down today with some graph paper and tried to get a concrete drawing for the mallet. After a little fooling around, I was happy with one that I came up with, then drew it up in Inkscape:

The planned dimensions are 5″ wide and 10″ long. The striking faces are about two and a half inches long.

The mallet will be roughly 2 5/8″ deep. I don’t know for sure, because I’m too lazy to check the exact width of my newly-milled piece of lumber. The idea here is to laminate the head, and at the same time, eliminate the need for making a complicated angled mortise for the handle (as well as save a lot of money on lumber). We’ll see how this works out. In any case, the striking faces should be roughly square.

Though the drawing’s handle is rather angular-looking, it will be oval in the final product.

One very amusing thing about the design is that all fits in actual size on a printed sheet of 8.5×11″ paper. Useful, too, I guess.

[Update: Here are the SVG plans for the mallet.] sigh

Milling musing

I still don’t have a scrub plane, so milling this piece of european beech for my future mallet was as time-consuming as you’d expect:

To minimize the pain, I just flattened one side and then scribed the other side for about the maximum thickness so that I wouldn’t have to take off too much stock. I don’t even know how thick it is, just that it’s pretty much uniform. We’ll see why this doesn’t matter in later stages.

I used the jack plane quite a lot more for this one. Working straight across the board and in diagonals took out the cup fairly quickly. The fore plane rounded out the first face, and this side turned out very, very flat.

There was more work to do on the other side because there was still a significant amount of stock to remove, so naturally, it took a long time. In addition, I decided to goof around with one of my smoothing planes again, trying again to improve its tuning. This went fairly well. I managed to tighten the throat a bit and straighten out the frog.

Moreover, I figured out a trick on how to straighten the frog: if the sides are square, you can use a double square. Put the stock on the frog bed (where it meets the blade), and extend the rule out over the side. If the frog is square, the rule can sit flush with the side of the plane, because those two surfaces are, in theory, supposed to be orthogonal. I suppose that a photo would be handy here, but I’m too lazy right now to show it.

The downside of all of this messing around with the smoothing plane is that in my excitement, I took off a little extra from one of the edges, making the second side “not quite flat.” In the grand scheme of this project, it does not matter. In fact, it might be a good thing.

The only thing that does matter is that the next thing I mill down had better be for the body of a scrub plane.

Mortise and tenon: Attempt #2

Now that I had taken care of the front vise in place and a working small tenon saw, I decided to make another go at a mortise and tenon.

Although this turned out to be a very workable joint, I made three incredibly stupid mistakes:

  • I didn’t measure the mortise properly. This mortise was supposed to start 1/2″ from the end, not 3/4″. Though I just trimmed the tenon on one side to compensate… doh!
  • I didn’t cut the tenon on the end of the board that I had marked.
  • I accidentally cut the cheeks of the tenon with a crosscut saw instead of a ripsaw. This affected speed, accuracy, and finish. Let’s try to avoid doing that again.

In spite of this, there is quite a lot of good news:

  • Other than the length, the mortise turned out perfectly, with a clean bottom and straight sides.
  • My newly-sharpened tenon saw worked astonishing well for cutting the shoulders.
  • Hooray for the front vise.
  • I did this one in half the time as my first one.
  • The fit is good.
  • It was really fun to make.

I’m going to practice another one of these soon, but I believe that the next thing I need to do is make a mallet. Banging on chisels with a block of birch is bogus.

Small tenon saw, Part 2

So the old ridiculous teeth were all filed off, and it was time to put on new teeth. On Thursday, I decided on 14 TPI (teeth per inch), put the saw along with a tooth guide in the saw vise, and set out to rock and roll.

It was not as easy to get the new teeth started as I would have hoped. I tried a small hacksaw at first. That didn’t work out, so I moved to a handsaw file. That wasn’t fine enough, so I finally dug out a set of hobbyist-grade needle files and found one that had sort of a knife-like edge. That worked, but it was slow, because that file sucked. It took forever to get the 140 little notches cut for the teeth, and my hand felt a little funky after doing it, but it was precise, so I was happy, and left it for a while.

On Sunday, I picked a rake angle of 20 degrees, and went to town shaping the teeth. Here’s what it looked like halfway through:

And close up…

After setting the teeth and a jointing, it was time to point the teeth. I chose 20 degrees for the fleam as well.

The result was far better than any crosscut sharpening I’d done before. (I don’t have a closeup, maybe on the next installment.) The best part, though, is the way the saw cuts–smoothly and quickly.

So now I have a workable small tenon saw. I don’t like the gent’s handle, and I do want to replace it with a closed-grip handle, but this is not an immediate need; I want to practice making tenons with it before going into further modifications. I’ll make the handle later.

I’m so happy with the way this has turned out that I’m considering buying a second saw for use as a ripsaw. It would only set me back another $10. Whee…