Tool Cabinet: Door and Panel Assembly

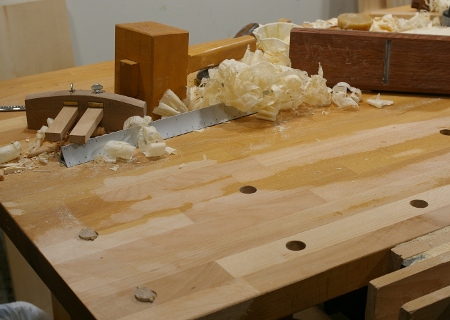
Having fooled around long enough flattening my workbench, I returned to the tool cabinet project. I was close to being done with all of the components, so I decided to get the doors finished. The doors will consist of two frames, each with a long panel inside, and the first order of business was to make the grooves to house the panel. I started with the easy parts–the pieces where the groove goes all the way though, because I was eager to try out the Stanley #45 I posted about a while back.

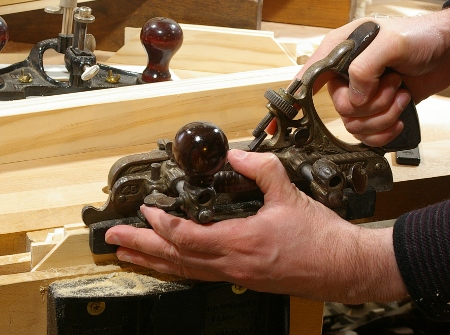
This is the first time I’ve ever really used it for a project. It’s a heavy beast, but gets the job done far faster than the router plane that I’ve been using, and because I already had it set up as a 1/4″ plow plane, there wasn’t much fooling around with its adjustments. It even helped a lot for the stopped grooves, because it can cut partway, leaving the final work with the router plane and chisel easier because they have somewhere to track.

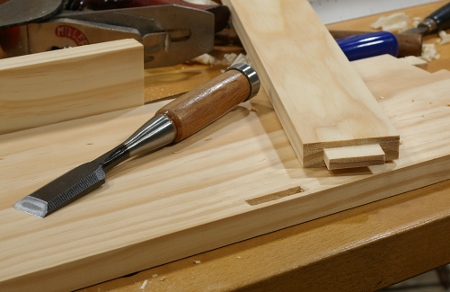
With the frame grooves made, it was time to cut the panel to size and fit them. I’d sized the panels slightly thicker than the grooves, so I decided to put rabbets around the edges to bring the rim down to thickness:

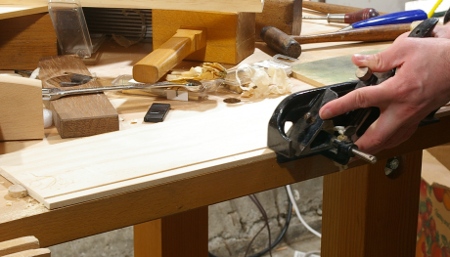
As usual, I did the bulk of the work with my #78, and finished it off with my Taiwanese rabbet plane.

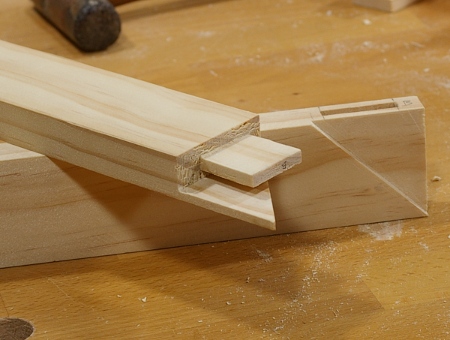
Then it was time to test-assemble the door:

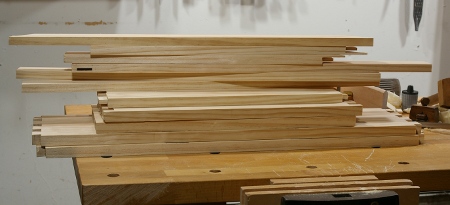
That seemed okay, so I made the other door, then shifted my attention to cutting the panels for the cabinet rear. They require edge-gluing, so I decided that it was time for a glue-up party for the panels and one of the doors:

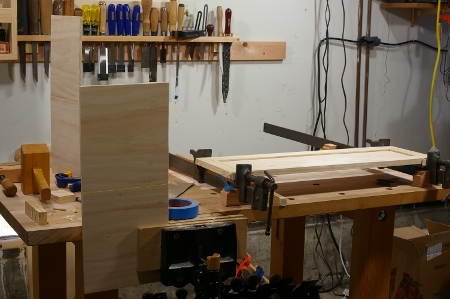
It’s definitely starting to look more like a cabinet and less like a pile of pieces. The tasks that remain are gluing the other door and main cabinet, hanging the doors, and making the tool holders for the inside. This latter part will likely take some time to finalize, since I haven’t actually made up my mind about much of it yet, but that won’t stop me from putting what I have into use as soon as I can. Come to think of it, I’ve never really done doors with hinges, so this could be interesting.

Workbench Distraction

I finished the frames for the doors of the tool cabinet project the other day, meaning that the only wooden pieces that I hadn’t made were the panels for the doors and the rear. Panels, of course, mean that I have to use the frame saw, which is never terribly enjoyable, but since this is pine, it at least didn’t take forever to go through the near-11″ wide board that I used (maybe 20 minutes, not sure).

Cleaning up the newly-resawn panels, however, meant that I had to dig up my low-profile bench dogs and try to get things as flat as possible. And that’s how I eventually lost my mind, because panels have still been a bit fiddly for me because my bench is, how shall we say, “not very flat.” The top had been sagging in the center by quite a bit for some time now. Because the panels I needed to plane are very flexible, it was getting hard to position them to get good contact with the plane.

After whacking away at a panel for a while with my deeply-cambered jack plane, I took the panel off, looked at the corner of the bench I was using, looked at the plane again, and started planing again without the panel:

Then I tried planing the panel again:

Ooh–much, much better. The flat bench let the Taiwanese plane really shine when smoothing those panels.

With these panels flattened, I sat back for a while and thought about the bench. I was expecting horrible tearout when I planed the top, because it’s basically a bunch of little blocks finger-jointed together and edged-glued. (I’m sure they don’t take handplanes into consideration when they make these things.) But to my surprise, there was very little, even with that blade taking out thick shavings.

I’d been avoiding flattening the bench because the top isn’t so thick in the first place, anyway. But even though I am considering making a new bench soon, this was just getting ridiculous–the sag was more than 1/8″. I took out the blade of the jack plane, gave it a good fresh sharpening, and set for a really deep cut. Then I cleared all of the crap off the bench and got medieval on the entire benchtop:

When I decided to call it a day, I had a huge pile of shavings, a blade that wasn’t exactly sharp anymore (funny what beech with a lot of glue will do), and a nearly flat workbench. I’d say that it needs a little more work with a fore and/or jointer plane, but after I do that, this should be much less of a headache for the immediate future.

Tool Cabinet: Frame Components

With the tool storage in a somewhat usable state in the new shop, I finally had a chance to restart the tool cabinet project last week. I finished the carcase before the move, so I’m left with the doors and some other odds and ends. I decided to start with the rear, which will have two cross-members to aid with mounting on the wall and internal tool arrangement.

After taking what seemed to be an eternity to size up the pieces, I made the first joint for the members in the back. Then I realized that it was the first joint that I’d made in the new shop, so I took a photo to commemorate the occasion:

That’s the wacky Taiwan-made chisel featured in this post, chosen this time by the ever-reliable “I was actually able to find that one” method. Though this joint was perfect in the end, I can’t say that it went without a hitch–for some reason, when marking out the tenon, I had set my mortise gauge incorrectly and just barely noticed in time. Unlike the saw till, I’ve decided not to use wedged or through joints here.

Okay, so that wasn’t terribly exciting, nor was it difficult. Soon it was time for the cabinet door frames. I made up my mind to use the mitered-face mortise-and-tenon joint for this application. The main reason is that I really would like some practice at this thing, and I’d much rather screw it up on a shop project than something I actually care about. Nevertheless, it seems to be going well so far:

The pile of components for this project is much larger than I anticipated:

I already had to go out to get more wood for it twice. Normally, this would be an incredible miscalculation, but since I can’t say that I’ve actually bothered to calculate, there’s probably another word or two for it that isn’t nearly as nice.

The shop seems to be usable. The intermediate state of the tool wall looks like this now:

The thing at the center top is a sort of shallow shelf-like thing that I made for the french cleats. The scrub plane just happens to fit on top, so I put it there because it seemed like a good idea at the time. The chisel rack is a reincarnation of the lamest tool rack ever built; for some reason, I brought it intact from the old place, and added cleats and screwed stuff into it until it actually fit on the wall. The space to the right is where the tool cabinet will eventually go.

And really, the cabinet can’t come too soon. This is what I’m dealing with on the benchtop right now:

Mind you, this was after cleaning up a bunch of stuff. There are tools in all sorts of weird places around the place and I keep getting nervous that I’m going to knock them over–I don’t have a lot of room to move around.

Oh yeah–thanks to Jasen, who lent me that Narex 3/16″ mortise chisel. For that size, I don’t have any of my own (yet).

[Edit: I didn’t notice at the time, but this is post #200.]