Frame Saw: Joinery and Hardware

After looking at lots of frame saws that a lot of other galoots have made (not mentioning any names here, Mssr. Isola), I decided to make my own for resawing. Well, I had decided to make my own a long time ago, but never got around to it until now. About a year ago, I ordered the blade (a Wilhelm Putsch blade, about 5 teeth per inch), and set aside a piece of beech. Then I proceeded to do nothing else on the project until last week.

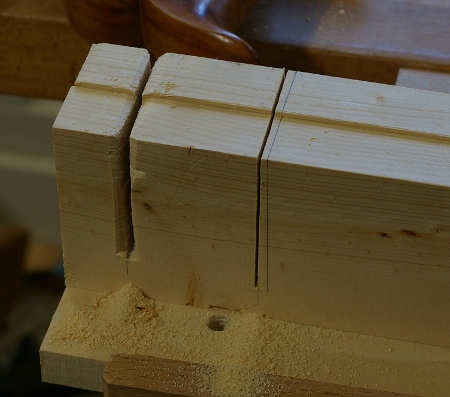
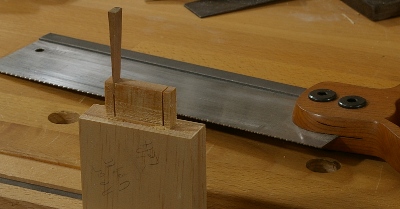
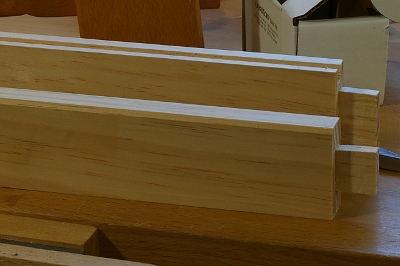
After cutting the pieces out and milling them to size, I cut the joinery. There have been many styles for the frame joints, but most people do mortise-and-tenon joints that aren’t glued (the blade tension keeps the saw together), so I did, too. I decided to make the joints haunched, because in theory, that kind of joint resists twisting better than a plain blind joint. Also, I’ve never made one, so I figure I’d better get down to the business of screwing them up.

And I screw up I did, slightly, on the first two. On the first one, I blew out the side of the mortise when chopping it (it was too close to the end, 1/4″). Nothing a little glue won’t fix. On the next one, I cut the tenon too loose, which doesn’t matter on a joint that I’m not going to glue, but still.

The next two came out perfectly, though:

Then it was time to make the hardware to hold the blade. I didn’t deviate from the way others have done it. I used a 5/16″ carriage bolt for one side (bottom in the picture) and a section of threaded rod (top in the pic) for the other:

The steps I took were as follows:

  1. Filed the threads flat and four-square at the end.
  2. Drilled the hole that will hold the blade-holding pin with a Millers Falls #5 eggbeater.
  3. Cut the blade slot with a Bahco junior hacksaw (slowly, to keep the hacksaw blade from wandering around). The kerf is almost a perfect match for the blade.
  4. Cleaned up the areas around the slot with a small tapered file.
  5. Cleaned up the slot with some folded sandpaper in the kerf.
  6. Cleaned up the tip.
  7. Discovered that the little bolts that I was using to pin the blade were a little too short for the little nut to fit.
  8. Filed recesses around the hole in the big bolt so that the little nut could reach the little bolt.
  9. Cleaned up the tip again.

One little tip when you’re filing any kind of thread: Keep a nut on the inside of the filing area. After each stage of filing, take off the nut and put it back on again. This cleans up the threads, although for this project, it doesn’t really matter for the carriage bolt side.

The saw is functional now (I’ve done a test cut), but I’m not quite finished yet. I’m currently waxing the blade and I also need to shape handles into the ends.

[Edit: I have ditched the wingnut in favor of a regular hex nut tensioned with a wrench. The wingnut does not provide enough tension.]

Silly Honing Guide Tricks

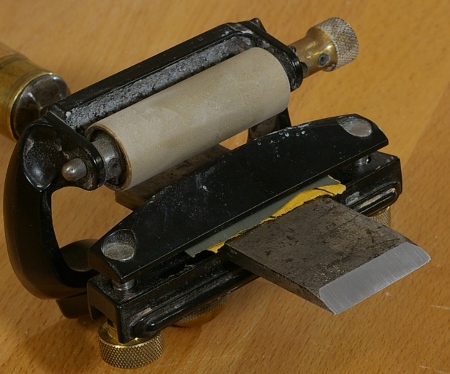
After finishing off those last two projects, I had some time to clean and rearrange stuff in the shop, and as I was doing so, I couldn’t help myself from sharpening up a nice old W. Butcher chisel I got off of eBay a while back. I decided that I needed to reshape the bevel, so I put some Norton 3X on the surface plate and set up my Lee Valley/Veritas Mk. 2 honing guide. (I sharpen freehand for the most part now, but for shaping, I use the guide.)

As I was going to work, the blade did something that it sometimes does in the guide–it slipped and rotated out of square. This has been my only major gripe with the guide, and it’s going to happen with any top-clamping guide, especially with the narrower blades.

Then I thought of a way to make it stop, maybe. I took a small piece of very fine grit sandpaper (1500 in this case), folded it, and put it between the blade and the guide on the bevel side, where it wouldn’t affect the bevel angle:

And it no longer slipped around. Someone else has probably thought of this fix, too, they’ve had to.

(For the record, my only other gripe with the guide, a minor one, is that the knurled knobs are sometimes difficult to loosen. I’d kind of prefer something more like a wingnut.)

Saw Till: Finished

After the glue-up, I planed the sides of till flat. The dovetails looked fine, and the through tenons turned out a lot better than I thought they would:

The front stretcher is slightly proud of the edge, but I decided not to bother planing it flush. I had the last significant step ahead of me, one that wasn’t illustrated in the plan.

The saws have to rest in some sort of slots in the back of the till. I didn’t know how I was going to make these, but I knew that I wanted this part to be replaceable. There’s too much potential to want changes in the future, and what if I screwed up on my first shot anyway?

I don’t have any photos of this (and I’m not going to take it apart to take them), but the next step was to put some screw nut inserts into the upper two stretchers so that I could fasten saw rests.

Then I took a couple strips of the worst part of my cheap mystery softwood, screwed them together, and set out cutting the slots where the saws would rest. I clamped the two rests together so that I could saw the slots as a gang. My first attempt was just a simple kerf with my biggest saw. Here it is, on the left:

After a lot of frustration (and work with my keyhole saw), it was finally big enough, but I decided that I would need to do it differently. On the next one (at the right in the preceding image), I laid out an 1/8″ slot that I would take with two separate cuts. Despite the sloppiest sawing I’ve done in a while, this worked really well:

The slots are 1.5″ apart, and 1/8″ wide. The depth depends on the saw (the bigger saws get deeper slots).

Notice that the structure here isn’t very strong because we’re cutting across the fibers. I figured that this was okay, because the rests weren’t supporting anything. Then I saw how Derek Cohen used certain space in his saw till, hanging backsaws instead of propping them up. We’ll get back to that in a bit.

After cutting the second slot, I did a test-fit:

So far, so good. You can see how the rests are attached to the rear stretchers with machine screws.

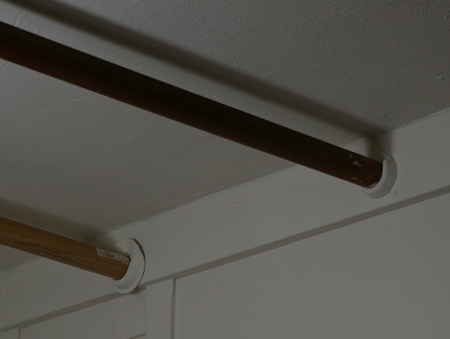
I cut the rest of the slots, with some extra attention at the right side for backsaws, and prepared for installation. Most people would just screw something into the wall in their shops, but since we rent this place, I was looking for a way that wouldn’t require me to spackle and paint later. Luckily, I had this to work with at the left of my workbench (where my lumberyard is):

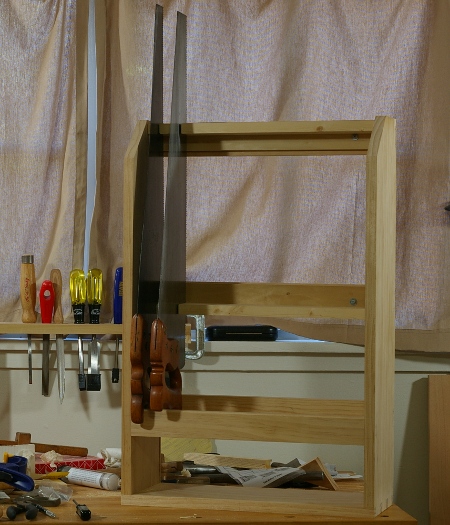
My plan was to be daring and hang the saw till from these rods. I bored a couple of holes into the sides of the till at the top, then strung up some twine from the rods, inserting it into the holes. Getting everything level was certainly a bit of a challenge, because the back does not rest on the wall. However, the total weight is an advantage; it doesn’t swing around much when you grab something.

Does the twine make the end result look more rustic? At this point, I’m just happy that it’s done:

I wish I had known about that hang-the-backsaws trick just a little earlier, because I probably would have planned to hang all of my small backsaws. This isn’t bad, though, because I was not originally planning to put any of those little saws in the till. Now they all fit in there, and I can always reconfigure it if I want to.

Shoe Rack: Finished

Remember the shoe rack I’d been working on for a while? The one I haven’t written about for a while? Well, it’s been in the finishing stage for the last month. I did a tung oil/varnish blend first, and after waiting the requisite million years for that cure, I put on three more coats of varnish.

I started today by rubbing out the finish. That’s always pretty hard work. I used 320, 600, and 1500 grit sandpaper dry at first. In retrospect, the 1500 was not necessary, because I hit it with #000 and #0000 steel wool lubricated with mineral oil afterwards. Why do I always forget what an amazing difference that makes? I did not use rottenstone as a final step this time, because this is a shoe rack and does not need a super-fine glassy finish.

Then I set out drilling holes for the assembly hardware. The sides were relatively easy–just pop them under the holdfasts, mark out, and go crazy with the brace and bit:

(Yeah, Dan, that’s one of my Millers Falls #2 eggbeaters on the right. It’s got a countersink chucked in. Just sayin’, ‘cuz it seems to be eggbeater season.)

The shelves were a lot trickier. I had to bore parallel into the stretchers for a place to insert the screw-in nuts. That’s difficult to do without splitting the wood, so here’s my solution. With scraps protecting each side, one end goes in the vise, the other is held tight with a handscrew:

So what hardware am I using, you ask?

It’s the same kind I used for my saw handles–those furniture connector bolts with the really wide heads that are screwed in with hex drivers. (I like these things, obviously. Very 20th century, I realize.)

Then it was time to see if everything went together okay. It did:

Oddly, it looks just like I wanted it to. Not so oddly, it’s already full. The SO had a job to do here, you see.

Saw Till: Glue-up

So I had all of the parts ready for glue-up, the clamps were in reasonable shape, and I had the time this morning. It was time to glue and assemble.

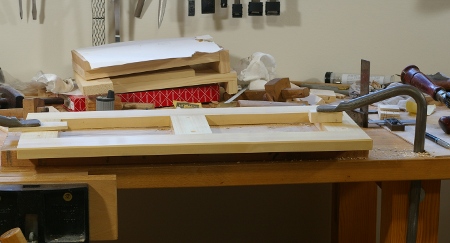
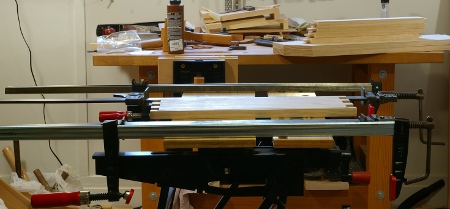
I decided that I’d use my Workmate as an assembly table again, but that I wouldn’t use its jaws as a clamp (because I figured that the till would be too wide. So to start, I cleared it and pulled it to the center of the shop (where I would have access to all sides), and laid out the clamps set to their approximate settings:

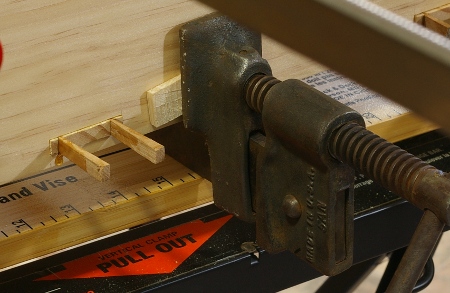
I put wooden pads (made from the tenon waste of the shoe rack project) on the big clamp pads and between the pins on the tail side of the dovetails where the other clamps would go. Magic tape was my weapon of choice here, since I figured that the bond only had to last for less than a half-hour.

So far, so good. I laid out all of the parts in order (right side as step one, then the bottom, rear and front stretchers, then finally the left side would be banged into those pieces all at once). I decided that it was time to go.

Applying the glue and putting the pieces together wasn’t so bad, though I almost forgot to put in the front stretcher, I got everything together to a certain degree.

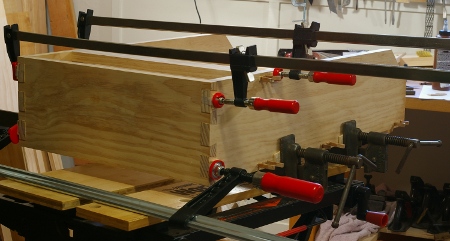
Then I moved it to the Workmate and put on the clamps. It was a little quirky, and of course I felt like I could have used a few more clamps, but it all went fine and everything drew up well.

At this point, it was time to drive in the little wedges on the through tenons. At first, it went just fine–I used the strange plastic-faced hammer that I use as a plane hammer (it has a specific purpose, but I don’t know what it is). It was kind of fun to bang those little things in, and they seemed to be holding up fine despite some of them having checks. Thump, thump, klonk. I had glue all over my fingers, but I was making good progress.

Halfway through this process, I realized that I was in trouble. You see, despite having a math degree, it seems that I still don’t know how to count. Remember how I said I needed ten wedges and made thirteen? From where did I get that number? There were four stretchers, with two tenons each, two wedge kerfs per tenon. 4 x 2 x 2 = 16, not 10. I should have made closer to 20 wedges.

Remember also how it took me a stupidly long time to make those? How could I possibly make three more in the limited amount of time I had? (Remember that I’m using liquid hide glue here!) Well, I still had some wide wedges that were in a reject pile. I decided to grab a chisel and chop straight down on these “rejects” at the proper width and hope that the checks and grain wouldn’t make me pay.

The results weren’t exactly perfect, but in a minute, I had made three wedges that would fit, and that’s what I needed. I banged those in, looked over the joints, checked stuff for square, and then started to take pictures.

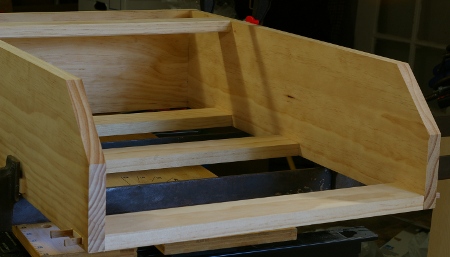
It would have been better if I would have had a clamp for that center dovetail, but I don’t have one. Perhaps a really big block as part of the cauls.

I found a check in the upper left corner (in the preceding photo, it’s on the right side at the bottom). Oh, drat it. It was a problem I was fearing somewhat, and I don’t recall it being there before. I may have accidentally banged up that corner when I was attaching the left side. It doesn’t make any difference as far as the functionality is concerned, and in fact, it’s likely that no one will even see it (it’s on the far side of the till), but I wish I’d been a little more careful. Actually, what I wish the most is that I could find out when it happened.

Now the glue is curing, and I’m waiting for the final steps, which will be to level and plane off the joints, insert the blade rests, hang it up, and put some saws in there. I will not apply any finish to the till, at least for the moment. This is one of those projects that needs to be complete.

Saw Till: Makin’ wedge kerfs

This is a relatively simple part of a wedged through tenon joint to make, but I was still wondering one thing about the kerfs where the wedges will be driven: How far from the ends of the tenon should they be? So I looked around to see if Korn had anything to say on the matter. He writes that it should be no more than a quarter-inch from the end, and made with a relatively thick-plated saw. So I decided to go to about 3/16″, and test to see if a wedge will fit into the kerf initially (without banging it in). Seems okay:

I opted not to drill the holes at the bottoms of the kerfs that another book says to do (I think this might be helpful if the wood were harder).

Then I did the other seven tenons, and I now have four stretchers ready to go:

Well, that’s nice. All of the saw till parts are now ready for assembly. In preparation, I also removed the huge layers of rust from a couple of heavy Hartford Clamp bar clamps (estate sale find) so that they won’t “rub off” on me or the saw till during assembly. About the only thing I don’t have are some cauls for the work, but I have plenty of scrap.

Glue-up will probably be tomorrow morning.

Saw Till: Makin’ wedges

I’m almost ready to glue up the saw till, but a few small details remain. Ten of them happen to be the little wedges that I’ll drive into the tenons at the end, so I sawed them out today. I decided to make them out of a little scrap of apple I had lying around in a box. The first step was to saw out the little sliver of the wedge shape:

And then, I had to cut the wedges to width:

For various reasons, this took a lot longer than it really should have. I had a really hard time holding this stuff steady as I was sawing at first, even with the bench hook. The scrap was too small to get a decent grip. The hook wasn’t at a good height (eventually solved with that riser block on the second photo).

There were also many checks in the wood, because this piece came from the end of the board. I convinced myself that this was okay, because the fibers only need to hold together until I insert them into the tenons and bang them home.

These wedges did eventually come out of the process:

The disheartening part was that after all of that work in the morning, I still didn’t have as many as I needed, so when I came home, I went to work until I had enough. I need ten of them, so I decided that I’d stop at thirteen.

In other saw till news, I cut a groove around the inside surfaces of the bottom back (on the sides, the bottom, and the lower stretcher). I also chamfered the edges that the saw handles will rest on.

I may break the edges of the chamfer a little.