Stool: Plan, Milling Stock

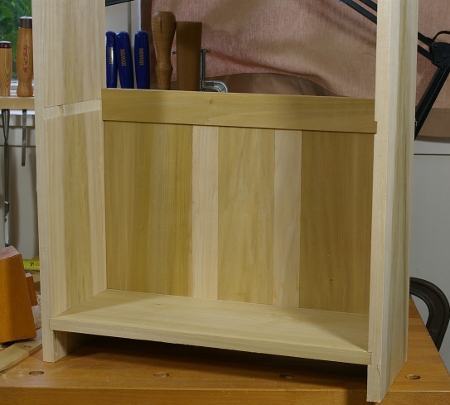
Now that the bookshelf prototype is glued up and ready for varnishing, I’m able to move on to my next project, which will be a short stool, essentially a single-step stool similar in spirit to the one that my great-great grandfather made. It won’t resemble his in size, wood type, or joinery; it will be adult-size and not use nails. Here is the general plan:

[Update: The plan is now available on the Plans and Guides page.]

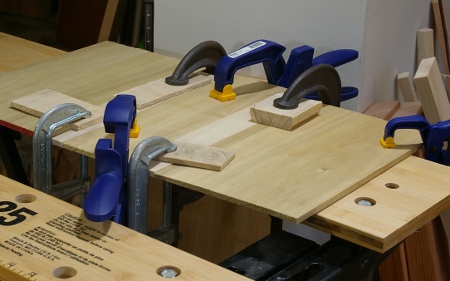
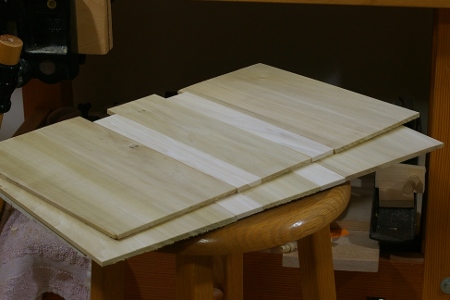
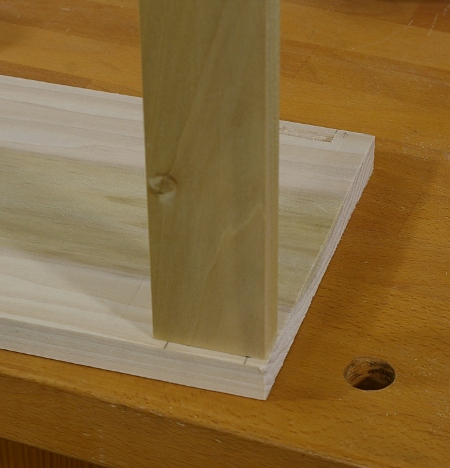
I’ll make the whole thing from a wide piece of beech that I got last year. The top has already made an appearance here, although back then, it wasn’t flat, uniform, and smooth, as it is now. This board is 8/4 stock, but unfortunately, part of one side of a 2.5-foot section isn’t usable. After looking at the requirements for this project, I determined that this section contains enough usable wood, though I have to be careful where I cut. The legs will be 1.5″ square, and the stretchers will be 1.5″ x 1″.

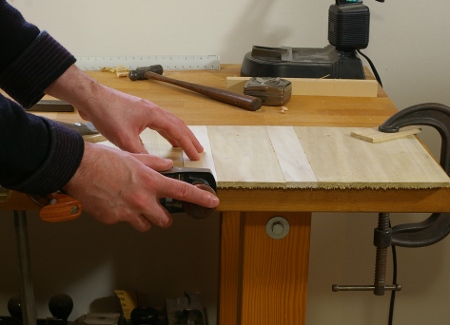
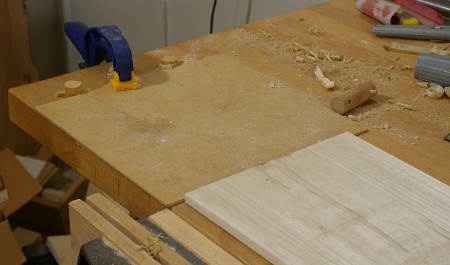
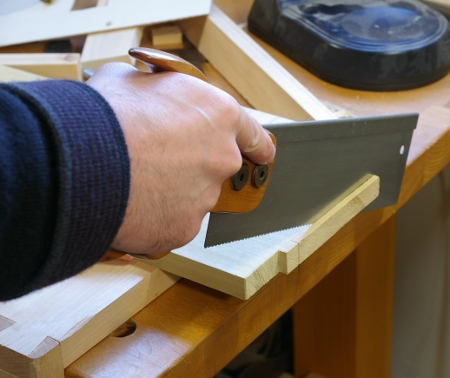
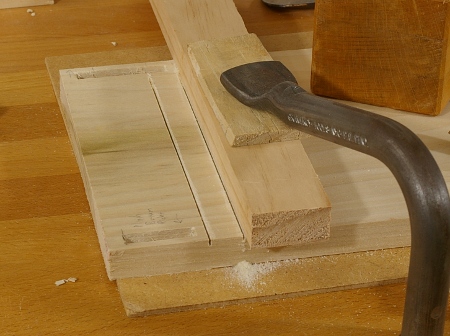
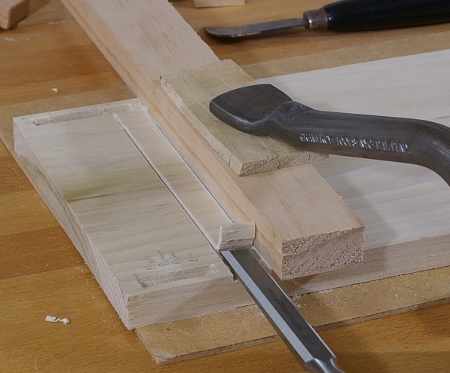
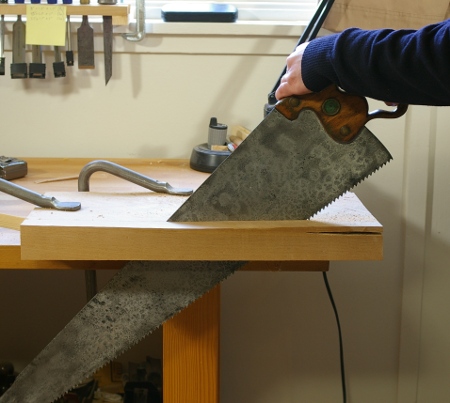
Milling the legs and stretchers is a little more work than I expected. Because the board is quite cupped, and also because I’m trying to avoid some nasty parts of the board, I decided to mill each piece to thickness individually instead of the entire board at once. I’m first ripping out sections like this (notice the wedge in the kerf at the end):

You can barely see the nasty stuff I’m trying to work around in this shot; the discoloration at the upper right and a previous (aborted) attempt at trying to slice that stuff off.

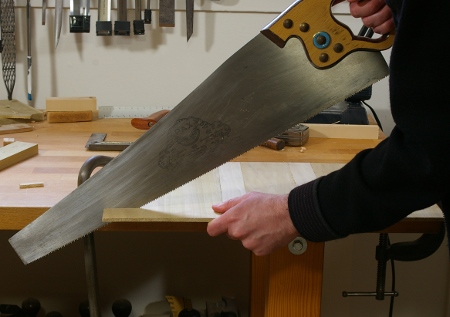
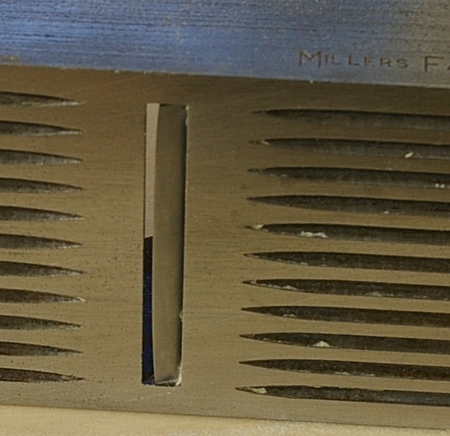
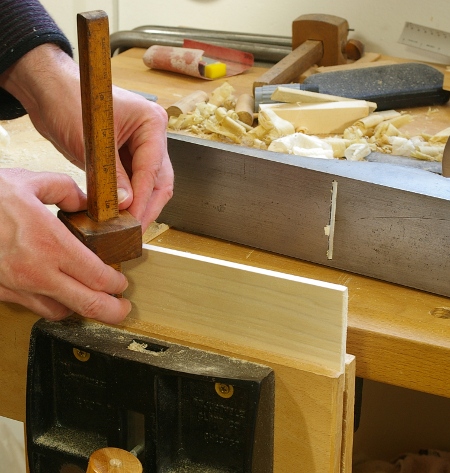
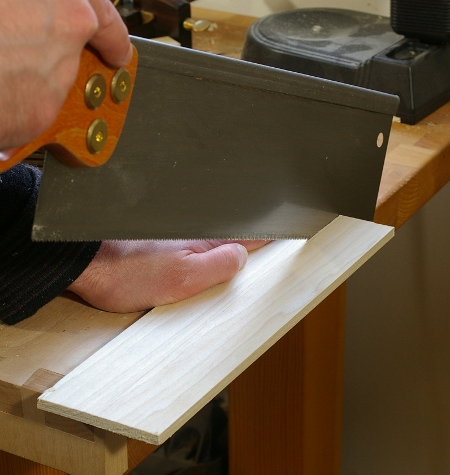
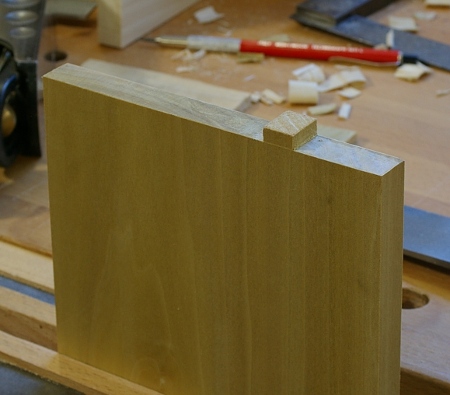
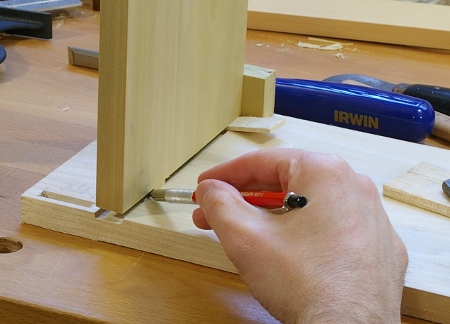
After ripping, I have to flatten one face, square an adjacent face, saw some more, and plane some more. So far, I have one leg and one stretcher four-square. If I didn’t have the big saw, I probably wouldn’t even be that far.

Bookshelf: Gluing, Sizing, and Fitting Panels

Getting panels glued up always looks sort of silly the way I’ve been doing it:

It works, though. Those little go-bar setups that luthiers like would be better, I think, but I’m far too lazy to make one of those right now.

While waiting for the (liquid hide) glue to set, I cut the grooves for the panel. With my mortise marking gauge and the same fence that I used for my original dovetailed box project, it was a lot less horrible than I expected. I still want a plow plane sometime, though.

With the glue reasonably dry, I squared off one of the ends of a glued-up panel and sawed away:

Yep, that’s the Pax copy of the Disston D-8 panel saw that I noted in a previous post, now waxed and sharpened. This saw works nicely now.

Of course, using this saw without a knife line on this wood will introduce a little tearout, so I had to clean it up a little. No big deal; it’s just another day in the life of my Veritas low-angle block plane:

After measuring out the height and repeating on the other side, it was time to mark out the width. In this project, those lighter strips are to be in the center of the panel, so I measured the final width from the edges of those strips. It was pretty simple arithmetic. Cutting to the width was a matter of using the tenon saw again (see the previous post).

Then it was time to test the panels. The first one fit well, and the project was really starting to look like something:

The top panel, however, did not fit as well at first, because (for whatever reason) the back of the dovetail didn’t quite line up in the rear. To fix this, I used my side rabbet plane for the first time ever; I just widened the groove at the top of the side by a small amount.

I don’t have a photo of the final test assembly (hey, it would ruin the surprise, anyway). Glue-up comes next.

Bookshelf: Making Panels

The final components in the bookshelf are panels to go in the back. Recall from earlier that I used my frame saw to separate slices from the rest of the stock; those slices were to become the panels.

I’d been dreading this part somewhat because milling those panels down to size always seems to be kind of a pain. It’s not that they have to be flat (they don’t; stuff that thin bends to a certain degree), and it’s not that they have to be the same precise thickness (they don’t; you need only line up things on the face). It’s that holding the work in place without obstruction had always been a pain.

So I put in yet another dog hole and made this planing stop out of two dogs, a clamp, and a piece of hardboard:

It turned out to be not so bad. I think it would be even better if I put in some tiny brads at the end of the hardboard to grip the end of the panel, but I haven’t gone too nuts yet.

Another thing I did finally was to put some serious camber on the blade of one of my jack planes. Since I have four, it would be kind of silly not to try. I did this by just letting my Norton 220 waterstone dish out as I was grinding out a new bevel angle. That stone dishes notoriously, but in this case, it produced exactly what I wanted it to:

This really made the panel-milling process a lot quicker and a lot less work. Yay.

Once the pieces were milled, it was time to cut them into various kinds of strips and parts. This process is just like with any other kind of board; you first joint and mark:

Then you get out some sort of saw, rip alongside the mark, and joint that straight. Check out the snazzy reflection of the wood in the saw here, the one that supposedly lets you know if you’re sawing straight:

When first approaching this task, I thought to myself, “A rip panel saw would be awfully nice right now, wouldn’t it?” But it turns out that the bigger tenon saw was actually a lot of fun to use on this thing.

With everything cut to width and approximate length, I put the pieces in the arrangement in which they’ll be glued. It looks interesting, to say the least:

Whether it’s a good idea or not remains to be seen. I haven’t glued them together yet. Maybe tomorrow. I still have to plow the grooves in which these things will rest, and therefore, I still have the part where I wish I had a plow plane ahead of me.

(And yes, all of this because I’m not using plywood. No, I don’t have anything against plywood.)

Bookshelf: Modified Housed Joint, Part 2

In the previous installment, I cut the dado for the housing, marked out the shelf tenon, and cut the tenon cheeks. The next step was to cut out the long shoulders:

It’s a little bit difficult to do this with this backsaw because it’s not deep enough to finish the cut, but I found that if you go as far as you can diagonally on both sides, it’s trivial to finish off with a coping saw. Something like a ryoba or thin panel saw would also work.

Here’s how the end of the shelf looks when trimmed and finished:

Now the slightly tricky part: marking and cutting the mortise for this little tenon. To mark, I put the shelf into the housing, registered where it needed to be registered, and used a lead holder to mark the lines at the bottom of the housing:

(However difficult this may look, it turns out that taking that photo was the most challenging part of this project so far.)

Then I removed the shelf, cleaned up the marks I had just made, got out the pigsticker, and started chopping away (but not too violently, since it’s not a through tenon):

Some paring was necessary to clean up the sides and bottom, as you’d probably expect.

That’s pretty much it. In the end, these were the final components:

And here is how it looks in a test-fit:

I also made the other three of these joints for the bookshelf prototype project today and did a test assembly. However, I’m not ready to glue up yet. There’s still a matter of the panels.

Bookshelf: Modified Housed Joint, Part 1

I finished with all of the stretchers for the bookshelf, meaning it was time to move on to the shelves. My original plan was to use a housed joint. I decided to make a small modification to the joint, though, to ensure that the bookshelf would resist twisting forces. The modification is basically just a small mortise and tenon hidden inside the joint.

The hitch is, of course, that I’ve never made a housed joint before, so I set off on a test on some of the cutoffs from the projects. Surprisingly, that actually went well, so I proceeded to the first of four “production” joints.

I started with the dado housing. First, I squared a knife line, clamped down a guide strip, and sawed a kerf on the inside of the line. Then I marked out the width from the shelf, put down another knife line, and sawed down that side. This is after both kerfs were cut:

Note that this is a stopped joint in the back. It doesn’t matter if I overshoot a little, but I can’t go all the way to the back. If I’d had a stopped joint where overshoot actually matters, I would have clamped a stop in place.

The next step was to remove the waste between the kerfs. I started with a chisel to get most of it out:

Then I went to the bottom with my router plane:

In this photo, I’ve stopped the board against a couple of bench dogs in the back. (I should have done this when I was chiseling, too.)

After the bottom was reasonably smooth, I turned my attention to the shelf section. I marked out the line where the board would protrude from the side first, then the line where the edge would meet the housing. Finally, I marked out a small tenon about an inch and a half into the board and sawed the cheeks:

And that’s all I had time for today. Notice my test joint making a cameo in the background behind the saw.

In the next installment, I’ll cut out the waste, chop the mortise, and clean up. Then I’ll have to do everything three more times.

Bookshelf: Munging Mortises

I cut the other dovetail joint for the top of the bookshelf and was feelin’ pretty good about it, and I thought that it might be a good time to start on some of the stretcher pieces that will provide the rest of the racking resistance. There will be three of them, two in the back, and one at the front at the bottom that will be a plinth (“kickboard”) piece.

The mortise in the back near the bottom was my first target, and I proceeded immediately to chop in the wrong place. I didn’t realize this until I had been away from it for a while, so when I came back, I extended it upward until it was in the right spot. You can see it here with its matching tenon:

Thankfully, it will not be visible when this project is complete, but I really have to make this lesson count for something.

I chopped the mortise on the other side and cut its tenon without a hitch, so I was again feeling pretty good about myself, so I decided to go after the plinth next. And, of course, I went straight out and chopped that one in the wrong place, too. You see, this piece is supposed to be inset a little into the depth of the shelf, not flush with the front. However, I used my already-set cutting gauge to mark where to chop, and I marked it in a position that would have the plinth flush. Argh.

Well, I couldn’t resort to the same old stupid trick to fix this one, because the mortise was the right length, but at the wrong depth. So I thought about it a little, and decided that since I hadn’t cut the tenon yet, I would modify the tenon location instead. And so here’s the hack I came up with:

Yeah, so I just moved the tenon over to one side of the piece. It’s stupid, but it does work, as shown in this fitted view:

I don’t think I’ll be making that mistake again, because I’ll probably do all of them this way from now on. The reason is that I won’t have to change my marking gauge for it. Though I am sort of happy that I discovered a way to deal with this sort of thing, I am not happy that I wasn’t paying better attention in the first place.

But then again, it is called my prototype shelf for a reason. I already have a few modifications in mind when I build larger examples.

I have three more of the mortise-and-tenon joints to make on this project, then some housed joints, and the final (dreaded) part is making and fitting the rear panel.

Bookshelf: The 60-Year Dovetail

I’m slowly making my way through the prototype bookshelf project. After realizing that my widths were all wrong, I had to spend some quality time with my rip saws and jointer plane to fix all of it, and I was able to do that during what little time I had this weekend.

So then I decided to get started on the dovetail joints for the top, and let’s just say that my dovetails are not the famous five-minute variety. I don’t get a lot of uninterrupted time in the shop these days, so I just cut whatever I can, and stop when I need to. On Monday, I laid out the tails and cut them. Yesterday, I only had time to finish cleaning the waste between the tails and mark out the pins. This morning, I had enough time to cut the pins and finish the joint (and mark out the tails for the next joint). So it may not be the 60-year dovetail, but sometimes it seems like that.

However, the story is not a sad one. For one, the joint is perfect; the only thing left to do here is plane off the proud excess at the ends of the tails and pins:

Another bright spot is that it went off without a hitch, even on pain-in-the-butt yellow-poplar sapwood (the lighter bits on the right). Saw, chop, and test-fit. The pins fit right off the saw; no paring was required on the sides of the pins. Thinking back to the first dovetail joints I made, it took much longer to cut joints that did not turn out as well. My speed is improving.

I’m back to using my cheap Crown gent’s saw, still with the same touching up of the teeth that I gave it when I first got it (slight jointing, filing with a needle file, slight stoning on the sides to remove some of the set, and wax). It works fine, though I can’t imagine how bad it would have been if I hadn’t tuned it. I am still plotting out the dream dovetail saw that I will make one day, but I’m too busy with furniture projects right now to get tied up with making another stupid tool, and honestly, it’s just not that important.

Sometimes I think of what could possibly make things move a little faster, and I came to the conclusion that some operations are actually going quickly but some not so quickly.

The fast ones are:

  • Sawing down the tails and pins
  • Removing the bulk of the waste
  • Test-fitting

The stuff that seems to take a little longer:

  • Laying out the joints
  • Paring down the final little bits in the tail and pin troughs

Now, I know that the paring could go a little quicker if I just bothered to make a pair of skew chisels. I really should get on that case some day.

What about laying out the joints, though? I do this mostly by eye now, marking out “what looks good” (to me, at least) for the tail spacing, then using a square and T-bevel to mark the lines. This works and it is St. Roy- (and others) approved. But it’s not fast for me. I can mark the spacing quickly enough, but lining up the T-bevel to the mark on top always seems to take a little extra time. A dovetail template could save some time, because you can register it to your marks at the top quickly.

But then again, we’re talking about a savings of only about two or three minutes here. And I don’t think it’s worth getting yet another tool for that at the moment. Furthermore, I can’t just arbitrarily pick the angle I want, as I do now. I know that’s been said a million times before, but I do think it counts for something.