Small tenon saw, Part 1

I’ve had the fantasy of making my own backsaw ever since I heard of someone else doing it. Unfortunately, I have an immediate need: A crosscut tenon saw for, well, cutting tenon shoulders. I do not have time to fool around forever, and I do not want to grind off any more of my current Jackson backsaw.

When I was in OSH the other day, though, I noticed that among the usual crud, there was a 10-inch Craftsman-brand “dovetail saw.” It featured the same general dimensions of the tenon saw I’d envisioned. In addition, the blade was moderately-sized–not as thick as a handsaw or the bigger backsaws, but not as thin as a dovetail saw is supposed to be.

I thought, “heh.” The teeth were ground in an absurd way; it was sort of a semicircular-type pattern. Plus, it had wavy set (on a 16 TPI saw!). Gee, thanks for trying, guys.

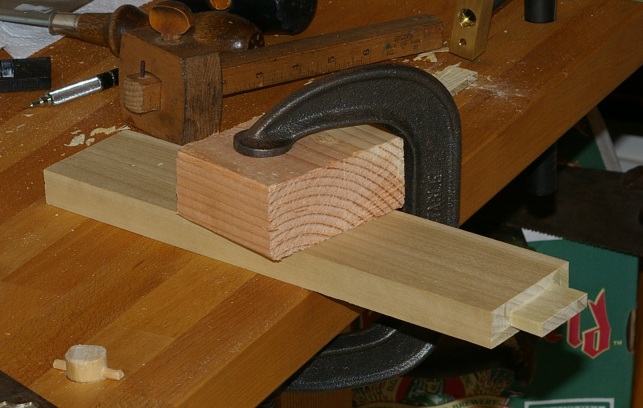
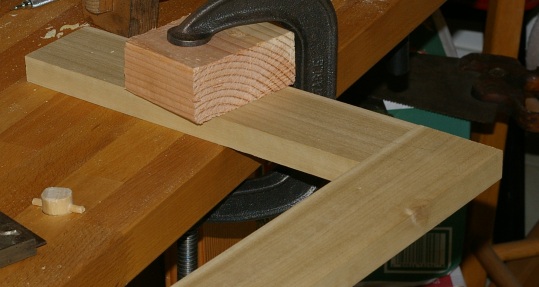
But it was only $10, and was purported to be made in the USA, so I thought, well, hmm, maybe I can make something of this, since it does have a blade and a back that I wouldn’t need to make and attach. So I bought one, then promptly went to town milling off the teeth with my saw jointer:

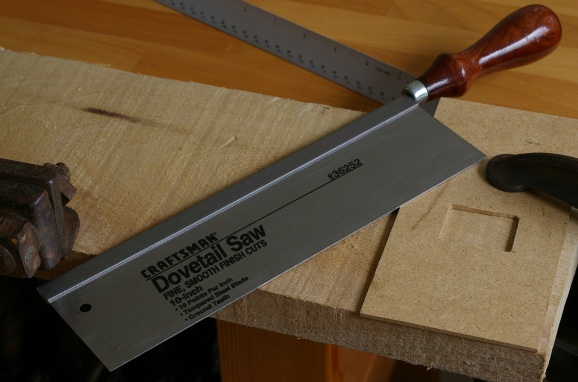
(“Fine, smooth finish cuts.” Yeah, sure, buddy.)

Well, at least the first stage seems to have gone fine. Next, I ought to cut new teeth. I’m thinking that I’d like somewhere around 14 TPI. Then I want to make a handle to replace that silly gent’s handle. I’d like to make the handle from beech or cherry. After today’s episode with beech, I’m not sure I want to mess with that so soon again (at least, as long as I do not have a scrub plane), but then again, I don’t know much about cherry’s durability, and these are not large parts that we’re talking about here. Eh, I don’t have to decide tonight.

Vise jaw liners

Yesterday, I put the roof rack on the car and got a big board of european beech at the lumberyard. And now I can’t believe that I spent most of the day making these silly liners for the vise jaws:

Beech, as it turns out, is quite a lot tougher than the stuff I’ve been working so far and it does not work as easily. Basically, ugh. I got the brilliant idea of resawing a board with my ripsaw, and well, now I know why people like to do that with bandsaws. Ugh.

Then I screwed around forever trying to do the surfacing until I finally wised up and sharpened my plane blades correctly. Sheesh. The good news about all of this, though, is that I finally got around to using one of my smoothing planes for its proper intended purpose, and it did a great job.

I suppose that more good news was that shooting the sides and cutting to length was really easy. Of course, something funny had to happen, and that funny was that the bosses for the machine screws that attach the rear lining are drilled off-center. This after all of the effort I put in to get the holes just right. Oh well.

Still left to do is fasten the front jaw and apply the finish, but this is pretty much done.

Front vise installed

After having trouble holding a board to cut a tenon, I decided that it was about time to install the front vise (a medium-sized Adjustable Clamp Company “Jorgensen” model; staying true to my time in Chicago, I guess). Not only did I need something better for holding boards vertically, but I was also sick of having the vise lying around in its box on the floor.

I installed it over a period of several days. First, I cut and milled birch shims that I needed because the benchtop is a little thinner than the vise depth. Then I determined the mounting hardware. Finally, I attached the front shim, then dragged the bench upside-down into the living room.

By today, I had all of the components ready, so I put everything together. Drilling the holes was a little tricky, but worked fine with my brace, and I was ready to go soon:

That sucker is heavy. Lugging the bench back into the “shop” was not altogether fun. I am a little unsure of how the front shim will hold up, but it should be okay–birch is very strong, and the front of the bench can support my weight (several times the vise) with no problem. Wood movement should, in theory, not be a problem with the screw clearances and slotting that I used. With all of the planes, weights, and other crap on the bench shelf, there’s no danger of the bench tipping over; the edge can still support my weight without tipping.

I mounted the vise across from one of the dog holes. I don’t know how much I’ll use its pop-up dog, but I figure I ought to have the option, since it doesn’t cost me anything.

Still left to do is line the jaws with hardwood so that it doesn’t mar boards. I want to line it with beech, because that’s what the top is made of, but I first need to find some beech. Sigh.

Hm. I made a tenon.

So I made the tenon for the mortise tonight. It seemed pretty straightforward, and I did arrive at something that looks like a tenon:

Well, it certainly looks like a tenon, and it does fit the mortise:

Unfortunately, it does not fit the mortise perfectly. The joint is perfectly square, and it fits snugly, and that’s all great, except that it’s a little misaligned on the horizontal plane. Well, that is, it’s misaligned in the configuration that I wanted. It’s aligned if I flip the tenon around (sigh). This seems to have something to do with the lines scribed by the marking gauge. They were probably too thick. Oh well, that’s an easy problem to fix.

Other than that, I had some performance-related difficulties. First, the dovetail saw that I used wasn’t sharpened worth crap. Its teeth are too small for any of my files. I don’t need teeth that fine, but I don’t have any other appropriate saws. Maybe I should just bite the bullet and cut entirely new teeth on that stupid thing.

The other problem was that the angle of approach was difficult when I was cutting the cheeks. That means that I seriously need to install my front vise.

On the positive side, I didn’t spend nearly as much time fooling around with my chisels this time. So it seems that I’m getting the hang of sharpening those guys.

Next, I suppose that I will do another mortise and tenon. But maybe I’ll try to throw on the vise before I try the tenon.

Hm. I made a mortise.

I decided to start the mortise of my very first mortise and tenon joint today. I don’t have a mortise chisel, so I used the old “drill holes and chop out the waste” method with my Millers Falls #5.

It’s 13/16″ deep and a little more than 1/4″ wide.

Surprisingly, this didn’t take much time at all. I think I spent a much more significant amount of time fiddling around with sharpening my chisels than doing the actual cutting, but that was only because I was being a bonehead with my 1/4″ chisel.

Even more surprisingly, it looks halfway decent. The sides seem reasonably flat and perpendicular. I guess you only get to see how badly you messed up when you cut the tenon, which is what I have to do next.

Milling, Part 5

At this point, I’d milled my board to width and depth; the only thing remaining was cutting it to length. My goal was two one-foot (roughly) lengths.

This meant using a crosscut saw, preferably a backsaw, which meant that the task fell to the old Jackson saw I’d been playing with. I wasn’t terribly happy with the initial sharpening job I did on it. The saw kept wandering around in the cut. so yesterday, I decided to try again. I jointed, shaped, and set the teeth, then went about to pointing the teeth.

I screwed up, and the teeth ended up looking ridiculous. The saw didn’t exactly cut so well, either. So I jointed, shaped, and set again, and then I screwed up the pointing again. So I jointed, shaped a little, then went to bed.

Not to be deterred, I woke up this morning (“full” of energy), and decided to try a few different things. First, I used less set on the teeth. Then I set about pointing with a lower fleam angle (something like 10-15 degrees). Finally, I decided to ignore the rake angle guide when pointing, rather relying more on sight and feel.

The saw certainly looked a lot better when I finished. And it cut better–it did not wander around now. So I was ready to put it to use. Here’s the end product after shooting the end grain with my low-angle block plane:

Yay. I’m done with milling. Plus, I got to put the Veritas plane to a torture test of sorts.

I’m still not thrilled with the backsaw. It cuts smoothly and relatively quickly now, and it doesn’t wander, but I can’t help but thinking that it could produce a finer cut. The question, though, is if I’m barking up the wrong tree here. That saw has just 10 teeth per inch, which is fairly coarse for a crosscut saw anyway. This thing may be better off as a ripsaw for tenon cheeks and stuff like that. I don’t think I want to retooth it, because that will wear down even more of the saw, and there isn’t much blade left to begin with.

Whatever. I’m ready to try making a mortise-and-tenon joint now.

Milling, Part 4

In the last milling episode, my board was now flat on three sides. I needed to rip it to its final width of 2.5 inches. First, I scribed a line around the cut with my marking gauge, then pulled out my now-functional ripsaw. I took the cut a little slowly, not really knowing what to expect. The saw did its job perfectly, guiding itself with the kerf and never wandering:

To get the final surface on the edge, I had two choices with my jointer plane: use a shooting board or try it freehand. Since I don’t have a shooting board, and I didn’t want to cobble together some lame setup again, I opted for the freehand method. It was a lot easier than I thought it would be.

That little Lee Valley double square is really handy for checking the edge.

There’s just one thing left to do: saw the end square to final length and plane it smooth. But for the rest of today, I’m going to clean and wax a few tools that seriously need it (like that jointer plane, ugh).