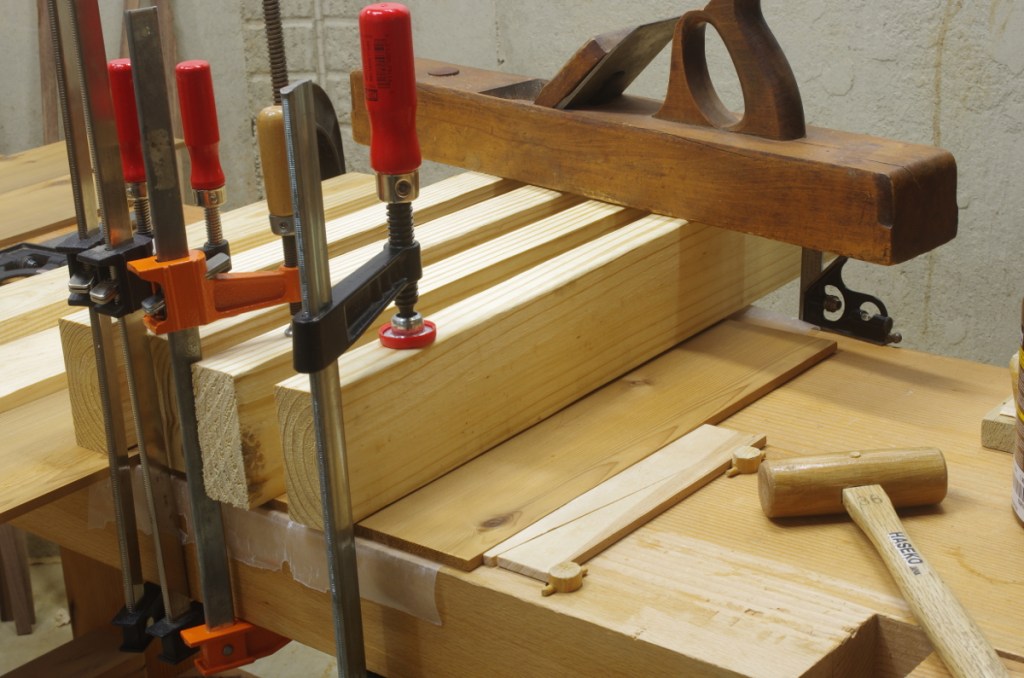
Yesterday’s oafishness had a predictable result: One of the panel pieces rode up ever so slightly in the rear, so I’ll need to plane that down a little more than desired. For the second drawer bottom, I came to my senses and did it this way:
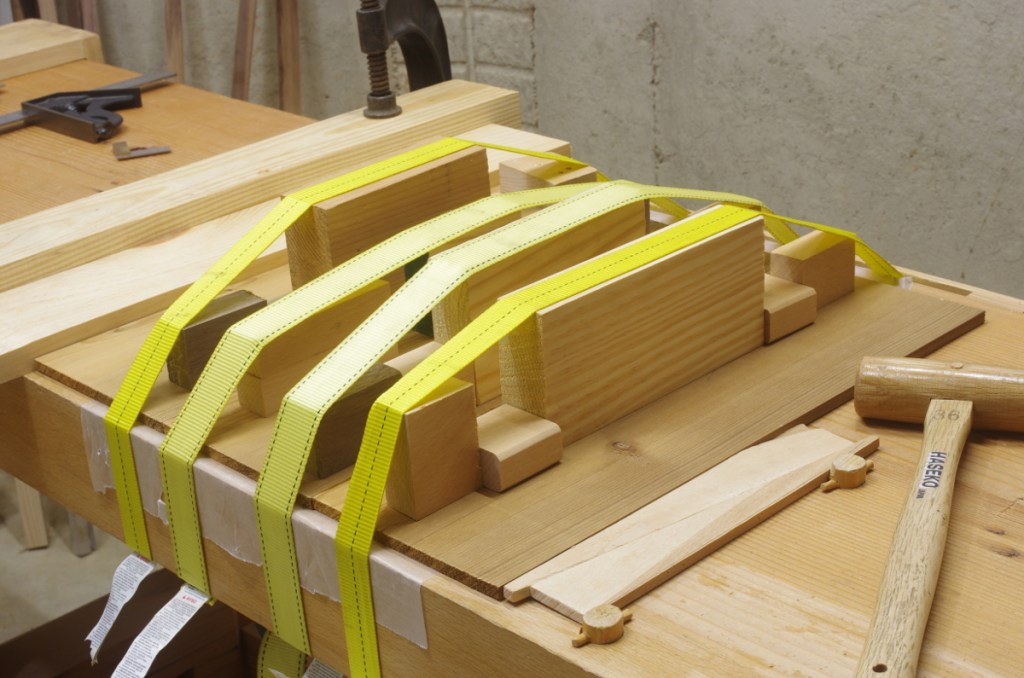
This looks somewhat complicated, but it’s not. Instead of the twine that I was originally going to use, I used the ratcheting tie-down straps that I also use for securing lumber to my roof rack. The ratcheting mechanisms are underneath the bench, upside-down. It’s also a decent excuse for keeping weird little cut-offs around.
This method takes a little longer to set up, but is more effective, and is easier to manipulate.
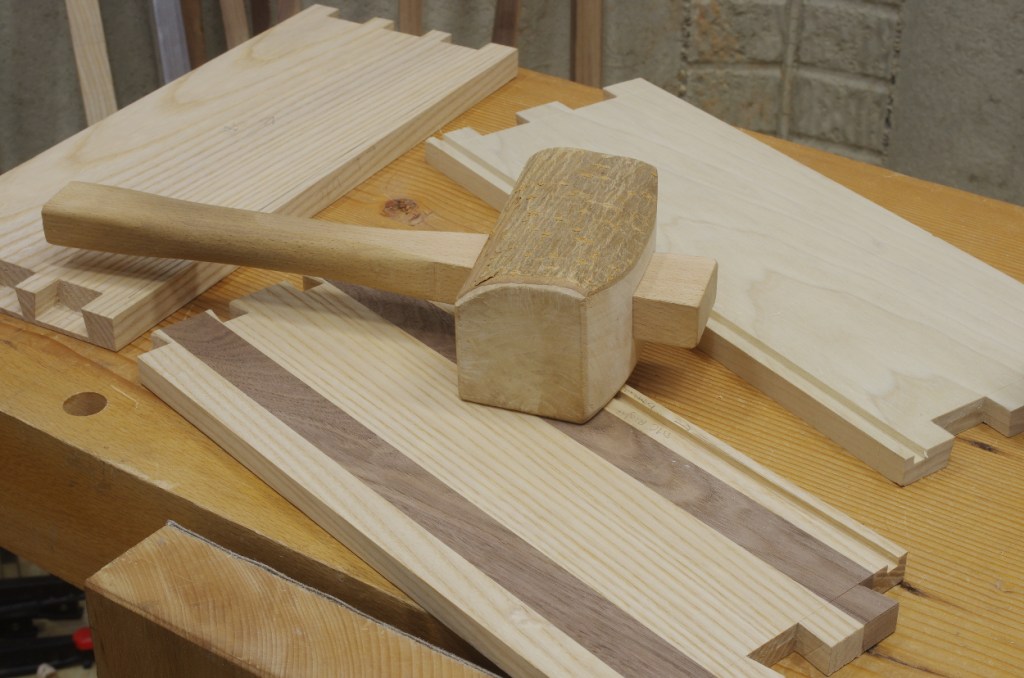
I’ve got all of the pieces for the coffee table drawer bottoms ready. Here are the three components of one of them:
These are western redcedar, resawn from an inexpensive S1S 1×6. These aren’t quite as nice as the quartersawn stock that I used earlier, but are largely defect-free. The knots that you see here won’t be in the bottoms; they’ll be trimmed off.
I glued up one of the bottoms today, and it looks completely ridiculous:
Like some other panel glue-ups, I used dual wedges on one side to apply pressure along the edge joints. But here, I’m using pieces of SYP to press down on the panels so that they don’t accidentally ride up. That big wooden jointer plane is supposed to add weight to that side.
This was an idiotic idea, and probably didn’t really work terribly well, at least in terms of keeping the joint flat (I’m going to do a final planing anyway, but still). The method that I used back when I was gluing up some other panels was far better. The reason I didn’t do it this time was lame: I didn’t feel like searching for the twine that I used before. But I think I will do it for the other drawer bottom.
During the past couple of weeks, I restored the old blog posts that have been missing for the past year or so. I won’t go into technical details, but it was a mostly unpleasant process. All comments from sometime or other in 2010 did not make the transition. Unfortunately (and unusually), this is a shame because there was some really good feedback.
Thanks to the Internet Archive for helping me patch up a number of holes where I had no backups.
I have the original versions of all photos. Many of the old photos are kind of dim due to that being a somewhat transitional period between CRTs and panel displays, and they are pretty low-resolution due to the limitations on storage at the time. If anyone wants me to brighten up and expand the resolution of a particular image, let me know.
As part of the process, I reviewed every post. I confess to making some minor edits for typos and such. Making it a little interesting is that I started the blog at the exact same time that I started woodworking; I had no hands-on experience until even a few posts in. So I saw myself learning again. (And then, there were those posts that I read and thought, “oh, that’s how I did that…”)
Enough navel-gazing. Here’s what we’re looking at right now:
A large amount of my time in the shop lately has been dedicated to something related to the coffee table, but hopefully to be used in most future projects. More on that soon, maybe. If I do write it up, it will be different than my usual fare here, for the three people who have been reading this blog for a while.
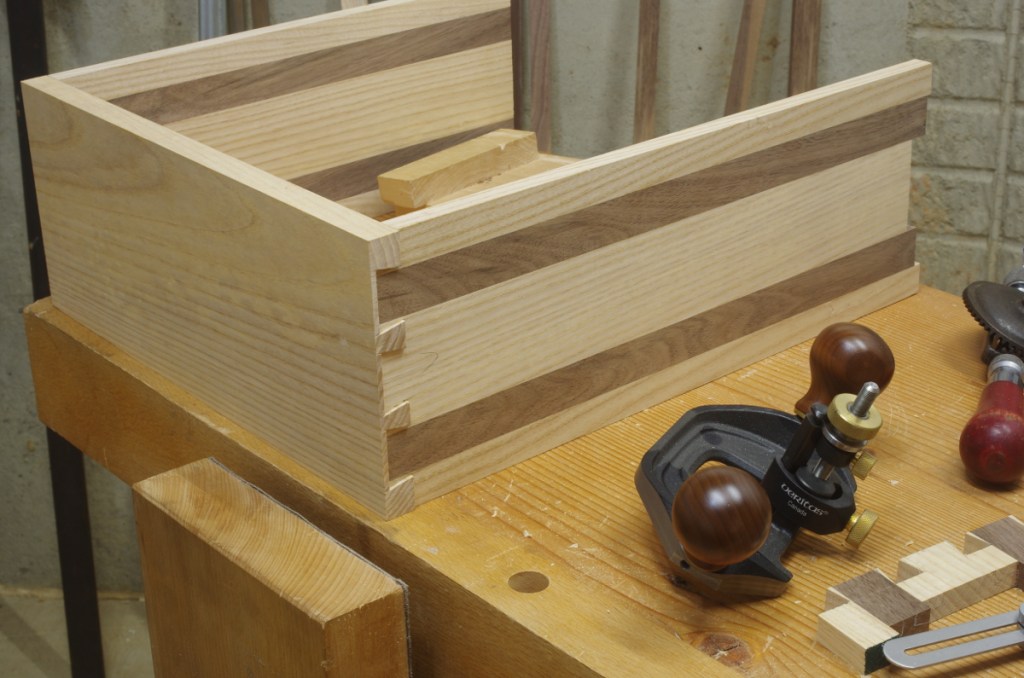
In the meantime, I have this update: The coffee table drawers are now officially underway. I finished milling all of the wood except the backs and bottoms, and just did the front joints of one drawer:
It’s been quite a long time since I last did some half-blind dovetails. At least it’s measured in years and not tens of years. The little cutoff in the lower right corner is a little test cut, investigating tail width and spacing.
The Veritas router plane is newish; I bought it last year after getting annoyed with the fence that I made for my vintage Millers Falls plane. I could have made another fence for the old one, but it would have cost me even more time, and I was getting irritated with the adjusting mechanism.
I used the router plane to go to the bottom inside of the blind part of the front, between the pins. I think I used a chisel for this in the past, but I think I’ll do it this way in the future (soon, because I have another drawer to make). It makes it a lot easier to keep things straight down there. The only thing to remember is to take fine cuts, and after you extend the blade down, move the adjuster back up to register against the top of the notch on the blade’s shaft to ensure that it does not slip. This sounds complicated, but if you’ve used a router plane before, you know what I mean.