Nightstands v2: Plan

It’s like déjà-vu.

My next project will have the same subject as my immediately previous serious furniture project: a pair of matching nightstands. The one I made last year was for the guest bedroom, which is great for the guests, but now we’d like to rid ourselves of some rather horrible (but cheap) graduate school-era stuff in our own master bedroom.

I’ve been agonizing over the design of these things for months now. I knew the project was coming up, but I couldn’t nail down a design. So as time went on, and I worked on other silly stuff such as the tool cabinet, I slowly defined the parameters.

Unfortunately, I wasn’t fast enough. I haven’t been ready to go with this because I didn’t have a completed drawing. In fact, I didn’t really earnestly start with the drawing until last week. So recently, I spent quite a lot of time both by myself and with the “client,” looking over various designs, trying to find a solid direction.

I finally came up with this:

It somewhat inverts the previous plan; there’s going to be an open shelf at the top, and two drawers below. This design also had to “feature something curved,” hence the arched plinth at the bottom (front only; the sides will not be arched).

There are a few elements that will be shared with the earlier design. The front cutaway view shows this in a little more detail:

In particular, this will feature frame-and-panel construction rather than the case construction (and housed joints) that you often find on a piece like this. I don’t know why, but I’ve really come to like frame-and-panel, and my general hope is that the piece will be lighter and maybe use a little less wood as a result. The frame around the shelf is a little daring, as the frame pieces on the sides will reside behind a panel when it’s together, but I don’t think it’s that much of a stretch. Happily, the legs are a bit bigger than the first nightstand, so I will have more room when cutting mortises in corners.

This piece will also be my first opportunity to use a secondary wood. I’ll use it in the internal rails as well as the drawer sides and back. What that wood will be, I don’t know yet, but it had better be cheap.

I’ve also been able to complete the cutting list:
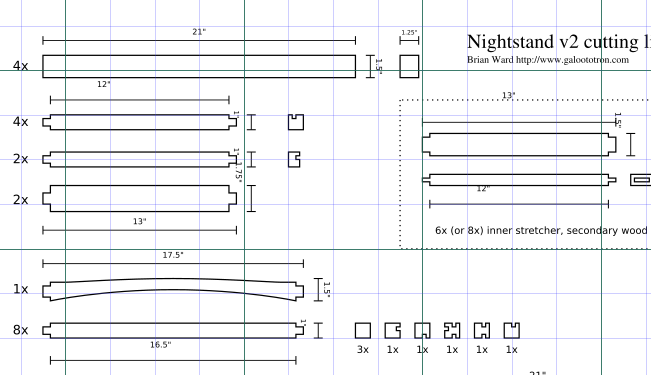
There’s a lot of detail here because I really need to know how much wood I’m going to use. All of that detail was kind of brutal to create–I burned hours on this plan and the cutting list. The catch is, though, that most of that time was spent squaring away details of the design and joinery. When you make a drawing like this, you’re really getting a preview of what it’s going to take to build your piece.

As usual, I’m making the new plan available as a PDF file, free of charge (as if anyone would pay for that thing). I’ve also made that link available on the plans page. grrr, annoyances

Next step: Get some wood! The plan is to use cherry, which may seem a little bit pedestrian, but I’m looking forward to it. It’s very enjoyable to work with hand tools and after all of the monkeying around with beech that I did last year, I could use a break.

Tool Cabinet: Mostly Finished

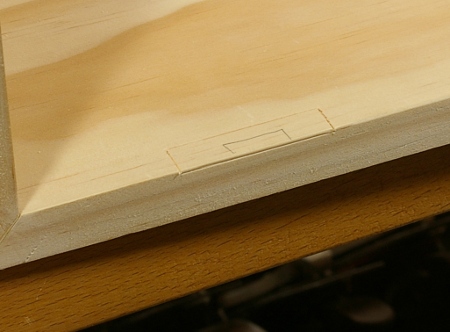
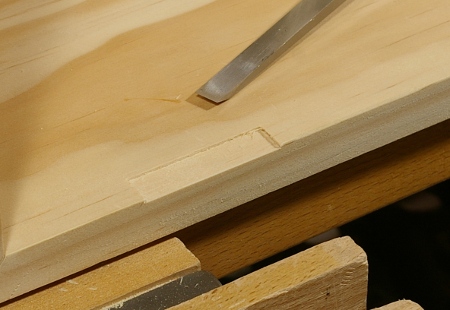
While gluing up the tool cabinet, I noticed that the joint that wasn’t closing up properly was probably just cut too much. So rather than having to look at a hideous gap in the miter there, I cheated and glued in a little piece of scrap:

After trimming the face, it looked like this, which is probably good enough for me not to notice all of the time:

Hopefully, I’ve got enough practice at this now so that I don’t make this mistake again.

So after the carcase was together, I had to hang the doors. As I noted in my previous post, I’ve never done this before, so I thought it might be a good idea to practice. The Korn book explains how to do it fairly well, so I went through the motions and came up with this:

I’m glad I did a practice joint first, because I didn’t really have a solid picture of how the hinge fit into the mortise relative to the pin and how far the hinge would open. But after doing it, things really became clear. I now also have a better appreciation of the butt hinge and its versatility.

I didn’t take photos of how I made the above test because I felt a little tepid while making it. However, I did photograph the process on the tool cabinet. First, I figured out where the hinges were to go. I decided that I wanted three hinges per door to give it enough strength. Then I looked around at a bunch of doors around the house and looked at the proportions of the hinge placement. I didn’t come up with a formula (next time, maybe), but I determined that two inches from the inside “would not look sucky,” so that’s what I came up with.

To make sure that I didn’t cut a mortise in the wrong place (a favorite habit of mine), I first penciled on a little mark where one would go. Then, after making sure that those marks were actually correct, I scribed in the precise marks:

I used the little Lee Valley miniature marking gauge for the depth and height. The depth was set to the width of the hinge leaf, up to just a little bit shy of the center of the hinge pin–I really should have taken a photo of this. I set the height with the other end of the gauge, to a bit more than the leaf thickness. To get the ends, I scribed the near one first, then scribed the other by placing the hinge in place.

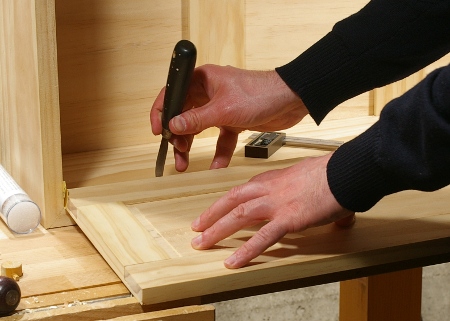
Then I knocked out most of the waste with a chisel. You can do the whole thing with a chisel, but I wasn’t feeling all that precise, so I grabbed my little miniature routing plane to go the bottom:

It seemed to turn out fairly well:

I completed all of the mortises for the inside, then I turned to the door. Again, I carefully penciled in the sides where the hinges were supposed to go. Then I wedged the door in place at a particular spot, and marked the mortise ends from the ones that I’d just made. This is a very similar technique to marking dovetails.

I didn’t have as much registration surface for the router plane on the edge of the door as I had on the carcase frame, so I clamped a couple pieces of scrap to the sides to give me more. This made it an easier job than the frame:

To drill the holes for the hinge screws, I eyed them with an awl. (Nope, I don’t have a center punch yet.)

After drilling the holes, I put in all of the screws, put the cleat on the back, and hung it on the wall. It looked like a cabinet:

There were a few little flubs–for example, I didn’t trust my lines in the mortises enough, and that was a mistake. Fortunately, it didn’t make enough of a difference to matter in the end, and what’s also fortunate is that I hopefully won’t make those errors again.

So it was on the wall, but didn’t have any tools yet. I fixed that yesterday, when I made a little bracket for my Taiwanese planes and added my Veritas low-angle block plane:

So the cabinet is now 1/6th full. I have to make little attachments for the other tools on the inside and the doors.

I’ll do that eventually. I have to get started on other projects now. Between the move and all of the other things that were going on in the past four months (which seemed like an eternity), there were times when I felt like I was trying to nail jelly to a tree. This project felt like it took forever. In reality, it was maybe half that, but I don’t want to have that feeling again.