#6 Reassembled

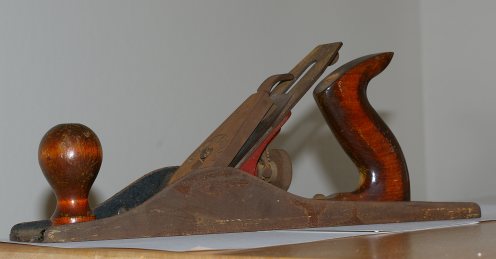
After looking at a pile of parts for about a month, I realized that now that I’d cleaned the frog and screws, there was no reason not to reassemble the #6 plane (other than losing a few of those parts, that is). Here’s the result:

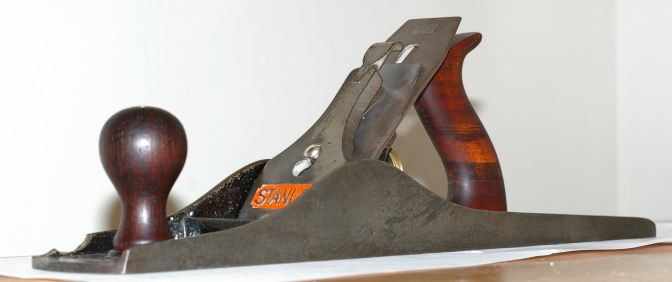
It sure isn’t gonna win any beauty contests with that big ol’ chip missing off the front left side. More important is that all of the moving parts actually move smoothly and easily now. It’s amazing how well this stuff works when you get rid of all of the rust and apply a tiny amount of oil.

Of course, it’s not done yet. Two big things remain; first, I have to lap the sole and clean the sides. Second, the iron needs honing. Actually, it needs more than that; it needs grinding first, because the edge lists to one side. That’s sort of a big job for someone who’s never done it before, but it’s not impossible.

[edit: see the edits in this post for my current thoughts on lapping.]
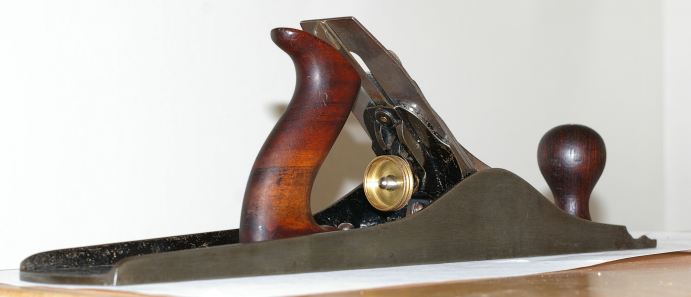
Here’s the rear:

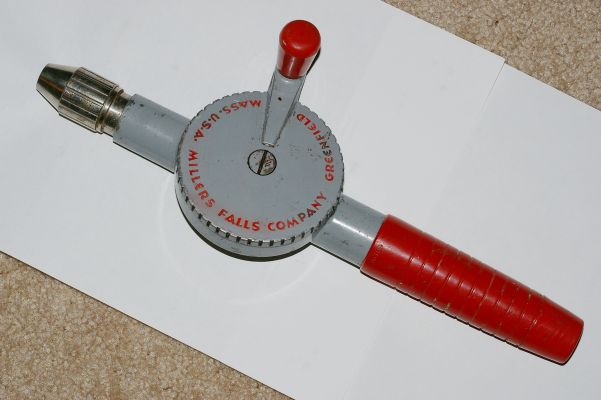
With this one in decent shape, I can move to another plane. I’ll probably do the Millers Falls #9 now. As you may recall, I already started on the lever cap from that. I’ve also cleaned the iron and chipbreaker, so given that the wood doesn’t need any special work, it won’t be long until that one is looking good, too.

At least I hope it doesn’t take too long. Other than these two planes, somehow five others have popped up that also need, uh… work.

First Marking Gauges, More Plane Work

These two marking gauges arrived last week:

One of these is a Stanley #61. Who knows what the other one is, a Stanley #62? The #61 is from the Sweetheart era, so that makes it between 70 and 85 years old. The other one is older, with a patent date of 1873. It’d be real handy if they actually told us the actual patent number, but that would have just been too easy.

The #61 is in really good shape, perfectly usable and ready to go. The other one’s marking scribe is in a strange state. It’s probably salvageable, but I don’t want to munge it too much on a tool that is this old (even if it isn’t in the greatest shape).

These are neat tools; check out the all-wooden screws.

Today’s tool work centered on that Stanley #6. I decided that it was time to attack the schmutz on the bed and frog. I was getting a little tired of wiping crud off, thinking, “OK, now I’m at the end of it,” only to discover more and more of it. So I sat back and thought, okay, well, water isn’t gonna hurt the japanning, and if I dry it fast enough, it won’t rust…

So I took it to the sink, whipped out the Palmolive, and gave ‘er a big scrubbing. That actually did the trick, finally. I had a hair dryer ready, so that’s one clean bed now. The frog is mostly clean now, too, but I did not do as much to it because it’s a more complex part and it may not need any more.

The final cleaning frenzy came this evening, when I scrubbed and polished the various screws and hardware. Although they look very nice now, I have to admit that there is a point, when you’re meticulously scrubbing a frog-securing washer with an off-center hole, that you ask yourself just what in the hell you’re doing…

First Block Plane

I wasn’t really looking to get a block plane right off the bat. First, for whatever reason, the good ones always seem to end up costing near $35-$40 when they’re in decent shape. Second, it wasn’t a pressing need; they are good at trimming end grain, and that’s not something I wanted to fool around with just yet.

As has happened with my other planes, a somewhat questionable example showed up for a reasonable sum (that is, like $5), and thus, I am now the owner of this little Millers Falls #16:

At first glance, this thing looks positively awful. God only knows what inhabited this plane before it was shipped to me. That pin holding in the iron’s cam locking lever doesn’t exactly look like the original part. The chrome on various parts looks like it’s flaked off. And there’s not a lot of japanning left.

However, the rust is really only a little surface rust, the brass knob and depth adjuster are intact, and most importantly, the mouth adjuster is intact. The adjustable mouth feature is really what separates the men from the boys in the block plane business, and this, being a knockoff of the Stanley 9 1/2, has that feature. Don’t ask me why they made so many stupid block planes without it, or why these manufacturers (Stanley in particular) decided to make so many stupid block planes in the first place, or why a low-angle block plane costs so goddamn much these days. I do not know the answers to these questions.

What I do know is that this plane is going to need a little work to clean up, and that it’s not among my priorities right now, especially because I have amassed way too many planes since I started on this little mission of mine. Seriously. When the dust clears from this initial spending spree, I’ll have two smoothing planes, three jack planes, a fore plane, and a block plane. It has also dawned on me that I’m probably gonna need to start to learn a few simple things about metalworking at some point. In particular, a lot of this stuff seems to have riveted parts. I don’t know much about that.

Further Down the Slippery Slope of the Hand Drill

I told you that I really liked hand drills, right? Well, here’s last week’s arrival:

This is a Millers Falls #2 “eggbeater” drill, probably made sometime during WWII or just after, due to its domestic hardwood handles and chuck design. It’s not exactly a collectible, especially due to the owner’s initials etched into two spots, but it does at least have its original eight fluted bits stowed in the handle.

This type has dual pinions, which George Langford poo-poos as an inferior later design “feature,” in part because it takes more energy to crank than the previous (admittedly ingenious) design, which I’ll probably snarf up sometime, too. Aside from the fact that I am a Veritable He-Man[tm] who cares not about trifling expenditures of energy, there may be some merit to that claim, because my example’s rear pinion was chatty and clearly annoyed upon arrival. However, one drop of oil fixed this problem, making my #2 into the easiest-turning hand drill I’ve ever used.

It’s been called “the finest hand drill ever made.” I can’t argue.

I have some other new acquisitions, they’ll have to wait for another day to get their spotlight in the blog, though.

Stanley #6 Tote and Knob

I’ve been working on the knob and tote of the Stanley #6 for quite a while now. Here’s how they looked when I got the plane:

The original finish was pretty much shot; chipped off in many places, cracked all over, and generally lousy. I guess that’s not too bad for 70 years of wear, but it wasn’t going to be very comfortable for a tool that I actually wanted to use.

Being very conservative about this, I first tried rubbing only some mineral spirits around the wood to see if the finish would crack and fall off easily, as it’s purported to sometimes do. Unfortunately, that didn’t work. The weak parts of the finish fell right off, sure, but a little less than half was really stuck on there. Here’s how it looked after the mineral spirits:

I don’t know if this was better or worse than before. However, even though I relish driving around in a beat-up-looking car, I do not want the same to be true of my bench planes.

So I waited for an appropriate time and place to get out the ol’ paint stripper. That stuff always gives me the heebie-jeebies, because it usually melts your gloves to a point where you generally throw them out after a strippin’ session. Scary or no, it is effective, as this photo shows:

I should make one note about paint stripper–make sure that you clean and rub the wood over with mineral spirits when you’re finishing up. Don’t use water. You see, wood expands and contracts based on its water content, and you risk cracks, raised grain, and all sorts of awful stuff. Wood won’t readily absorb mineral spirits like that. It will evaporate slowly over time and leave the wood in a fairly even, dry state.

So, with the paint finally off, I had a decision to make: what to use for a new finish? Traditionally, varnish or lacquer is used for this stuff, but I’m not much of a fan there. I’ve always really liked the oil finishes, but I wasn’t too sure about this because it is rosewood, after all, and it’s a pretty dark wood already. Not to mention that the tool collectors would scream bloody murder.

Eh, screw those guys. The wood was nicked up anyway, and I really like the way that oil finishes feel in the hand:

This is after two treatments; one more tomorrow and it’s ready to go. It’s hard to tell much because of the glare from the flash, but this is really looking good. The knob is darker than the tote (you can tell this pretty clearly from the stripped photo above), and is now a very rich hue, with the growth rings adding a subtle accent. This should hold up fairly well. I guess if I’m unhappy about it later, I could always draw the oil out with the yummy paint stripper and go at it again with something else. But it’s unlikely that I’ll do anything else except maybe replenish with a different oil.

Chisels: Check.

The chisel problem had been weighing hard and fast on my mind, and today I did something about it. After picking my car up from its regular service, I remembered that there was one of those Woodcraft stores in San Carlos, which is relatively close to the mechanic. Having that convenient mode of transport ready, I went there to see if they had any new chisels that were okay and didn’t cost like a million dollars. Also, I’d never been to one of those stores before, and I was kind of curious to see stuff like the Lie-Nielsen planes.

So I asked the guy there about the chisels. He was really helpful. He understood exactly what I was trying to do, and basically said, “Yeah, we have a lot of really spendy chisels, but these plastic-handled Irwin/Marples ones that are much cheaper and available in this handy four-pack will be great for what you’re trying to do. You just gotta put the time and effort into honing and learning how to use them. Then, when you are good at that, and properly addicted, come on back, purchase the really expensive stuff, and take lots of classes ‘cuz you’ll like that.”

I paraphrase, of course, but I have to admit that it was rather refreshing that the guy wasn’t trying to sell me the most expensive thing in the store. This might be partly because there is no shortage of Yuppie Bastard (and his silly German car) in the bay area, and therefore, no shortage of chumps throwing money around like candy at a parade. He asked me if there was anything else I needed, and I told him that maybe my small try square might not be very useful, but he said, “Nah, it may be a little small, but for now, it’ll be fine; sometime later you might need something bigger.” Odd, all of this, but it definitely means that I’ll probably go back there on similar occasions.

Anyway, the store definitely has some drool appeal. Those Lie-Nielsen planes sure do look nice, but, uh…

Rusty Tool #1 and Other Junk

This Millers Falls #14 jack plane arrived on Saturday:

The jack plane is one of the more useful sizes; Stanley’s #5 was the archetype mass-produced until the cows came home. My new plane, like the MF #9 shown a few days ago, is another of the type 3 wartime production series.

It’s also kinda rusty. Even though all of the parts still move and all, it’s pretty clear that this plane needs a lot of work (this is what $5.99 gets you). Because my Stanley #6 is starting to shape up, it’s likely that I won’t bother starting on this iron oxide dump for another month (more on why later).

I have a few more things on the way from eBay. There’s a couple of marking gauges, a Millers Falls #2 hand drill, a backsaw that may be in questionable shape (99 cents cannot be expected to buy much, but I figured it was worth it if just for the handle and sawnuts), and a rusty block plane (yay).

I’m very close to having all of the tools on my initial list. In fact, seems like I really only have the saw set and the chisels left, assuming that I can get the backsaw in some sort of decent shape.

The chisels worry me. The other stuff on my list consists of no-brainers to get “vintage,” but the chisels seem like kind of an iffier thing to get used, the sort of thing you want to look for in person. Because it’s always a questionable proposition to look for anything remotely old around here, I’m just thinking that it might be worth the extra $10-$30 to get a couple of new chisels, provided that they are well-made. There’s a place down in San Carlos that supposedly has them, so I might look at them tomorrow after I pick up my car from the shop.

I also paid a visit to an automotive paint store two blocks from work today to check out their sandpaper supply. They had up to 2500 grit paper, so I bought a bunch in anticipation of Scary Sharp[tm]. Just need to get some plate glass (or something), and I’ll be ready for my first shot at honing.

Cleaning an Iron and Chipbreaker

Today, I attacked the rust and grime on the chipbreaker (“cap iron”) and iron (“blade”) of that Stanley #6. This is yet another new metal–high carbon steel. Thankfully, this stuff isn’t as hard as the chrome and nickel of the lever caps from yesterday, so I was very happy to be able to take most of the crap off with the mineral-spirit-doused wadding, very fine steel wool, and a razor scraper:

The chipbreaker is on the left, and the iron is on the right. The screw shown here attaches the iron to the chipbreaker. It was very hard to get a good “after” shot here, because the cleaned iron and chipbreaker are very light and somewhat reflective. So I converted that image to black and white to eliminate the weird color reflection.

The reason they reflect is not just because they are very clean, but also because I very lightly lapped them on 600-grit silicon carbide sandpaper. I was very impressed at what this did, but I had to be careful, because I will need to do a quality lapping of the iron when I hone it. Now that I’ve tried out sandpaper on a flat surface like this, it seems more likely than ever now that I will try out the so-called Scary Sharp method for honing blades.

The iron is not very straight, but it is straight where it counts–between the slot and the edge. I’ll lap that and maybe polish the rest, depending on how I feel. It’s definitely going to need quite a bit ground off for a new edge; it’s not straight there, and it’s even a little concave at the very end.

The Millers Falls smoothing plane’s iron and chipbreaker should be even easier than this one, because they’re a lot cleaner. But I still need to get some experience honing and lapping on the Stanley before I get to that plane. Good thing I’m not in a particular hurry.

Frivolous Purchase #1

This delightful tool is a Millers Falls #104 hand drill (nicknamed the “Buck Rogers” drill):

These drills, alongside their plane counterparts (that now sell for a zillion dollars, because plane collectors have a lot of money) are precious rare examples of quality postwar hand tool design and mass production in the USA. Millers Falls not only thought that they needed some o’ this here “industrial design” stuff, but they decided to keep their quality up to scratch. This drill’s casing is die-cast and its gear mechanism is enclosed, keeping dust out. As in the finer hand drills of yesteryear, the handle is hollow for drill bit storage, and the rear unscrews as the cap.

This drill cranks as smoothly as glass, just as it did when it was new, some 50 years ago. Of course, I just had to try it out, but then again, doing that to random wood in the apartment can get you in trouble. My solution was the obvious one–good luck finding that hole, heh heh heh.

Wouldn’t it be nice if you could buy a drill as nice as this in a hardware store today? You can, in fact, get a Chinese-made cast iron drill for cheap at some (no doubt the cast is from some antediluvian American or European manufacturer). I actually have one; it’s crap. Guys, is it so hard to make sure that all the parts fit correctly? Yeah, I can probably tweak it a little to get it to work so that parts don’t scrape against each other, but I also have a Millers Falls #2 on the way, so it’s likely just not worth it.

Also, there is no way in the world that I should have bought this drill. You might say that I have a soft spot for hand drills, but I don’t want to get into this collector mania stuff. But on the other hand, it was cheaper than what a Millers Falls #5 goes for.

Cleaning Lever Caps

I decided to clean off the lever caps on the Stanley #6 and the Millers Falls #9 today. This was by no means a fun task. In fact, it was a severe pain in the ass, but there’s a good reason for that.

The MF’s lever cap is chrome-plated, and the Stanley’s is nickel-plated. Both of these are really hard metals that are much more resistant to the agents in metal cleaners. I learned on the intarweb that you generally want to use the same thing for chrome and nickel, went to the auto parts store in order to find some chrome cleaner. I’d read that you don’t want to use a cleaner that includes wax if you’re doing a “hot” chrome piece (like an exhaust pipe). A bench plane’s lever cap doesn’t qualify, so I got one with wax, especially considering that some of the plating was showing signs of cracking.

Here is the before and after:

Because there was so much tarnish and some pitting, I first hit the surface with a “wadded polisher” (basically, fiberglass immersed in mineral spirits) to take off any rust and whatever other crud was on there. Then I nailed them with the chrome polish.

The Stanley cap appears to have lost a bit of its plating to the left of the kidney. Maybe someone took some sandpaper to it once? That surface is much smoother than the rest. It looks OK in the cleaned-up picture, but trust me, the finish on the right and bottom is much more reflective. Note the dark spot right below the logo’s “A.” This is as close to the original as possible (there was a drop of paint there). At least the logo cleaned out nicely.

The Millers Falls cap is in much better shape, but its chrome has started to crack. Basically, all of that discoloration above the arched lettering is a bunch of cracking.

None of this really matters to me. I guess I could spend like a million dollars and have them replated…

The backs of the lever caps saw only light tarnish and no cracking, so they cleaned up very nicely:

Overall, I’m very happy with the progress on these two planes so far. Neither has anything but very light surface rust, so the rest of the parts should clean up quickly. Then they’ll be ready for lapping, and finally, honing.