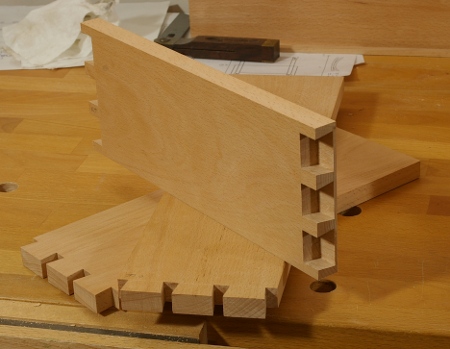
All of the dovetail joints for the drawer are now cut, the bottom panel grooves are in, and the panel itself is glued up. That leaves some fine-tuning of the drawer.
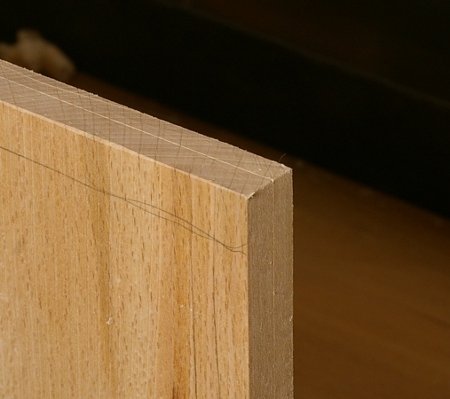
I found that the sides were a really tight fit, one that was likely to become too tight with the addition of too much humidity (or finish, for that matter). To fix it, I knocked off 1/32″ from each side with my jack and smoothing planes, and now it’s much more comfortable. I also had to trim a little off the tops, which was not a problem, either.
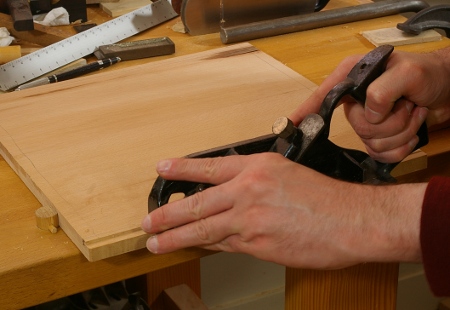
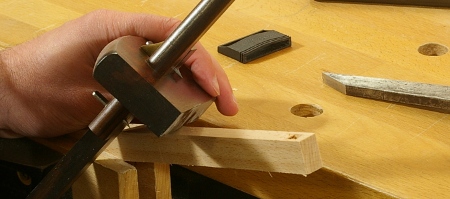
The matter of the pull remained. I could have bought something, but I decided that since this piece already had one thing that I stole from Krenov, I’d just do it again and make some sort of tongue-like thing. So after one false start, I pulled out a cutoff of the pacific madrone that I’d fooled with earlier and started sawing:
After some cuts and a little bit of planing, I got down to a roughly-rectangular chunk:
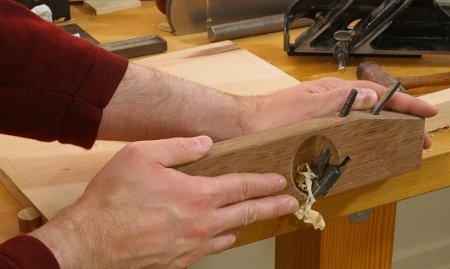
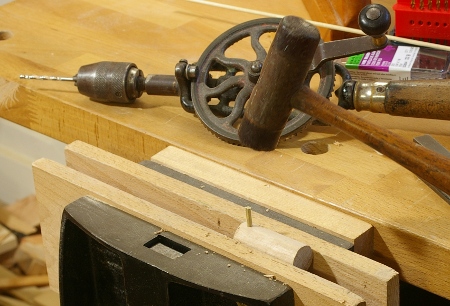
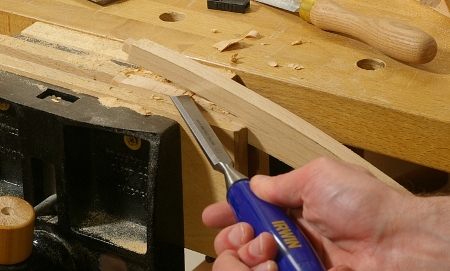
Then I put this into the vise, got out my favorite shaping tools and started working:
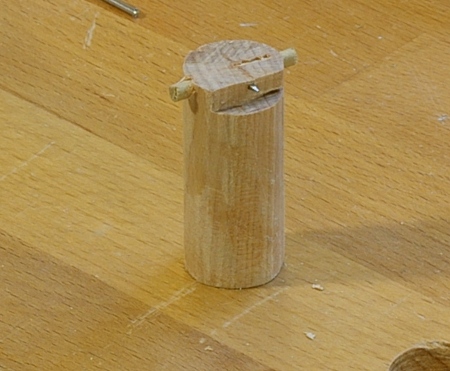
Before long, I had the basic shape that I was looking for:
Check out all of the rays that madrone has. Working with this little piece has been fun. It planes, cuts, and pares very easily, similar to apple or cherry. I’m a little unsure what to make of the way it feels when you touch it. It has sort of a soft, dry feel, but it’s not a terribly soft wood. It’s almost a “chalky” feeling. I’m looking forward to playing with some larger chunks.
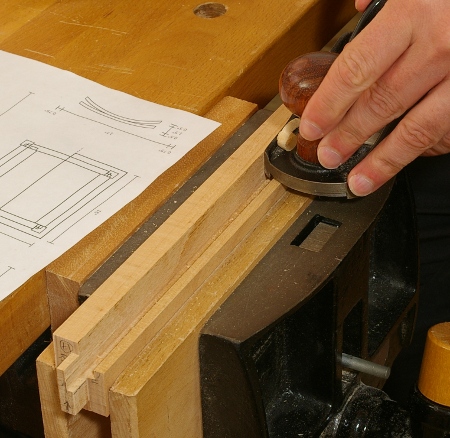
Then I put a mortise in the drawer front and (carefully) cut the tenon in the pull:
A test-fit indicates that it seems to look the way I intended:
I think I might have some final smoothing to do on it, but that can wait until the drawer is glued up, and that step will come in a few days. There isn’t much else left to do on this project other than finish off the top and varnish everything.
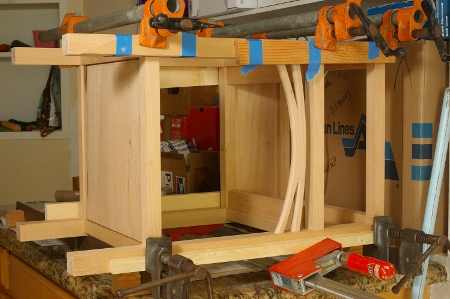
With the shelf made, the front and back frames glued and set for a few days, there was nothing left to do but to glue up the whole frame.
I never have many pictures of the glueup process, because it’s really the only time when time matters a lot. When you’re under pressure to get all of the parts into the right places and into the frame before the glue starts to set, there really isn’t any chance to take photos. In addition, all of my shots are done on a tripod and involve long exposures because the lighting is really bad in the shop, and I can’t hold the camera steady anyway. Finally, my hands tend to get a little sticky with the liquid hide glue, so I don’t want to get any of that on my camera.
I can, however, take pictures of the piece when I’m finished and it’s in the clamps. Thanks to Jasen for lending me the pipe clamps and K-clamp:
This will be ready for varnish in a few days.
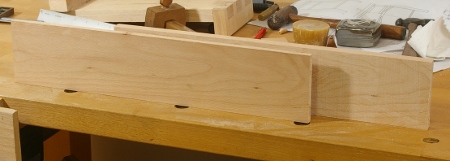
The two other remaining components of the project are the top and the drawer. I’ve got the boards for the drawer down to size and cut the half-blind dovetails for the front:
I’m a little concerned about the clearance in the front, it’s possible that this may be too tight of a fit. Depending on how it works out, I may knock off 1/32″ or less off of the faces of each side, because I don’t want this thing getting stuck inside the frame if the boards expand a little.
Though half of the joints are made for the drawer, I’m almost done, because the rear joints will be through dovetails, which are much faster to make. In addition, it’s likely that I will cut only two tails back there to keep it simple. Then there’s fitting the drawer bottom and finally, the drawer pull.
I may be finished cutting wood on the project this weekend.
The front and back of the nightstand are now glued up (Thanks for the help on the back, Jimmy). To complete the frame glue-up, the only obstacle remaining was to finish off the shelf that will go in the bottom. It will be held in place by a groove running around the frame.
Milling the boards for the shelf was a difficult task because there was a big nasty knot going through the two halves of the resawed board that I used. The discovery of this knot marked those boards as being for the shelf; it was possible to arrange them so that it would make the piece interesting but not look weird or overwhelm the otherwise clear (but not straight) grain.
So when I jointed the two boards and glued them together, I was prepared for the possibility that I might need to start again. Fortunately, this did not turn out to be the case; it flattened well with just a smoothing plane after the glueup, and so I was optimistic about the final steps.
The general idea for fitting this shelf is with “tongue” on the side of the shelf going into the groove in the lower stretchers in the frame. However, this tongue would not be a complete tongue; it would be formed by a simple rabbet extending around four edges of the shelf, and the shelf is to hang down so that the rabbet is invisible. With this design, it will be able to float in the frame and be able to expand and contract as it pleases.
I started by marking the underside as being the rabbeted face (the pencil marks going around the edges), and scribed a line 1/4″ from the top face (slightly harder to see in this photo):
Then I got out my Stanley #78, did the requisite fooling around with its adjustments, and cut the bulk of the rabbet almost down to the scribed line:
Then I used my Taiwanese rabbet plane to finish off the cut down to the line and fine-tune the fit:
The difference between setting up and using these two planes is like night and day. The Stanley is an older version without a depth adjuster, and while holding it is more comfortable than, say, holding Kerry King’s armband, your left hand always feels like it’s in an awkward spot. The Taiwanese plane is simple to set and adjust, and its comfortable “back” (“toe” in western terms, or something) is easy to grip and provides a very nice registration surface ahead of the cut. Overall, these two planes complemented each other very well for this task.
The completed shelf looks like this when upside-down:
You can see parts of the knot in the lower left. I was lucky that this did not extend much further into the board.
To fit the corners of the shelf at the legs, I had two choices: I could chop out a little notch on each corner on the shelf and fit it around the legs, or I could extend the grooves in the stretchers into the legs and slip the shelf in as-is. I opted for the latter approach because it seemed to me to be the easiest and the best-looking.
It was quick work with a chisel, since it’s only about 1/4″ square of wood to remove. Here are two of the extended grooves:
Finally, I did a test-fit. Success:
I’ll let the front and rear frames sit for another few days before I glue up the whole frame. Now I need to decide whether I will size up/flatten the top or make the drawer. Apart from finishing, they are (surprisingly) the only two things left to do on this project.
I’m in the process of gluing up various components of the nightstand. I started with the rear panel, and actually did this with a rubbed joint (because I trust my rubbed joints enough to put them in a place where no one will see them).
The shelf on the bottom is made of two thicker pieces. I got out the clamps for this job, and it went about as well as it usually goes. My old bar clamps went underneath and I put a couple of F-clamps on the top. The bar clamps constantly fell over as I was working, as usual, and they’re really heavy, but eventually, I got the thing together.
Then it was time for the top, and a little voice in my head told me that if the bar clamps weren’t always falling over when I was trying to get stuff glued up, they might be a lot more pleasant to use. So I cut off a few sections of a 2×4 and made some stands. What a difference this made!
This took very little time to get set up and in place; because the screws to tighten the clamp are at the ends of the bars and free of obstruction, it was a piece of cake to swing the handles around. I also began to appreciate the impressive clamping power that these things have. The additional F-clamps I started with were the smaller, light-duty ones. Then I noticed that the bars on those were bowing a bit, so I switched to a heavier-duty clamp that was a little bit better (see above), but nothing like the bar clamps. It did not occur to me to use a couple of pipe clamps that I’m currently borrowing, sigh.
Let’s take a closer look at those clamp stands, made from a typical douglas-fir 2×4. You can tell that I really went all-out with the details on these. It’s funny how something so simple and cheap can make so much difference.
After going through all of this, I started wondering to myself how much it would cost to get a few more bar clamps, because I’ll be needing something to help out with other glue-ups in the future. Yikes, they sure do cost more than the $2 that these cost me. I guess I’ll be either borrowing clamps more or trawling more estate sales to get my fix.
With the panels milled to thickness, it was time to make the grooves in the frame to house them. Normally, this isn’t such terrible work; I don’t have a plow plane, but I do have a router plane with a fence that I made and it works, just not as quickly as a plow. With this project, however, there were a few additional matters:
I needed an additional fence setting, because the grooves in the legs go at a different offset than the stretchers.
There are more than three times as many grooves to make in this project than my previous project.
All of the leg grooves are stopped on both sides.
Two of the stretchers have strange profiles.
Beech is much more difficult to work than the stuff I’ve used for other projects with panels.
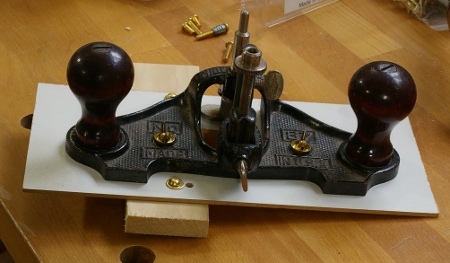
I started by modifying my homemade router plane fence. First, I took it apart and replaced the wood screw fasteners with screw inserts and brass machine screws so that it would be easier to move around:
Then I drilled a few more holes at different offsets on the fence mount so that I could move the fence sideways. Here’s a view of the complete router plane and fence:
With this done, I did the grooves for the stretchers. These were mostly straightforward, except for the ones on the side middle. Viewed from one end, these have J-shaped profiles because they form part of the enclosure for the drawer. (I don’t think I will ever design anything like this again; I’ll just use additional stretchers or something to avoid complications like this.)
So first, I had to cut a groove about 3/4″ deep into the stretcher:
Then I scribed a line from the bottom of this to the proper height and sawed off most of the waste. The first time, I did it freehand (as shown below), but on the second one, I wised up and clamped a batten on top to use as a sort of guide.
Finally, I used a block plane to bring the side down to final height:
The stretchers were then out of the way, but the grooves in the legs remained, so I moved the fence on the router plane and did them.
The whole process took quite a long time. A plow plane would have made very quick work of the stretchers because those grooves aren’t stopped. However, the leg grooves were just slow going. There’s just a lot of constant time-consuming adjustment when you go progressively deeper on a router plane, especially an older one like this, where there is a little bit of play in the blade alignment. You have to be a little careful about how you tighten it. I imagine that the Veritas router plane doesn’t have this problem, but I’m not shelling out the dough to get one of those when I’ve already got one that works (I’d rather have a plow plane).
At long last, I was ready to start sawing the panels to size and fit into the grooves this morning. Turned out well; I now have the sides done (the back requires a glueup which is in progress):
One problem I’ve had with several projects in the past is that my bench dogs protrude from the bench just enough to get in the way when planing thinner panels (such as 1/4″ ones). I’ve gotten around this in the past with a number of kludges, but this time, I decided that I would do something about it before milling the nightstand panels. It seemed that it was possible to create a low-profile dog that would really grip well–one particular problem with planing panels is that they can slip off of dogs, so I wanted to avoid that.
I started by cutting off a length of 3/4″ hard maple dowel. For this kind of dog, a tough, hard wood is best. This particular stock was slightly more than 3/4″, so I had to thin it up a little with a spokeshave before anything else (the first use of my Taiwanese wooden spokeshave, yay!).
Next, I drilled a radial hole straight through the center with my trusty Millers Falls #2, then pounded a short length of 1/8″ dowel into that hole:
The 1/8″ dowel here is yellow-poplar, but it could be anything. It won’t be subject to very much force.
Then I did the following:
Sliced off a piece at the top so that there would be a flat face for the work to abut against.
Drilled a smaller radial hole perpendicular and intersecting the first hole (with my trusty Millers Falls #5, sigh, too many eggbeaters).
Drove a brad through this hole from the back of the dog, just enough to jut out the front at the flat face just created.
Hacksawed off the brad at the back of the dog, filed that smooth, then drove it into the back a little more with a nail punch.
Sawed off the top of the dog to bring the top just above the smaller dowel.
That’s a mouthful, but this picture of the finished product should explain it all fairly well:
You can see that the idea is to push the panel being milled into the brad so that it won’t ride up.
I made two of these, and two without the flat face and brad. This latter type is mostly for auxiliary support when planing across the grain. Then I had to see if all of this effort was actually going to amount to something.
They work well. Here’s how they would look in use when planing straight along the grain (no vise required):
They really do keep the board in place, and you can see that they don’t obstruct anything–they’re just a little more than 1/8″ off the top of the bench when in a hole. A planing stop (with the same sort of brads, of course) could be useful for keeping the work from “jackknifing” when planing along the edge, but I found that repositioning is fast enough. A wagon vise would also be a great help here, but still unnecessary.
Armed with these new little doodads, I had just enough time today to make one nightstand panel from the board shown in the preceding image:
Sometimes, you just need to make a lot of shavings.
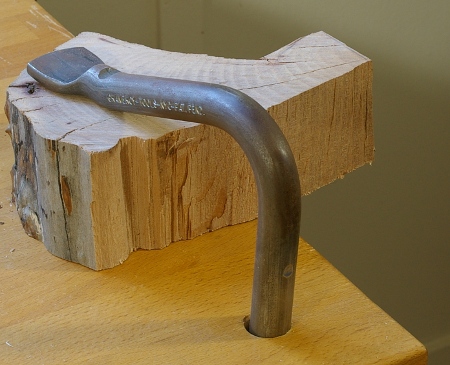
One of the design specifications for the nightstand project was that it had to have “something curved.” After some grumbling about this, I decided to take it as an invitation to steal something I saw in one of Krenov’s books.
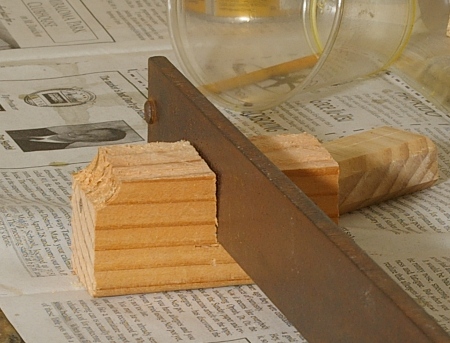
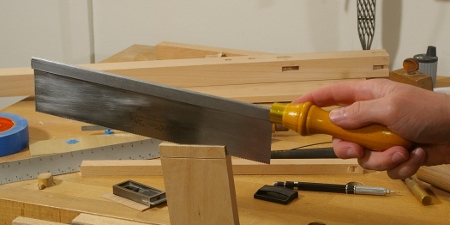
The first step was to resaw the wood for the piece. The target board was only 3.5″ wide and was a real piece of cake with the frame saw:
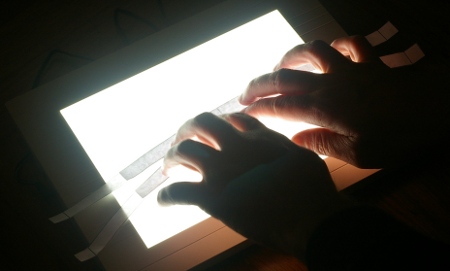
After getting this four-square, I headed back to the drawing board and squeezed out a full-scale drawing of the decoration piece. Unfortunately, I don’t have a big enough printer, so to make the template, I had to tape two pieces together using a light box from my old slide photography days and some mysterious hands:
In retrospect, this was a silly way to do it. I should have found someone who had a printer that can do legal size. (Strangely enough, I just ordered one, but not for this kind of thing.)
Next, I taped the frankentemplate to the board and traced the pattern:
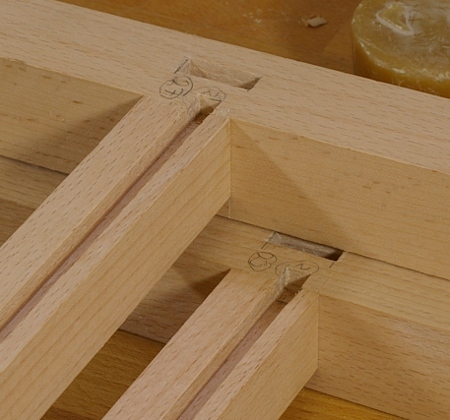
Before anything else, I now had to address the way that the decoration was to be joined to the frame. Basically, this is a twin mortise-and-tenon, and the layout promised to be a pain. To mark the mortise offset into the frame piece, I did this:
Test-fit the closest frame stretcher in its mortise.
Lined up a piece of scrap flush with this stretcher’s front.
Centered my mortise chisel alongside this piece.
Made a mark with the chisel in the frame at this offset.
Used a marking gauge to make a line for where to chop the mortises.
That sounds a little complicated, but it’s not. It was a lot easier than chopping the mortises themselves, because the mortises are so tiny that you have to be really careful prying out the waste, or you’ll dent up everything and have awful marks on the frame. Nonetheless, the task is complete soon enough:
Then, on to the tenons, which were also oh-so-much-fun to lay out. It’s a little easier, though:
Using the same stretcher test-fit, measure the distance between the depths of the front of the stretcher and the start of the mortises that you just cut.
Set a (different) marking gauge to this distance and scribe it on a piece of scrap.
Chop a mortise along the scribe line in the scrap (with the same chisel that you used for your original mortises, obviously).
Set your mortise gauge according to the mortise in the scrap.
Hey, that wasn’t so bad, was it? The only real grumble I have with this right now (and this holds for all mortises) is that my mortise gauge takes too long to set. Because one screw fastens both arms, they touch (through a center plate), so when you’re setting one arm, the other one moves. You have to fiddle with it a lot. Grr, when I get some free time, I’m going to make some gauges and I am going to solve this stupid problem, and probably not by just using a single arm like some of those nice English and Japanese gauges.
The good news is that once you have your gauges set, you don’t have to reset them for the next joint if it’s the same type.
In any case, with the tenon marked, it was time to saw the cheeks and do the usual mortise-and-tenon stuff:
Before long, you have your tenons.
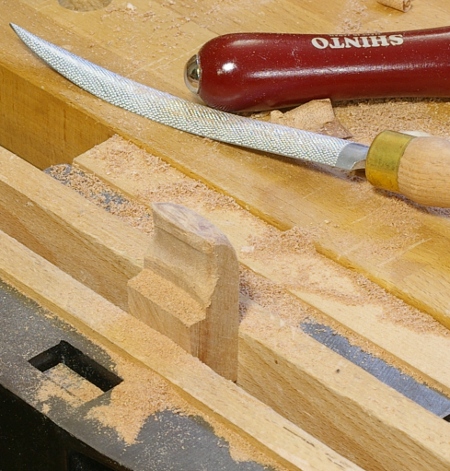
It was then time to cut out the pattern and shape. I did the cutting with my coping saw, and then I evened and squared up the top and bottom with my Shinto saw rasp:
I’ve mentioned before how much I like this tool, but it has its limits, and one of them is that it can’t get into confined spaces so well. To square up the insides, I pared across the grain with a chisel, and then used a knife in the tightest areas:
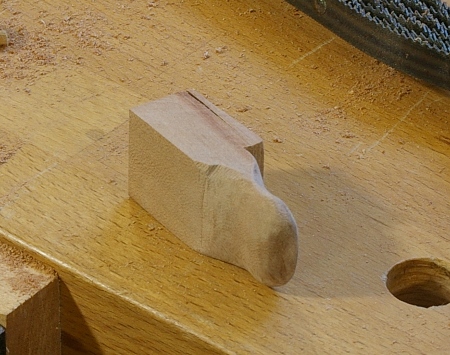
Then it was time to shape it. I used the old “finger on the side while holding the pencil” trick to outline the rounding depths:
Shaping the top was a matter of a minute or so with the saw rasp. The bottom was also reasonably fast with the Gramercy sawmaker’s rasp, though I would have preferred a larger half-round for that. I did the inside with anything that would fit. The last shaping tool was 80-grit Norton 3X sandpaper, which thankfully fits everywhere, which left me with this:
Then I hand-sanded with 120, 220, then 320 grit to get to the final point, and I test-fit it with the front of the frame:
It looks fine, I suppose, but it took longer to make this than I care to admit. I think I may glue up just the top tenons in the decoration to account for wood movement. This thing isn’t exactly structural.