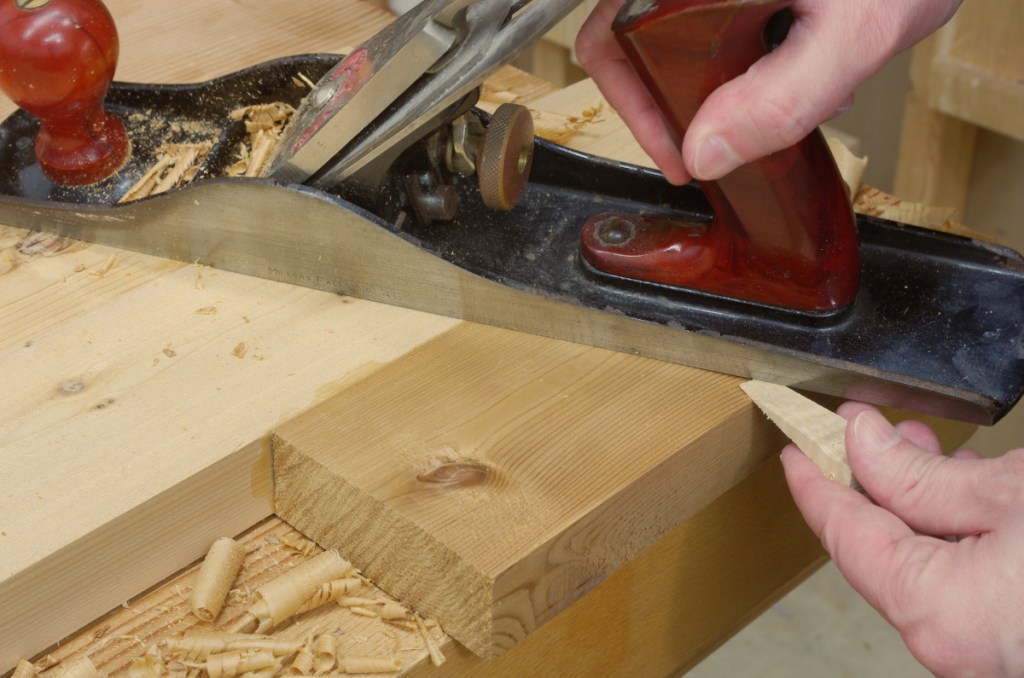
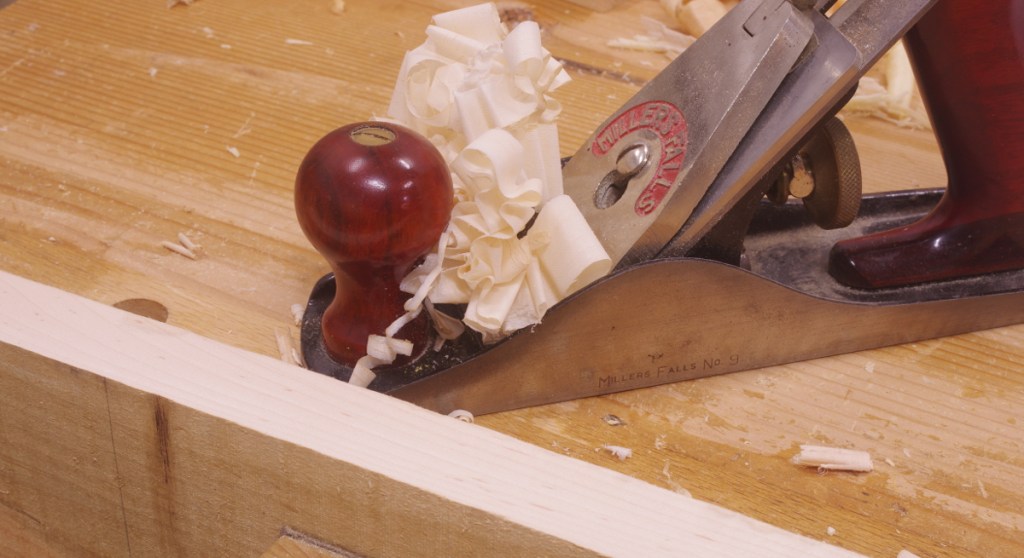
With its ability to flatten wide stock quickly and effortlessly, one of the things that my planer sled design has enabled is a little more flexibility and ease when I need to glue up something wide. Ironically (or perhaps not so much), the jack plane often comes into play here. A quick treatment with everyone’s favorite “rough ‘n ready” sometimes saves even more time.
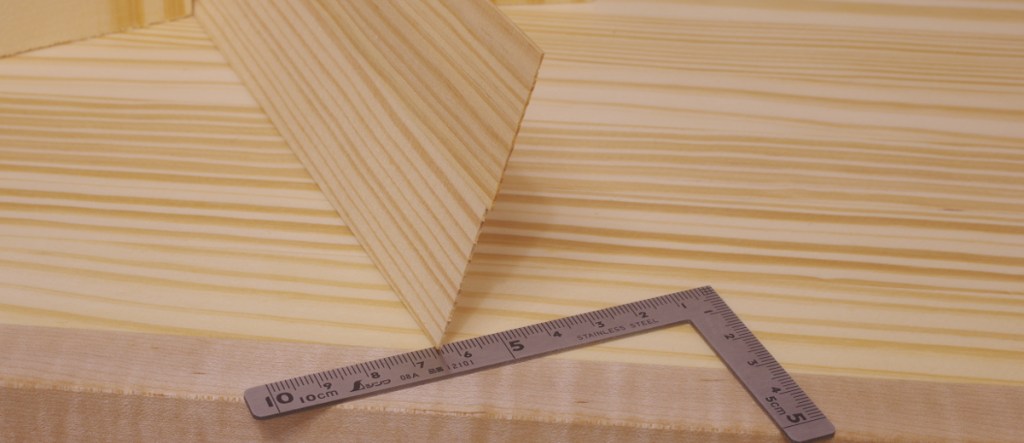
By way of example, I’m working with a bunch of suboptimal cedar at the moment. I need 10-inch (~255mm) stock, and I don’t have any. So I glued up sections of three (crummy) 4-inch stock, first roughing out the stock on the bandsaw, then planing slightly “sprung” edges using a jointer plane. I didn’t make the edges perfectly square to the sides because the sides were rough and uneven from the bandsaw (and the thicknessses varied anyway)–all I cared about was getting edges that would join together.
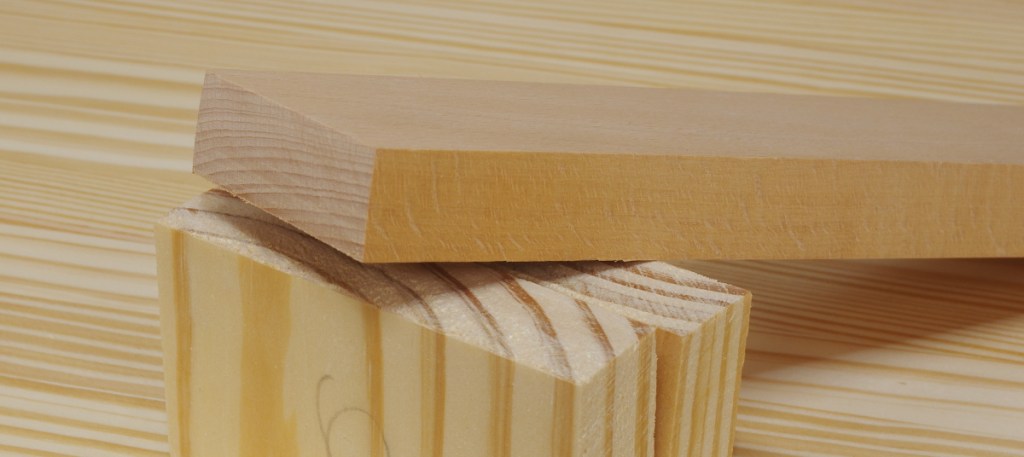
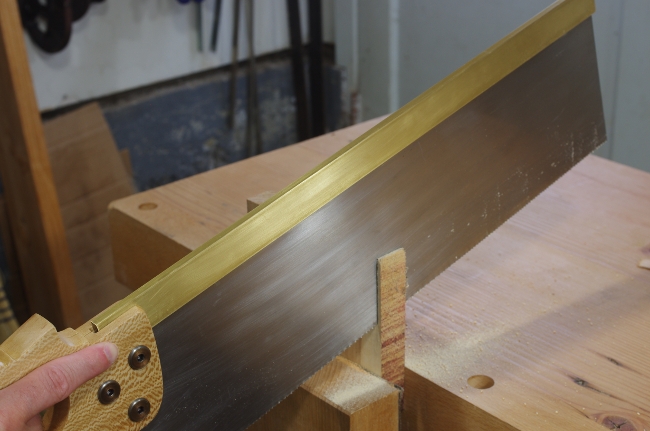
When doing something like that, you end up with a glued-up board resembling something from the Cubist style, for which the conformist cries out to flatten. And we oblige. For the planer sled to work correctly, you want the face you put on the bottom to be “roughly” convex, but there’s no particularly exacting standard. So you can grab a jack plane to (effortlessly) knock off a bit from the sides near the edges:
Wedge shows the part that I planed off.
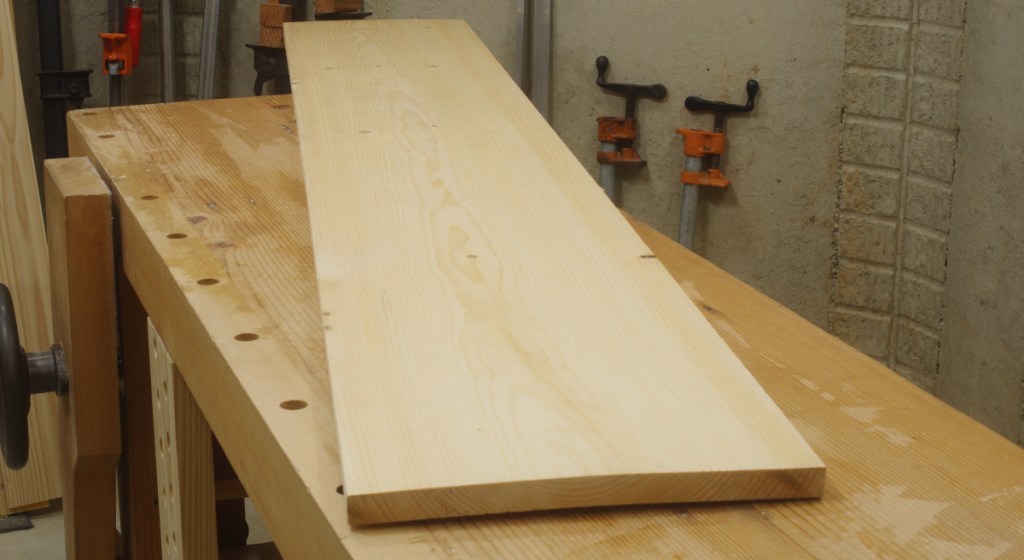
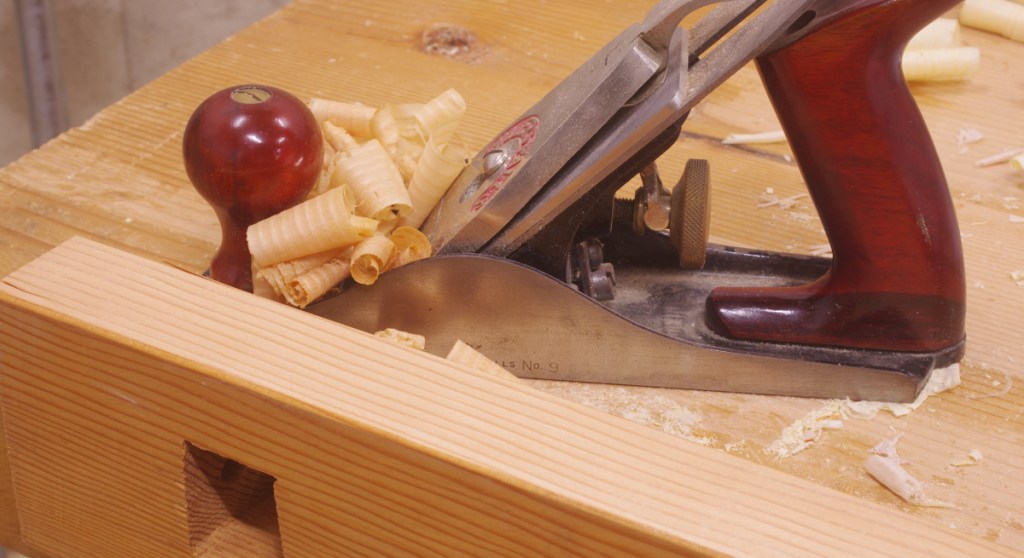
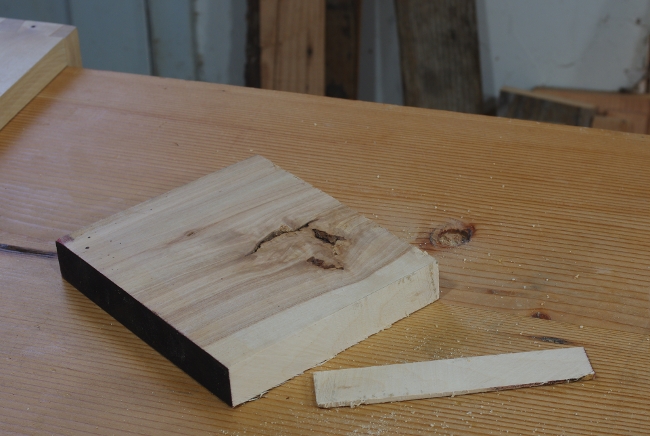
Now, you can flip it over, pull out the planer sled, and fix the whole mess in place:
Yes, this is a strangely-shaped piece.
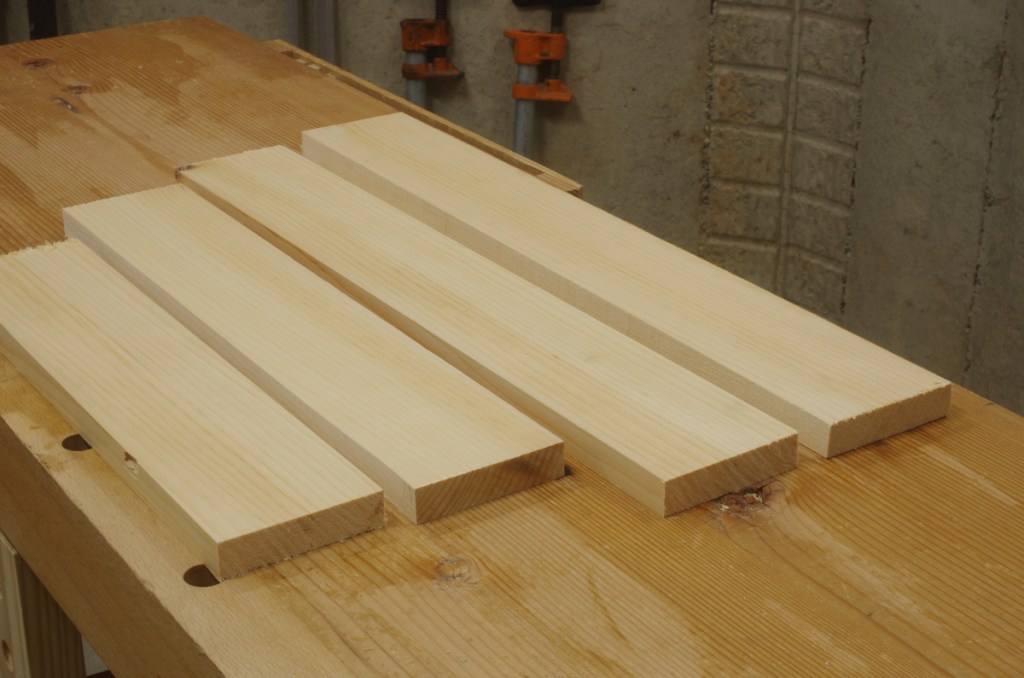
And just like that, you’re ready to feed the whole mess into the thickness planer and flatten it in one shot. The process of knocking off the edges, fixing in the planer sled, and flattening with the thickness planer only takes a few minutes (I spent a lot more time taking the photos and writing up this post).
Perhaps there’s a need for a “moral of the story” trope-ish thing in here, so here you go: The jack plane is invaluable. Even though I don’t need to use it nearly as much as I did in my prep-stock-by-hand days, I’d still be lost without it.
There seem to be several little camps when it comes to stock preparation methods. There are those who rive arrow-straight oak with a froe and plane it down, the hand plane exclusivity evangelists, the hand plane to flatten/thickness planer on rest, the “hmm, maybe hand planes and a big bandsaw” types, the machine heads who won’t use anything but jointers and planers, the various router sled types, and then, of course, the people who mostly do hand work, but keep a huge jointer in a separate area as a dirty secret. You know who you are.
Doing it completely by hand taught me a lot of things, and switching to a hybrid approach with a thickness planer saved me some time. I’ve never really been religious about stock preparation, so this discussion might start to seem a little out of place on this blog, which is mostly about hand work.
But something inside of me wasn’t satisfied with a few things. First, I wasn’t thrilled about flattening stuff by hand anymore. Second, I didn’t want a jointer. Finally, I wasn’t enthusiastic about my thickness planer being such a one-trick pony. I’d read about planer sleds that could flatten boards, but when I looked into them, I wasn’t too impressed. There was one overriding problem: Holding the work conveniently, yet securely.
Still, the sled idea sat in the back of my mind. I kept thinking to myself that there must be a reasonable way to get a board to stay in place, and that some sort of traditional approach to workholding might work. Maybe double wedges? But how? Finally, about a year and a half ago, something went off in my head and I had a basic design. I built a prototype. Surprisingly, it worked. I was then able to refine it some more.
So without further ado, here is my video describing the multiwedge planer sled.
A video might seem a little unusual for me, but I really felt that it was the best way to illustrate the sled.
I really hope it will be useful to someone else as well. It’s been great for me.
After doing that tongue-and-groove stuff, I nailed on the bottom of the chest:
I guess I sawed off the ends with a panel saw. I don’t remember. In any case, I’ve been looking through not just the “ATC,” but also “The Woodworker” articles on traditional chests, and noted that some of the articles in the latter had said to use screws on the bottom. I went with cut nails, especially encouraged by the fact that I actually have some cut nails on hand.
Then it was on to the plinth and lower dust seal. These are just dovetailed bits and pieces and are pretty much standard fare. Pictures of those are a little later down.
The lid frame and panel presented another typical situation: determining which boards to use for the frame and panel. You normally want frames to be rift- or quartersawn because they’re more stable, and of course, those cuts are difficult to find if you’re just looking superficially (which is close to what I was doing when I bought most of the white pine that I have on hand). Fortunately, I had this one:
At first glance, this looks like a board with a lot of knots and an obnoxious cup. But slice out the center part, make some cuts here and there, and you get this:
That kind of riftsawn cut is what I was looking for.
I made the frame using through mortises (something I rarely do), did the joinery for the upper dust seal, and am now close to finished with the outer shell:
In a case of not following directions, there’s a small knot on one side here. It doesn’t show much sign of wanting to fall out, but if it does, I could repair it, or something. Because this is not a tool chest, it may not be important.
A look at the lid:
The upper dust seal is not attached or trimmed to final dimensions. This is because to really finish off the lid, I need to install the hinges, which I do not have at the moment. These are allegedly in transit.
I’ve already selected the wood for the sliding till runners and the sides of the tills themselves. I haven’t decided if I want to make some kind of divider in the bottom yet. Again, this isn’t for tools, so I don’t know if that kind of compartmentalization is appropriate here.
But it looks like I’m getting somewhere. In theory, this project shouldn’t take much longer.
One effect of my cross-country move from the San Francisco bay area to Maryland is that I now have easier access to more types of wood. In particular, I can get southern yellow pine (SYP, also called simply “yellow pine” by actual southerners). Even if the local supplies of it are kind of weird, there are big-box stores carrying it within a 2-hour drive.
Since I finished one substantial laminated-top project (the “auxiliary bench“) with SYP along with a few other utility pieces, I have now used it in addition to a bunch of other woods for workbench construction. I asked some friends back in California if they were interested in my thoughts on SYP now that I’ve had a chance to work on it, and they said, “yeah, why not?”
Because this blog is about woodworking, this discussion is oriented mostly on using this wood (and others) for workbench construction. However, this is by no means its only use.
Here’s what I will survey:
Southern yellow pine
Douglas-fir (several varieties)
Beech (F. sylvatica and F. grandifolia work similarly)
Soft maple
To recap the Chris Schwarz book, you’re not looking for the “perfect” wood when building a workbench. You generally want something that’s reasonably heavy, reasonably stiff, and cheap. That last bit is important because you’ll use a lot of wood on a bench, and you’re also probably going to beat the crap out of it as well, so there’s no use if you get all sentimental about that kind of thing. Workability also helps, especially if you plan to use a lot of hand tools.
Southern Yellow Pine
When Schwarz first started to research workbenches, he was lucky to have a source of cheap wood that he wouldn’t feel bad about consuming and mauling with abandon. Or perhaps we were the lucky ones. Things might be very different for the aspiring benchbuilder if Schwarz had no access to southern yellow pine in his local big-box stores. Even in those retailers, which tend to be overpriced for lumber, this stuff is currently running between 50 and 75 cents per board-foot.
So it’s cheap, it’s stiff, it’s usually pretty heavy, and you can get it in wide, thick sizes. The 2×12 is the go-to size; if the pith runs through it, in clear enough pieces, you can slice that out and have quartersawn stuff as a result. It’s also fine to use narrower stuff like 2x10s if they look good.
Moreover, it’s sold dry (well, mostly dry). This is a requirement: If you don’t kiln-dry yellow pine, the sap/pitch makes for a wretched sticky mess. Even when dried, it’s still possible to run into “pitch pockets” with clumps of goo that hasn’t fully set into resin.
You gotta clear that stuff out. Ick.
So you’re thinking that there’s got to be a catch. There are two principal issues:
It’s not available in many parts of the country. Well, at least if it’s not pressure-treated.
You might need to pay attention to the latewood.
At this point, I should mention that there are several different kinds of “southern” yellow pine. The kind that you’re most likely to get commercially is loblolly pine, and that’s what we’ll concentrate on.
So let’s talk about those growth rings. Many woods have a substantial difference between the so-called earlywood (sometimes called springwood) and latewood (summerwood) in their annular rings, but in SYP (and douglas-fir, which we’ll get to soon), it’s dramatic. Simply put, the earlywood is fairly soft and the latewood is dense and tough.
This varies from tree to tree. There’s a lot of detailed information on the factors in publications like Summary on Growth in Relation to Quality of Southern Yellow Pine by B. Paul and D. Smith, 1956, USDA Forest Service, Forest Product Laboratory Report No. 1751. That is fascinating reading to me, but when it comes down to it, it’s best if you get a feel for it in practice.
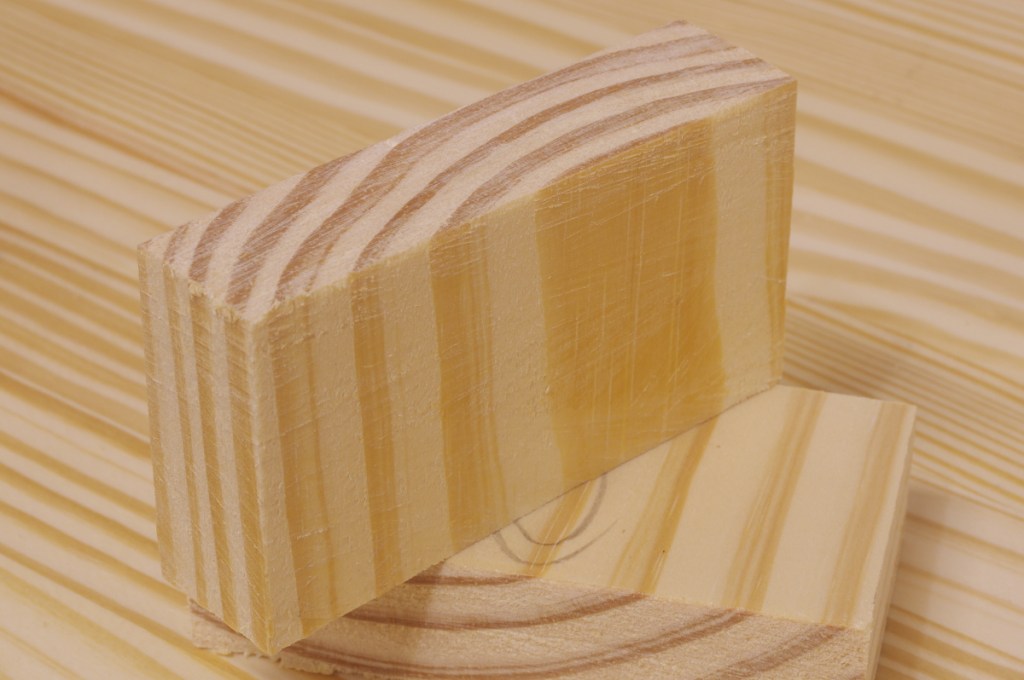
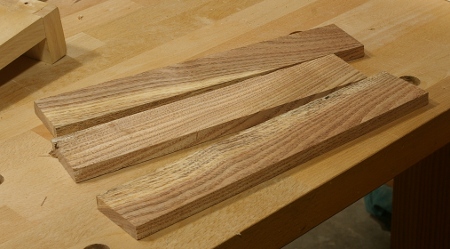
The factor that you’ll feel the most is the latewood, especially when working with hand tools. In some boards, the latewood will be really tough. You’ll also get a wide variety of early- and latewood quantity per annual ring. This view of the side of the new bench should give you the idea:
The pieces with the smaller annual rings (often with the thinnest latewood sections) were the toughest to deal with. Strangely, the third from the left with the very thick sections of latewood was not too bad.
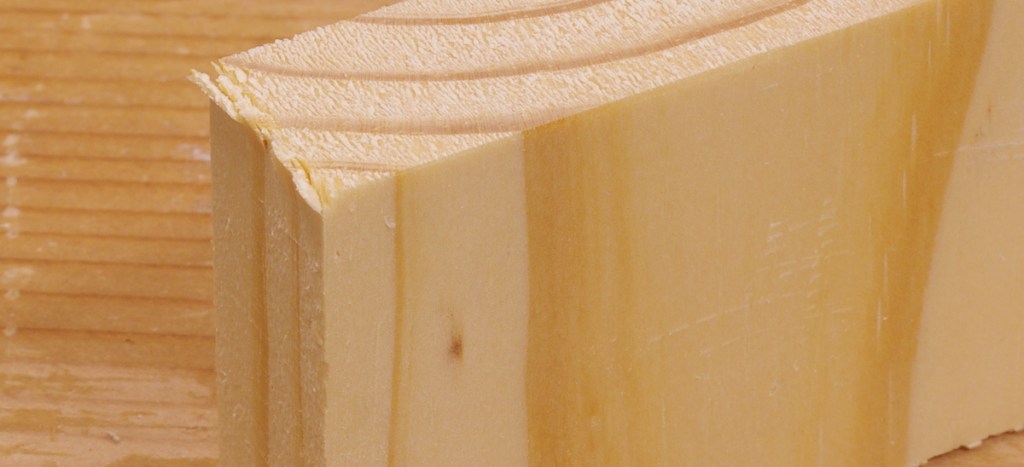
By “tough to deal with,” there are two difficulties, at least that I noticed. One was simply that when planing or chopping or whatever, the tougher ones tell you when you need to sharpen your blade because it just refuses to work. The other problem is that when ripping, your saw can track the latewood grain. Here’s the offcut from a large tenon cheek where this sort of thing can occur:
The earlywood is generally pleasant to work. It’s not as soft as, say, eastern white pine or that radiata stuff, but it’s not a bear, either. It’ll mush and smash up (for example, when chopping) if your tools aren’t particularly sharp, but it’s not a big deal.
Most softwoods have a higher tendency to “spelch,” that is, splinter out of an end when cutting across the grain. SYP varies across individual pieces, but it’s never really terrible. Though it’s very stiff, the fibers deform pretty evenly. Flattening the new bench (going cross-grain with a jointer plane) was the easiest flattening job that I’ve ever done. It might have helped that the bench was pretty flat to begin with, but it was a smooth, even motion, and the shavings were very uniform.
To give you an idea of what you can expect, I took the smoothing plane shown earlier (and later), and just went at some endgrain with its 45-degree blade angle. Going right off the edge about the worst thing you can do to invite spelching. This is the result; it’s pretty close-up; the piece is about 1/2″ thick:
SYP machines really well. Here’s a sub-1mm offcut that I took with the bandsaw; this is actually two pieces glued together:
This was with a pretty aggressive “Wood Slicer” blade.
There is one thing I wonder about yellow pine. Supposedly, the jeffery pine that you see up in the Sierra Nevada is a yellow pine. It gets really big. Could it have properties like this? Not that I have any idea how you’d get any, especially kiln-dried. Maybe someone has an operation up there. Or maybe it would be like (or even sold as) ponderosa pine, as this is also a yellow pine.
Douglas-Fir
Oh, douglas-fir, what a tangled web we weave.
First off, Pseudotsuga menziesii, you are not a fir, and that is why I put the dash in your name. You should probably be called Douglas Weirdofreak, but I suppose that we’d need approval from Pseudotsuga wilsoniana, or whatever that thing is being classified as these days. OK, I digress.
The wood, being very stiff and strong, has many uses, such as wooden boatbuilding, where it can be used for many purposes, including masts. As far as most people are concerned, most of the douglas-fir available for purchase is for construction and framing. This makes it somewhat inexpensive, but it’s still not as cheap as SYP.
And it’s almost invariably sold green. Quite green. For the benchbuilder (and woodworker in general), this is obnoxious for several reasons: It’s going to shrink and move a lot when it dries, so after acquisition, you’re going to have to wait for that to happen, at least a little. It hard to gauge how heavy individual pieces are because they can be sopping wet. The earlywood is even mushier than usual.
Here is a piece of real bottom-of-the-barrel construction-grade douglas-fir, from the 2×4 (stud) pile:
You probably don’t want to build a bench with that kind of stuff. The 2x4s are always from the worst part of the tree. The annular rings are huge. There is a lot of earlywood without much latewood. The good news is that, as is the case with SYP, if you make a foray over to the wide pieces (e.g. 2×12, 2×10), you find better stuff. You’re going to have to be picky, of course. Wilbur Pan built a fantastic Roubo out of 4x4s; he took his time collecting the pieces he needed.
If you’re lucky, you can find another grade of douglas-fir. This is sometimes called “old-growth” (and sometimes it is), and at other times it’s just called “clear.” In the photo below, the three pieces on the left were sold as “clear”. I got them at Minton’s in Mountain View, which has unfortunately been out of business for several years:
The two pieces with the holes in them were stretchers on my very first bench before I replaced them with wider stuff. They came dry and extremely well-dimensioned.
The two pieces on the right may look similar, but they are of much different origin. They were reclaimed from an old warehouse in San Francisco, and came to me by way of Bill K., to whom I’m very grateful. I built the Screwbo out of that stuff, and a friend back out in San Francisco recently completed a cousin bench that he calls the Jacques Roubo from the same source.
But wait–there’s more. What if I told you that there was douglas-fir with even tighter annular rings? Well, get a load of this:
That square sitting on top is metric (a.k.a. “sensible”), and each tick is 1mm. I found this board dumpster diving while a neighbor in SF was renovating. When I pulled it out, it was covered in some sort of contact paper and had been originally used as a shelf. (I’ve been working on making it into some kind of box for years now, but clearly not working terribly hard at it.)
OK, it’s stiff and strong, but will dent, especially while green. So far, on paper, this is pretty similar to SYP. But what happens when you take tools to it?
Mostly, it’s not too bad. Douglas-fir saws pretty well, and planing it works fine, too. If you like to pound nails into stuff, doing that when it’s is green is super easy.
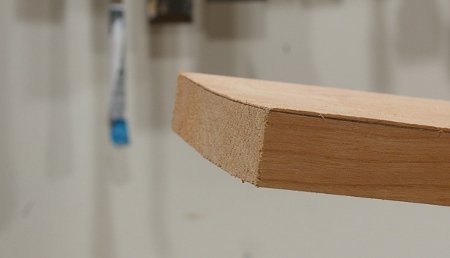
However, there are two properties of this wood that drive people nuts. The first is that it spelches horribly. Observe what happened when I did the same thing on endgrain with the smoothing plane that I did earlier:
All of my woodworking buddies out west know what I mean. Douglas-fir doesn’t just blow out at the ends. The fiber bond fails at a substantial distance from the end, and the wood really wants to follow the shake a long ways down (like being riven). The result is an appalling mess of huge splinters and chunks cracking off of the end. It will do this if you so much as look at it funny. I’m not sure why this is; it might have something to do with how strangely “dry” it feels to the touch. Redwood also pulls this stunt to a certain extent, for whatever that’s worth.
This effect is worst in green wood and gets marginally better as it dries and ages, but it’s still awful. The piece above is 100+ years old. It’s so bad that you have to be extremely cautious even when sawing boards to length–especially with a hand saw. If you don’t take the protective measure of rotating and sawing in from all corners before completing a cut, it’ll snap off badly, invariably in the most ugly way possible.
Still, with this awareness, you can prevent bad splintering, at least until some assclown mover decides to bang the underside edge of your benchtop onto the concrete.
The other thing that I dislike about working douglas-fir is how it has a tendency to wear your tools. Green stuff is OK, but the old stuff is especially cruel to your edges. You just seem to sharpen constantly. I ran into this when using my scrub plane to dimension the pieces of my bench, and that’s not a tool that usually needs a lot of sharpening. Just take a look at what it did to the sole of that plane:
Think twice about taking a woodie to douglas-fir.
It machines OK, just be careful about what kinds of blades (or whatever) you use. I imagine that the carbide-tipped stuff does a lot better against the old stuff.
Overall, this is an extremely versatile wood and should not be discounted when building a bench or in any kind of utility work. It’s very stable when dry, not moving much under different humidity conditions. I wouldn’t think twice about using it for a workbench base even if I were dead-set on a hardwood top. Speaking of which…
Beech
Now I’m going to talk briefly about two other woods that I’ve used in benches. The first is beech, which is pretty traditional for Europeans. It’s moderately hard, fairly heavy, and stiff. As with the softwoods we’ve just talked about, the fiber structure is quite fine, so you’re not likely to get crud caught up in places.
Beech is a go-to utility wood in Europe, where it’s been reasonably well-managed there for a long time. So it’s readily available and inexpensive there, and there’s pretty much no reason not to use it for benchmaking, at least if you’ve got it. The species that grows over here in North America is similar, but it’s rarely harvested, perhaps because we have trees such as the soft maples that are easier to manage. Still, you might find a sawmill that’s sawn one up.
For some unknown reason, beech happens to be one of my favorite woods, and I’m always interested in picking some up. There’s something about the grain that I like, but I can’t really put my finger on it.
That’s not to say, though, that beech is my favorite wood to work. It’s not too bad, but it will put up more of a fight when planing and chiseling than something like cherry or walnut. I also don’t like it when the grain reverses (sometimes old knots telegraph through in weird ways), but that’s at least rare.
I personally wouldn’t use it for a bench unless I had ready access to a lot of it, at least not entirely. I did use an 8/4 chunk for the very front piece of my benchtop, and that’s been great. The dog holes mostly went in that piece.
It’s really easy to machine.
Soft Maple
The last wood that I’m going to talk about for benchmaking is not an obvious one. When people think of a maple bench, they think of hard maple, because, you know… it’s really hard. When I think of hard maple, I think of a wood that’s a royal pain in the butt because it’s so freakin’ hard. It also isn’t cheap.
Soft maple, on the other hand, can be a joy to work as long as the grain doesn’t be a big ol’ jerk and reverse. It’s usually not as hard as something like beech, but it’s no pushover. And it’s also relatively inexpensive for a hardwood, but keep in mind that you can’t quite compare it to something like SYP in that regard. You’re also more likely to find big cuts of at a sawmill than beech.
When I was looking for a hardwood to line the front and rear of my auxiliary bench (just like I used beech on the front of the Screwbo), a board of soft maple immediately caught my attention. I’d picked it up at the lumberyard for odd jobs.
Seems legit (so far).
There are lots of other woods I’d like to explore for utility and benchbuilding work. For example, the “hem-fir” stuff that you find as construction lumber is full of intrigue; I have some of this. There just needs to be a reason to try. Perhaps I’ll never need to build another bench (mine has served very well), but there are lots of other things in the shop that need to be built.
With the coffee table in the finishing stage, it’s time to move on to the next thing. I haven’t quite figured out what the next furniture project will be, but I do have a fairly immediate need in the shop for something to help out with a number of tasks, including assembly, storage, and miscellaneous kinds of work.
There are a few partial solutions to this problem, including framing up a wall to add some shelves for storage, but due to current events, I don’t think I’ll be getting the help I’d prefer with the framing down there.
So I think I’m going to make another workbench, meant as an auxiliary to the Screwbo. The reasoning is that it will solve the immediate organizational problems, and then when I get around to framing the wall or something, I can move the new bench to another part of the shop, where I already know it will be useful.
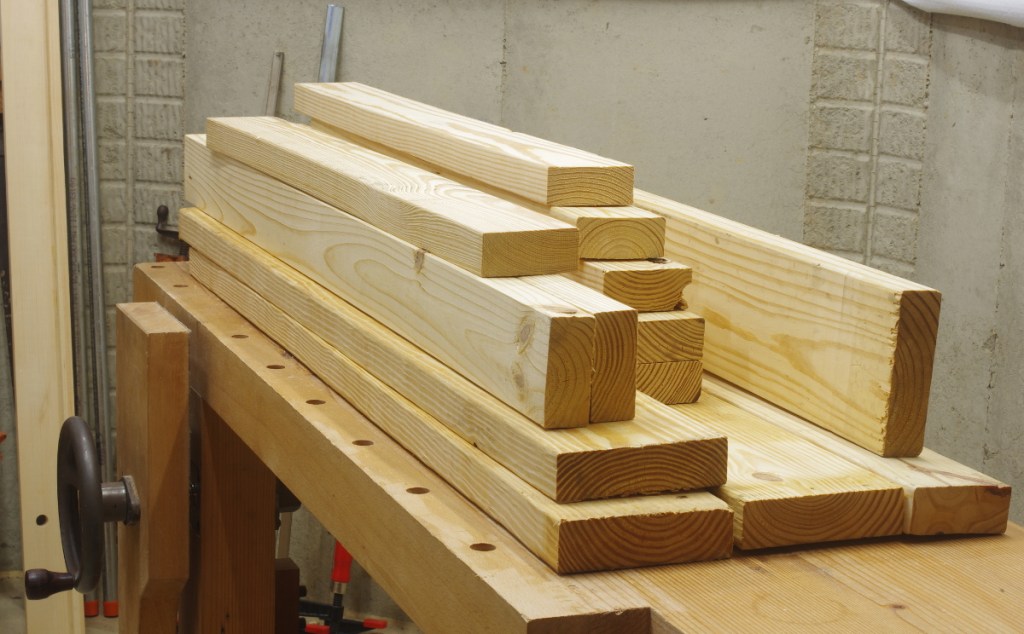
To that end, I picked through my hoard today to get some wood to get the frame started:
This is southern yellow pine. I don’t have a good source of it here (apparently the closest big-box source is in FredericksburgRichmond), but the borg nearby has “project wood” that happens to be SYP. The catch is that, due to bad planning, it’s cut into three-and-four-foot lengths.
The length should be OK, because I’m imagining something perhaps around three and a half feet (1060mm or so) long. I haven’t decided on the benchtop thickness yet.
This will be the first “big” thing that I’ve done in SYP. I made a stand with it about a year ago and was happy the way that turned out (even if it was sort of a quickie).
In any case, it’s a fair amount of wood to mill. Time to get rolling.
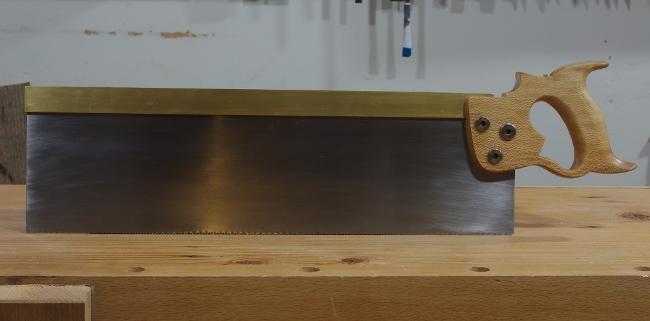
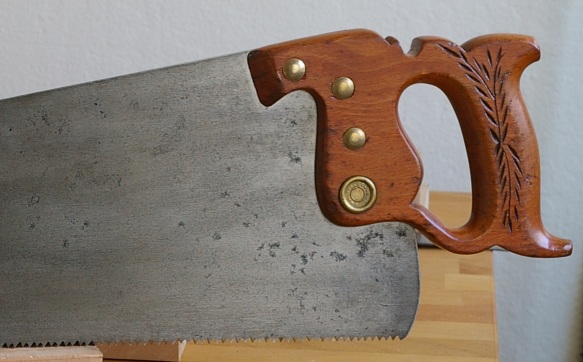
In my previous post, I briefly mentioned that I’d filed the plate of a new saw. I have now completed that saw; it’s a large tenon saw.
This particular project has been lagging for a long time. I’d gotten the plate and back from Mike Wenzloff several years ago, but they sat in a box for years. Finally, I filed the plate back in April. It’s 19″ long, and I filed it at 10TPI rip, with zero degrees of rake. Then it sat for a few more months until an informal gathering with some friends in June.
I decided to get started on the handle then. The wood is allegedly “Peruvian Pepper Tree” (Shinus molle); it comes from a piece that a local brought to a BAGathon several years ago and has been bouncing around several subsequent gatherings. I don’t really know if this is actually the wood here or not, but whatever; here’s a photo of the roughing-out process at my friend’s (awesome) shop:
(Later on in the day, I would get to use his Versa Vise. Very nice!)
This wood isn’t the worst thing I’ve ever worked, but it’s certainly got its quirks, namely wavy, reversing, interlocked grain (much to our amusement, as we initially tried to rive it with a froe). It’s about as hard as beech. I found it easiest to smooth it out with a scraper. Even then, I didn’t take a whole lot of care smoothing out the final surface, figuring that it would get dinged up anyway. (This hypothesis was quickly confirmed when I dropped it on the floor as I was just completing the rubout of the finish.)
I was initially going to use a Kenyon pattern for the handle, but decided on a Disston pattern at the last moment because I’ve been very happy with the comfort of the Disston-based patterns I’ve used in the past. I modernized certain parts (as I always do), but left this one mostly alone.
As usual, the finish is varnish. I used about five coats this time. The wood has some strange inclusions, but you can redefine those as “character.” Here’s a closeup of the completed handle.
The saw hardware is my usual (see herewhoops, cross-reference broken for now). Here’s the whole saw:
All of this is fine and good, but does the saw work? I picked up a piece of the wood that I like to hate the most (some really hard birch), and checked to see if it could saw straight and quickly:
Hey, it wasn’t so bad at all. I came to my senses and switched to a bench hook to finish off this test cut:
Then I tried it on some less horrible woods. It slices through yellow-poplar like butter.
So it’s done. It would have been nice to have had this saw for the big tenons on the workbench project last year, but that’s the way it goes.
It’s been five years since I made my first post on this blog. At that time, it was on Livejournal, and I was doing it just because it seemed like a good idea at the time. Apparently, I’m still posting, so because it’s been a nice “even” number of years since I started, I figure I ought to do a review post because I have nothing better to do.
(You won’t see too many of these posts on this blog, so bear with me.)
Before starting, I should mention something about the name of the blog. It doesn’t mean anything. It was just something that rolled off my tongue. It is a dippy name, it’s difficult to remember, and I’ve always been open to changing it. Unfortunately, I couldn’t think of anything better at the time, and that condition persists to this day.
The first post is my introduction, but perhaps there’s a little more that I can add to it. At that point, I had never done anything resembling semi-advanced woodworking. In hindsight, this was a natural time for me to start because I’d finally gotten some measure of stability in my life after years of grad school, moving across the country, working in crazy environments, and living in cramped places. I’d moved into that particular San Francisco apartment not too long before. It was nice and roomy, I lived alone, and I finally had some extra time. Sure, I’d like to have started earlier in life. I didn’t, so there’s no point in thinking about that.
Regarding tools: I don’t know what was going on in my mind, but I must have been researching old tools quite a bit. For example, how did I know that I needed to sharpen my own saws at that time? My initial tool list wasn’t too far-off. I still haven’t bought a shoulder plane unless you want to count the mini Veritas version. And although I have a miter box, I haven’t used it (I haven’t even sharpened the saw). But I had one special tool right-on, and that was the Winchester handsaw I’d picked up (but never used) in 2003, three years before starting. It was a long time before I actually sharpened that thing, but ever since, it’s really been one of my favorite tools.
That a very common style of saw is special to me may provide some insight into the type of woodworking that I like to do now. I feel that I went after too many planes in the beginning, and did not realize the amount of work that saws do. In time, I began to appreciate saws more and more, and even made a few of my own.
I thought that I would be very project-oriented when I first started. I had the idea to make bookshelves–perhaps I believed that I’d make them within a year? I was wrong. I still haven’t made a set of bookshelves (I did make a prototype). What I did instead was learn the process of milling wood and basic joints. The first larger thing that I put together was my workbench, followed by tools such as my mallet and scrub plane.
But about a year and a half into the process, I slowly made a dovetailed box, and that got things rolling. Though I didn’t have much time to work on it, that box went together more smoothly than I expected, and I still use it. By this time, things were changing in my life, and soon enough, I moved from the apartment to a house that actually had room for a shop. I spent the first few months trying to get organized there:
Then I started to build projects in earnest. The first big one was the shoe rack, which took some time but ultimately was a success. That was followed by the prototype bookshelf, the stool, and the first nightstand–I did all three of those projects in less than a year. At the same time, I made some shop improvements such as the saw till.
Incidentally, I switched the blog to the galoototron.com domain about a half-year after I moved to this shop. It was September 2009, and this shoe rack post was the first on the new domain. Before the switch, no one other than some family and friends knew about the blog, but then I started to tell a few more people (such as Luke Townsley at unpluggedshop.com) about it. Suddenly a lot more people than I really ever expected were reading this thing. That’s about as far as I ever went to promote it, though, and I don’t have plans to change that. I do appreciate all of the comments that I get from fellow woodworkers.
In retrospect, the two years I had in that shop were pivotal. I went from dorking around with tools and wood on a somewhat irregular basis to building projects. I gained speed and confidence in my joinery. The shop itself had a lot to do with this. No longer did I have to be completely fastidious about cleaning up after each session–I could leave a small amount of shavings or sawdust on the floor and it didn’t matter. Because I had enough room, I could put down my work at any time and pick it up again whenever I had the chance. This helped me establish a work pattern; I’d come home from work and have fun with a project for as little as 10 minutes or as much as an hour and a half before finishing for the day. I could even do a little in the morning before I went to work.
Of the projects I built in that shop, the nightstand seems like an obvious choice for a favorite, and it is. However, the little stool is a co-favorite:
The nightstand was the last project I completed there. Then, in the span of a few months, life got really busy, and after that, I moved again.
The new place also had room for a shop but it was more “raw”–as part of a garage, I really had to work to define the space. The old shop had room for me to put tools on tables all over the place. It was mostly disorganized, but I sort of knew where everything was, so I managed. There was no room for that in the new shop. To make up for it, I was allowed to hang cabinets, racks, and hooks on the walls and ceiling to my heart’s desire.
Unfortunately, I wasn’t able to get the new shop organized quickly enough for my taste. Part of this was a chicken-and-egg problem; the tool cabinet is an example of this. My first task in the new shop was to get some of the tools on the walls, and I had to finish the cabinet so that I could put tools in there. Unfortunately, my tools were all packed away in boxes (from the move) that surrounded the workbench. I really had no idea where anything in particular was and I didn’t have places to put them temporarily.
At the same time, I also had more furniture to make. The second nightstand project kicked off this year, and it turned out to be far more complicated and time-consuming than I expected. (And I’m still working on it, but I’m almost done.)
Every now and then, I add to the wall storage in the shop. That situation isn’t fully resolved (see below), but it is much better. Things are getting done, and I have to say that I prefer the new shop to the old one.
Also, I’m making a concerted effort to work out some of the annoying little stumbling blocks that I have to deal with from time to time. The two biggest problems I come across are tool and project storage (both temporary and permanent) and workholding. I have plans to solve those soon.
Going forward with projects, I have a long list in front of me. The most pressing, according to those in the know, is an entertainment center. We’re also looking at the rest of the living room–coffee table, bookshelves, who knows what. With the exception of our couch, the living room furniture is crap and it makes sense to concentrate on that room. Whatever I do, I’ve decided that I’m not going to make anything as brutally complicated as the second nightstand project(s) for a while.
But then again, I may just make more complicated things. Here’s how.
The title of this blog is no lie. Everything I do is by hand, and that includes stock preparation. I didn’t go down this road out of principle or some other similarly silly reason. I did it primarily out of interest and necessity–the apartment I once lived in was no place for power tools.
Unfortunately, it turns out that flattening, thicknessing, and resawing by hand is a lot of work. A large majority of my time and effort goes into stock preparation. That’s not even mentioning how much time I spend sharpening plane blades as I go. It’s getting out of hand. I can flatten a board quickly now (and wow am I glad I learned), resawing isn’t so incredibly horrible when you keep your saw blade sharp, but that last step of getting down to final thickness is totally bogus when you have to repeat it dozens of times, even with my scrub plane that can take off 1/16″ at a time.
So I think I’m going to get myself a stupid lunchbox-style thickness planer sometime in the new year. I’ll continue to flatten stuff by hand–it’s a great way to get to know the wood and the board that you’re about to use–but when it comes to getting that other side down to something reasonable, I won’t think twice about feeding it to a machine. I’ve got furniture to build and I do not have the time to lollygag.
However, the blog remains the same. The preceding paragraph (I hope) will be the only mention. I don’t plan to write about it when it happens, and I’ll continue to do all joinery by hand.
At this point, it would be remiss not to mention that I’ve had help. Schwarz says that the modern woodworker works alone and I think he’s wrong. Even if one never meets another woodworker in person, and even if one never takes part on a discussion forum online, the modern woodworker has an incredible resource mass available. It’s sometimes easy to overlook that a person wrote what’s on your screen, and when you learn something from someone, that person is very much with you in spirit as you work.
And wow, have a lot of people been working with me in spirit in my shop. There are just too many to list, but I’d really like to thank anyone who’s written anything that I’ve learned from or even read.
Also, there are the BAGs (Bay Area Galoots). Several of you have really helped me out in more direct ways–lending me tools, giving advice, being generally cool, that sort of thing.
Now, back to the work on the new nightstand projects. Progress has been (inexplicably) made.
This year’s Bagathon (Bay Area Galoot meetup) was last Sunday, awesomely hosted by Greg Isola. Upon arrival, most of us wandered into his shop to check it out and there was a lot of drooling. (He’s got one seriously nice shop.)
I’ve gone to this event every year since I got into woodworking and started this blog, and it really is a treat. Seeing all of the tools that attendees bring along is one thing, but the demonstrations and interaction that you get with fellow woodworkers is priceless. It’s strange to wrap your head around this, but five days out of five years have really accelerated my work.
There was no shortage of good demos this year.
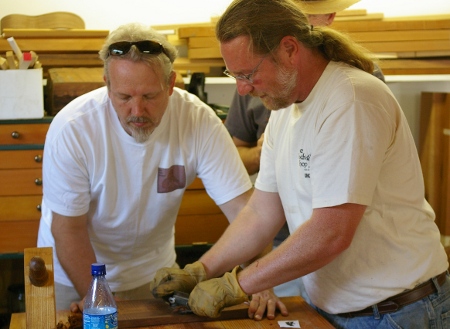
Mike Suwczinsky did a demo on scrapers, starting with cutting up beat-up handsaws. Here he is on the right demonstrating the use of a #80 cabinet scraper (if it’s not a #80, let’s pretend that it is):
That’s Bill Kasper on the left, sort of steadying that nasty piece of cocobolo.
Note the attire: Bill’s got a BAG shirt, and Mike’s outfitted in the more traditional Woodwright’s Shop garb. Not feeling content to leave it at the shirt, Mike also gave himself an Underhill-style cut on his arm (see foreground). Unfortunately, we weren’t filming, so we have no idea how he managed to do it.
Tom Conroy gave a demonstration on leather-bound bookbinding, gluing a piece of leather to a cardboard book cover. The technique is a little similar to how you might glue leather to a desktop. It was fascinating to see how one massages the material into place, and also how you can form it to shape with glue (and water).
Kirk Eppler demonstrated how to make leather sheaths for axes, adzes, and tools of a similar nature. This was fascinatingly easy-looking–installing the rivets and snaps appears to be a quick process once you’re used to it. Mike made one for an axe.
A perennial feature of Bagathons is the wine box feeding frenzy. Greg Hahn shows up with a whole bunch of empty wooden wine boxes, and we take them. This year, our host had the idea to surprise him, so several people brought projects they’d made with the boxes. A great many of these are tool holders, as you can see:
Greg H showed us his appreciation in advance by bringing another truckload of wine boxes. Thanks, Greg! Also, thanks again to Greg I for hosting, and to everyone who went.
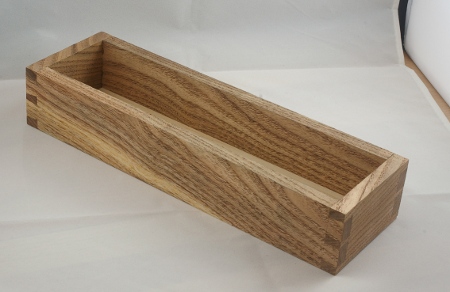
There I was, working on the latest project, when SWMBO approached and asked for some sort of container to put in the cabinet for some spices. She drew something that suspiciously resembled a box, so I inquired, “would a box work for this?”
Affirmative was the reply, and in the words of Topato Potato and Sheriff Pony, it was time to “spring into action!” The valiant woodworker never misses an opportunity to trot off to Mount Carcase to face off with the Dovetail Dragon, no?
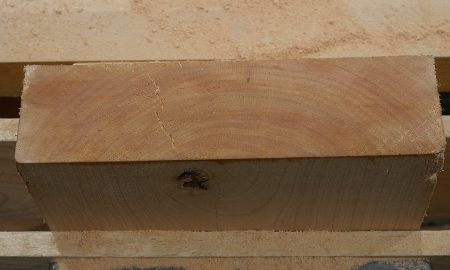
I selected a target and started milling. Then I realized that the chunk I had chosen didn’t have enough wood to make the piece, so I looked around for another piece, which turned out to be this:
It was a measly offcut from some much larger board that I’m saving for a rainy day. Making the second call to “spring into action,” I was successful at milling the necessary pieces.
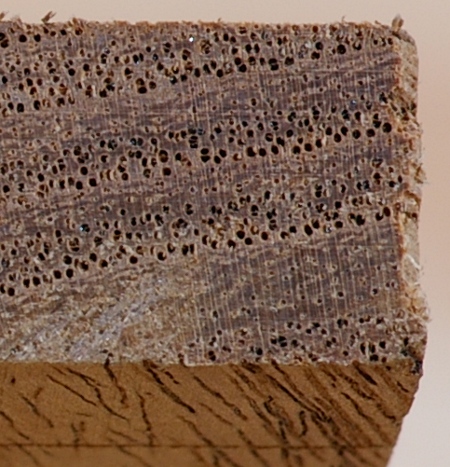
At about this time, I realized that I had no idea what this wood was. I still do not. Here is a cross-section of this ring-porous (without tyloses) angiosperm for the sole purpose of an excuse to use the macro lens again, and on the off-chance that one of you crack wood identifiers knows:
At this point, I just made the box. I think most of everyone who reads this knows about through dovetails, so I’ll digress on that. The sole excitement was getting to use the 1/8″ blade on the Stanley #45 for the groove on the bottom, and since that doesn’t reach high enough on the excite-o-meter, let’s just skip to the end.
When you’re resawing by hand, there is a big consideration in determining how difficult it’s going to be: Under how much stress is the wood? There are two big factors that I’ve noticed:
The cut of the wood
Moisture content
Let’s start with the moisture content, because that’s perhaps a little easier to understand. Green wood is usually under a lot less internal stress than dry stuff because that’s more or less its natural state before being cut down. As R. Bruce Hoadley’s book explained, you can cut slices off of a fresh log and it won’t crack apart until it starts to lose moisture. Sure, there might be pitch, resin, sap, or whatever else inside to make it more difficult to cut, but it does mean that the wood will be less likely to close up on you.
Because I rarely get the chance to work with green wood, the cut of dry wood is what causes me the most grief. Dry wood is always under stress of some sort; it’s unavoidable because you’ve taken away the water that was maintaining equilibrium when it was (probably) a stable, living organism. What you want is another state of equilibrium where the lignin is strong enough to hold everything together without cracking. Quartersawn wood is great because it’s under the least stress–because it’s got a consistent density pattern across the cut, it dries evenly and doesn’t tend to cup. Just a little more shrinkage at one end is pretty easy to handle.
Well, that’s nice, except that quartersawn wood is more expensive and it’s a lot harder to find than flatsawn stuff (not to mention that the figure may not be what you’re looking for). So this is the sort of thing I usually end up with:
This is a cross-section the 8/4 stock for the new nightstands that I wrote about earlier. The wood on the bottom that’s closest to the pith (center) is under a lot of stress. You can see a minor check here–this was due to that knot and its proximity to the end of the board.
You can see that this board was fed through a planer a little after drying because the cross-section across the cut is flat. But below is what happens when you resaw it:
That pencil line (and the sawcut) was straight when I started, but as I got further into the cut, the stress along that cross-section was relieved slightly, and this cupping was the new state of equilibrium.
The problem is that this stress relief is a major pain in the tuchus when you’re resawing dry flatsawn stock by hand. Basically, some part of the wood inevitably closes up around your saw as you are sawing, and you find your saw incredibly hard to push or pull through the cut, especially if you’re using a deep-bladed affair such as a Disston handsaw. It’s less severe with a frame saw, but it’s still there.
To work around it, break out your wedges and keep tapping them in as you’re working:
They’ll keep the kerf from closing in around you and it will be easier to saw. You really want to put them in as soon as you can, because the easier you saw, the straighter your cut will be. If your blade is pinched by the wood, it is being bowed out of a straight line, and your cut will wander.
Wedges are easy, except for one minor detail. You mostly want to be working like a bandsaw, perpendicular to the grain. However, when working with a fairly thin blade such as this, you need to be able to establish a shallow kerf in both sides so that your blade can track inside. To get these small kerfs, you need to tilt the saw at a diagonal, and this is precisely where the wedges and/or stress-relieved wood will get in your way. If you pop out a wedge or if you’re not able to drive them in deep enough, the wood will close up around your blade.
So what you often end up doing is tilting the saw just a little and establishing a small kerf until you can get deeper.
A bandsaw arguably does this better, because it always cuts perpendicular to the grain because you’ve got a fence, and the blade will always be cutting next to some (hopefully) straight wood. But that’s not to say that the wood isn’t under stress and isn’t closing around the wood–it is, and that’s why you’ll hear a POP at the end of a particularly nasty cut. You need a fairly beefy bandsaw to resaw wide flatsawn stock. You can cheat a little with wedges by turning the machine off in mid-cut, banging some wedges in, and resuming, but this is to be avoided if at all posssible…
As far as the current project goes, I’ve chosen to cut the thinner slice from the more stressed parts of the wood, the “pith” side. The result is that the thicker slice, having a more consistent density, mostly retains its straight profile, but the thin slice (shown above) cups like crazy. My plan is to make those thin slices into panels, where I can use their more interesting figure to my advantage, and not care about their increased instability, because they will be flexible and slide in grooves.
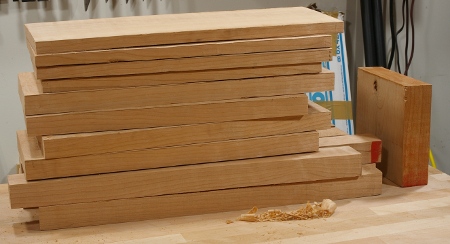
That said, here is what became of that 8/4 piece of cherry in an intermediate state (the chunk on the right is what remained at the end and I probably won’t use it):
It’s hard to believe how large that board used to seem, and now it’s so much more compact. The crazy thing is though it’s not much different in volume (I was actually efficient at slicing this for a change), it seems like it’s a reasonable weight now, whereas before, it was really unwieldy. Of course, there will be a significant change in volume when I whittle those panels down to desired thickness.
Eh, whatever. What it boils down to is that I’ve got my new project frames right there! There are a few more notes I have for how I chose to cut this, but I’ll save them for a later post.