This might seem like an obvious topic, but I don’t know if I’ve ever discussed it. To be clear, I’m not really talking about species selection here. It’s more a matter of the individual boards that you incorporate into a project and where they end up.
Wood selection might not stand out as one of the most compelling reasons to bother to learn woodworking, but it’s at least an implicit reason. If you’ve ever seen one of those kitchens with the cherry cabinets that were popular about 10-15 years ago, you know what I mean. These typically don’t have any rhyme, reason, or consistency to the boards making up the frames and panels; they often look like they were made up of many different species. It’s the same way with a lot of more expensive factory-made furniture as well. Well, if that doesn’t drive you nuts, the pocket joints will.
So this relates especially to my current project, the coffee table, which has a frame made of walnut. Like cherry, walnut has a high degree of variability between trees, boards from a tree, and often even within a single board. To try to get everything as consistent as possible, I always try to group pieces according to location and function, then map those groups to boards. The fewer boards, the better. Then you start working on the puzzle of where everything fits. Here’s where I’m at on the frame:
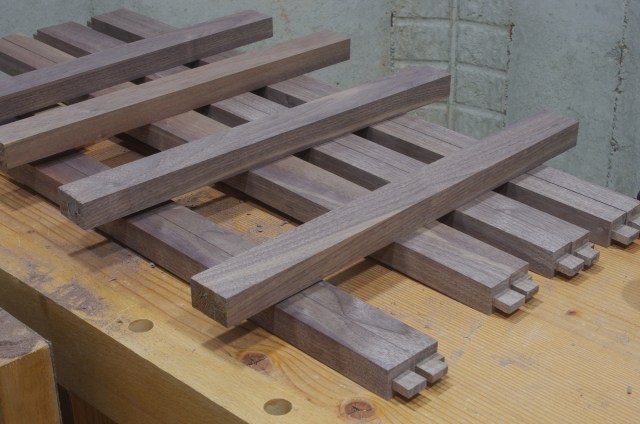
There are two stretchers per side between the legs, and they are paired (bottom layer) in this photo. Between those stretchers will be two inner frame pieces. The boards on the top layer of the photo will each be cut in two make those pieces. The pair on the top will go with the board on the right, the next down is second from right, and so on.
All of these pieces came from the same board, which made it a little simpler in some respects.
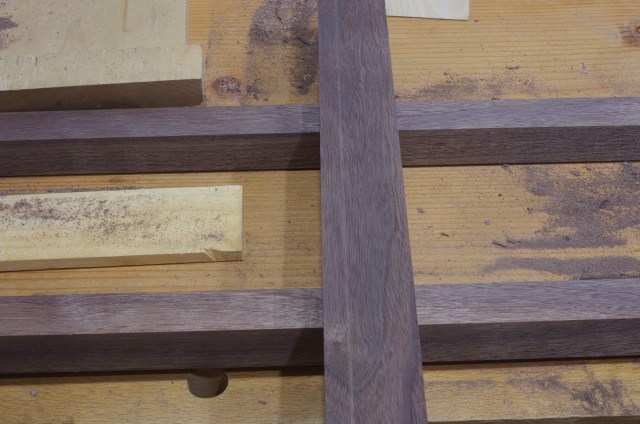
If you look closely, you’ll see that the grain orientation (top side in the photo) of each pair matches, with the rear pair being quartersawn, the next one mostly quartersawn, and the front pairs flatsawn. These are chosen to match the legs. Recall this photo from the last post:
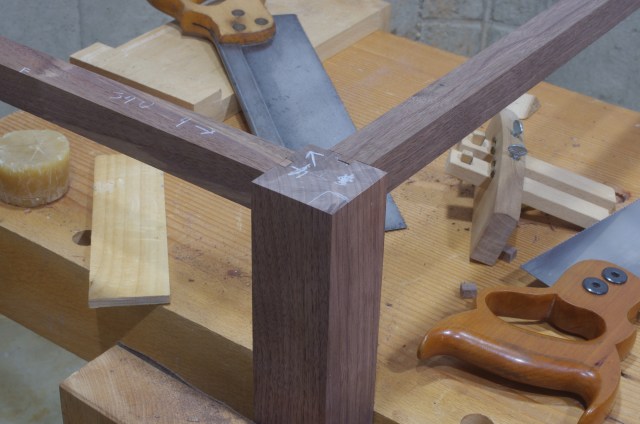
That leg is the trickiest part of the arrangement because it’s riftsawn. But it mostly resembles flatsawn on the left and quartersawn on the right, and the legs on the other ends are definitely in that orientation, so the pairs of stretchers are chosen accordingly. (The other legs are much more straightforward in orientation and have obvious matches.)
In any case, the flatsawn sides oppose each other, as do the quartersawn, making it easier to arrange the legs. And the oddball above is going in the “rear” of the table to keep it mostly out of sight anyway.
Let’s take a closer look at some of those stretcher pairings, starting with the quartersawn:
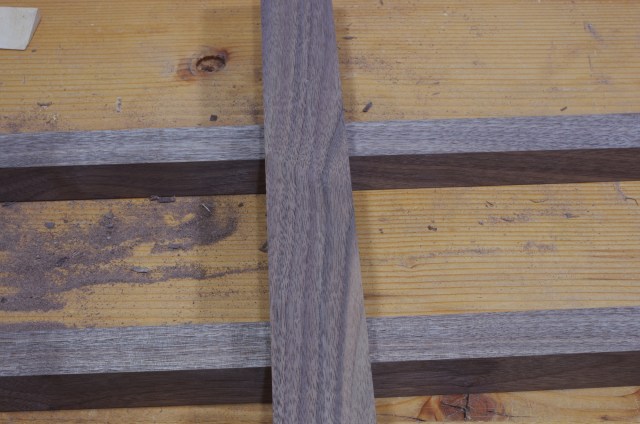
And now the flatsawn:
If you look even closer at this one (and the pairing in the post’s first photo), you’ll notice that the horizontal stretchers were cut not only from the same board, but right next to each other. This might seem a little crazy because the upper ones won’t even be really all that visible (the top will overhang, obscuring them), but it’s the kind of thing that I like to be in the habit of doing.
So I guess I spend a lot of time thinking about this kind of stuff. It might even be worth it.