Tongue-and-Groove Without Match Planes

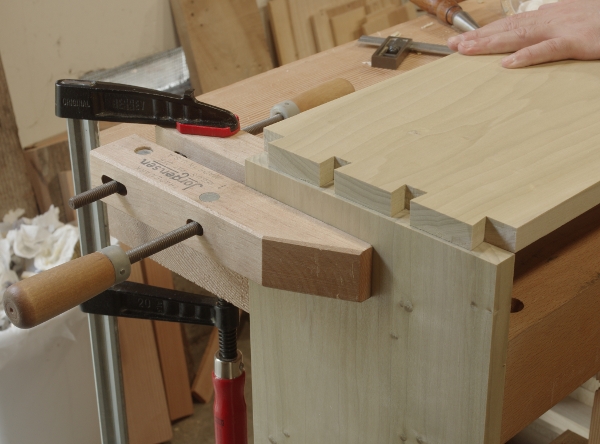
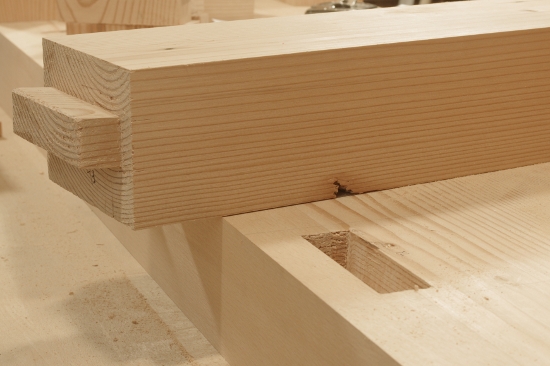
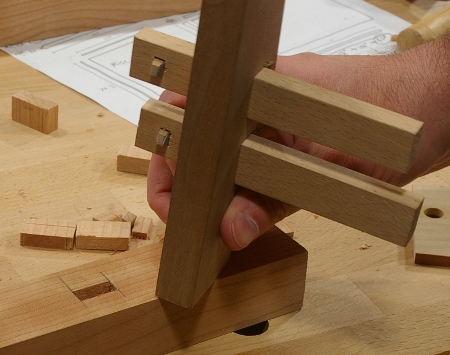
In my small chest build, I started working on the bottom. This is usually done with a series of tongue-and-groove or shiplap joints. I prefer tongue-and-groove, but although I do have a set of match planes (and a Stanley 45), they are for 1/4″ grooves, and I’m working with stock where 3/16″ would be more appropriate.

Match planes are great for pumping out a lot of tongue-and-groove joints. To do it at almost the same speed, I could spend $30 on the Veritas tongue-cutter for my plow plane in that size. But none of this is necessary, and I didn’t feel like waiting around for that cutter to arrive anyway. So I set out to do it with the plow plane. Doing so requires three cuts instead of the two that you’d need to do with match planes; the tongue is nothing other than two rabbets.

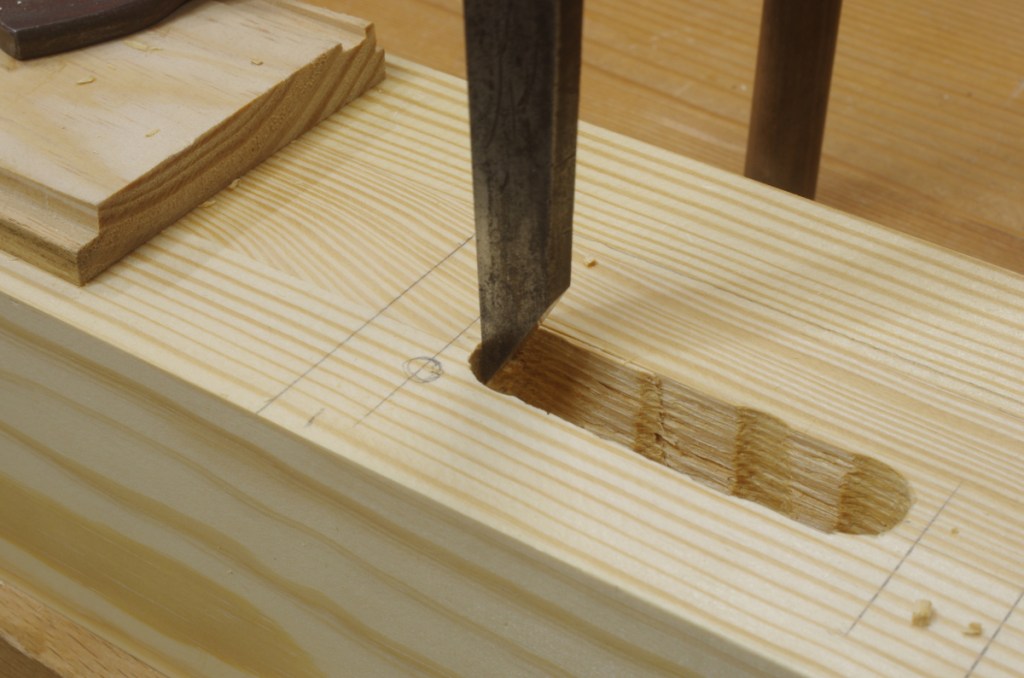
You start by plowing the groove side, which is the same no matter what:

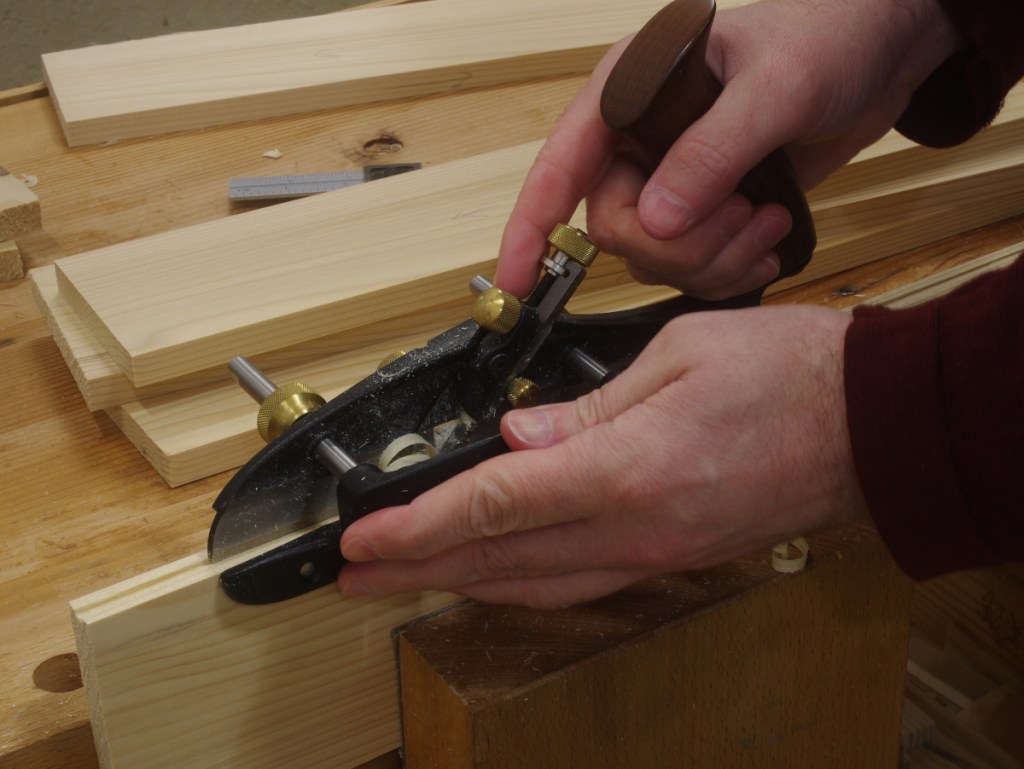
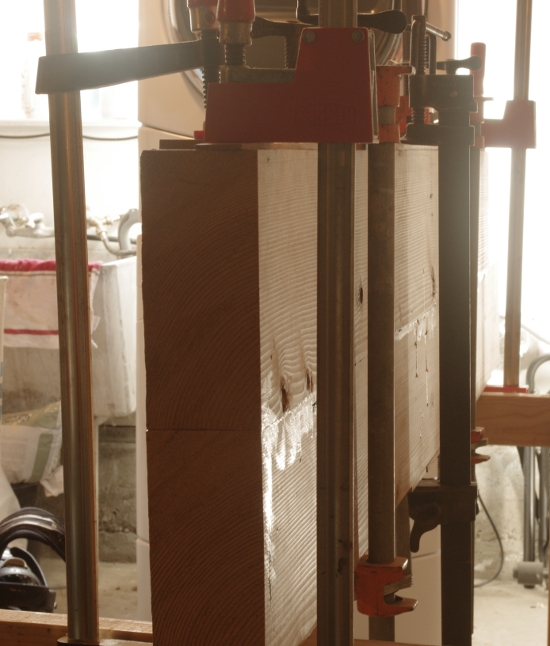
It’s best to plow all of the grooves at the same time, so that you don’t have to constantly readjust your plane.

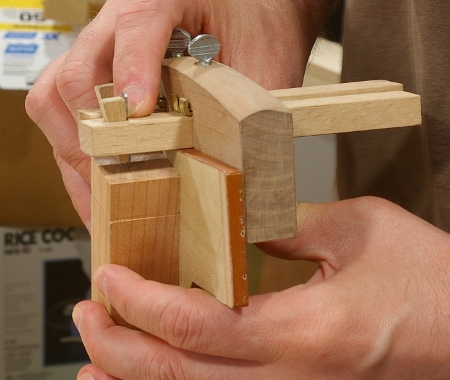
Then, with the groove side still up, adjust the fence so that the cutter sits right on top of the “outer” side of the groove (the side opposite the fence), with the sides of the blade and groove flush:

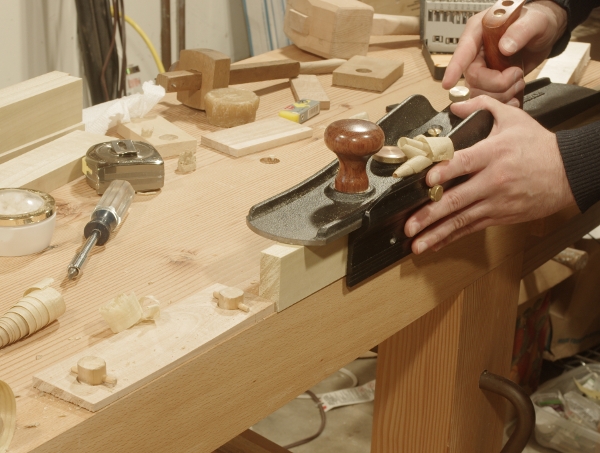
This is where I have to say that I really like the Veritas small plow. I could do this with my Stanley #45, but moving and locking down the fence on that thing is finicky and difficult to do with precision.

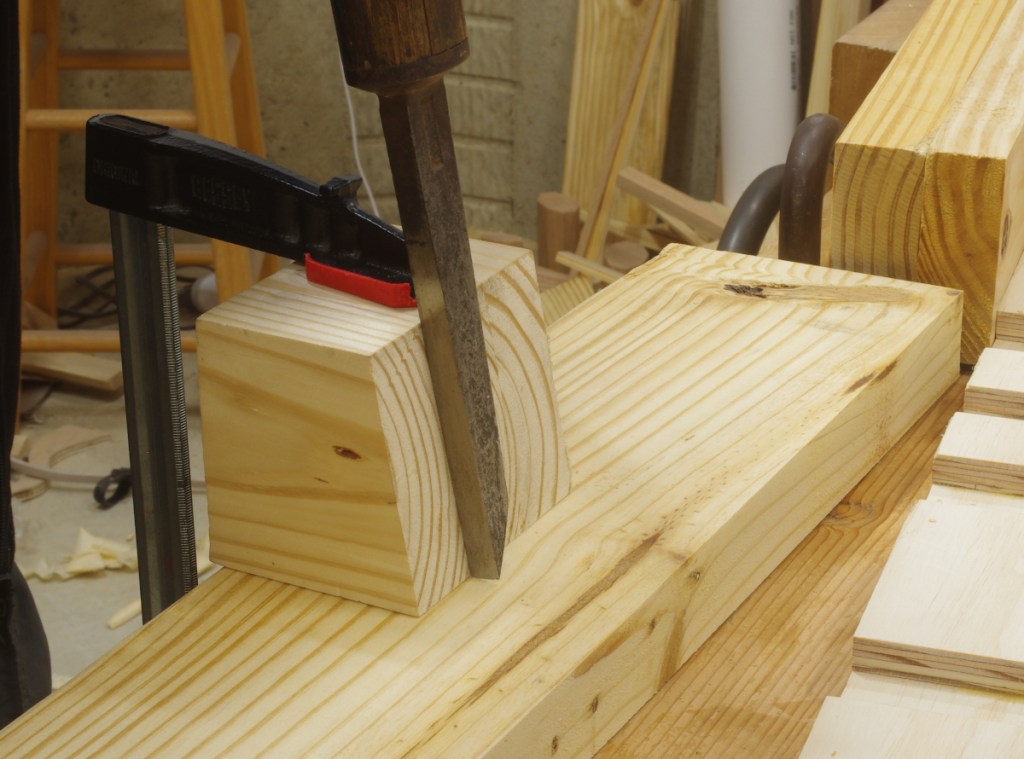
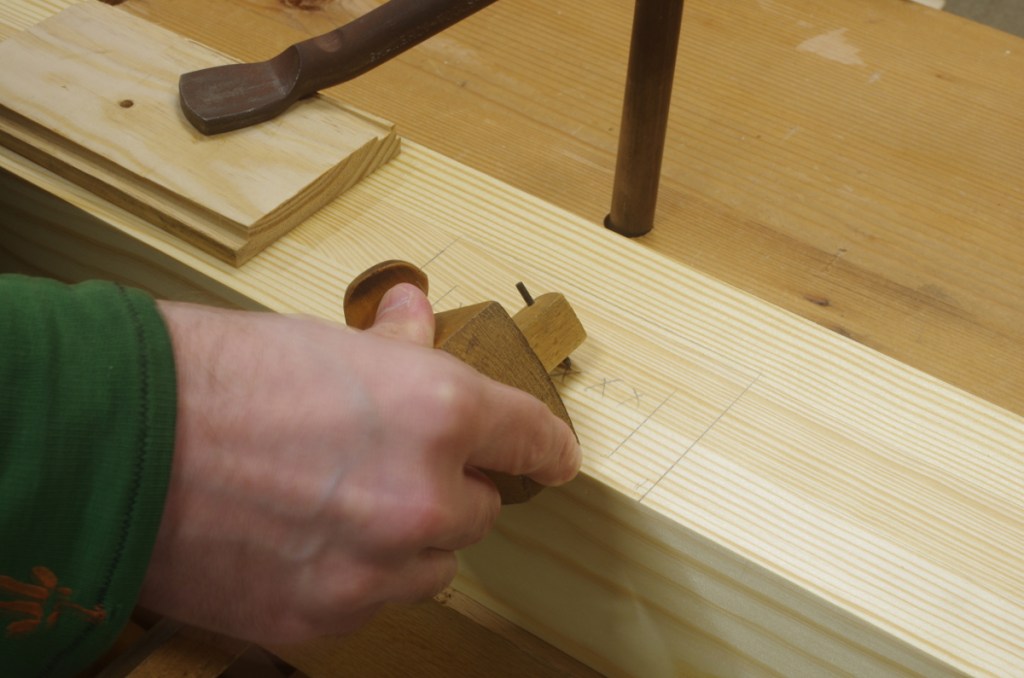
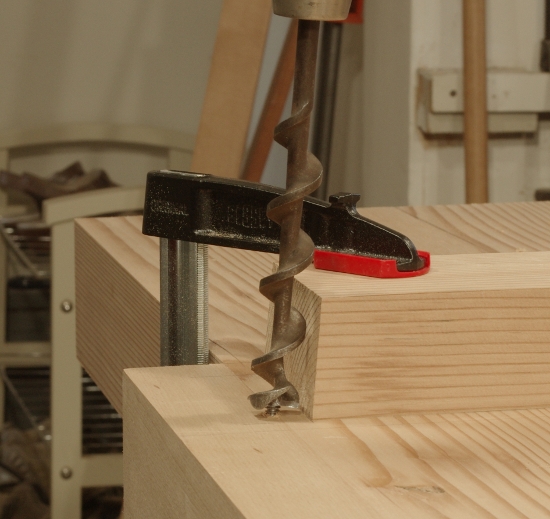
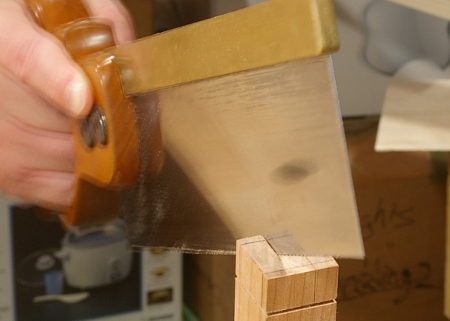
Now, flip to your tongue side of a board, and (here’s the important part) clamp a scrap to the side that you’re going to cut, flush to the top. Then cut this side of the tongue:

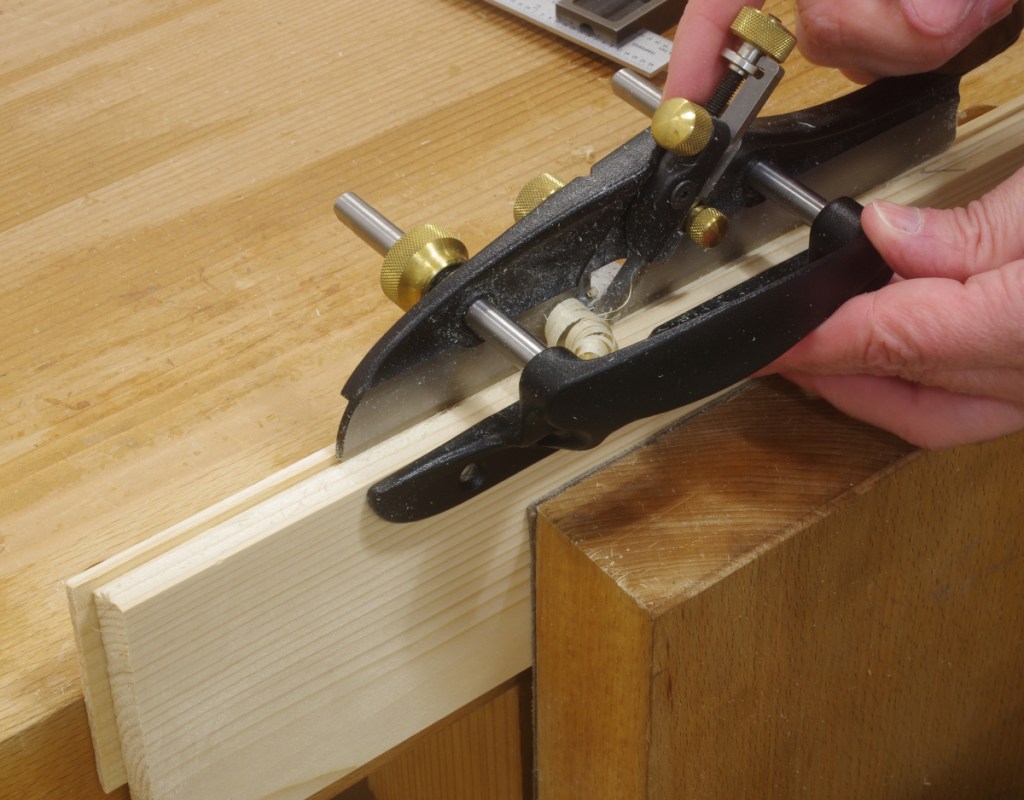
The reason for the scrap is so that your depth stop (which is usually on the side opposite the fence) has something to hit when the cut is complete. Yes, I made the mistake of forgetting to do this on my first attempt.

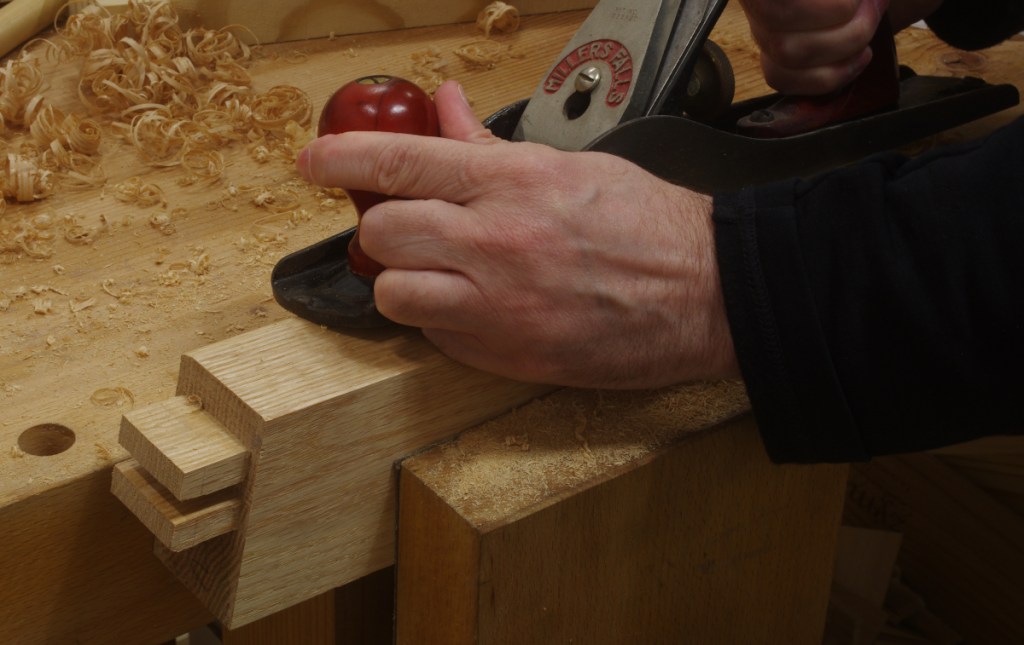
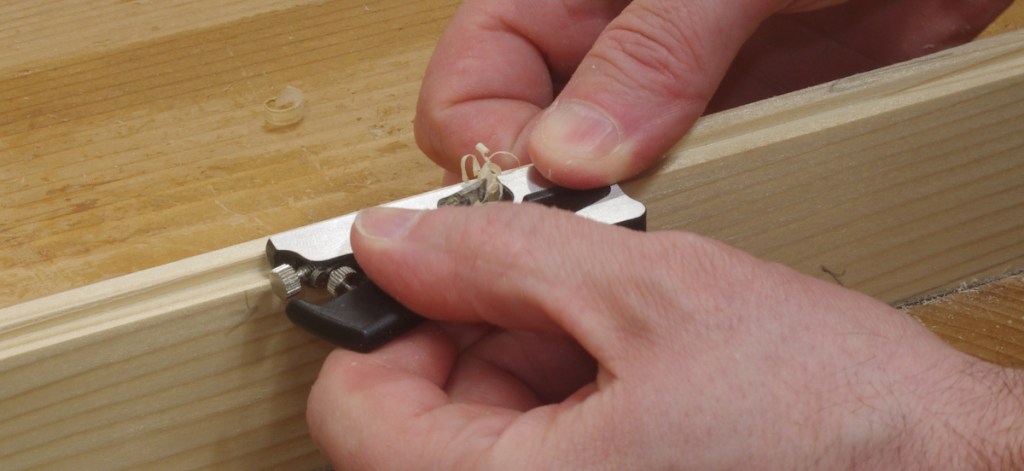
Again, it’s best to cut all of your boards at the same time. Then, put a board’s groove side up again, and set the fence so that the cutter rests on the “inner” side, like you did before:

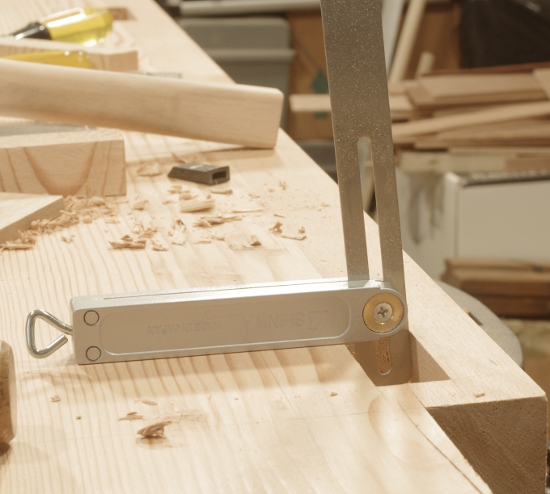
This one is more difficult to see, so feel free to use any optical method of cheating that comes to mind.

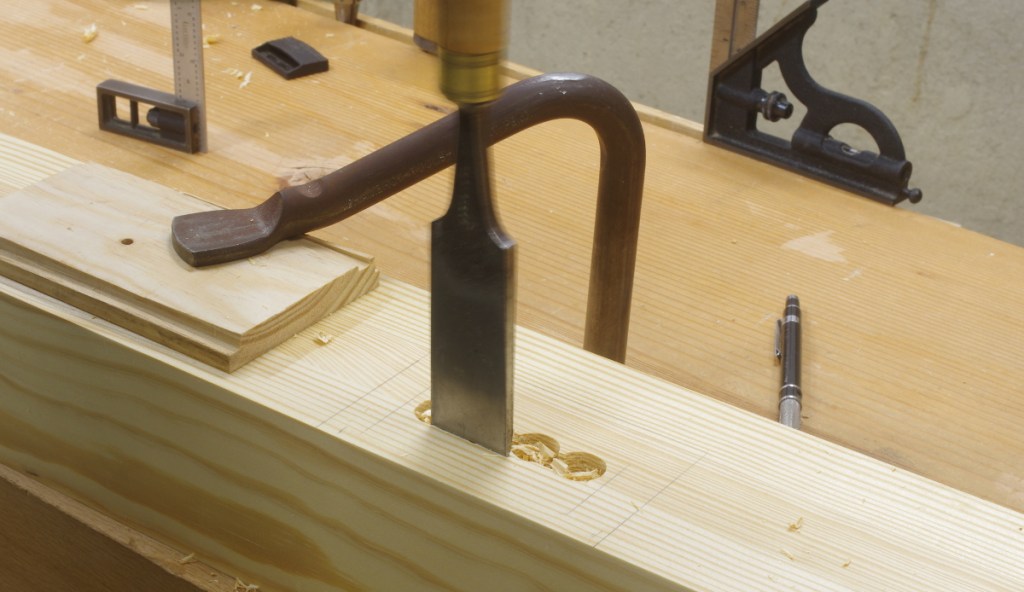
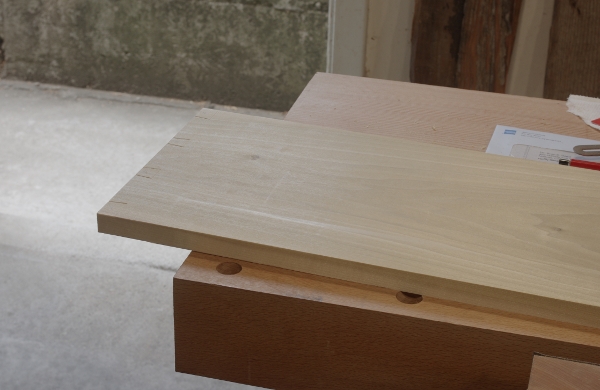
Then flip back to the tongue side, and cut this second rabbet that makes the tongue:

You probably won’t need to include the scrap this time, because the depth stop should register against the tongue itself.

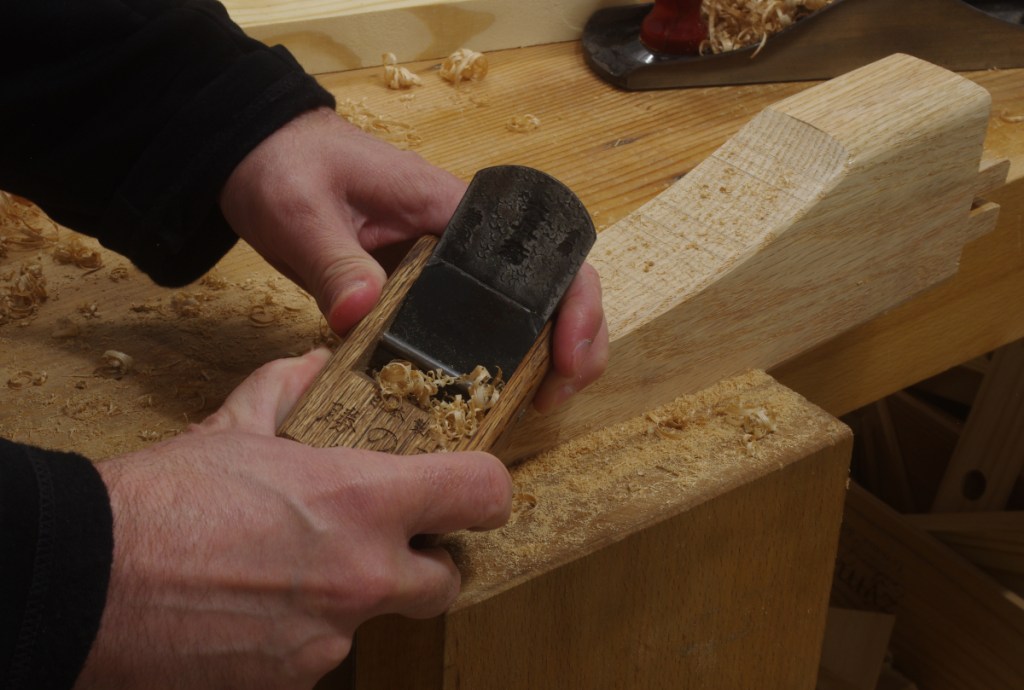
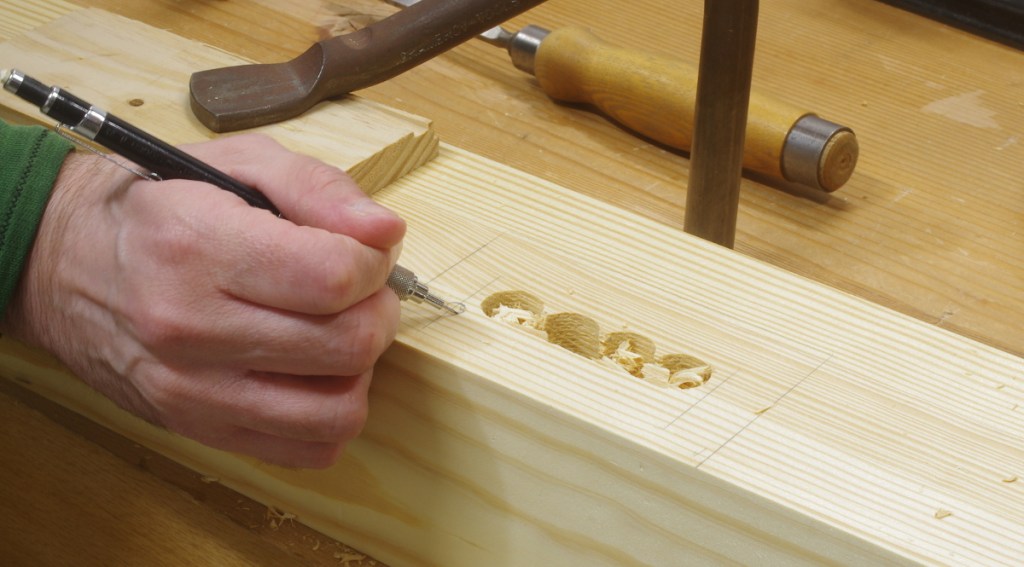
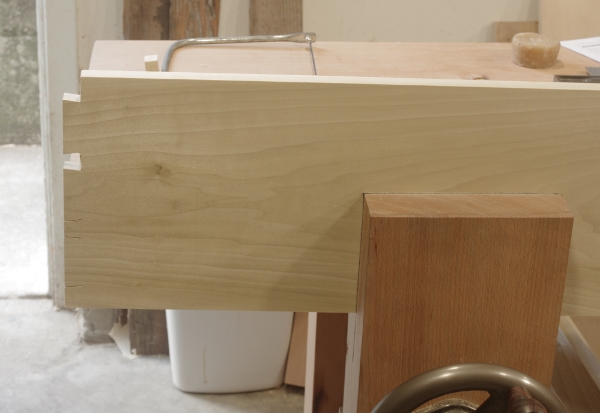
It’s possible that you might feel that the fit is too tight when you’re done. In that case, just adjust the “inner” side with a rabbet plane. I’m using my miniature shoulder plane because I recently said that I seldom use it, and I feel guilty for that. Or something.

If you’ve got a lot of these to make, one possible time-saver is to reset the fence to the trimmed side after you adjust the first tongue.

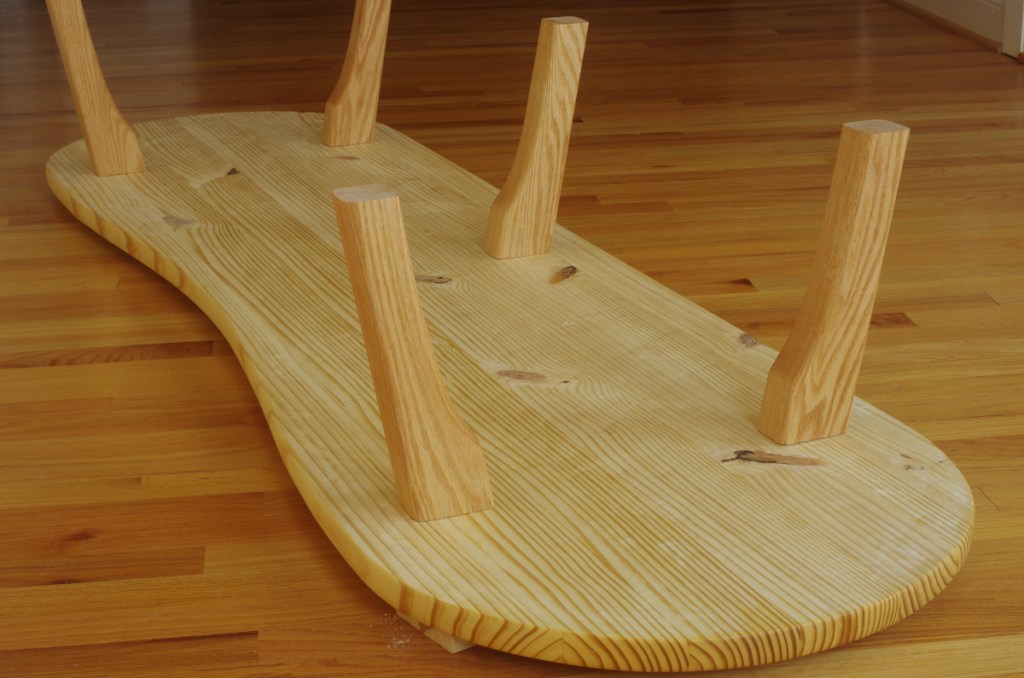
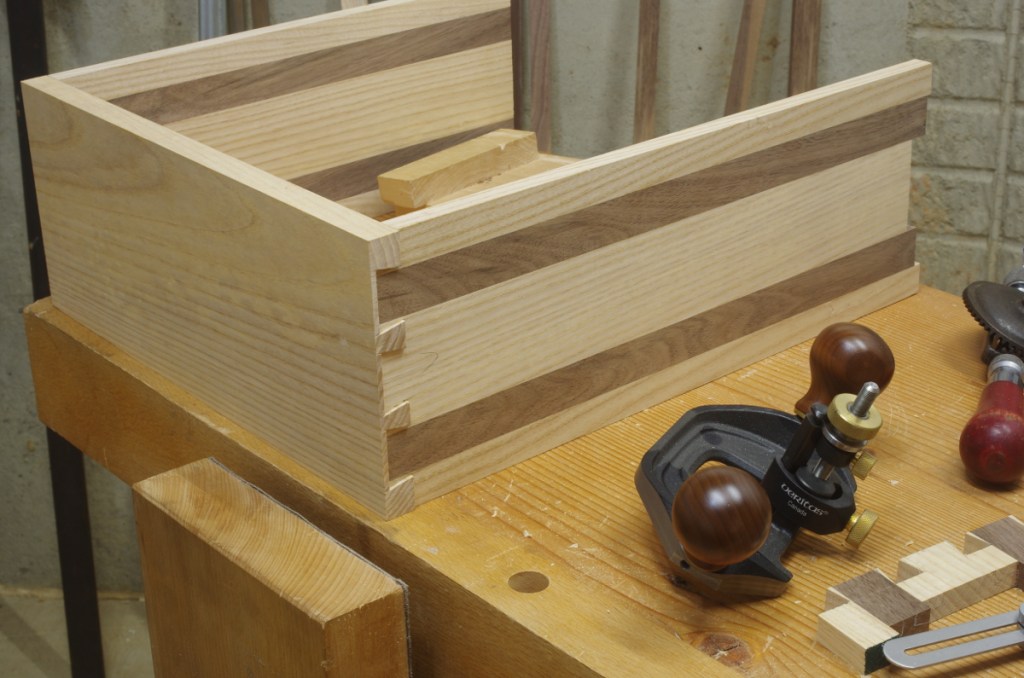
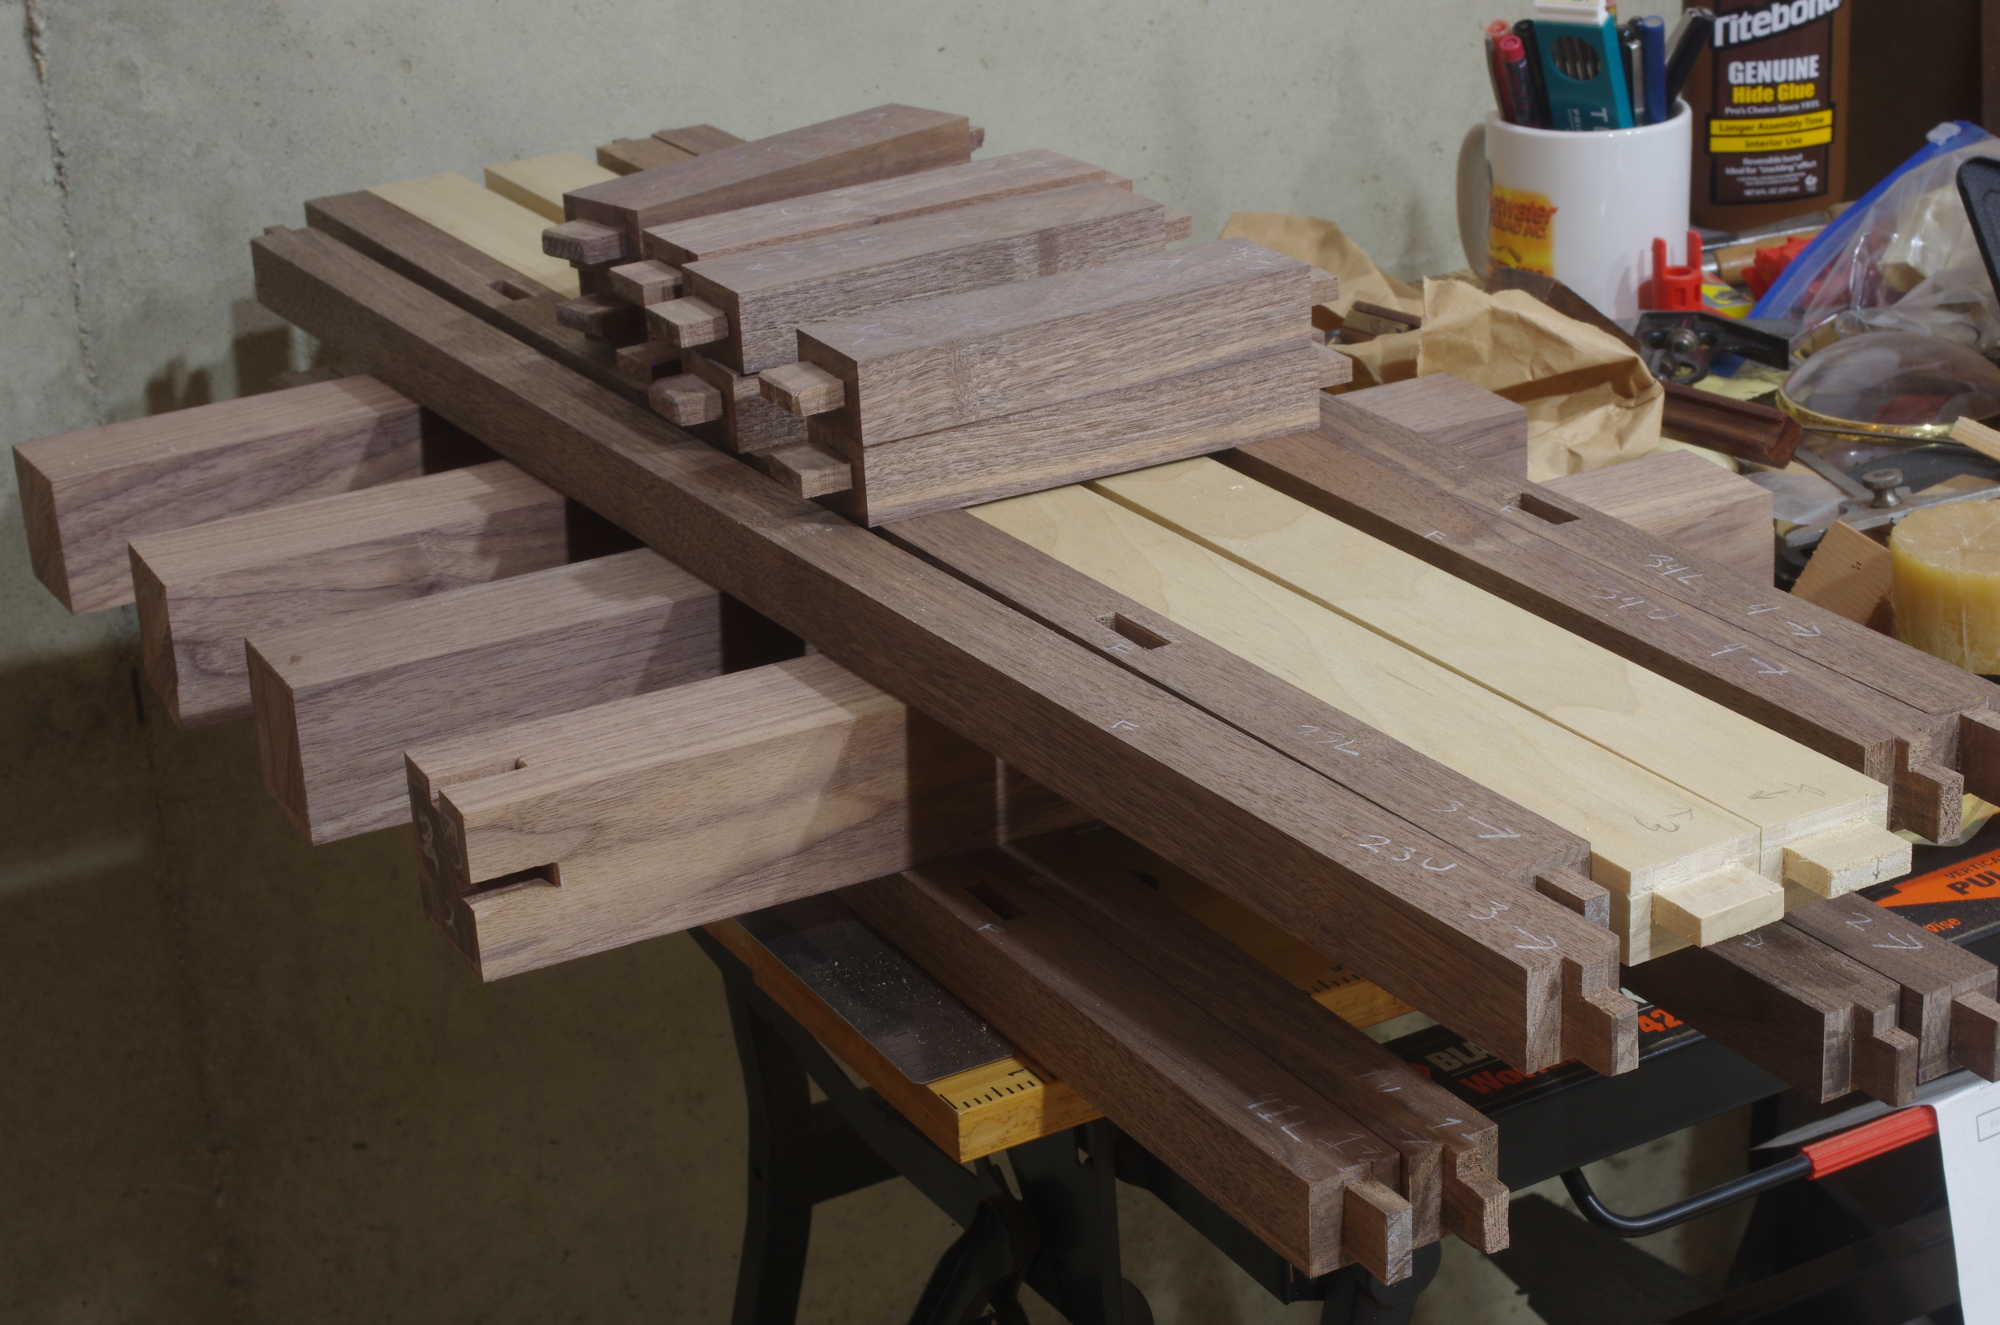
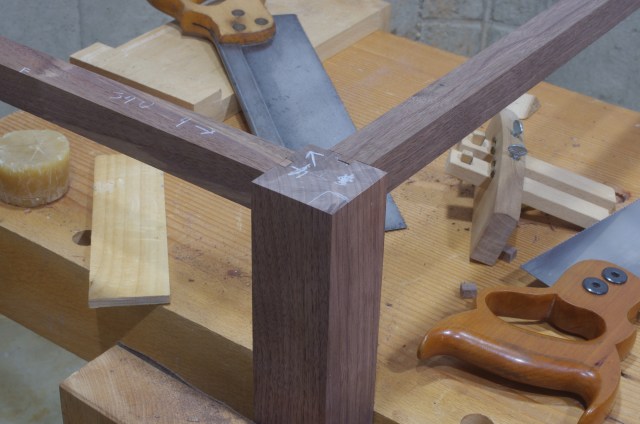
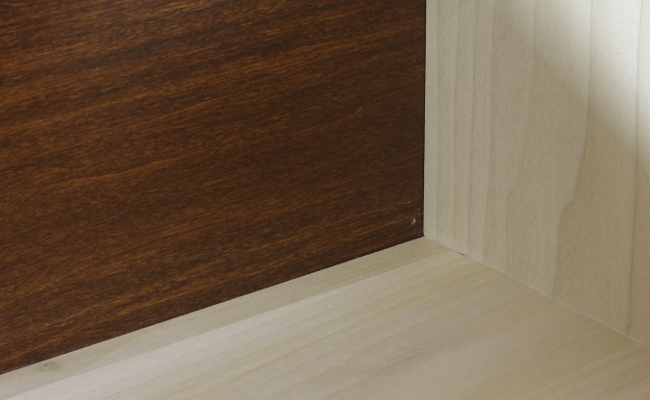
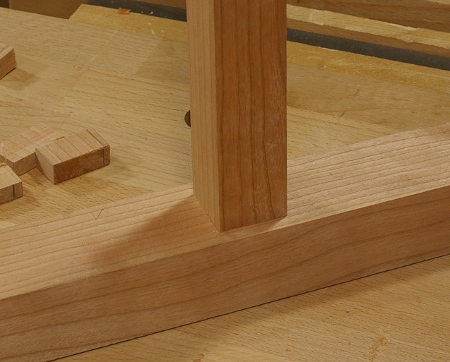
That’s more or less it. And I now have everything ready for the bottom of my small chest:

Daybed: Legs

I’d originally intended the daybed project to have tapered-tenon legs and railings, but after I thought about the design a bit and what I wanted to accomplish (and with the help of a spectacular failure with the tapered reamer), I decided to use normal mortise-and-tenon joints. Well, sort of normal–I decided to use angled twin tenons.

I don’t have many photos of the process of making these, but the biggest difference is that, because the mortises are the weirdest part of this, I cut the tenons first. I marked the tenon thicknesses using the width of my mortise chisel–something that I almost never do. Then I marked one side of the “outer” mortise” and use a block cut at an angle (10 degrees) to guide the chisel. Here is a simulation of how that worked:

With the first mortise made, I then inserted the tip of one of the “outer” twin tenon into the mortise, and gave the end of a leg a good whack. This put an indentation of the other tenon into the platform, and then I knew where to line up the block to chop the second mortise. Surprisingly, this worked; I was not terribly optimistic about it.

In any case, with the legs made, it was time to shape them. I cut out the rough shape on my bandsaw because when you have one, that’s what you do. Then it was time to do the medium-grade shaping. Doing the “front sides” was easy because those are straight; I just used a jack plane like this:

I followed that up with a smoothing plane. Hmm, look at that, you can actually see the twin tenons in this photo.

In any case, the rear sides of the legs were to have concave curves, which excluded the jack plane. However, I did have a small compass plane that I got in Taiwan several years ago (Japanese blade, Taiwanese body), and was able to use that for much of the work:

But once that reached its limit, it was rasp time. The shaped legs looked like this:

The next steps were to sand the legs smooth and finish them. I don’t have any photos of that. I used a tung oil/varnish blend.

After that, they sat for a long time until today, when I glued them into the platform of the bed:

This project is almost done. The other wooden component is the railing, which is done but not glued on. Otherwise, there are three cushions that go on the top, which I’ve also completed but won’t address in this post.

Cutting Big Mortises

[Edit: I made a video that includes this technique in action.]

The mortises in the new bench/whatever-it’s-called are pretty big, and I can’t do them like my usual ones, because I don’t have a mortise chisel that large. So I’m using the old “bore holes to get rid of most of the waste and chop down all sides” method.

This got me thinking that there are a few extra things I do for these that might be useful to someone. So let’s go through them. First, when marking out the mortise, I scribe a line along the center of the mortise:

This is useful for the next step, boring out most of the waste with brace, because I know exactly where to put the lead screw of the auger bit:

Notice that I’m using a square to help keep the bit parallel to the long sides of the mortise direction, and a piece of painter’s tape on the bit to mark the depth. I liked these particular mortises a lot more than the ones in the top, because there was plenty of room to spare when boring down. Going a bit beyond your tenon depth with the brace makes it a lot easier to get out the required amount of waste. (And through mortises are cheating.)

Another note on the holes is that I’m staying a bit away from the ends by, say, 5mm or something. This makes it easier to chop the ends later on.

Next it’s time to get most of the waste off the sides. I’m using an old W. Butcher, uhhh, I guess it’s a firmer chisel, for the sole reason that it’s beefy:

You don’t want to go all the way to the side yet, and while you’re doing this, pay attention to the grain on your initial cuts. Because the wall of the mortise is longer than the chisel, the wood will split in the grain direction past the end of the chisel. If it splits in the wrong direction, you could split it out past your marks for the wall of the mortise.

Now that you’ve figured out the grain direction, mark the “low corners” of the mortise. What I mean by this is that the corners where, if you start splitting the grain at that point, the split will extend into the waste part of the mortise.

And of course, here I am, marking an incorrect corner:

In this board, the correct ones are the top left and bottom right. You’ll see this mark “move” later on in this post after I figured out what was going on.

If it’s just a normal, single piece of wood that you’re mortising, these “low” spots should be at opposite corners. Your grain could reverse or do some other horrible thing, though. And the piece above has the mortise spanning two laminated boards, so it’s possible that it wouldn’t follow that rule, either.

In any case, once you’ve got this done and enough of the walls wasted away, you’re ready to work into those “low” corners. Start with cross-grain chopping on the ends, but don’t go quite all the way to the side, and keep some wood left on the ends (remember that I’m ignoring that first erroneous mark here):

Then, when you’re close, chop down the side with a narrow chisel:

Notice how the waste is splintering out to the waste side of the mortise wall. You might need to do a little back-and-forth to get to your line on the side, but it shouldn’t be too bad with a narrow, sharp chisel.

You also might need to be a little cautious if your wood is uneven. This is (southern) yellow pine, and the darker latewood in this stuff can really shove your tools around. Douglas-fir can do that, as well.

When you’re all the way to the bottom of that corner, grab a wider chisel and chop the wall right next to the corner:

Work your way to the other side in this direction. The wood will continue splitting into the waste, as you can see above. When you reach the end, you can square it off like the “low” corner; when chopping the wall over there, it should not split because you can overlap the stuff that you’ve already done; the chisel will slice instead of tearing out at the border of where you already worked if you keep it flush to the wall.

Then you can go all the way to the ends. I don’t have any photos or anything of this; just use the standard practice of working your way back to the ends until you have enough left that you can cleanly chop it without bruising the wood. Though it’s not so relevant here, it really matters on a through mortise.

You’ll probably need to tune the walls a little due to the way that chisels tend to cut. One nice thing about these big mortises is that it’s really easy to stick a square down there to check to see if it’s complete:

Notice how the “low spot” mark on the near wall has migrated from the left to the right in this picture. Sigh.

So maybe this is helpful. I don’t know. Mortising can be time-consuming. I really understand the reason that hollow-chisel mortising machines exist. And I have to admit that they are kind of tempting.

In any case, the joint that I made in this post was the last one for the new auxiliary bench:

It’s ready for glue-up.

Coffee Table: Drawers Started

A large amount of my time in the shop lately has been dedicated to something related to the coffee table, but hopefully to be used in most future projects. More on that soon, maybe. If I do write it up, it will be different than my usual fare here, for the three people who have been reading this blog for a while.

In the meantime, I have this update: The coffee table drawers are now officially underway. I finished milling all of the wood except the backs and bottoms, and just did the front joints of one drawer:

It’s been quite a long time since I last did some half-blind dovetails. At least it’s measured in years and not tens of years. The little cutoff in the lower right corner is a little test cut, investigating tail width and spacing.

The Veritas router plane is newish; I bought it last year after getting annoyed with the fence that I made for my vintage Millers Falls plane. I could have made another fence for the old one, but it would have cost me even more time, and I was getting irritated with the adjusting mechanism.

I used the router plane to go to the bottom inside of the blind part of the front, between the pins. I think I used a chisel for this in the past, but I think I’ll do it this way in the future (soon, because I have another drawer to make). It makes it a lot easier to keep things straight down there. The only thing to remember is to take fine cuts, and after you extend the blade down, move the adjuster back up to register against the top of the notch on the blade’s shaft to ensure that it does not slip. This sounds complicated, but if you’ve used a router plane before, you know what I mean.

Coffee Table: Midway

So let’s check in on that coffee table project. I have completed the frame joinery:

Aside: Does anyone else have the problem hinted at above? Well, not so much a problem, but an annoyance. As I work through a project, its components start to pile up and I don’t really know where to put them. They always end up in awful places, but those places are chosen because they are the least awful. This gets worse when I have a few things going at once. Maybe I ought to have some dedicated shelves for this.

I’ve also flattened and thicknessed the boards for the top:

Hopefully, that one board in the center won’t look too out of place. I think I have a transition for that. Piecing together a consistent walnut top can be rough. In any case, all that’s left to do with the top is to joint, glue, smooth, and finish.

Then there’s what I’m working on now:

These are the panels for the sides and the drawer fronts. Rather than using a monotonous walnut all around, I decided to go with ash for these parts. Everything is now resawn; I’m just working through the flattening before I get to thicknessing.

That plane in the foreground is a Charles Nurse jack plane that I picked up at the spring PATINA Damascus tool sale. I’d been looking for a wooden plane to help with the more gruntish work like minor flattening, thinking that maybe it would be a little bit easier to shove around than my #5-size cast iron plane, or at least give an auxiliary when its blade is too dull and I’m feeling too lazy to sharpen it. I had to mess around with it a little (trimmed the wedge to prevent shavings from getting jammed, gave it a cursory sharpening), but it seems to be working acceptably now. I have a feeling that there’s more I could do, but I don’t want to spend the time on it right now. Perhaps I’ll feature it a little later if I stick with it.

Coffee Table: Starting Joinery

It seems like it’s taken forever, but I’m finally ready to start a furniture project in my new shop. It will be a coffee table, something that’s been on “the list” for a very long time.

Like many of my designs, it will be based on a frame built with mortise-and-tenon joints, and will include 1/4″ panels. There will also be two drawers. The primary wood will be black walnut (despite its high cost at the moment), with a secondary contrast wood to be announced at a later time.

I have already cut and milled down enough of the wood to make the entire frame, and chosen the orientation and arrangement of the legs and stretchers. And here are the first two joints:

Those are haunched tenons; the ends directly below the top will not be visible when the project is complete. These joints give you a little more resistance to twist and a little more flexibility when making long tenons. I guess they’re also supposed to look cool or something.

As is my custom, I already screwed up. I referenced from the wrong side when marking the mortise on the right, yielding an incorrect offset from the front when I cut the tenon. So I sawed off the tenon, then made a new tenon using a compensating shim when marking. I suppose that I’m lucky that I made this error at this stage, because if I’d done that on a stretcher that already had a tenon on the opposing end, it’d be kind of unfortunate.

Bookshelf 2: Glued Up

There are times when I feel like I’ve gotten nothing done, and this past month was one of them. It’s not entirely, true, though, as I have the new bookshelf glued up now:

Getting to the glue-up point was nontrivial. I had all of the joints cut more than a month ago. However, I decided that I would try to stain this thing dark, and because of this, there were some components that I should probably stain and varnish before final assembly. I spent a considerable amount of time doing so.

Staining is a nontrivial process. I read Flexner’s book about a hundred times, tried out many samples, and finally jumped in. Because the shelf is made entirely of yellow-poplar, and blotching is a problem on that wood, I decided to use a gel stain, topcoated with the usual varnish. As Flexner will tell you, gel stain doesn’t penetrate much. If you sand it, you’ll cut through in a flash. I used a full-strength coat of varnish right on top of the gel stain to build the initial coat of protection. Because the stain raised the grain and left a fairly rough surface, I wasn’t worried about adhesion problems, especially because I applied the varnish just one day after the stain. At that point, I was able to sand without worrying so much about cutting through, and a couple more coats went on after.

For me, one of the strangest things about using stain (well, pigment stain, that is) is that it seemingly went against everything I’ve learned so far. Normally, I just plane the wood smooth and apply varnish. However, a very smooth surface makes it difficult for pigment to find the nooks and crannies that it needs to stick in the wood. That might be OK if you don’t want much stain color, but I wanted a lot.

So, with this in mind, I did something that might make you cringe. After I planed the surface smooth, I sanded it with #120 grit sandpaper to rough it up a little (in the direction of the grain, of course). The strangest thing about the whole process was that the planing probably made the sanding faster.

There is another thing that I wanted to write about, but I somehow forgot to take photos. You might recall how the joint for the rear panels went in for the first bookshelf that I made; there were just a bunch of cross-members in the rear of the shelves that housed the tops and bottoms of the panels entirely. That worked, but it left me wanting more, mainly because the cross-member would stick up behind the shelf at the rear:

I came up with a way to keep the cross-member (which I like, for added strength), but hide the top of it and instead slip the panel in directly behind the shelf:

(I guess you can see the famous stain color here. Also, I didn’t bother to make the grain vertical in the panels, since it’s unlikely that anyone will really see them anyway.)

This isn’t complicated, but when put into words, it sounds complicated. There’s one rabbet on the top of the cross-member, with the high side being on the back, and then another rabbet is cut into the rear underside of the shelf, so that rear of the shelf rests on top of the cross-member. This forms a gap between the protruding end of the cross-member and the rear of the shelf, and that’s where the panel slips in.

In any case, now the hard part begins: I have to stain and varnish the rest of the piece. It’s taller than I am and barely fits in the shop.

Jointing Narrow Boards (Yet Another Dog Incarnation), Long-Tailboard Dovetails

I decided that the break-in project for my new workbench would be a bookshelf. Because the bench can handle six-foot boards, and I can still reach things that are six feet high, I decided to make the shelves six feet high.

Two workholding problems popped up in the course of the project. One was an oldie, and the other one was new. Let’s start with the old one.

I’ve found it annoying to joint narrow boards because I usually have to make a lot of them. I have a jointer fence for my Veritas jointer, but if a board just isn’t wide enough, something always obstructs the fence because it projects below the opposite edge being planed. For some time, I’ve dreamed of being able to secure a board on the edge of the bench so that I could use my jointer fence on it. I’d been scheming on accessorizing my bench dogs a little more, and yesterday, I finally did it:

This stop is nothing more than a piece of a panel that I’ve bored two 3/4″ holes in, and stuffed two of my bench dogs through and into the holes on the bench. There’s another one with two more holes and two more dogs in the tail vise on the other end of the board. Notice how the board is slightly proud of the edge of the bench.

The whole idea is to keep the stop from rotating around in a hole. I didn’t really expect this to work–I thought that the weight of the jointer would tip the board over. But it did work. I had to ease up the rear hole a little (with a half-round rasp) to keep the front of the stop from lifting off the bench.

What’s kind of funny about this is that Lee Valley released something similar to this for planing panels today, except theirs is supposed to be used perpendicular to the way this one sits on the bench. But I’m happy with my low-profile bench dogs for planing panels.

The other difficult situation I ran into was dealing with a dovetail joint on the end of a six-foot board. To cut the tails, I extended the board off the edge of the bench, marked it, and sawed:

Then I put it in the leg vise (supported on the other side by a holdfast in the other leg) and sawed/pared the tails to completion:

Then I had to mark the pinboard. After a bit of fussing around, I came up with this:

(They’re half-blind dovetails.)

Workbench v2: Top, Legs

The past few weeks have primarily involved milling, milling, and more milling. Oh, right, there was also a trip to Pennsylvania. But after all of that excitement, I was able to glue the top. I used every medium- and heavy-duty clamp that I had for it:

Then I glued that piece of beech to the front, flattened the top, then flattened the bottom.

I’m not going to talk too much about this flattening and milling process because it was exhausting enough just to do it. The main reason was that the douglas-fir just ate up my plane blades–I constantly had to resharpen them. I’m not sure why this is the case, but it might have something to do with the hardened resin in this old wood. In any case, dull blades are next to useless on this stuff, and sometimes it takes a little while for it to dawn on you that you’re working with dull tools.

In any case, I was finally at the point where I could fit the legs. I’ve been thinking about the joints for the legs for a long, long time. I can’t say that I understand the monster through tenon joint illustrated in Roubo’s book. Schwarz only seems to say that “well, this is how it’s illustrated there, so that’s what I’m gonna use,” and that’s all fine and good, but I still don’t get it. Sure, you want a tenon, but should it really be through? That makes the top more difficult to reflatten. Plus, the through joint creates a weak point in the front left, especially if your wood over there is suspect to begin with. Roy Underhill illustrated what happens to that sort of thing at WIA.

Believe it or not, I like Underhill’s rising dovetail idea better for this kind of joint. Not that it’s any better with the weakness in the wood, but there is one property of it that I haven’t really seen anyone talk about in conjunction with a leg vise. If you think about it, because the top sinks down from the front, when a leg vise clamps something into place against any part of the top, it wedges the top into the leg.

As cool as that joint looks, I still did not want to use a through joint for my legs, so I just used angled mortises and tenons so that the top would still sink down from the front. I used a very slight angle (using the “eh, that looks about right” calculation with the sliding T-bevel), and before I started, I made a couple of guides to help. Here’s one that helped me guide my brace and bit as I wasted most of the mortise.

After boring and chopping out most of the waste, I registered the chisel face against this guide to pare out the sides at the angle necessary.

One advantage of making mortises this large is that you can shove a T-bevel into the mortise to verify that you got the side correct:

Here’s a finished joint (this time for the rear of the bench). It’s only a little more than an inch deep, and I do not plan to use glue, but I figure that the mass of the top will be more than enough to keep it in place:

If I’m wrong, I’ll use fasteners to wedge the joints into place.

It was a fine sight when I completed all four joints for the top:

These joints, however, didn’t really take much time (despite having only my fine-toothed joinery saw available to cut the tenons). Sure, I had to be a little more careful with the angles on the joints, but compared to process of preparing the top that I’d just been through, it was nothing.

Next up: Getting the stretchers in place, and installing the vises.

Recessed Mortise and Tenon

Here’s a quick little note on how I cut the mortise-and-tenon joints for the frames of projects such as the nightstands and the stool (though to be honest, I didn’t really do it this way until the latest project).

Normally, you arrange a mortise-and-tenon joint so that the faces of the two members that you’re joining are flush. However, you can recess the tenon member so that you get more of a three-dimensional look. In part, I’ve done this to frames that hold panels. My panels aren’t typically raised, so getting a little extra depth is nice:

Start by milling your pieces and figure out roughly where the mortise ought to go. You don’t need to be too precise about it; just make sure that your tenon member covers the mortise fully, and try to even out the shoulders as much as makes sense, because tenon shoulders make your joint significantly tougher. You can mark the area with pencil if you like.

Then mark out a line with a marking gauge for one wall of the mortise. If you really want to, you can set a mortise gauge for the width of your chisel and mark both walls, but I don’t do that because I set my mortise gauge from the mortise itself after I’m done chopping one.

Chop your mortise. The following photo shows a completed mortise, and the tenon member roughly at the depth it will eventually go:

Set your mortise gauge if you haven’t already. Set it from the mortise piece, as if you were going to chop another mortise:

Now, figure out how much of a recess you want. Set another marking gauge to this depth. Mill a thin, flat piece of wood to this depth by marking the piece all around with the gauge, sawing, and planing to the line (normal practice for milling wood if you do it by hand; feel free to use an electrobeast if you like).

This piece of wood will be your spacer, and is really the whole trick to putting the tenon in the correct place.

Mark out your tenon the usual way with your mortise gauge, but put the spacer between the stock and the tenon member as you’re marking. Mark from the face side.

Now, saw your tenon (the following photo is gratuitous, but just in case anyone’s forgotten how to saw a tenon cheek):

And you’re done.

The point to making the spacer is that once you have it made, you can use it over and over. I had to make dozens of these joints for the new project but needed only set the mortise gauge once. I just used it with the spacer for all of the joints I needed. (Obviously, you don’t use the spacer when marking the mortise; only the tenon.)