
My deadline for the nightstand project is Wednesday. [Ed: This was posted the Friday before that Wednesday.] I had originally planned on having this thing done about a week before then, but stuff happened. I’ve been applying varnish to the frame, top, and drawer over the past few weeks and they were finally ready. I rubbed out the varnish with 320-grit sandpaper followed by #000 and #0000 steel wool, all lubricated with mineral oil. I decided not to use rottenstone on this project for two reasons: first, the #0000 steel wool got it to where I wanted it to be, and second, I was afraid of getting it into some of the parts that don’t have finish in them. The second concern was a little silly.
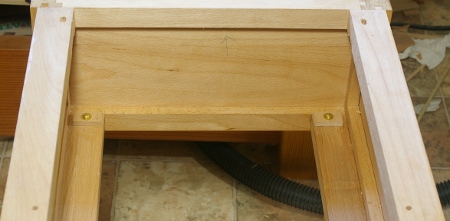
I started assembling the whole thing by drilling holes and cutting recesses in the top stretchers for the screws to attach the top. This was an ugly job that took forever, and I was very silly not to have done this before glueup. I didn’t realize that I would be attaching the top this way until it was glued–I couldn’t find the hardware I was looking for and I didn’t feel like making it. Oh well, it’s not like anyone is going to see this part anyway (it’s on the inside):
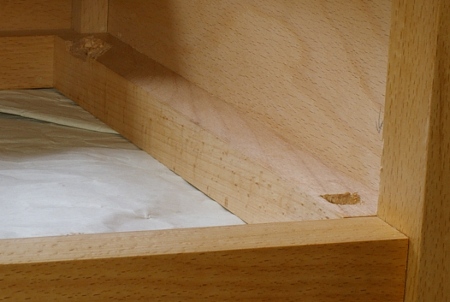
Then it was time to solve an uglier problem. The drawer is slightly out of square because (I think) the bottom panel is a hair trapezoidal (thankfully, the end that’s too big is not subject to wood movement). I’ll be a little more careful of that sort of thing in the future, but for now, I decided to make the drawer fit by trimming the side of one of the runners:
Hey, finally a use for my Stanley #75!
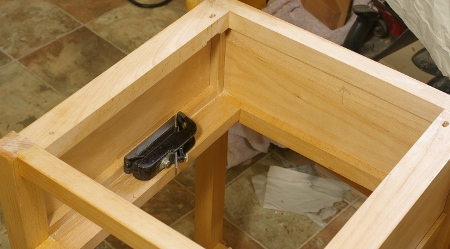
With the kludges out of the way, I put in some simple stops for the drawer:
You can also see in the preceding image how the rear holes for the screws to attach the top are elongated to cope with wood movement (and this being riftsawn beech, that’s pretty much a given).
Then, after trimming the bottoms of the legs a little to get them level, I put everything together, waxed the drawer bottom and runners, and it was done:

Here’s a detail of the open drawer:

Though I made more mistakes than I care to admit, reflecting back on this project, it’s pretty positive. Despite the slight goof, the drawer looks perfect and the dovetails are very crisp–and I’d only done one practice half-blind joint a few months back.
Probably most importantly, this was by far the most complicated project I’ve done so far, and I finished it faster than any of my other projects. And it’s done just in time.
