
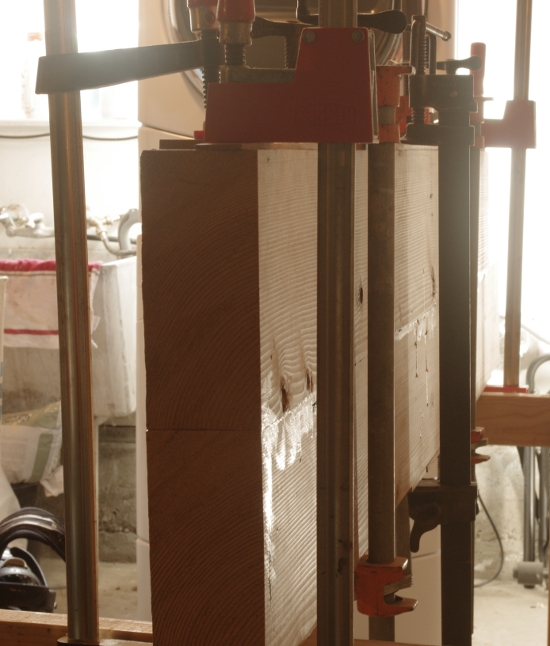
The past few weeks have primarily involved milling, milling, and more milling. Oh, right, there was also a trip to Pennsylvania. But after all of that excitement, I was able to glue the top. I used every medium- and heavy-duty clamp that I had for it:
Then I glued that piece of beech to the front, flattened the top, then flattened the bottom.
I’m not going to talk too much about this flattening and milling process because it was exhausting enough just to do it. The main reason was that the douglas-fir just ate up my plane blades–I constantly had to resharpen them. I’m not sure why this is the case, but it might have something to do with the hardened resin in this old wood. In any case, dull blades are next to useless on this stuff, and sometimes it takes a little while for it to dawn on you that you’re working with dull tools.
In any case, I was finally at the point where I could fit the legs. I’ve been thinking about the joints for the legs for a long, long time. I can’t say that I understand the monster through tenon joint illustrated in Roubo’s book. Schwarz only seems to say that “well, this is how it’s illustrated there, so that’s what I’m gonna use,” and that’s all fine and good, but I still don’t get it. Sure, you want a tenon, but should it really be through? That makes the top more difficult to reflatten. Plus, the through joint creates a weak point in the front left, especially if your wood over there is suspect to begin with. Roy Underhill illustrated what happens to that sort of thing at WIA.
Believe it or not, I like Underhill’s rising dovetail idea better for this kind of joint. Not that it’s any better with the weakness in the wood, but there is one property of it that I haven’t really seen anyone talk about in conjunction with a leg vise. If you think about it, because the top sinks down from the front, when a leg vise clamps something into place against any part of the top, it wedges the top into the leg.
As cool as that joint looks, I still did not want to use a through joint for my legs, so I just used angled mortises and tenons so that the top would still sink down from the front. I used a very slight angle (using the “eh, that looks about right” calculation with the sliding T-bevel), and before I started, I made a couple of guides to help. Here’s one that helped me guide my brace and bit as I wasted most of the mortise.
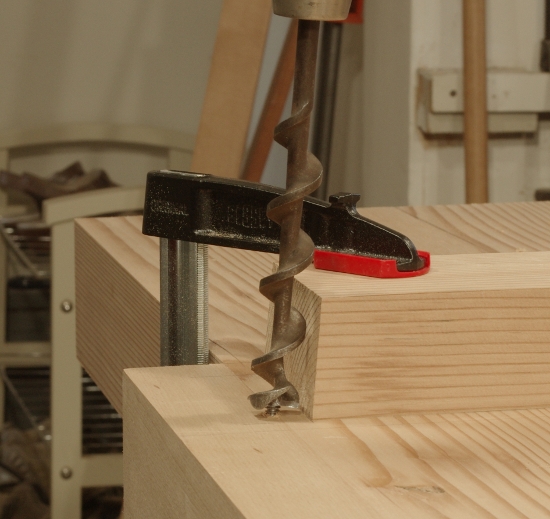
After boring and chopping out most of the waste, I registered the chisel face against this guide to pare out the sides at the angle necessary.
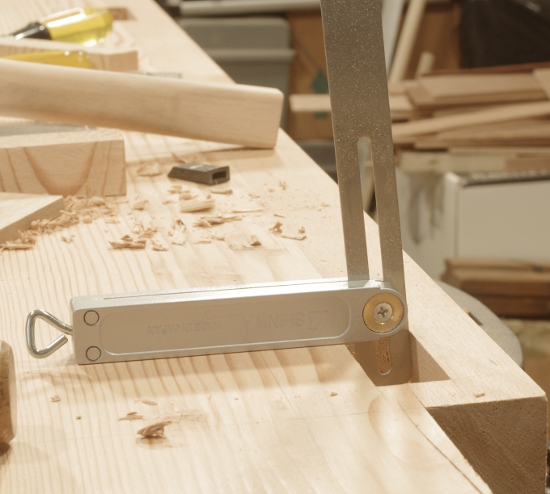
One advantage of making mortises this large is that you can shove a T-bevel into the mortise to verify that you got the side correct:
Here’s a finished joint (this time for the rear of the bench). It’s only a little more than an inch deep, and I do not plan to use glue, but I figure that the mass of the top will be more than enough to keep it in place:
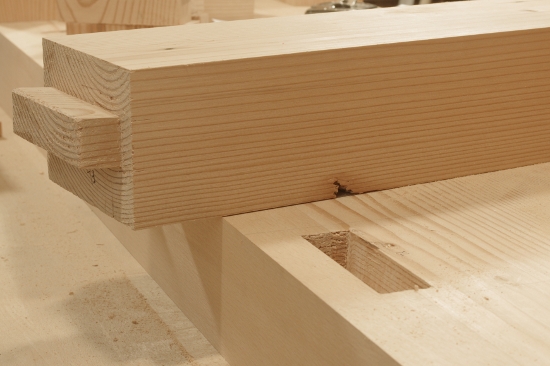
If I’m wrong, I’ll use fasteners to wedge the joints into place.
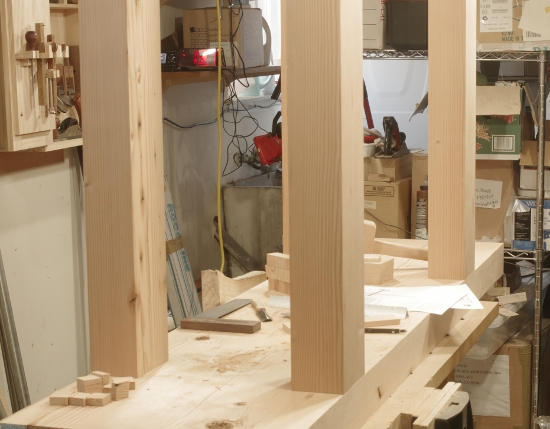
It was a fine sight when I completed all four joints for the top:
These joints, however, didn’t really take much time (despite having only my fine-toothed joinery saw available to cut the tenons). Sure, I had to be a little more careful with the angles on the joints, but compared to process of preparing the top that I’d just been through, it was nothing.
Next up: Getting the stretchers in place, and installing the vises.
