Cutting Big Mortises

[Edit: I made a video that includes this technique in action.]

The mortises in the new bench/whatever-it’s-called are pretty big, and I can’t do them like my usual ones, because I don’t have a mortise chisel that large. So I’m using the old “bore holes to get rid of most of the waste and chop down all sides” method.

This got me thinking that there are a few extra things I do for these that might be useful to someone. So let’s go through them. First, when marking out the mortise, I scribe a line along the center of the mortise:

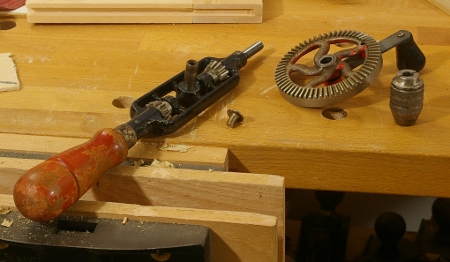
This is useful for the next step, boring out most of the waste with brace, because I know exactly where to put the lead screw of the auger bit:

Notice that I’m using a square to help keep the bit parallel to the long sides of the mortise direction, and a piece of painter’s tape on the bit to mark the depth. I liked these particular mortises a lot more than the ones in the top, because there was plenty of room to spare when boring down. Going a bit beyond your tenon depth with the brace makes it a lot easier to get out the required amount of waste. (And through mortises are cheating.)

Another note on the holes is that I’m staying a bit away from the ends by, say, 5mm or something. This makes it easier to chop the ends later on.

Next it’s time to get most of the waste off the sides. I’m using an old W. Butcher, uhhh, I guess it’s a firmer chisel, for the sole reason that it’s beefy:

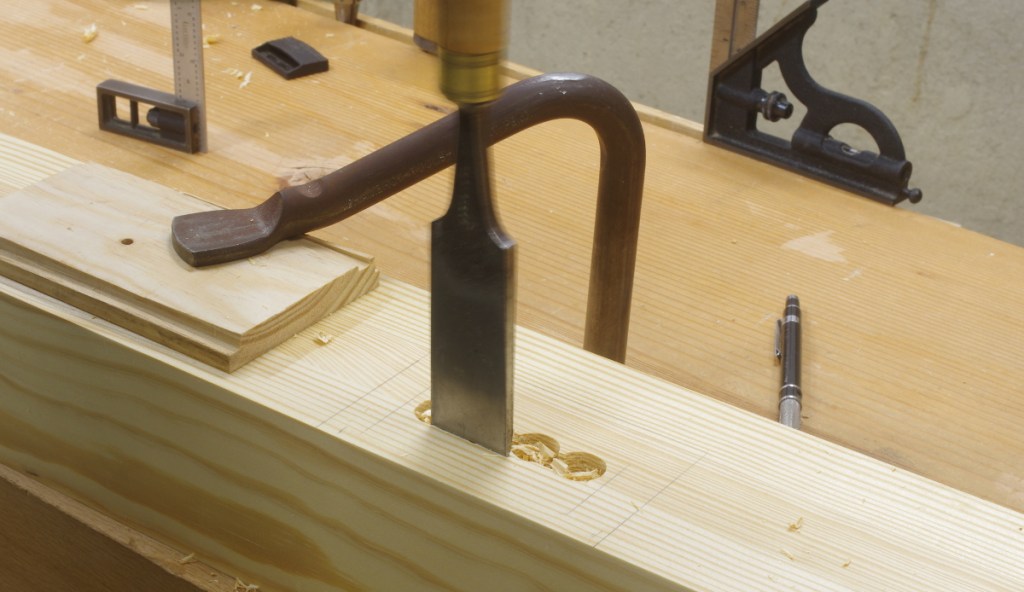
You don’t want to go all the way to the side yet, and while you’re doing this, pay attention to the grain on your initial cuts. Because the wall of the mortise is longer than the chisel, the wood will split in the grain direction past the end of the chisel. If it splits in the wrong direction, you could split it out past your marks for the wall of the mortise.

Now that you’ve figured out the grain direction, mark the “low corners” of the mortise. What I mean by this is that the corners where, if you start splitting the grain at that point, the split will extend into the waste part of the mortise.

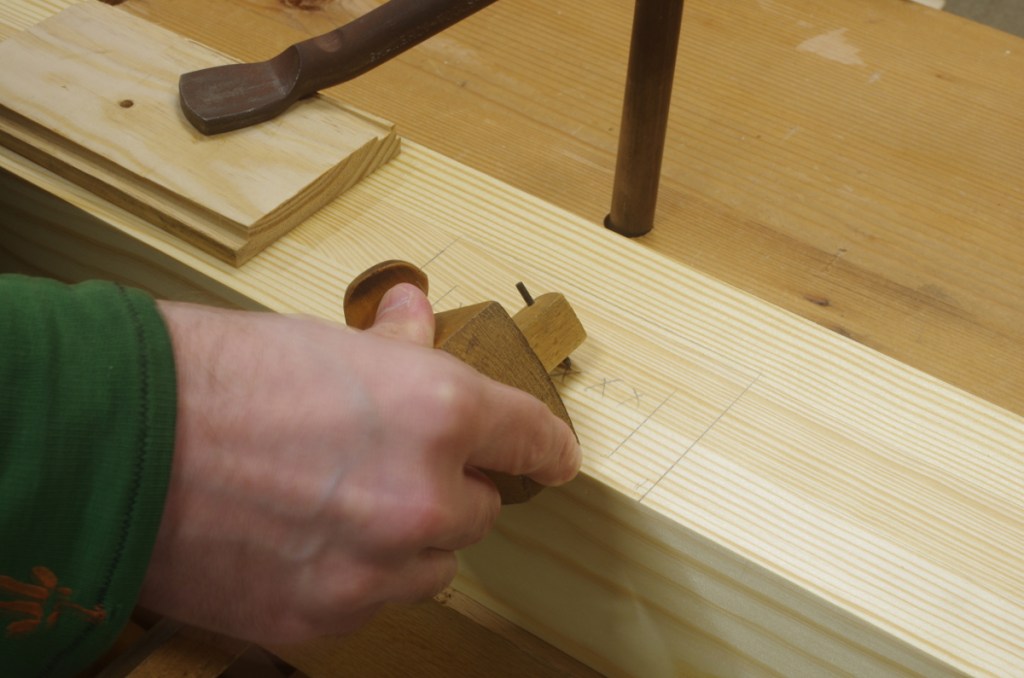
And of course, here I am, marking an incorrect corner:

In this board, the correct ones are the top left and bottom right. You’ll see this mark “move” later on in this post after I figured out what was going on.

If it’s just a normal, single piece of wood that you’re mortising, these “low” spots should be at opposite corners. Your grain could reverse or do some other horrible thing, though. And the piece above has the mortise spanning two laminated boards, so it’s possible that it wouldn’t follow that rule, either.

In any case, once you’ve got this done and enough of the walls wasted away, you’re ready to work into those “low” corners. Start with cross-grain chopping on the ends, but don’t go quite all the way to the side, and keep some wood left on the ends (remember that I’m ignoring that first erroneous mark here):

Then, when you’re close, chop down the side with a narrow chisel:

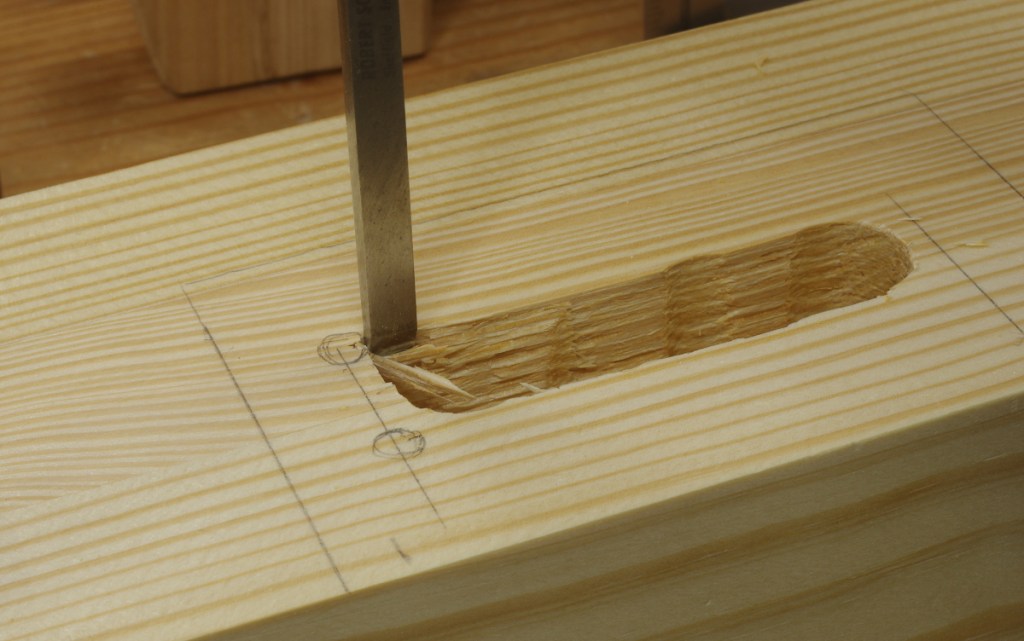
Notice how the waste is splintering out to the waste side of the mortise wall. You might need to do a little back-and-forth to get to your line on the side, but it shouldn’t be too bad with a narrow, sharp chisel.

You also might need to be a little cautious if your wood is uneven. This is (southern) yellow pine, and the darker latewood in this stuff can really shove your tools around. Douglas-fir can do that, as well.

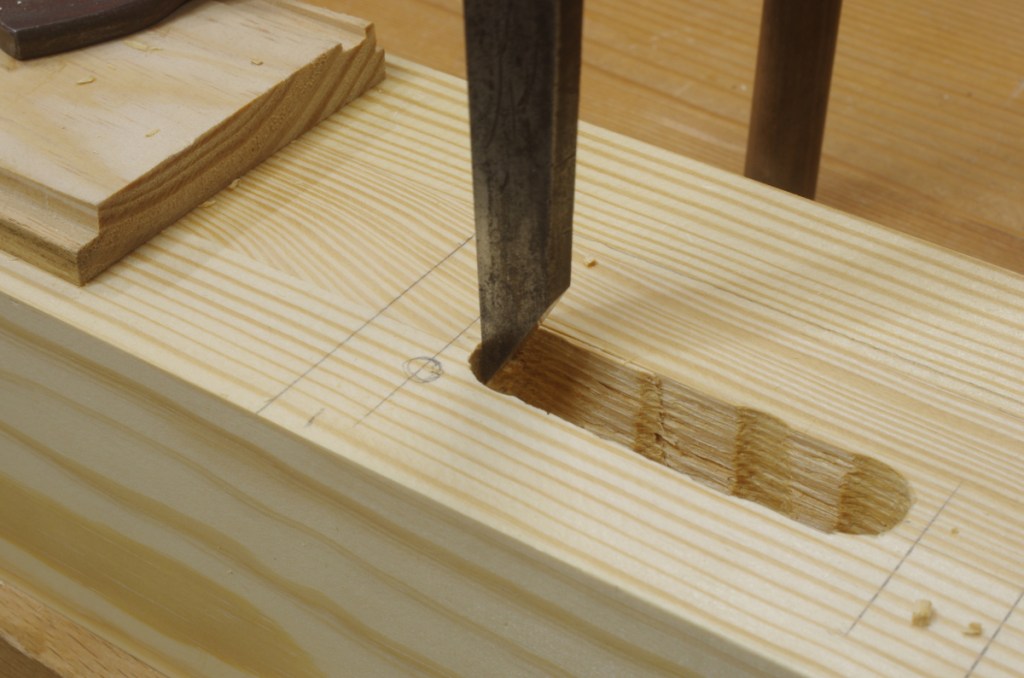
When you’re all the way to the bottom of that corner, grab a wider chisel and chop the wall right next to the corner:

Work your way to the other side in this direction. The wood will continue splitting into the waste, as you can see above. When you reach the end, you can square it off like the “low” corner; when chopping the wall over there, it should not split because you can overlap the stuff that you’ve already done; the chisel will slice instead of tearing out at the border of where you already worked if you keep it flush to the wall.

Then you can go all the way to the ends. I don’t have any photos or anything of this; just use the standard practice of working your way back to the ends until you have enough left that you can cleanly chop it without bruising the wood. Though it’s not so relevant here, it really matters on a through mortise.

You’ll probably need to tune the walls a little due to the way that chisels tend to cut. One nice thing about these big mortises is that it’s really easy to stick a square down there to check to see if it’s complete:

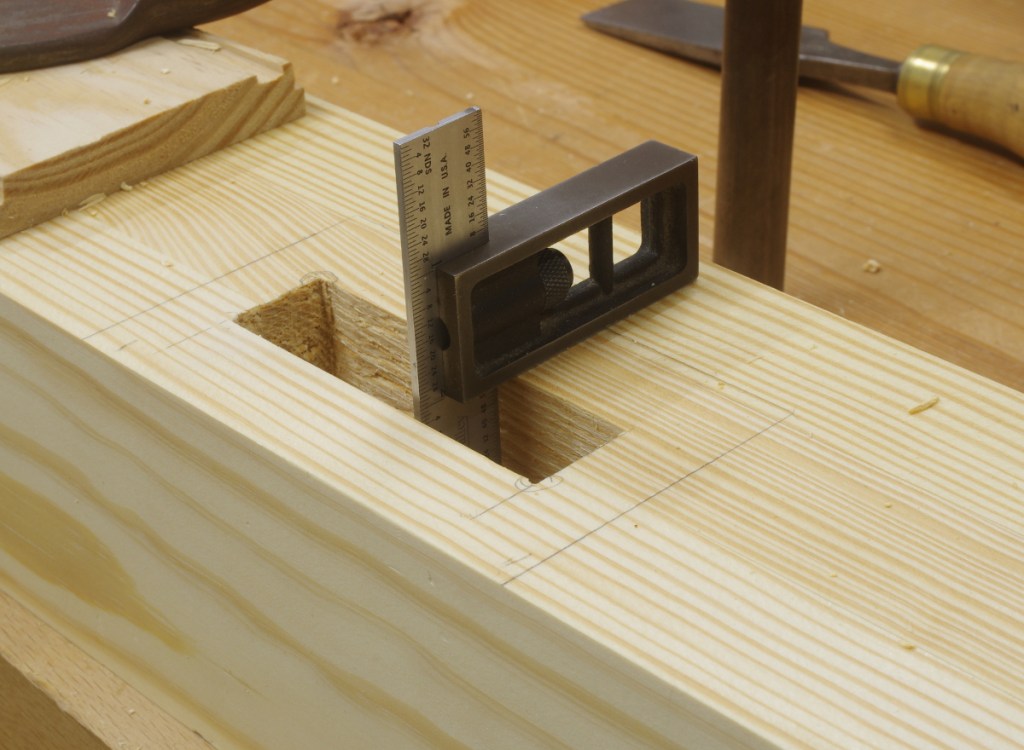
Notice how the “low spot” mark on the near wall has migrated from the left to the right in this picture. Sigh.

So maybe this is helpful. I don’t know. Mortising can be time-consuming. I really understand the reason that hollow-chisel mortising machines exist. And I have to admit that they are kind of tempting.

In any case, the joint that I made in this post was the last one for the new auxiliary bench:

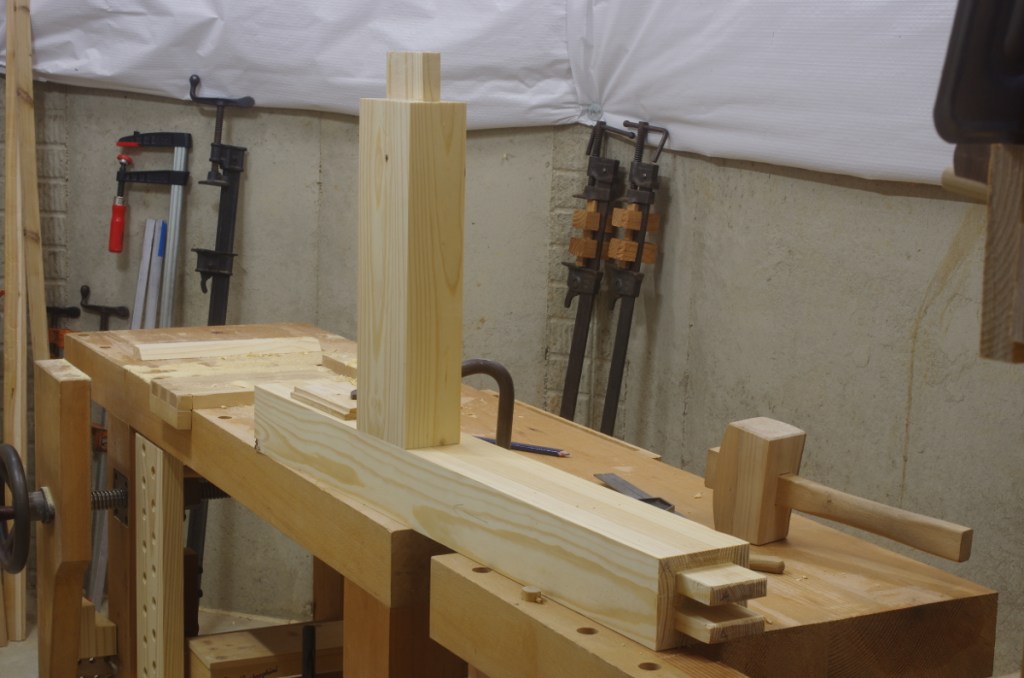
It’s ready for glue-up.

An Eggbeater and a Plow

So I’m back after a vacation, and I’ve been going like gangbusters on the bench modification, right?

Ha, no. I’ve just been dorking around with this Millers Falls #5A, first taking it apart to degrease:

Then I reassembled it and tested it:

By this point, you’re asking, hey wait, don’t you already have two of those things already? Correct; this drill now goes to a friend. After testing it out, I realized that it actually works better than my two #5s (I guess I’d better pay attention to them sometime). It may not be as pretty, as it is a late model with the plastic side handle (type 17, according to George Langford, but hmm, that chuck is different), but at least it’s got a side handle!

One of the tools that I’ve complained about not having from time to time is a plow plane. Well, I have one now. This story gets weird, though, because I never imagined that I would get one in this form:

Time will tell if I’m completely insane for getting a Stanley #45. This thing is as complicated as everyone says it is, and it is quite heavy, but its adjustments seem to work reasonably as a plow plane. Although I have them, I won’t be using anything but the plow cutters (Stanley, how did you even think that the beading cutters have even a remote chance of actually working?).

I set it up with the 1/4″ cutter and moved the nickers out of the way, and it seems to work pretty well. Given that the only grooves I tend to plow are 1/4″, I might just leave it like this. Thanks again to Roger for making an offer I couldn’t refuse. Even if this thing does drive me crazy, I can just pass it along to someone else for the same.

At least it’s not a #55.

Millers Falls flange wheel mystique

I’d mentioned earlier in an earlier entry that there has been some hubbub about the design of the Millers Falls #2 drill, namely that some guy named George Langford says that the later dual pinion design is inferior to the flange roller. I eventually snagged a really beat-up #2 for cheap on ebay. It’s hard to date this one precisely, but it’s probably at least 105 years old; it is a type H, I, or J, which includes a chuck patented in 1890. It’s hard to say exactly what type it is because the side handle is missing and the main handle is a replacement:

This is, of course, beside the point. It’s a flange roller model, and the real question I wanted to answer was, “does it really turn that smoothly?” Why I cared, I don’t really know.

Well, “out of the box,” it didn’t. In fact, it was a lot worse than my dual-pinion #2, but I didn’t take much stock of that. I suspected that it needed some cleaning and lube, just as my dual-pinion did (and as one of my #5s did).

As you might be able to tell from yesterday’s entry, that job sucked. Every tooth gap on the main gear and pinion had caked-on grease inside. I picked it out with the closest pick-like thing at hand, which happened to be a putty knife (a real precision instrument). Then I wiped away the residual crap with some WD-40 and a toothbrush, and called it a night.

Then today, upon arriving home from work, I was faced with a pile of drill parts on my dinner table, so my executive decision was that putting it back together was better than eating it. So I cleaned off the flange roller, applied a little bit of oil to the proper places (basically, any metal that rubs against any other metal, except for the gears, because they’ll just collect grease again).

The result?

Okay, that is one smooth drill. It’s really hard to describe, but it’s significantly smoother and easier to turn than anything else I have, and anything else that I’ve ever tried, and that’s saying a lot, because one of my #5s is very, very smooth. Maybe there really is something to this flange wheel mystique after all.

Further Down the Slippery Slope of the Hand Drill

I told you that I really liked hand drills, right? Well, here’s last week’s arrival:

This is a Millers Falls #2 “eggbeater” drill, probably made sometime during WWII or just after, due to its domestic hardwood handles and chuck design. It’s not exactly a collectible, especially due to the owner’s initials etched into two spots, but it does at least have its original eight fluted bits stowed in the handle.

This type has dual pinions, which George Langford poo-poos as an inferior later design “feature,” in part because it takes more energy to crank than the previous (admittedly ingenious) design, which I’ll probably snarf up sometime, too. Aside from the fact that I am a Veritable He-Man[tm] who cares not about trifling expenditures of energy, there may be some merit to that claim, because my example’s rear pinion was chatty and clearly annoyed upon arrival. However, one drop of oil fixed this problem, making my #2 into the easiest-turning hand drill I’ve ever used.

It’s been called “the finest hand drill ever made.” I can’t argue.

I have some other new acquisitions, they’ll have to wait for another day to get their spotlight in the blog, though.

Frivolous Purchase #1

This delightful tool is a Millers Falls #104 hand drill (nicknamed the “Buck Rogers” drill):

These drills, alongside their plane counterparts (that now sell for a zillion dollars, because plane collectors have a lot of money) are precious rare examples of quality postwar hand tool design and mass production in the USA. Millers Falls not only thought that they needed some o’ this here “industrial design” stuff, but they decided to keep their quality up to scratch. This drill’s casing is die-cast and its gear mechanism is enclosed, keeping dust out. As in the finer hand drills of yesteryear, the handle is hollow for drill bit storage, and the rear unscrews as the cap.

This drill cranks as smoothly as glass, just as it did when it was new, some 50 years ago. Of course, I just had to try it out, but then again, doing that to random wood in the apartment can get you in trouble. My solution was the obvious one–good luck finding that hole, heh heh heh.

Wouldn’t it be nice if you could buy a drill as nice as this in a hardware store today? You can, in fact, get a Chinese-made cast iron drill for cheap at some (no doubt the cast is from some antediluvian American or European manufacturer). I actually have one; it’s crap. Guys, is it so hard to make sure that all the parts fit correctly? Yeah, I can probably tweak it a little to get it to work so that parts don’t scrape against each other, but I also have a Millers Falls #2 on the way, so it’s likely just not worth it.

Also, there is no way in the world that I should have bought this drill. You might say that I have a soft spot for hand drills, but I don’t want to get into this collector mania stuff. But on the other hand, it was cheaper than what a Millers Falls #5 goes for.