
There are times when I feel like I’ve gotten nothing done, and this past month was one of them. It’s not entirely, true, though, as I have the new bookshelf glued up now:
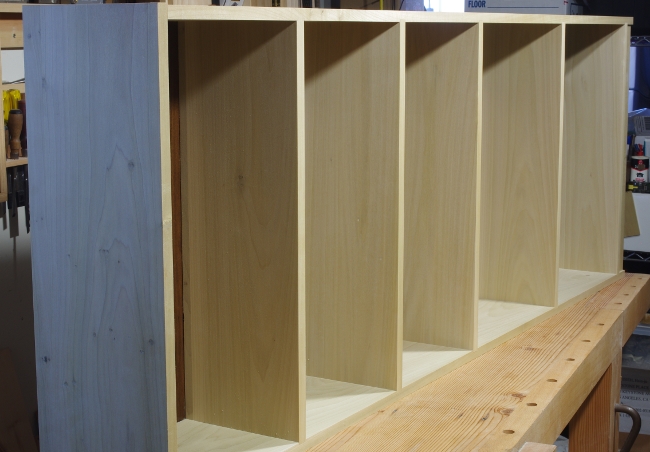
Getting to the glue-up point was nontrivial. I had all of the joints cut more than a month ago. However, I decided that I would try to stain this thing dark, and because of this, there were some components that I should probably stain and varnish before final assembly. I spent a considerable amount of time doing so.
Staining is a nontrivial process. I read Flexner’s book about a hundred times, tried out many samples, and finally jumped in. Because the shelf is made entirely of yellow-poplar, and blotching is a problem on that wood, I decided to use a gel stain, topcoated with the usual varnish. As Flexner will tell you, gel stain doesn’t penetrate much. If you sand it, you’ll cut through in a flash. I used a full-strength coat of varnish right on top of the gel stain to build the initial coat of protection. Because the stain raised the grain and left a fairly rough surface, I wasn’t worried about adhesion problems, especially because I applied the varnish just one day after the stain. At that point, I was able to sand without worrying so much about cutting through, and a couple more coats went on after.
For me, one of the strangest things about using stain (well, pigment stain, that is) is that it seemingly went against everything I’ve learned so far. Normally, I just plane the wood smooth and apply varnish. However, a very smooth surface makes it difficult for pigment to find the nooks and crannies that it needs to stick in the wood. That might be OK if you don’t want much stain color, but I wanted a lot.
So, with this in mind, I did something that might make you cringe. After I planed the surface smooth, I sanded it with #120 grit sandpaper to rough it up a little (in the direction of the grain, of course). The strangest thing about the whole process was that the planing probably made the sanding faster.
There is another thing that I wanted to write about, but I somehow forgot to take photos. You might recall how the joint for the rear panels went in for the first bookshelf that I made; there were just a bunch of cross-members in the rear of the shelves that housed the tops and bottoms of the panels entirely. That worked, but it left me wanting more, mainly because the cross-member would stick up behind the shelf at the rear:
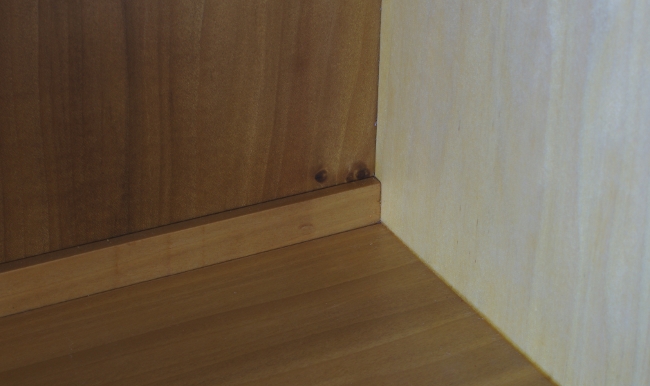
I came up with a way to keep the cross-member (which I like, for added strength), but hide the top of it and instead slip the panel in directly behind the shelf:
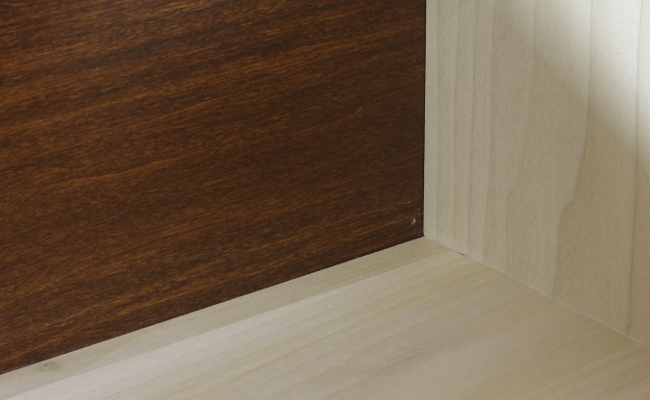
(I guess you can see the famous stain color here. Also, I didn’t bother to make the grain vertical in the panels, since it’s unlikely that anyone will really see them anyway.)
This isn’t complicated, but when put into words, it sounds complicated. There’s one rabbet on the top of the cross-member, with the high side being on the back, and then another rabbet is cut into the rear underside of the shelf, so that rear of the shelf rests on top of the cross-member. This forms a gap between the protruding end of the cross-member and the rear of the shelf, and that’s where the panel slips in.
In any case, now the hard part begins: I have to stain and varnish the rest of the piece. It’s taller than I am and barely fits in the shop.
