Five Years of Galoototron

It’s been five years since I made my first post on this blog. At that time, it was on Livejournal, and I was doing it just because it seemed like a good idea at the time. Apparently, I’m still posting, so because it’s been a nice “even” number of years since I started, I figure I ought to do a review post because I have nothing better to do.

(You won’t see too many of these posts on this blog, so bear with me.)

Before starting, I should mention something about the name of the blog. It doesn’t mean anything. It was just something that rolled off my tongue. It is a dippy name, it’s difficult to remember, and I’ve always been open to changing it. Unfortunately, I couldn’t think of anything better at the time, and that condition persists to this day.

The first post is my introduction, but perhaps there’s a little more that I can add to it. At that point, I had never done anything resembling semi-advanced woodworking. In hindsight, this was a natural time for me to start because I’d finally gotten some measure of stability in my life after years of grad school, moving across the country, working in crazy environments, and living in cramped places. I’d moved into that particular San Francisco apartment not too long before. It was nice and roomy, I lived alone, and I finally had some extra time. Sure, I’d like to have started earlier in life. I didn’t, so there’s no point in thinking about that.

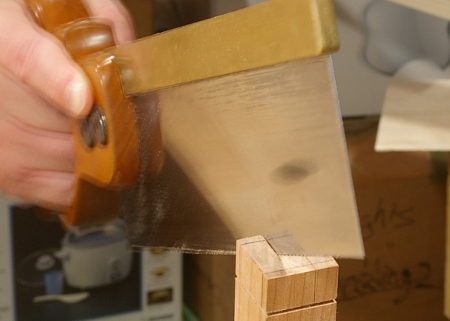
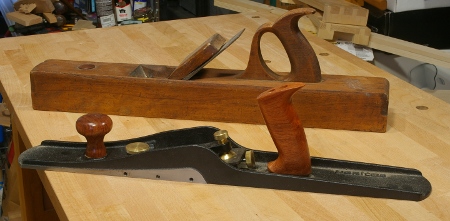
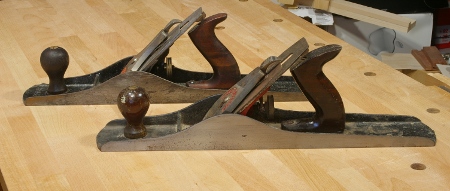
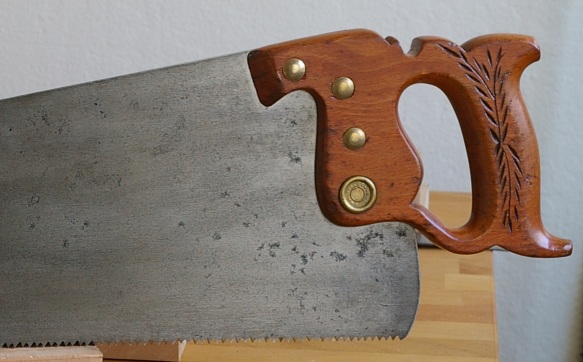
Regarding tools: I don’t know what was going on in my mind, but I must have been researching old tools quite a bit. For example, how did I know that I needed to sharpen my own saws at that time? My initial tool list wasn’t too far-off. I still haven’t bought a shoulder plane unless you want to count the mini Veritas version. And although I have a miter box, I haven’t used it (I haven’t even sharpened the saw). But I had one special tool right-on, and that was the Winchester handsaw I’d picked up (but never used) in 2003, three years before starting. It was a long time before I actually sharpened that thing, but ever since, it’s really been one of my favorite tools.

That a very common style of saw is special to me may provide some insight into the type of woodworking that I like to do now. I feel that I went after too many planes in the beginning, and did not realize the amount of work that saws do. In time, I began to appreciate saws more and more, and even made a few of my own.

I thought that I would be very project-oriented when I first started. I had the idea to make bookshelves–perhaps I believed that I’d make them within a year? I was wrong. I still haven’t made a set of bookshelves (I did make a prototype). What I did instead was learn the process of milling wood and basic joints. The first larger thing that I put together was my workbench, followed by tools such as my mallet and scrub plane.

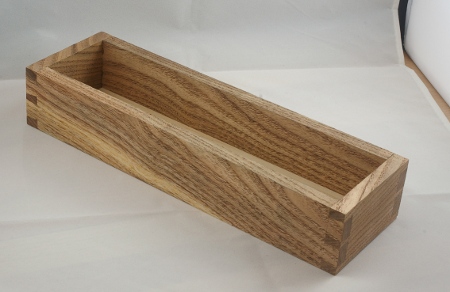
But about a year and a half into the process, I slowly made a dovetailed box, and that got things rolling. Though I didn’t have much time to work on it, that box went together more smoothly than I expected, and I still use it. By this time, things were changing in my life, and soon enough, I moved from the apartment to a house that actually had room for a shop. I spent the first few months trying to get organized there:

Then I started to build projects in earnest. The first big one was the shoe rack, which took some time but ultimately was a success. That was followed by the prototype bookshelf, the stool, and the first nightstand–I did all three of those projects in less than a year. At the same time, I made some shop improvements such as the saw till.

Incidentally, I switched the blog to the galoototron.com domain about a half-year after I moved to this shop. It was September 2009, and this shoe rack post was the first on the new domain. Before the switch, no one other than some family and friends knew about the blog, but then I started to tell a few more people (such as Luke Townsley at unpluggedshop.com) about it. Suddenly a lot more people than I really ever expected were reading this thing. That’s about as far as I ever went to promote it, though, and I don’t have plans to change that. I do appreciate all of the comments that I get from fellow woodworkers.

In retrospect, the two years I had in that shop were pivotal. I went from dorking around with tools and wood on a somewhat irregular basis to building projects. I gained speed and confidence in my joinery. The shop itself had a lot to do with this. No longer did I have to be completely fastidious about cleaning up after each session–I could leave a small amount of shavings or sawdust on the floor and it didn’t matter. Because I had enough room, I could put down my work at any time and pick it up again whenever I had the chance. This helped me establish a work pattern; I’d come home from work and have fun with a project for as little as 10 minutes or as much as an hour and a half before finishing for the day. I could even do a little in the morning before I went to work.

Of the projects I built in that shop, the nightstand seems like an obvious choice for a favorite, and it is. However, the little stool is a co-favorite:

The nightstand was the last project I completed there. Then, in the span of a few months, life got really busy, and after that, I moved again.

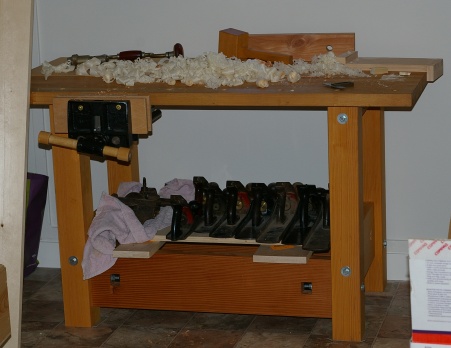
The new place also had room for a shop but it was more “raw”–as part of a garage, I really had to work to define the space. The old shop had room for me to put tools on tables all over the place. It was mostly disorganized, but I sort of knew where everything was, so I managed. There was no room for that in the new shop. To make up for it, I was allowed to hang cabinets, racks, and hooks on the walls and ceiling to my heart’s desire.

Unfortunately, I wasn’t able to get the new shop organized quickly enough for my taste. Part of this was a chicken-and-egg problem; the tool cabinet is an example of this. My first task in the new shop was to get some of the tools on the walls, and I had to finish the cabinet so that I could put tools in there. Unfortunately, my tools were all packed away in boxes (from the move) that surrounded the workbench. I really had no idea where anything in particular was and I didn’t have places to put them temporarily.

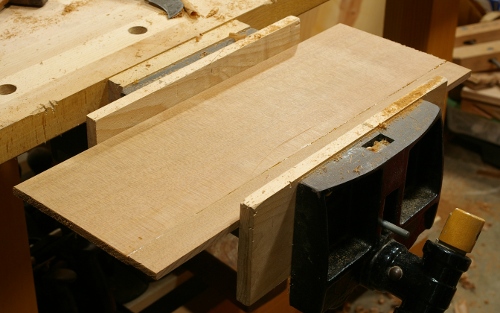
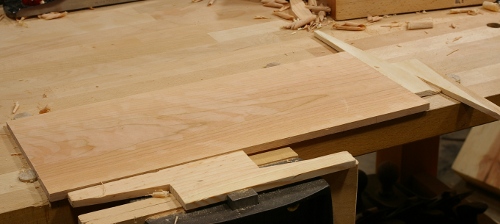
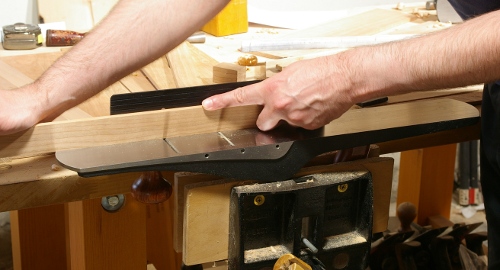
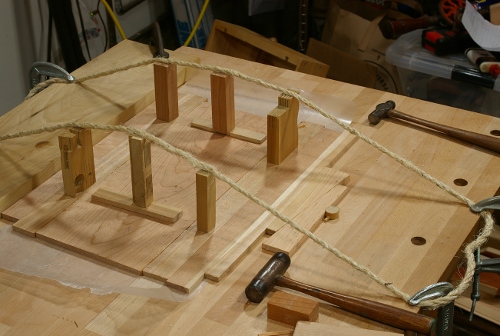
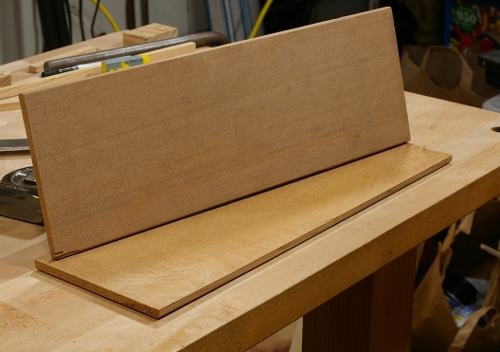
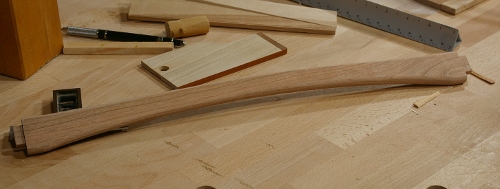
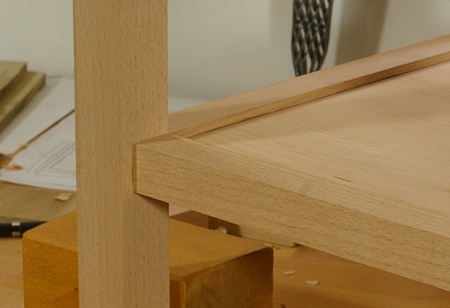
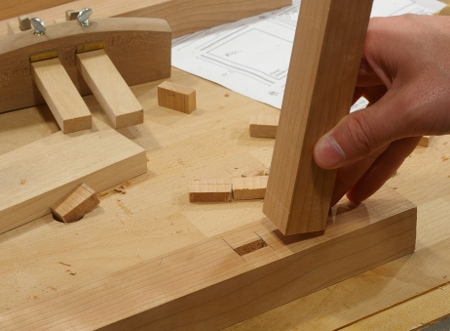
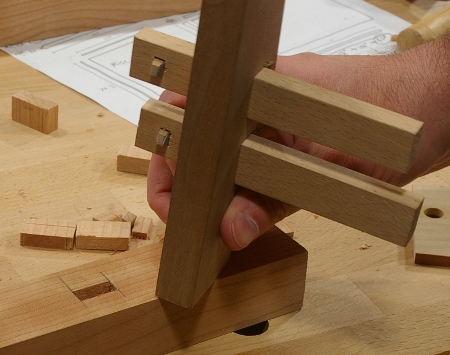
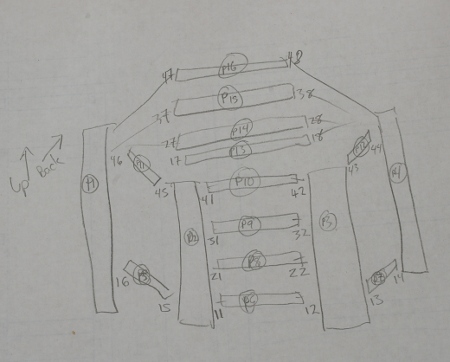
At the same time, I also had more furniture to make. The second nightstand project kicked off this year, and it turned out to be far more complicated and time-consuming than I expected. (And I’m still working on it, but I’m almost done.)

Every now and then, I add to the wall storage in the shop. That situation isn’t fully resolved (see below), but it is much better. Things are getting done, and I have to say that I prefer the new shop to the old one.

Also, I’m making a concerted effort to work out some of the annoying little stumbling blocks that I have to deal with from time to time. The two biggest problems I come across are tool and project storage (both temporary and permanent) and workholding. I have plans to solve those soon.

Going forward with projects, I have a long list in front of me. The most pressing, according to those in the know, is an entertainment center. We’re also looking at the rest of the living room–coffee table, bookshelves, who knows what. With the exception of our couch, the living room furniture is crap and it makes sense to concentrate on that room. Whatever I do, I’ve decided that I’m not going to make anything as brutally complicated as the second nightstand project(s) for a while.

But then again, I may just make more complicated things. Here’s how.

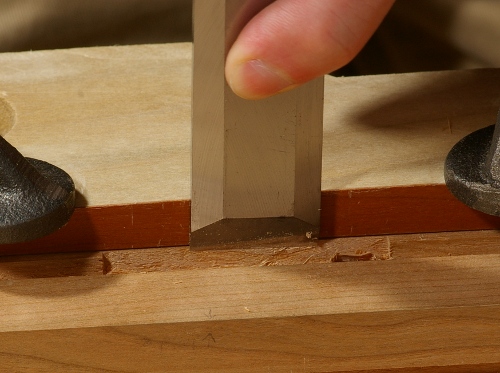
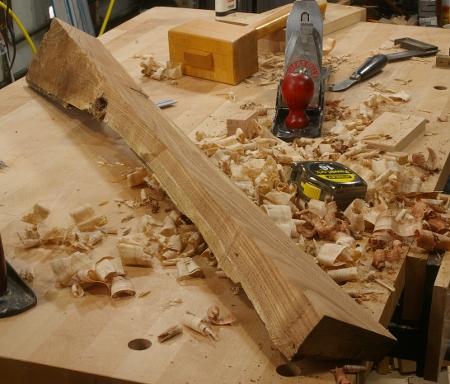
The title of this blog is no lie. Everything I do is by hand, and that includes stock preparation. I didn’t go down this road out of principle or some other similarly silly reason. I did it primarily out of interest and necessity–the apartment I once lived in was no place for power tools.

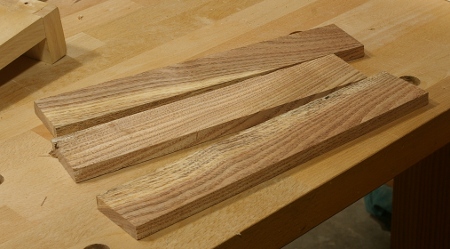
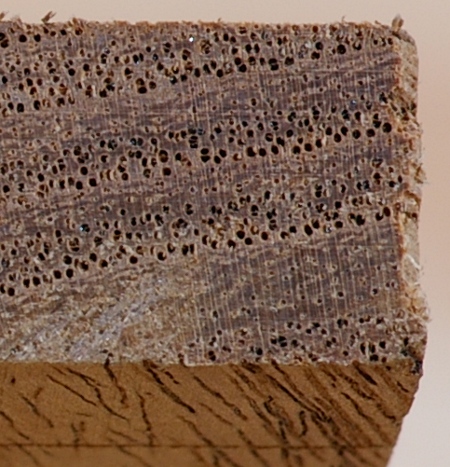
Unfortunately, it turns out that flattening, thicknessing, and resawing by hand is a lot of work. A large majority of my time and effort goes into stock preparation. That’s not even mentioning how much time I spend sharpening plane blades as I go. It’s getting out of hand. I can flatten a board quickly now (and wow am I glad I learned), resawing isn’t so incredibly horrible when you keep your saw blade sharp, but that last step of getting down to final thickness is totally bogus when you have to repeat it dozens of times, even with my scrub plane that can take off 1/16″ at a time.

So I think I’m going to get myself a stupid lunchbox-style thickness planer sometime in the new year. I’ll continue to flatten stuff by hand–it’s a great way to get to know the wood and the board that you’re about to use–but when it comes to getting that other side down to something reasonable, I won’t think twice about feeding it to a machine. I’ve got furniture to build and I do not have the time to lollygag.

However, the blog remains the same. The preceding paragraph (I hope) will be the only mention. I don’t plan to write about it when it happens, and I’ll continue to do all joinery by hand.

At this point, it would be remiss not to mention that I’ve had help. Schwarz says that the modern woodworker works alone and I think he’s wrong. Even if one never meets another woodworker in person, and even if one never takes part on a discussion forum online, the modern woodworker has an incredible resource mass available. It’s sometimes easy to overlook that a person wrote what’s on your screen, and when you learn something from someone, that person is very much with you in spirit as you work.

And wow, have a lot of people been working with me in spirit in my shop. There are just too many to list, but I’d really like to thank anyone who’s written anything that I’ve learned from or even read.

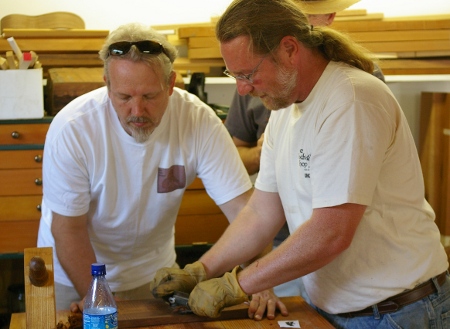
Also, there are the BAGs (Bay Area Galoots). Several of you have really helped me out in more direct ways–lending me tools, giving advice, being generally cool, that sort of thing.

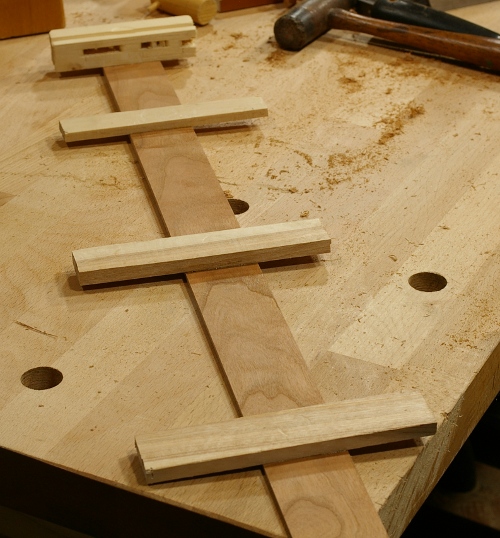
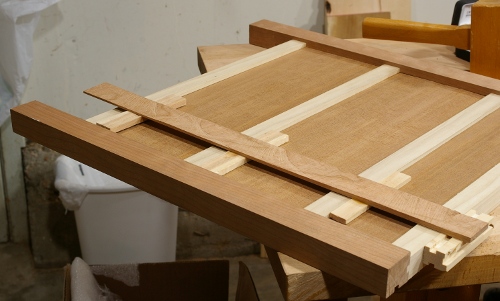
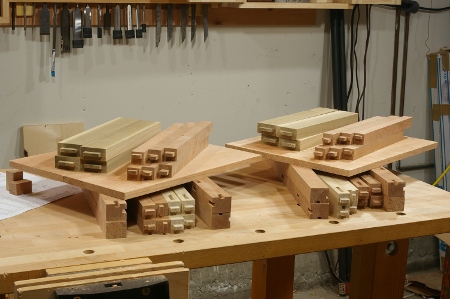
Now, back to the work on the new nightstand projects. Progress has been (inexplicably) made.

Goofs Illustrated: Repairing Grooves

I thought I would be posting about the glue-up on the current twin nightstand project at this point, but there was one remaining thing that was really bugging me.

It turns out that I’d carelessly torn out the sides of a couple of grooves when I was cutting them, and although it wasn’t severe, with the panels fit, the shadow there would stick out like a sore thumb whenever I saw it. Unfortunately, I did it in a prominent area, and at the exact same place on each of the nightstands. So I wouldn’t be able to hide from it, and since I plan to use these things for a long time, I’d have a constant reminder of when I messed that up. Something needed to be done.

I started by marking out the repair area with a cutting gauge. In the following photo, the tearout isn’t easy to spot at first (it’s on the near edge of the groove), but if you look closely, it will be apparent.

Note also that I’m taking all of these photos with a macro lens so that you can see everything a bit better. For reference, that’s a 1/4″ groove.

Then I clamped a flat piece of stock right up against the mark I’d just made and started wasting out the repair area. You have to do this really carefully–use a small chisel diagonally (or a gouge) to avoid tearing out your repair area when you’re starting.

The photo below shows the last part of the wasting step–registering the chisel back against the scrap and paring out the last little bit.

Your chisel has to be very sharp and the back must be flat for this to work properly. For most chisel operations, the back may not need to be flat, but this is an exception.

I also gratuitously used my new Veritas miniature router plane in the repair area. It probably wasn’t necessary.

Now at this point, I was lucky enough to have not made it look any worse than it did at the beginning, so I carefully milled a small piece of wood two-square and pared down the length until it was the length of the repair area. I also made sure that this piece would have the same grain direction as the wood in the original. If I’d been smarter, I would have also matched the vector of the medullary rays, but I wasn’t, so I didn’t.

I glued it in place and banged in a couple of pine wedges to “clamp” it:

After letting it dry overnight, I pulled out the wedges and removed most of the material on the repair that was proud of the surface and groove (again, carefully).

For the final touches, I used planes. This was the very first time I got to use the side rabbet plane that I got from Veritas when they first released it:

It was very handy for this, but as they say, it’s a plane you don’t want to have to use.

After doing the sides, I planed off the top and the repair was complete:

There’s a tiny little nick at the top of this one where I accidentally dented the edge of the repair area, but I can live with that. I’ll only notice it every now and then and it’s something that I should notice occasionally. The important part is how it looks with its panel in place, and that seems to be OK:

The moral of the story? Don’t ever have to do this. I had thought that I was careful enough when I made the grooves; I’d marked the grain with a mortise gauge and worked the area with a chisel beforehand. But I still tore it up with my router plane because I was just too ham-fisted. If I’d spent an extra 30 seconds total being just a bit more careful, this would have never happened and I would have saved the hour that it took to do these repairs.

Nightstands v2: Rear Panels and Alignment Guide

Since my last update, I smoothed and fitted the side panels to the main cabinets, which left just the back panels before I could glue up the cabinets. I’d resawed the western redcedar for these panels, but I hadn’t cut them to size to fit them to the grooves that I also did in the last week or so.

The top section (backing the shelf) was easy–I just sliced the panel to width, cut the rabbets, and test-fit. Then I started on the backing panel for the first drawer. That opening is 5.5″; add about 1/8″ on each side for the housing grooves, and you’ve got about 5.75″. Because the redcedar I resawed was from a 1×6, that’s perfect, right?

Well, no.

I always forget how crazy they go when they surface these softwoods. What I had was a total width of about 5.5″–a quarter-inch short. Oh, so annoying. (Note to lumberyards: I really, really want my softwood unsurfaced, like my hardwood.)

So I jointed an edge from the offcut from the previous panel, jointed an edge on the slightly-too-small 5.5″ piece, glued it up (sprung-joint style), and rather than getting fancy with clamping as in my previous episode, I just slammed it into the front vise on my bench:

That vise sometimes makes some good arguments for why it should stick around.

Then after the glue dried, the most annoying part came: I sawed off all but about 3/8″ of the smaller piece that I had just glued on so that the panel was the right size. It’s a really good-looking, almost seamless joint when planed down, but no one will ever see it because it’s on the back of the piece. That means that, in the future, I get to spin the piece around, point at a practically invisible line, and say, “this here was really annoying.” I’ll also be suspected of having gone off the deep end at some point.

So right now, I have these rear panels finished on one of the cabinets. To help align the cross-members of the piece, I made myself a little guide out of scraps:

And here it is in use on the rear frame of the cabinet:

The main goal of making this guide was for glue-up, because you have a lot less time to go measuring stuff during that process. And hopefully by the next time I post, I should have the cabinets glued up.

Nightstands v2: Panels, Decorations

Work on the new nightstand projects has been excruciatingly slow this month, but has not stopped. In part, I’ve needed to do a lot of stock preparation and a lot of resawing (that’s the bandsaw calling me with its siren song again). The other problem is a lack of time–external stress causing most of it. But who cares about that? Let’s get into the woodworking.

I’ve been primarily working on the panels for the sides and backs of the cabinets. The sides are similar to the ones I’ve used before–1/4″ thick wood from the same stock (or similar) as the frame. There’s a slight difference, though: I decided that because I didn’t have any single piece of cherry wide enough to cover an entire side, I’d make a decorative touch with another species (birch) when gluing them up to make the piece.

The birch I picked was particularly annoying to work with, mainly because in many places, the grain reverses halfway through the width. Oh yeah, and it adores tearout.

This time, I used the double-wedge method to secure the panel stock against dogs (my low-profile versions) as I was planing it:

The panel jointing/glue-ups gave me a chance to use my new Veritas bevel-up jointer with the fence. I’d already used it in this piece back with the shelves, but this operation was tricker because the stock is so thin (it tends to bend when you press it).

I cut pieces out of the stock as I needed them, first jointing one edge with a slight hollow, then sawing off the desired stock, then jointing again. This was not as simple as it sounds, because when you saw off a small strip, the strip often slightly changes in geometry, because it’s under tension. So the hollow that you had before on that one edge may now be a bit convex, and you have to redo that edge.

But the most annoying thing, by far and away, was that I couldn’t use the jointer fence on the now-thin strip as I did before, because the fence is too deep and I don’t have a workbench trick for that yet (though I might in the future). So I had to use the old “clamp the plane upside-down in the vise and pull the strip through” trick.

It works, but I’m not terribly fond of it. I’m always afraid of planing a knuckle, and you tend to get sweat on the plane sole, leading to rust if you’re not careful. Still, it was the only option I had at the time.

With that done, it was time for laying out the panel components and choosing which pieces would go on which panel. Some people use stroke marks or triangles to mark which pieces go where, but because I had 20 pieces, I decided to go with a more detailed system that told me which part went where, and which panel each piece ultimately belonged to.

Now the fun part began: glue-up. There’s been a bit written about gluing up panels lately, and wouldn’t you know that The SchwarzThe Chris would post something just as I was doing mine. However, that method is for thicker stock. Plus, I was itching to try a variation on something I saw on page 20 of Toshio Odate’s shoji book.

Essentially, that method calls for you to sandwich the panel that you’re gluing between two boards, wrap a rope around the panel/boards, and put some blocks of wood underneath the rope to tension it and smash the panels between the boards to keep everything flat.

I modified it a little, making it sort of a hybrid with go-bars:

  • I used my workbench top instead of the board.
  • I didn’t use a board on top, but rather, just put the blocks directly onto the panel.
  • I used two sets of rope instead of one (one for each side of the panel)
  • Instead of using the rope to tension both on the top and the sides, I used it on the top only. For the sides, I used wedges, dog holes, and a stop on my workbench.
  • I put wax paper between the panel and the workbench to keep the panel from getting stuck to the benchtop.

It’s much easier to show this in a photo:

It took me a while to finalize the setup. I actually used a single piece of rope (twine, really) that I clamped to the bench in strategic places, and didn’t even cut it from its spool. I didn’t have scrap blocks handy, so I had to search all around the place for one of my boxes of scrap. And since I’d never done it before, I didn’t have a feeling for what the tension should be like and how everything fit together.

The good news is that once I figured it out, the actual glue-up process was a snap and took only a couple of minutes to execute. That’s important, because I had to do eight repetitions. (There are four panels, and each panel has five pieces, and hence four joints. I glued only two joints at a time to reduce complexity.)

Additional good news: it worked like a charm. Those panels came out really flat and seamless on the faces, and the wax paper did a perfect job at preventing the panel from sticking to the bench (and the paper). You have to replace the wax paper now and then because the wax coating comes off because it’s stuck to the glue.

I’m really happy with the results of the method and I’ll be trying it again. I’d struggled doing this sort of glue-up earlier because the panels are so thin. Being able to put the interim work into a spot where it won’t shift around is nice. I just hope that my experience with this time reduces the time it takes to set up next time (although part of that time was spent looking through boxes to find the rope).

I also acquired and resawed the stock for the backs of the nightstands. I picked up a bunch of “vertical grain” (quartersawn) western redcedar. It was so easy to resaw and plane–what a relief.

I guess there’s also this obligatory shot of this board’s grain (sorry to you folks on Google+, you’ve already seen these shots):

The other thing I’ve been doing on this project has been the decorations. I changed the design to be a little closer to the one I used on the first nightstand, to give it a little less transparency and eliminate the need for plinth on the bottoms of the sides:

With all of these components made, I’m nearly ready to glue up the main cabinets.

BAGathon 2011

This year’s Bagathon (Bay Area Galoot meetup) was last Sunday, awesomely hosted by Greg Isola. Upon arrival, most of us wandered into his shop to check it out and there was a lot of drooling. (He’s got one seriously nice shop.)

I’ve gone to this event every year since I got into woodworking and started this blog, and it really is a treat. Seeing all of the tools that attendees bring along is one thing, but the demonstrations and interaction that you get with fellow woodworkers is priceless. It’s strange to wrap your head around this, but five days out of five years have really accelerated my work.

There was no shortage of good demos this year.

Mike Suwczinsky did a demo on scrapers, starting with cutting up beat-up handsaws. Here he is on the right demonstrating the use of a #80 cabinet scraper (if it’s not a #80, let’s pretend that it is):

That’s Bill Kasper on the left, sort of steadying that nasty piece of cocobolo.

Note the attire: Bill’s got a BAG shirt, and Mike’s outfitted in the more traditional Woodwright’s Shop garb. Not feeling content to leave it at the shirt, Mike also gave himself an Underhill-style cut on his arm (see foreground). Unfortunately, we weren’t filming, so we have no idea how he managed to do it.

Tom Conroy gave a demonstration on leather-bound bookbinding, gluing a piece of leather to a cardboard book cover. The technique is a little similar to how you might glue leather to a desktop. It was fascinating to see how one massages the material into place, and also how you can form it to shape with glue (and water).

Kirk Eppler demonstrated how to make leather sheaths for axes, adzes, and tools of a similar nature. This was fascinatingly easy-looking–installing the rivets and snaps appears to be a quick process once you’re used to it. Mike made one for an axe.

A perennial feature of Bagathons is the wine box feeding frenzy. Greg Hahn shows up with a whole bunch of empty wooden wine boxes, and we take them. This year, our host had the idea to surprise him, so several people brought projects they’d made with the boxes. A great many of these are tool holders, as you can see:

Greg H showed us his appreciation in advance by bringing another truckload of wine boxes. Thanks, Greg! Also, thanks again to Greg I for hosting, and to everyone who went.

Nightstands v2: Frames Complete, Shelves Joined

It’s been a little while since I posted anything on the twin-nightstand project, so it’s time for a quick checkpoint (one of the reasons I write this blog is so that I can record when I’ve finished various phases of a project).

Both frames, exterior and interior, are complete. The interior frames are to support the shelf and drawers in each piece. In the first nightstand project, I shaped some of the exterior pieces to provide drawer supports in strange ways, and I said to myself that this method was too complicated to be worth the effort next time. So in the new one, I’ve been making the supports as separate pieces, in a secondary wood (yellow-poplar salvaged from an old bed frame).

I was finished with the exterior frame several weeks ago, and I finished with the interior frame about two weeks ago. This week, I’ve been working on the shelves that go above the midsection of each piece. Each shelf is made from two roughly 1/2″ panels edge-glued; I did the glue-ups yesterday and today.

So now the pile of components looks like this:

You can clearly see the secondary yellow-poplar members here. The components that I have yet to make are:

  • panels for the sides and back
  • drawers
  • drawer bottoms
  • tops
  • decorations (these will line the base of the pieces)

In theory, none of this should take too long, but it’s still a fair amount of work to do. There will be a non-trivial amount of resawing for the panels. I can’t really put a time estimate on how long this is going to take, because I’ve encountered a lot of diversions when making this project (though I’m starting to feel like I really need to finish this and move on to the next thing).

There is a new tool in the preceding photo that I may feature sometime in the future, depending on how just I like it. You could guess which one it is, though the excitement factor may not be entirely present in doing so.

Recessed Mortise and Tenon

Here’s a quick little note on how I cut the mortise-and-tenon joints for the frames of projects such as the nightstands and the stool (though to be honest, I didn’t really do it this way until the latest project).

Normally, you arrange a mortise-and-tenon joint so that the faces of the two members that you’re joining are flush. However, you can recess the tenon member so that you get more of a three-dimensional look. In part, I’ve done this to frames that hold panels. My panels aren’t typically raised, so getting a little extra depth is nice:

Start by milling your pieces and figure out roughly where the mortise ought to go. You don’t need to be too precise about it; just make sure that your tenon member covers the mortise fully, and try to even out the shoulders as much as makes sense, because tenon shoulders make your joint significantly tougher. You can mark the area with pencil if you like.

Then mark out a line with a marking gauge for one wall of the mortise. If you really want to, you can set a mortise gauge for the width of your chisel and mark both walls, but I don’t do that because I set my mortise gauge from the mortise itself after I’m done chopping one.

Chop your mortise. The following photo shows a completed mortise, and the tenon member roughly at the depth it will eventually go:

Set your mortise gauge if you haven’t already. Set it from the mortise piece, as if you were going to chop another mortise:

Now, figure out how much of a recess you want. Set another marking gauge to this depth. Mill a thin, flat piece of wood to this depth by marking the piece all around with the gauge, sawing, and planing to the line (normal practice for milling wood if you do it by hand; feel free to use an electrobeast if you like).

This piece of wood will be your spacer, and is really the whole trick to putting the tenon in the correct place.

Mark out your tenon the usual way with your mortise gauge, but put the spacer between the stock and the tenon member as you’re marking. Mark from the face side.

Now, saw your tenon (the following photo is gratuitous, but just in case anyone’s forgotten how to saw a tenon cheek):

And you’re done.

The point to making the spacer is that once you have it made, you can use it over and over. I had to make dozens of these joints for the new project but needed only set the mortise gauge once. I just used it with the spacer for all of the joints I needed. (Obviously, you don’t use the spacer when marking the mortise; only the tenon.)

The Embellished Story of a Simple Box

There I was, working on the latest project, when SWMBO approached and asked for some sort of container to put in the cabinet for some spices. She drew something that suspiciously resembled a box, so I inquired, “would a box work for this?”

Affirmative was the reply, and in the words of Topato Potato and Sheriff Pony, it was time to “spring into action!” The valiant woodworker never misses an opportunity to trot off to Mount Carcase to face off with the Dovetail Dragon, no?

I selected a target and started milling. Then I realized that the chunk I had chosen didn’t have enough wood to make the piece, so I looked around for another piece, which turned out to be this:

It was a measly offcut from some much larger board that I’m saving for a rainy day. Making the second call to “spring into action,” I was successful at milling the necessary pieces.

At about this time, I realized that I had no idea what this wood was. I still do not. Here is a cross-section of this ring-porous (without tyloses) angiosperm for the sole purpose of an excuse to use the macro lens again, and on the off-chance that one of you crack wood identifiers knows:

At this point, I just made the box. I think most of everyone who reads this knows about through dovetails, so I’ll digress on that. The sole excitement was getting to use the 1/8″ blade on the Stanley #45 for the groove on the bottom, and since that doesn’t reach high enough on the excite-o-meter, let’s just skip to the end.

Box.

Goofs Illustrated: Too Many Planes

I’m going to start a new feature that will appear irregularly, meaning “whenever I have material.” Essentially, when I have enough explanation for something that I messed up, I’ll write about it. I was originally going to call these “mistakes,” but I realized that they aren’t that serious (and Kari Hultman agrees). It’s an important distinction because I don’t want to give the impression that you can’t get anything done if you goof up, goof off, or whatever. I’ve completed several projects while doing the “wrong thing.” The contradiction is that in woodworking, completing a project is essentially never the wrong thing to do. Just ask your significant other.

So here we go with the most obvious one: I bought too many stupid bench planes, and didn’t know what to do with them. You’re going to see a lot of confessions like this (if you haven’t already) due to the release of Schwarz’s The Anarchist’s Tool Chest, where he goes into detail about this. It is a recurring thing, though–seems that everyone has to go through it because otherwise, you really don’t know for yourself.

Let’s start with jack planes. I knew that I needed a jack plane and I got a pair of metal Bailey-style models early on because they were not expensive. I got one working well as a general-purpose plane and I was really happy that I was able to get the thing to take nice shavings. So far, so good, but that didn’t stop me from buying more. I ended up with four #5-size ones. I don’t know why, because I use only one of them. I’m currently thinking about adapting a second to shooting-board use, so that would still leave two extras. And that #5 1/4-size plane I picked up? I’ve used it maybe once, but it sure is cute.

What’s probably worse is that I didn’t put a serious camber on my jack plane until, what was it, three years after I got it? That was almost a year and a half ago. Stock prep has never quite been the same since. I’d made a scrub plane, which is great for getting really icky boards into shape, but it never occurred to me that I should have something somewhere between that and a straight edge.

What was I thinking?

So I’m happy with that thing, but am I finished with jack planes?

Oh well, the answer doesn’t matter. Let’s talk about smoothers now, because we have to. At my peak, I had five metal #4-sized smoothers. I’m down to three: one that does what it’s supposed to do when it’s sharp, one that I don’t use so much, and another that I’m prepping to give to a friend. I have a wooden Taiwanese plane that works wonders as a smoother, and I’m thinking about rehabbing a coffin smoother because wooden planes are awesome. And there’s the #3 size that I’ve got, too. It works great but I never use it.

This would be a nice set. The coffin smoother isn’t tuned, though.

At least smoothing planes are small, though. I don’t have as many as a hardcore addict, so they’re easy to stow away and sort of forget about. Unlike jointer planes.

I’ve owned five jointer planes. I had two metal Bailey #7-size examples and they worked okay, but I was never terribly happy with them. I gave one to a friend. I also had a #8 that needed some work. I gave that one to a fellow BAG when I realized that I hadn’t gotten it to work yet because I never really wanted it to.

And I was still in jointer hell. The one that remained and I actually used, I didn’t like very much. There was just something about it that bugged me, so this year, I bought two more at about the same time. One of these was a woodie that a friend picked up at the flea (thanks, again, Kirk!). The other is Veritas bevel-up jointer (BUJ). Now that there is a serious plane–and I think it cost more than all of my other bench planes combined. I flattened the sole of the woodie with the BUJ, set the woodie for a thicker shaving (kind of like a fore plane), the BUJ for a fine shaving, and maybe, just maybe, I’ve escaped jointer hell. I found stock prep on the nightstands v2 project to be much less of a chore with these. Remember the phrase, “coarse, medium, fine?” The woodie is medium and the BUJ is fine. On thin boards where the blade is wider than the stock, you don’t need to use a smoother.

If I’m lucky, this will be the end of the jointer debacle.

Oh yeah, and of course, I have two Bailey #6-size planes. I never use them because I’ve found that I prefer the jack plane size as a fore plane. Why? The #6 is too heavy for my weight. When I make a diagonal stroke with one, it’s too much effort to lift it back toward me. I’ve noticed that guys who like the #6 size for this sort of thing tend to outsize me. So, would a wooden plane be better, or should I just stop fooling around and be happy with my jack plane?

Too heavy.

That final question is why I’m still in the goofing-off stage with bench planes. There are two sides to this. On one hand, goofing around with tools can seriously detract from projects that you’re supposed to be working on (and believe me, those are my top priorities). On the other hand, there are certain tools that can save you a lot of time on your projects if you spend enough time goofing around with them.

I have slight excesses of other tools, but the plane surplus is the one I’m embarrassed about. So this will probably be the only goof episode about too many tools.

Nightstands v2: Exterior Frame A

The new twin-nightstand project is coming along. After some quality time with saws and planes, I had all of the external frame pieces milled for each piece:

In the center are eight sticks of yellow-poplar that I salvaged from an old bed frame. They’ll be used for the rear of the nightstands. Looking at the timestamps of the photos, it looks like it took (gasp) almost two weeks to produce this stack. That’s just the speed you’ll experience when you’re working by hand, have at most an hour and a half to work each day, and maybe aren’t the quickest person around. (Would a bandsaw greatly facilitate the speed? You bet it would.)

The next step was to come up with a frame map, as I did for the previous nightstand. Because there are so many components in this piece, it’s best to keep close track of them. And again, as I did in the previous version, I made a really ugly but still-workable and accurate drawing:

There are two kinds of labels here. One begins with a P, meaning “piece,” so P1 is the far left leg in this case. The others, which are simply numbers, label joints. The joints are in four vertical levels in the piece, so I decided to have the lower-level joints start with 1, the next with 2, and so on. Then, the second number denotes the position. In this drawing, the x1 joints are in off the right side of the front left leg. So joint 11 is the lowest one of these, and 21, 31, and 41 are directly above. Naturally, in this system, there will be plenty of holes–for example, there are no joints 25 or 35.

Finally, because there are to be two identical nightstands, I decided to add a letter A or B to the end to identify each one. So you’ll have all sorts of labels like P3A and 43B.

Whew. But that wasn’t the hard part. That honor went to planning which piece would go where:

If I recall correctly, the components for piece A are on the right and piece B’s are on the left. In any case, it was tricky. Because the components came from different offsets into a single flatsawn board, the cut profiles were different. The ones from the center were more or less quartersawn in flavor, but most were riftsawn in one way or the other. The worst part was that two of the legs had very tangential grain on their sides because they came from the center of the board. To produce a consistent look, I decided to put both of those legs on one side, and use matching rails between them. The reason? You can’t look at both sides at once, and in the end, I can always choose to hide that side against the side of the bed if it looks too ridiculous. In any case, that will be on nightstand A, and I’ll try to show that when all of this is done.

I wasn’t just trying to match the grain on each side, though. I decided to try out the arrangement of shoji described in Toshio Odate’s book, where you arrange the pieces so that the core of the tree is pointing inward (bark side out). Because this is a 3-D piece, I also tried to place the legs and rails so that the cores would face the interior of the nightstand. It didn’t look so bad to me, so maybe this traditional arrangement has a bit of merit.

With everything arranged, I labeled each piece and its orientation, put half of the pieces away, and started work on the actual joinery. One week later, and I’ve finished the 24 mortise-and-tenon joints of the exterior frame of nightstand A:

Hey, how about that, it doesn’t seem to look too bad and it took a lot less time than I thought it would. Now it’s B’s turn.

Or, it will be B’s turn when the Thagomizer recovers from its run-in with a holdfast. I broke it in a different spot this time, a clean shear across the top:

Of course, it had to wait until I was working on the next-to-last mortise. I finished that one and the final one with it still broken (it hadn’t split down the middle). Then I removed the head, gunked on and spread the hide glue, and clamped it together. Yeah, I’ve thought about making a new mallet one of these days, but I just don’t have the time right now to be dorking around with tools (sigh). Maybe when this project is near an end and in the finishing process.