
Work on the new nightstand projects has been excruciatingly slow this month, but has not stopped. In part, I’ve needed to do a lot of stock preparation and a lot of resawing (that’s the bandsaw calling me with its siren song again). The other problem is a lack of time–external stress causing most of it. But who cares about that? Let’s get into the woodworking.
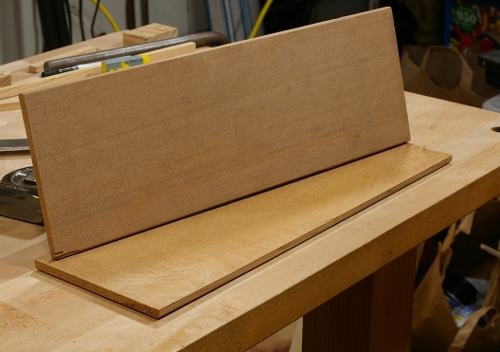
I’ve been primarily working on the panels for the sides and backs of the cabinets. The sides are similar to the ones I’ve used before–1/4″ thick wood from the same stock (or similar) as the frame. There’s a slight difference, though: I decided that because I didn’t have any single piece of cherry wide enough to cover an entire side, I’d make a decorative touch with another species (birch) when gluing them up to make the piece.
The birch I picked was particularly annoying to work with, mainly because in many places, the grain reverses halfway through the width. Oh yeah, and it adores tearout.
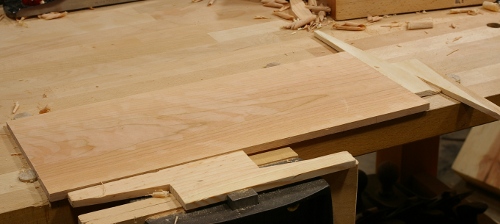
This time, I used the double-wedge method to secure the panel stock against dogs (my low-profile versions) as I was planing it:
The panel jointing/glue-ups gave me a chance to use my new Veritas bevel-up jointer with the fence. I’d already used it in this piece back with the shelves, but this operation was tricker because the stock is so thin (it tends to bend when you press it).
I cut pieces out of the stock as I needed them, first jointing one edge with a slight hollow, then sawing off the desired stock, then jointing again. This was not as simple as it sounds, because when you saw off a small strip, the strip often slightly changes in geometry, because it’s under tension. So the hollow that you had before on that one edge may now be a bit convex, and you have to redo that edge.
But the most annoying thing, by far and away, was that I couldn’t use the jointer fence on the now-thin strip as I did before, because the fence is too deep and I don’t have a workbench trick for that yet (though I might in the future). So I had to use the old “clamp the plane upside-down in the vise and pull the strip through” trick.
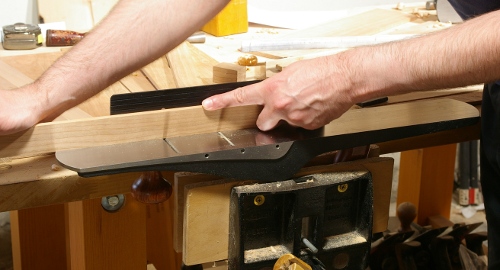
It works, but I’m not terribly fond of it. I’m always afraid of planing a knuckle, and you tend to get sweat on the plane sole, leading to rust if you’re not careful. Still, it was the only option I had at the time.
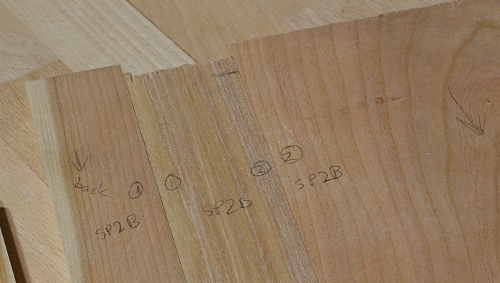
With that done, it was time for laying out the panel components and choosing which pieces would go on which panel. Some people use stroke marks or triangles to mark which pieces go where, but because I had 20 pieces, I decided to go with a more detailed system that told me which part went where, and which panel each piece ultimately belonged to.
Now the fun part began: glue-up. There’s been a bit written about gluing up panels lately, and wouldn’t you know that The SchwarzThe Chris would post something just as I was doing mine. However, that method is for thicker stock. Plus, I was itching to try a variation on something I saw on page 20 of Toshio Odate’s shoji book.
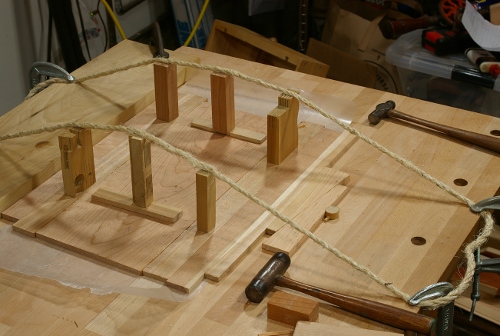
Essentially, that method calls for you to sandwich the panel that you’re gluing between two boards, wrap a rope around the panel/boards, and put some blocks of wood underneath the rope to tension it and smash the panels between the boards to keep everything flat.
I modified it a little, making it sort of a hybrid with go-bars:
- I used my workbench top instead of the board.
- I didn’t use a board on top, but rather, just put the blocks directly onto the panel.
- I used two sets of rope instead of one (one for each side of the panel)
- Instead of using the rope to tension both on the top and the sides, I used it on the top only. For the sides, I used wedges, dog holes, and a stop on my workbench.
- I put wax paper between the panel and the workbench to keep the panel from getting stuck to the benchtop.
It’s much easier to show this in a photo:
It took me a while to finalize the setup. I actually used a single piece of rope (twine, really) that I clamped to the bench in strategic places, and didn’t even cut it from its spool. I didn’t have scrap blocks handy, so I had to search all around the place for one of my boxes of scrap. And since I’d never done it before, I didn’t have a feeling for what the tension should be like and how everything fit together.
The good news is that once I figured it out, the actual glue-up process was a snap and took only a couple of minutes to execute. That’s important, because I had to do eight repetitions. (There are four panels, and each panel has five pieces, and hence four joints. I glued only two joints at a time to reduce complexity.)
Additional good news: it worked like a charm. Those panels came out really flat and seamless on the faces, and the wax paper did a perfect job at preventing the panel from sticking to the bench (and the paper). You have to replace the wax paper now and then because the wax coating comes off because it’s stuck to the glue.
I’m really happy with the results of the method and I’ll be trying it again. I’d struggled doing this sort of glue-up earlier because the panels are so thin. Being able to put the interim work into a spot where it won’t shift around is nice. I just hope that my experience with this time reduces the time it takes to set up next time (although part of that time was spent looking through boxes to find the rope).
I also acquired and resawed the stock for the backs of the nightstands. I picked up a bunch of “vertical grain” (quartersawn) western redcedar. It was so easy to resaw and plane–what a relief.
I guess there’s also this obligatory shot of this board’s grain (sorry to you folks on Google+, you’ve already seen these shots):
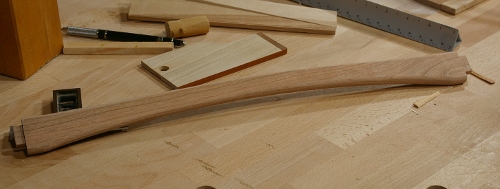
The other thing I’ve been doing on this project has been the decorations. I changed the design to be a little closer to the one I used on the first nightstand, to give it a little less transparency and eliminate the need for plinth on the bottoms of the sides:
With all of these components made, I’m nearly ready to glue up the main cabinets.
