
The front and back of the nightstand are now glued up (Thanks for the help on the back, Jimmy). To complete the frame glue-up, the only obstacle remaining was to finish off the shelf that will go in the bottom. It will be held in place by a groove running around the frame.
Milling the boards for the shelf was a difficult task because there was a big nasty knot going through the two halves of the resawed board that I used. The discovery of this knot marked those boards as being for the shelf; it was possible to arrange them so that it would make the piece interesting but not look weird or overwhelm the otherwise clear (but not straight) grain.
So when I jointed the two boards and glued them together, I was prepared for the possibility that I might need to start again. Fortunately, this did not turn out to be the case; it flattened well with just a smoothing plane after the glueup, and so I was optimistic about the final steps.
The general idea for fitting this shelf is with “tongue” on the side of the shelf going into the groove in the lower stretchers in the frame. However, this tongue would not be a complete tongue; it would be formed by a simple rabbet extending around four edges of the shelf, and the shelf is to hang down so that the rabbet is invisible. With this design, it will be able to float in the frame and be able to expand and contract as it pleases.
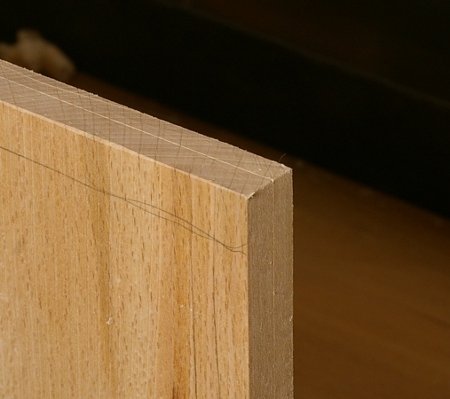
I started by marking the underside as being the rabbeted face (the pencil marks going around the edges), and scribed a line 1/4″ from the top face (slightly harder to see in this photo):
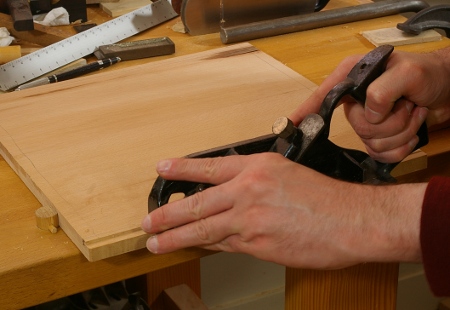
Then I got out my Stanley #78, did the requisite fooling around with its adjustments, and cut the bulk of the rabbet almost down to the scribed line:
Then I used my Taiwanese rabbet plane to finish off the cut down to the line and fine-tune the fit:
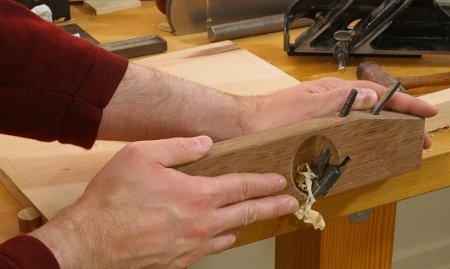
The difference between setting up and using these two planes is like night and day. The Stanley is an older version without a depth adjuster, and while holding it is more comfortable than, say, holding Kerry King’s armband, your left hand always feels like it’s in an awkward spot. The Taiwanese plane is simple to set and adjust, and its comfortable “back” (“toe” in western terms, or something) is easy to grip and provides a very nice registration surface ahead of the cut. Overall, these two planes complemented each other very well for this task.
The completed shelf looks like this when upside-down:

You can see parts of the knot in the lower left. I was lucky that this did not extend much further into the board.
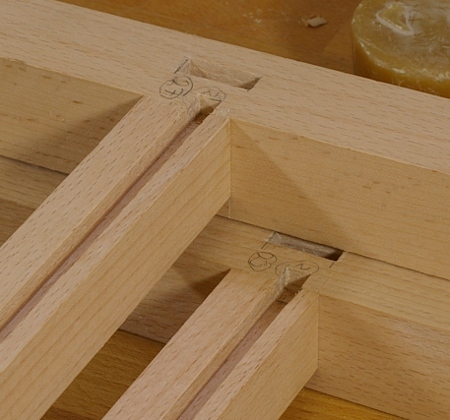
To fit the corners of the shelf at the legs, I had two choices: I could chop out a little notch on each corner on the shelf and fit it around the legs, or I could extend the grooves in the stretchers into the legs and slip the shelf in as-is. I opted for the latter approach because it seemed to me to be the easiest and the best-looking.
It was quick work with a chisel, since it’s only about 1/4″ square of wood to remove. Here are two of the extended grooves:
Finally, I did a test-fit. Success:

I’ll let the front and rear frames sit for another few days before I glue up the whole frame. Now I need to decide whether I will size up/flatten the top or make the drawer. Apart from finishing, they are (surprisingly) the only two things left to do on this project.
