
One of the design specifications for the nightstand project was that it had to have “something curved.” After some grumbling about this, I decided to take it as an invitation to steal something I saw in one of Krenov’s books.
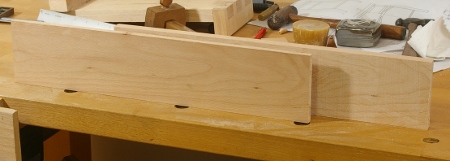
The first step was to resaw the wood for the piece. The target board was only 3.5″ wide and was a real piece of cake with the frame saw:
After getting this four-square, I headed back to the drawing board and squeezed out a full-scale drawing of the decoration piece. Unfortunately, I don’t have a big enough printer, so to make the template, I had to tape two pieces together using a light box from my old slide photography days and some mysterious hands:

In retrospect, this was a silly way to do it. I should have found someone who had a printer that can do legal size. (Strangely enough, I just ordered one, but not for this kind of thing.)
Next, I taped the frankentemplate to the board and traced the pattern:

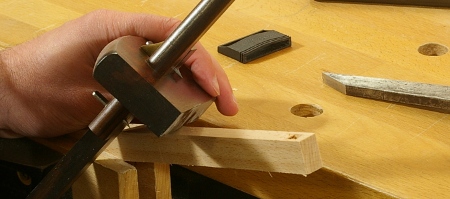
Before anything else, I now had to address the way that the decoration was to be joined to the frame. Basically, this is a twin mortise-and-tenon, and the layout promised to be a pain. To mark the mortise offset into the frame piece, I did this:
- Test-fit the closest frame stretcher in its mortise.
- Lined up a piece of scrap flush with this stretcher’s front.
- Centered my mortise chisel alongside this piece.
- Made a mark with the chisel in the frame at this offset.
- Used a marking gauge to make a line for where to chop the mortises.
That sounds a little complicated, but it’s not. It was a lot easier than chopping the mortises themselves, because the mortises are so tiny that you have to be really careful prying out the waste, or you’ll dent up everything and have awful marks on the frame. Nonetheless, the task is complete soon enough:

Then, on to the tenons, which were also oh-so-much-fun to lay out. It’s a little easier, though:
- Using the same stretcher test-fit, measure the distance between the depths of the front of the stretcher and the start of the mortises that you just cut.
- Set a (different) marking gauge to this distance and scribe it on a piece of scrap.
- Chop a mortise along the scribe line in the scrap (with the same chisel that you used for your original mortises, obviously).
- Set your mortise gauge according to the mortise in the scrap.
Hey, that wasn’t so bad, was it? The only real grumble I have with this right now (and this holds for all mortises) is that my mortise gauge takes too long to set. Because one screw fastens both arms, they touch (through a center plate), so when you’re setting one arm, the other one moves. You have to fiddle with it a lot. Grr, when I get some free time, I’m going to make some gauges and I am going to solve this stupid problem, and probably not by just using a single arm like some of those nice English and Japanese gauges.
The good news is that once you have your gauges set, you don’t have to reset them for the next joint if it’s the same type.
In any case, with the tenon marked, it was time to saw the cheeks and do the usual mortise-and-tenon stuff:
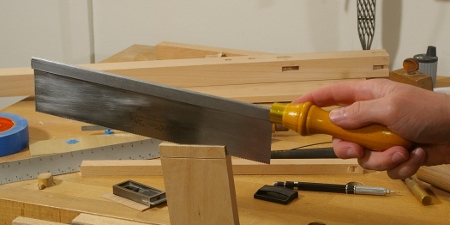
Before long, you have your tenons.

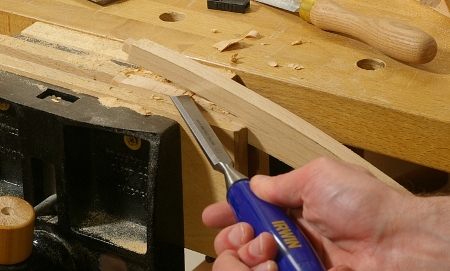
It was then time to cut out the pattern and shape. I did the cutting with my coping saw, and then I evened and squared up the top and bottom with my Shinto saw rasp:

I’ve mentioned before how much I like this tool, but it has its limits, and one of them is that it can’t get into confined spaces so well. To square up the insides, I pared across the grain with a chisel, and then used a knife in the tightest areas:
Then it was time to shape it. I used the old “finger on the side while holding the pencil” trick to outline the rounding depths:

Shaping the top was a matter of a minute or so with the saw rasp. The bottom was also reasonably fast with the Gramercy sawmaker’s rasp, though I would have preferred a larger half-round for that. I did the inside with anything that would fit. The last shaping tool was 80-grit Norton 3X sandpaper, which thankfully fits everywhere, which left me with this:

Then I hand-sanded with 120, 220, then 320 grit to get to the final point, and I test-fit it with the front of the frame:

It looks fine, I suppose, but it took longer to make this than I care to admit. I think I may glue up just the top tenons in the decoration to account for wood movement. This thing isn’t exactly structural.
