Tool Cabinet: Frame Components

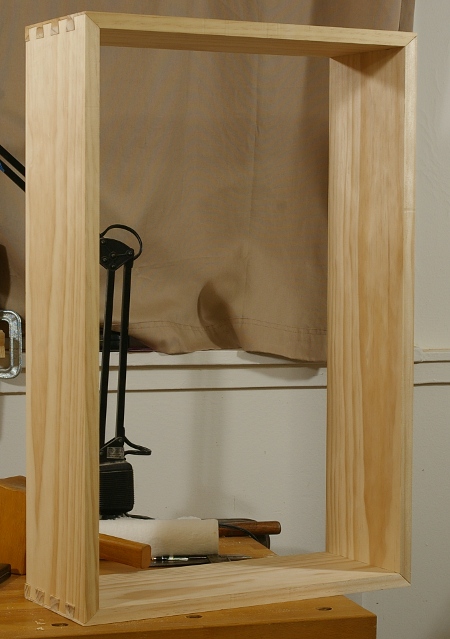
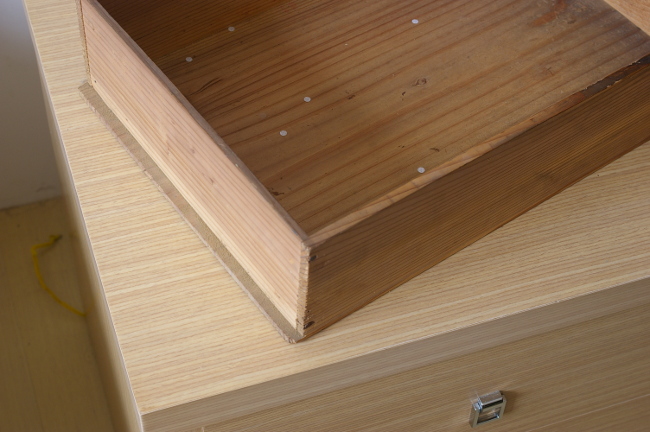
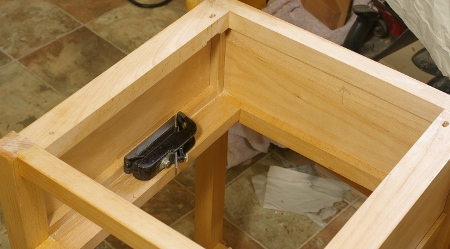
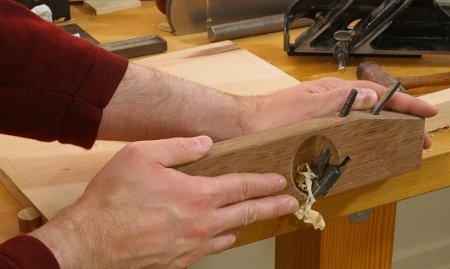
With the tool storage in a somewhat usable state in the new shop, I finally had a chance to restart the tool cabinet project last week. I finished the carcase before the move, so I’m left with the doors and some other odds and ends. I decided to start with the rear, which will have two cross-members to aid with mounting on the wall and internal tool arrangement.

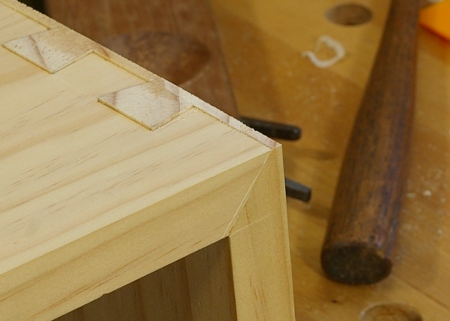
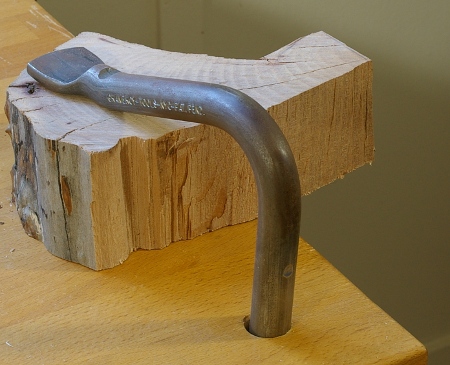
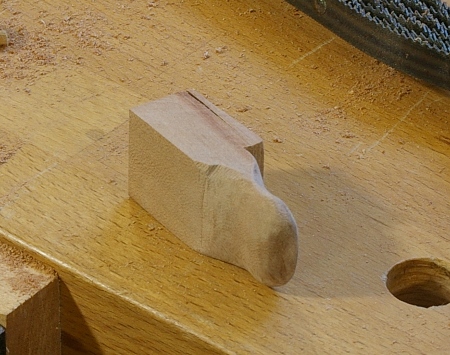
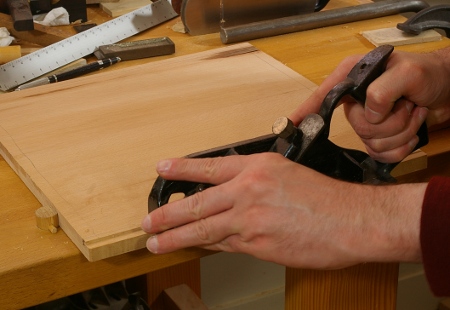
After taking what seemed to be an eternity to size up the pieces, I made the first joint for the members in the back. Then I realized that it was the first joint that I’d made in the new shop, so I took a photo to commemorate the occasion:

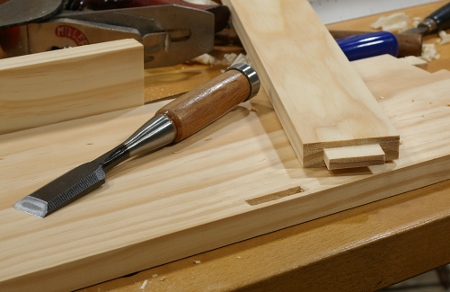
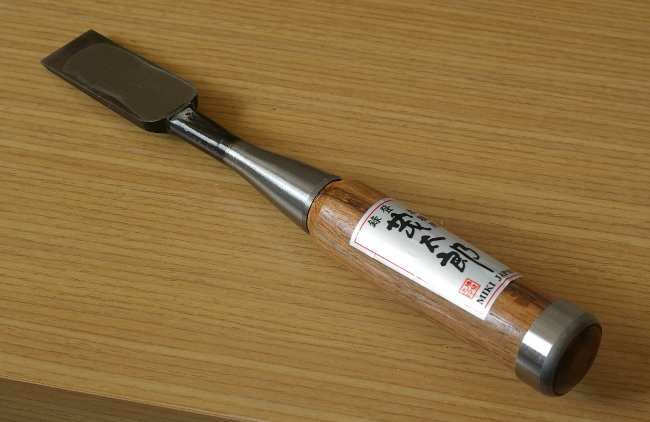
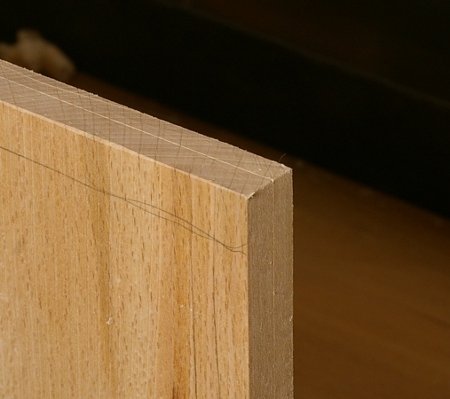
That’s the wacky Taiwan-made chisel featured in this post, chosen this time by the ever-reliable “I was actually able to find that one” method. Though this joint was perfect in the end, I can’t say that it went without a hitch–for some reason, when marking out the tenon, I had set my mortise gauge incorrectly and just barely noticed in time. Unlike the saw till, I’ve decided not to use wedged or through joints here.

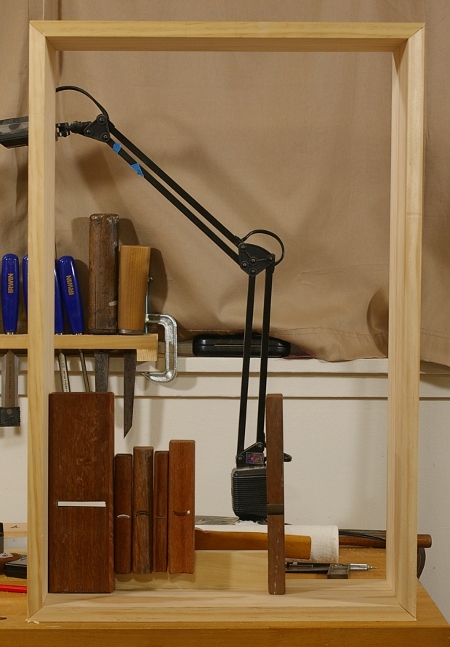
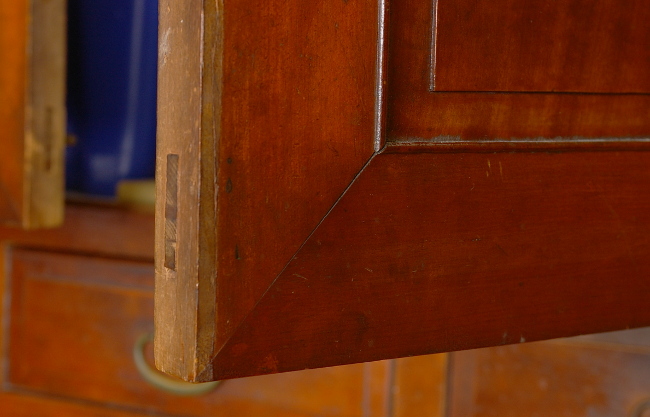
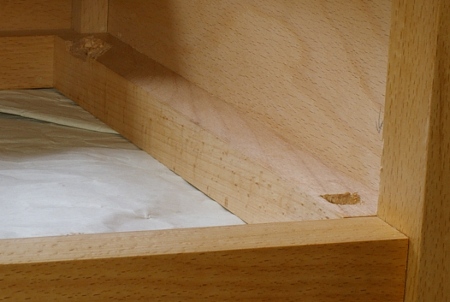
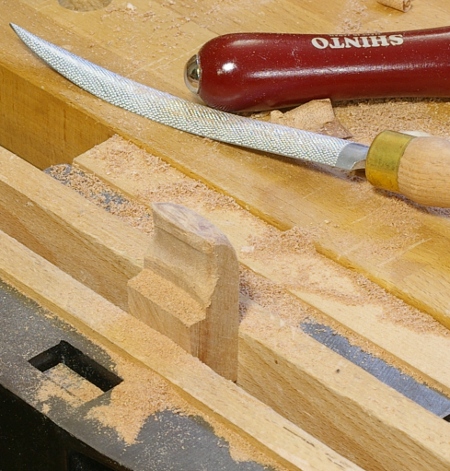
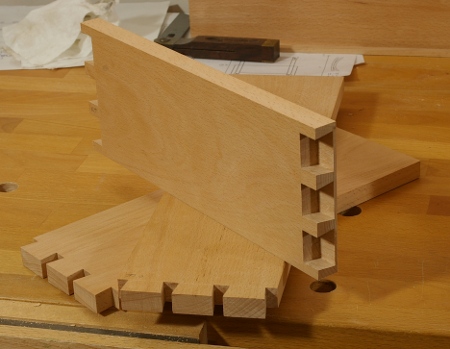
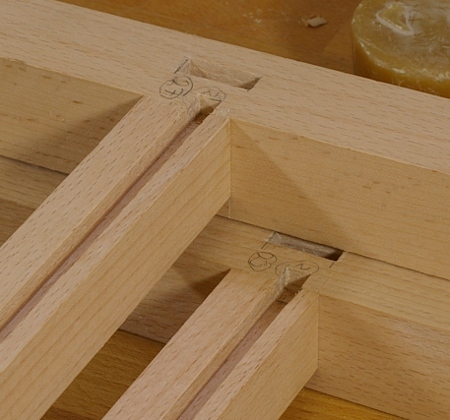
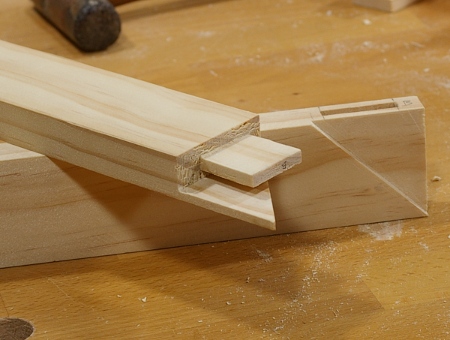
Okay, so that wasn’t terribly exciting, nor was it difficult. Soon it was time for the cabinet door frames. I made up my mind to use the mitered-face mortise-and-tenon joint for this application. The main reason is that I really would like some practice at this thing, and I’d much rather screw it up on a shop project than something I actually care about. Nevertheless, it seems to be going well so far:

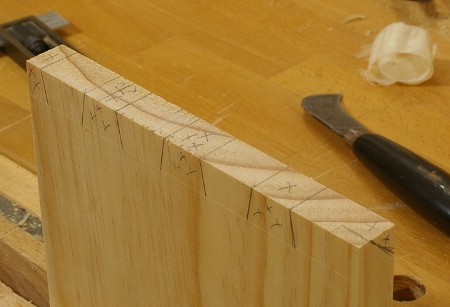
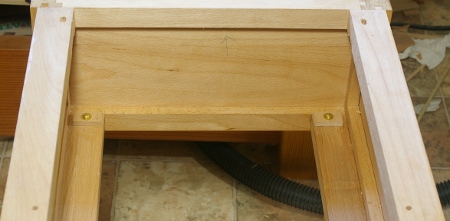
The pile of components for this project is much larger than I anticipated:

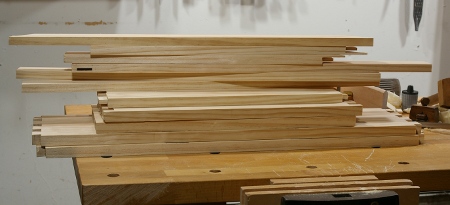
I already had to go out to get more wood for it twice. Normally, this would be an incredible miscalculation, but since I can’t say that I’ve actually bothered to calculate, there’s probably another word or two for it that isn’t nearly as nice.

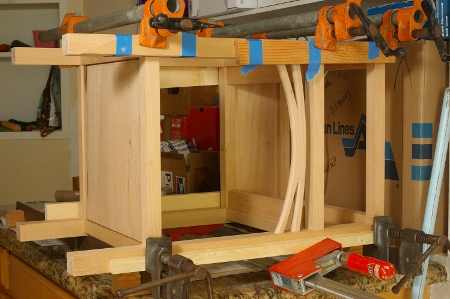
The shop seems to be usable. The intermediate state of the tool wall looks like this now:

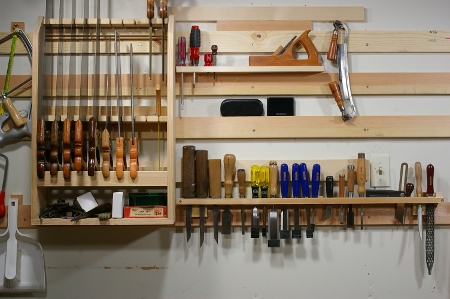
The thing at the center top is a sort of shallow shelf-like thing that I made for the french cleats. The scrub plane just happens to fit on top, so I put it there because it seemed like a good idea at the time. The chisel rack is a reincarnation of the lamest tool rack ever built; for some reason, I brought it intact from the old place, and added cleats and screwed stuff into it until it actually fit on the wall. The space to the right is where the tool cabinet will eventually go.

And really, the cabinet can’t come too soon. This is what I’m dealing with on the benchtop right now:

Mind you, this was after cleaning up a bunch of stuff. There are tools in all sorts of weird places around the place and I keep getting nervous that I’m going to knock them over–I don’t have a lot of room to move around.

Oh yeah–thanks to Jasen, who lent me that Narex 3/16″ mortise chisel. For that size, I don’t have any of my own (yet).

[Edit: I didn’t notice at the time, but this is post #200.]

Tool Cabinet: Introduction; Moving

My last post covered the weird joint I experimented with in a new project that I’ve been working on, a tool cabinet. During my last few projects, I’ve really gotten a feel for a set of tools that I use on a fairly regular basis but don’t have a real place for. These tools–marking gauges, measuring tools, some smaller planes, and the like–are always sort of hard to find because they’re lying about on a table next to the bench. So they’re hard to find, and they take up a lot of space. My saw till solved these problems for my saws, and my absurd chisel rack solved them for the chisels. I figured that a medium-sized cabinet would do the trick with these tools.

Going at probably the slowest possible pace for a woodworker, I finished the other three crazy joints in the carcase and test-fit the sides:

They basically fit (the lower right corner needs a little more adjustment), so now it’s time to think about what to do with the insides.

I already had the idea to put my Taiwanese planes inside. I grabbed about 3/4 of them and arranged them like this:

So, in all, they’d take about 1/4 of the space in the rear half of the cabinet. The front half will be sort of empty, because I plan to put on doors that are open most of the time, and these doors will have lighter tools attached (such as marking gauges and squares).

It’s all preliminary, but one idea that I’m going to carry over from my saw till is to have it reconfigurable. In other words, I’ll use screw inserts to hold the tool holders in place, so that if I decide that I don’t like some tools I’ve chosen for the cabinet, I’ll just replace them.

That’s all fine and good, but now I’ve got something else to do before finishing this: I’ve got to pack up the shop, because we’re moving. The next two weeks are going to be hectic. I’ve got more than half of my tools packed already, I believe.

There is, at least, some good news. The new place not only has space for a shop, but I’ll also be able to hang stuff on the walls. So my saw till will have a spot, as well as the chisel rack and this new cabinet (once complete). I’ll also probably be able to hang some eggbeaters and a few other things. Right now, my boring tools are pretty disorganized.

I also might build a new bench. However, that’s looking a little farther into the future.

Half-Blind Dovetail With Mitered Shoulder: What Was I Smoking?

This weekend, I started work on a new project for the shop that will soon be desperately needed. As with nearly all of my other projects, I drew it up and decided on the joint–dovetails for a carcase frame, of course. I recalled that I’d seen a mitered-shouldered through dovetail joint, did a little bit of reading on it, and decided that it would be a neat one to try.

Except that I decided to make it a half-blind version. I clearly did not plan this one out very well, but I was very careful when laying out the tailboard, making sure to put the Xs in the waste parts, and indicating where the shoulder would miter. I thought that this would be a piece of cake, I’d just rough out the miter on both pieces when fitting the pinboard, then fine-tune it later. After all, both miters would be the same angle, right? Right?

What could possibly go wrong?

It should have occurred to me that I’d screwed up somewhere simply based on the fact that as I was sawing down the pinboard the first time, I managed to saw on the wrong side of one of the lines. At the time, I chalked this up to not having taken a break, the anticipation of the big game soon to start, and the fact that a really annoying song was playing on the radio when I made the mistake.

Unfortunately, it was actually fate trying to warn me, and I didn’t listen. Instead, I just sawed off the end of the pinboard, marked it out again, and went upstairs to watch the game.

When I came back the next day, I managed to saw everything correctly, popped out most of the waste, and then, to make sure that the pins and tails fit, sawed off a small amount of the miter on the shoulders.

The tails and pins fit without paring. That was as far as the good times went, though, because that’s when I got out my other T-bevel, set it to 45 degrees, and went to mark out the final miter for the corner.

Something wasn’t right. Why didn’t the miter line up to the corners of the joint? Everything should be the same width and thickness, ri–oh, wait. Duh, on a half-blind dovetail, unless the tailboard is thinner than the pinboard, the joint profile will not be square, and that’s not going to be a 45-degree miter. Furthermore, you can’t cut your miter beyond the half-blind portion if you’ve already done your tailboard, because the tailboard probably doesn’t extend that far.

I don’t know how long I stared at that thing, trying to figure out what to do. I didn’t know if I should try to salvage it, or just hang my head in shame and start anew with something a little more conventional.

Masochist that I am, I chose to try to salvage it because I hadn’t cut beyond the half-blind portion of the shoulder. For another equally long time, I tried to figure out what this was going to look like. I’m not sure I had an idea, but in any case, I started by marking out the miter on the pinboard from the pin base to the half-blind line (or whatever it’s called). Then I measured that angle: 50 degrees. That seemed really fishy to me, but I set my T-bevel to the 40 degrees necessary to complete the full 90 degrees and marked it lightly on the tailboard.

I banged the pieces together a little. Of course, I dented the beautifully-surfaced face that my newly-acquired Taiwanese plane had made because I used a buffer scrap that was too small. At this point, I didn’t care about that anymore, I just wanted those two miter lines to be perpendicular, and to my surprise, they were.

So I pulled the pieces apart and shaved down to the miter lines with my Veritas mini shoulder plane (this worked remarkably well). And then I banged the pieces together to see if they drew tight.

They didn’t, of course. In addition to this unsightly gap, there were also big gaps at the pinboard baseline, and I suspected that they might be related. I put the work down for the night and went off to freak out about something else.

When I dragged myself back the next morning, I tried jamming a piece of paper into the miter gap. It went in only halfway, so I pulled the pieces apart and checked the square of the long edge to the mitered surface. It was slightly out of square–kind of convex on the top. I pared it out (maybe making it a little convex in the process) and tried again.

I almost fainted. There’s no way that this should have drawn tight given the number of errors that I made.

The preceding photo was taken after I pared off the excess of the pinboard on the end–I wanted to see what it looked like. I’m afraid to admit this, but I sort of like it. Only I wish I could say that I’d actually planned it that way.

Now I have to make three more. Guh.

An Antique Eastern Cabinet

On last year’s trip to Taiwan, I encountered a cabinet at the in-laws’ place that I found interesting. This year, I got to take a closer look and some photos.

It’s probably about 90 years old. My grandmother-in-law says that her husband bought it before they were married, and he bought it from a Japanese friend or vendor (at this time, Taiwan was a territory of Japan).

It was likely not the most expensive cabinet that you could buy at the time, but its construction clearly indicates that it was a good quality item and that it was primarily (if not completely) made by hand–I don’t see any machining marks on it, and at this time, machine tools were not in common use in the area.

The design is pleasant and streamlined. It consists of two pieces–the upper part shown in the preceding image, and a base with two more drawers on the bottom. The base has a kickboard that matches the overall design, and is well-moulded:

Last year, what I noticed first about this piece was that the doors had the mitered-face mortise-and-tenon joint that I wrote about (and made) last year:

The tenon (like most of the ones I’ve seen here) is a through tenon. It’s very common in furniture here, and I now know the Chinese name for it–but I’ll save that for later.

The drawer construction would bring mixed reactions to some western joinery enthusiasts–the sides are tacked in. Though our first reaction might be to poo-poo this, remember first, that dovetails are not common in eastern furniture, and second, that this thing is 90 years old, and these drawers are still very solid. The humidity differences it has had to endure have been quite extreme–from very humid and sticky summers to a life in an air-conditioned environment.

It’s all solid wood construction. The face is a good-quality light-colored hardwood that’s been lacquered, the rim around the face is an expensive dark wood (don’t know what, but it has large pores). The rest is a quick-growing softwood of some sort.

The rest of the drawer is also quite solid, in spite of violating “rules” of drawer construction (tacked together from the bottom, bottom panel grain runs along the front-to-back axis rather than side-to-side):

Notice the “rear deck” on the back. It’s not of a consistent width. It serves as a drawer stop–I am speculating that the builder intentionally let this protrude and then simply trimmed the end to get the drawer to stop flush with the front of the cabinet.

Here’s the hardware on the lower drawers. I don’t know if this is the original, but it’s kind of cute:

[Edit: It’s not original; in the picture at the top, you can see where the original hoop handles were. Thanks to Daniel for putting a finger on this.]

Now, with all of this said, there’s a further story with this cabinet. Over the years, the wood has moved in such a way that made the drawers very difficult to close. It was even said that they might have to get rid of it because it was so difficult to use. So I said, hey, this is the best piece of furniture in this house, and I could get the thing in good shape.

I didn’t have any appropriate tools (even after a ritual tool-shopping trip that I’ll talk about later), or any I could borrow, so of course, I decided to go buy something. I went down to the tool shop in search of a chisel and some sandpaper to sharpen it.

The sandpaper was easy enough. But I wanted a Taiwanese-made chisel, and got one. However, it looks like this:

Yeah, it says “Miki Japan” on it, with a name. This is one thing that sometimes drives me up the wall with Taiwanese manufacturers. An example of this is that you’ll often see labels like “Boozoletti Italy” in stores on clothing that’s made in Taiwan, on really decently-made stuff. (Yeah, you can get not-so-well-made stuff too, but that’s another story.) It’s almost a very strange parody of the knockoff concept. Some companies have wised up and created their own unique identities, but that’s another story, too.

In this case, the chisel is made of the laminated (laid) steel that you’d expect from something like this, and it takes and holds an excellent edge. The grinding was excellent–it took only a few minutes to flatten and polish the face. Perhaps it doesn’t hold an edge as well as the famous Japanese chisels (not sure about how to test that), but it’s as good as any mass-produced western manufacturer of the past such as Union or Pexto.

And it cost a grand total of about $7.50. Best of all, it got the old cabinet in great shape in very short order.

Wooden Purse Handles

I got a request a few months ago from my sister-in-law to investigate how one would go about making wooden purse handles, because she’s been in the habit of making purses lately. We talked about a few ideas–some involved bending, some involved joints, and some were not so strong. I was particularly concerned about strength of cross-grain when cut thin, because we all know how well that often turns out for plane totes. And I said that I would get around to making some at some point.

It was one of those projects in the back of my mind, where was I trying to figure out a way to do it where the end result might not totally suck. And so there I was one day, watching some Harry Potter movie on TV, when I thought I saw a glimpse of a purse with wooden handles being used as a prop. Pause and rewind with the DVR confirmed it.

Then I thought, “why don’t I do a Google Image Search on wooden purse handles?” Well, duh, turns out that there are a lot of ideas out there.

So I came up with a drawing that seemed to minimize the danger of cross-grain stress and milled some wood. The wood might be walnut. I’m not really sure. Maybe I should break out the loupe some day:

I cut out part of the drawing to use as a template (I just traced it onto the wood):

Notice the segmented slot in the drawing–I’ll get to explaining this later.

I cut out the rough template with a coping saw (one side at a time, not gang-cut), then taped the two sides together and clamped it into the vise:

Then I shaped them with my ever-trusty Shinto saw rasp and Gramercy sawmaker’s rasp:

I don’t know why this is so, but the more I shape handles, the more I like it. In this case the edge profile of the two handles when put together is similar to one edge of a saw handle.

With each side shaped, I put in the slots for hanging the textile part of the purse (the part that I will not make):

You can see here that the slot is segmented. That’s to keep whatever is wrapped around it from bunching up on one end when the handle is tilted (this is a problem on one prototype that I saw).

Cutting these slots was difficult. I don’t have a 1/8″ mortise chisel, so I had to pare out the slots. If I ever have to do something like this again, I’ll get a mortise chisel and be done with this task in ten minutes instead of the who-knows-how-long this took me.

Next up was to cut recesses for clearance of the textile parts on the inside. This design feature is so that the handles can close flush to each other. This was easy once I got the hang of it. It was the standard procedure of using a chisel to waste out most of it and a mini routing plane to clean the floor of the recesses. I got the plane in a trade a while back (thanks, Darren!):

Then I smoothed everything out and put on the first thin coat of varnish:

They need a few more coats, then they should look quite nice. I have only about a week to complete that task, so I only have time for that much, anyway.

Perhaps one day, I’ll have a photo of the complete project.

Nightstand: Finished

My deadline for the nightstand project is Wednesday. [Ed: This was posted the Friday before that Wednesday.] I had originally planned on having this thing done about a week before then, but stuff happened. I’ve been applying varnish to the frame, top, and drawer over the past few weeks and they were finally ready. I rubbed out the varnish with 320-grit sandpaper followed by #000 and #0000 steel wool, all lubricated with mineral oil. I decided not to use rottenstone on this project for two reasons: first, the #0000 steel wool got it to where I wanted it to be, and second, I was afraid of getting it into some of the parts that don’t have finish in them. The second concern was a little silly.

I started assembling the whole thing by drilling holes and cutting recesses in the top stretchers for the screws to attach the top. This was an ugly job that took forever, and I was very silly not to have done this before glueup. I didn’t realize that I would be attaching the top this way until it was glued–I couldn’t find the hardware I was looking for and I didn’t feel like making it. Oh well, it’s not like anyone is going to see this part anyway (it’s on the inside):

Then it was time to solve an uglier problem. The drawer is slightly out of square because (I think) the bottom panel is a hair trapezoidal (thankfully, the end that’s too big is not subject to wood movement). I’ll be a little more careful of that sort of thing in the future, but for now, I decided to make the drawer fit by trimming the side of one of the runners:

Hey, finally a use for my Stanley #75!

With the kludges out of the way, I put in some simple stops for the drawer:

You can also see in the preceding image how the rear holes for the screws to attach the top are elongated to cope with wood movement (and this being riftsawn beech, that’s pretty much a given).

Then, after trimming the bottoms of the legs a little to get them level, I put everything together, waxed the drawer bottom and runners, and it was done:

Here’s a detail of the open drawer:

Though I made more mistakes than I care to admit, reflecting back on this project, it’s pretty positive. Despite the slight goof, the drawer looks perfect and the dovetails are very crisp–and I’d only done one practice half-blind joint a few months back.

Probably most importantly, this was by far the most complicated project I’ve done so far, and I finished it faster than any of my other projects. And it’s done just in time.

Nightstand: Drawer Tuning and Pulls

All of the dovetail joints for the drawer are now cut, the bottom panel grooves are in, and the panel itself is glued up. That leaves some fine-tuning of the drawer.

I found that the sides were a really tight fit, one that was likely to become too tight with the addition of too much humidity (or finish, for that matter). To fix it, I knocked off 1/32″ from each side with my jack and smoothing planes, and now it’s much more comfortable. I also had to trim a little off the tops, which was not a problem, either.

The matter of the pull remained. I could have bought something, but I decided that since this piece already had one thing that I stole from Krenov, I’d just do it again and make some sort of tongue-like thing. So after one false start, I pulled out a cutoff of the pacific madrone that I’d fooled with earlier and started sawing:

After some cuts and a little bit of planing, I got down to a roughly-rectangular chunk:

Then I put this into the vise, got out my favorite shaping tools and started working:

Before long, I had the basic shape that I was looking for:

Check out all of the rays that madrone has. Working with this little piece has been fun. It planes, cuts, and pares very easily, similar to apple or cherry. I’m a little unsure what to make of the way it feels when you touch it. It has sort of a soft, dry feel, but it’s not a terribly soft wood. It’s almost a “chalky” feeling. I’m looking forward to playing with some larger chunks.

Then I put a mortise in the drawer front and (carefully) cut the tenon in the pull:

A test-fit indicates that it seems to look the way I intended:

I think I might have some final smoothing to do on it, but that can wait until the drawer is glued up, and that step will come in a few days. There isn’t much else left to do on this project other than finish off the top and varnish everything.

Nightstand: Frame Glueup, Drawer Started

With the shelf made, the front and back frames glued and set for a few days, there was nothing left to do but to glue up the whole frame.

I never have many pictures of the glueup process, because it’s really the only time when time matters a lot. When you’re under pressure to get all of the parts into the right places and into the frame before the glue starts to set, there really isn’t any chance to take photos. In addition, all of my shots are done on a tripod and involve long exposures because the lighting is really bad in the shop, and I can’t hold the camera steady anyway. Finally, my hands tend to get a little sticky with the liquid hide glue, so I don’t want to get any of that on my camera.

I can, however, take pictures of the piece when I’m finished and it’s in the clamps. Thanks to Jasen for lending me the pipe clamps and K-clamp:

This will be ready for varnish in a few days.

The two other remaining components of the project are the top and the drawer. I’ve got the boards for the drawer down to size and cut the half-blind dovetails for the front:

I’m a little concerned about the clearance in the front, it’s possible that this may be too tight of a fit. Depending on how it works out, I may knock off 1/32″ or less off of the faces of each side, because I don’t want this thing getting stuck inside the frame if the boards expand a little.

Though half of the joints are made for the drawer, I’m almost done, because the rear joints will be through dovetails, which are much faster to make. In addition, it’s likely that I will cut only two tails back there to keep it simple. Then there’s fitting the drawer bottom and finally, the drawer pull.

I may be finished cutting wood on the project this weekend.

Nightstand: Bottom Shelf

The front and back of the nightstand are now glued up (Thanks for the help on the back, Jimmy). To complete the frame glue-up, the only obstacle remaining was to finish off the shelf that will go in the bottom. It will be held in place by a groove running around the frame.

Milling the boards for the shelf was a difficult task because there was a big nasty knot going through the two halves of the resawed board that I used. The discovery of this knot marked those boards as being for the shelf; it was possible to arrange them so that it would make the piece interesting but not look weird or overwhelm the otherwise clear (but not straight) grain.

So when I jointed the two boards and glued them together, I was prepared for the possibility that I might need to start again. Fortunately, this did not turn out to be the case; it flattened well with just a smoothing plane after the glueup, and so I was optimistic about the final steps.

The general idea for fitting this shelf is with “tongue” on the side of the shelf going into the groove in the lower stretchers in the frame. However, this tongue would not be a complete tongue; it would be formed by a simple rabbet extending around four edges of the shelf, and the shelf is to hang down so that the rabbet is invisible. With this design, it will be able to float in the frame and be able to expand and contract as it pleases.

I started by marking the underside as being the rabbeted face (the pencil marks going around the edges), and scribed a line 1/4″ from the top face (slightly harder to see in this photo):

Then I got out my Stanley #78, did the requisite fooling around with its adjustments, and cut the bulk of the rabbet almost down to the scribed line:

Then I used my Taiwanese rabbet plane to finish off the cut down to the line and fine-tune the fit:

The difference between setting up and using these two planes is like night and day. The Stanley is an older version without a depth adjuster, and while holding it is more comfortable than, say, holding Kerry King’s armband, your left hand always feels like it’s in an awkward spot. The Taiwanese plane is simple to set and adjust, and its comfortable “back” (“toe” in western terms, or something) is easy to grip and provides a very nice registration surface ahead of the cut. Overall, these two planes complemented each other very well for this task.

The completed shelf looks like this when upside-down:

You can see parts of the knot in the lower left. I was lucky that this did not extend much further into the board.

To fit the corners of the shelf at the legs, I had two choices: I could chop out a little notch on each corner on the shelf and fit it around the legs, or I could extend the grooves in the stretchers into the legs and slip the shelf in as-is. I opted for the latter approach because it seemed to me to be the easiest and the best-looking.

It was quick work with a chisel, since it’s only about 1/4″ square of wood to remove. Here are two of the extended grooves:

Finally, I did a test-fit. Success:

I’ll let the front and rear frames sit for another few days before I glue up the whole frame. Now I need to decide whether I will size up/flatten the top or make the drawer. Apart from finishing, they are (surprisingly) the only two things left to do on this project.

Bar Clamp Appreciation Week

I’m in the process of gluing up various components of the nightstand. I started with the rear panel, and actually did this with a rubbed joint (because I trust my rubbed joints enough to put them in a place where no one will see them).

The shelf on the bottom is made of two thicker pieces. I got out the clamps for this job, and it went about as well as it usually goes. My old bar clamps went underneath and I put a couple of F-clamps on the top. The bar clamps constantly fell over as I was working, as usual, and they’re really heavy, but eventually, I got the thing together.

Then it was time for the top, and a little voice in my head told me that if the bar clamps weren’t always falling over when I was trying to get stuff glued up, they might be a lot more pleasant to use. So I cut off a few sections of a 2×4 and made some stands. What a difference this made!

This took very little time to get set up and in place; because the screws to tighten the clamp are at the ends of the bars and free of obstruction, it was a piece of cake to swing the handles around. I also began to appreciate the impressive clamping power that these things have. The additional F-clamps I started with were the smaller, light-duty ones. Then I noticed that the bars on those were bowing a bit, so I switched to a heavier-duty clamp that was a little bit better (see above), but nothing like the bar clamps. It did not occur to me to use a couple of pipe clamps that I’m currently borrowing, sigh.

Let’s take a closer look at those clamp stands, made from a typical douglas-fir 2×4. You can tell that I really went all-out with the details on these. It’s funny how something so simple and cheap can make so much difference.

After going through all of this, I started wondering to myself how much it would cost to get a few more bar clamps, because I’ll be needing something to help out with other glue-ups in the future. Yikes, they sure do cost more than the $2 that these cost me. I guess I’ll be either borrowing clamps more or trawling more estate sales to get my fix.