
On my visit to Taiwan in December, I had a chance to look at a family cabinet that was probably made in the 20s or 30s on the island. No one could tell me a lot about it, but the thing that fascinated me the most was that it had a joint that I did not recall ever seeing in the wild. Then on the trip to Sanyi, I saw a new cabinet with the same joint. When I got home, I looked for it in my books, but I did not find it. The only thing I saw that was similar was in a book on Japanese construction joinery.
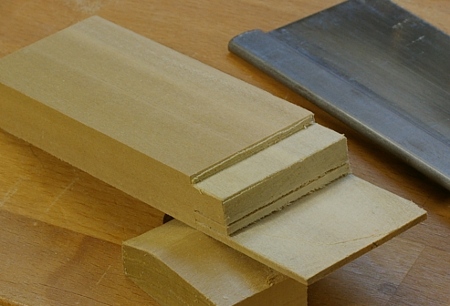
For lack of a better name (or research, at least for the moment), I’m going to call this a mortise-and-tenon joint with a mitered face, because that’s what it is:
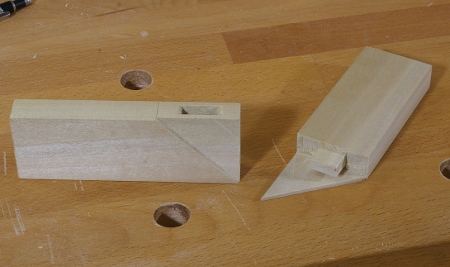
The ones I saw have through tenons, as opposed to this one, which does not, but it’s basically all the same idea.
I was really eager to make one when I got back from Taiwan, but I didn’t have the chance because I was too busy making other stuff. But right now, I’m varnishing both the bookshelf and the stool, and I don’t have the next project designed yet, so I thought I’d try some new joints. I made my first one yesterday, but I wasn’t entirely successful, so I tried again today.
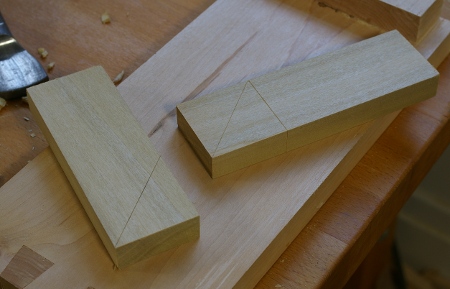
The first thing I did was mark out the miters on the mortise and tenon pieces. I accidentally marked a shoulder on the face of the tenon piece here. The shoulder should be marked all the way around except for on the face with the miter. Somehow I will forgive myself for this:
Then I marked the face thickness around the edges of the mortise and tenon pieces (don’t mark on the bottom of the mortise, though). Notice the use of the mini wheel marking gauge that Lee Valley “made” everyone buy last year:

With this done, I set aside the tenon piece and chopped the mortise. A very important note here: For the distance between the inside of the face and the mortise, make sure that it’s at least a little bit bigger than the width of your smallest chisel! My smallest chisel is 1/8″. I made this mistake on my first attempt.
Chopping the mortise was easy as usual with a pigsticker, especially on yellow-poplar. On my first attempt at the joint, I blew out the sides of the mortise, but I managed to avoid that today:
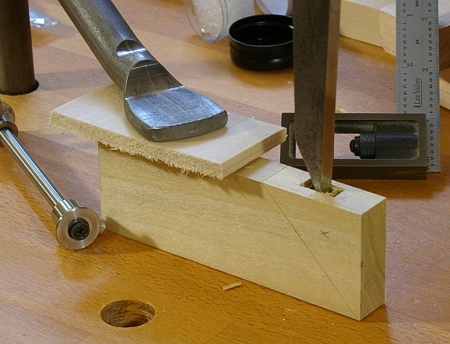
(I felt that it was pretty important to mark the waste sections of the mortise and tenon with an “x,” because the miter makes things a little complicated.)
With the mortise chopped, I set my mortise gauge from the mortise, then set the mortise piece aside and turned to the tenon. After marking the tenon width, I sawed the cheek of the miter, then the inside cheek of the tenon, then finally, the outside (back) cheek of the tenon. I did not saw any shoulders yet.
All three cheek cuts go down to the shoulder line. Again, the shoulder line on the face above is an error. It should appear on the other three sides, but not this one.
Working from the back of the tenon, I sawed the rear shoulder first, then sawed the top of the tenon to the proper height. I continued the tenon-height cut through the waste between the face and the tenon, so I was left with this:
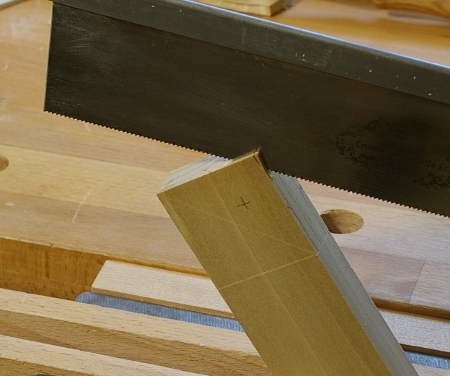
I decided to saw the miter on the tenon next. During my first attempt yesterday, I found it pretty difficult to do freehand, so this time, I clamped a piece of scrap across the knife line and used that as a guide for a crosscut saw:
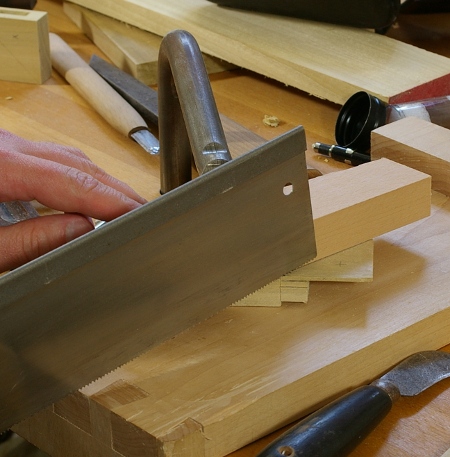
This worked surprisingly well, and I also used the same technique for the mortise (but I’m not at that point yet).
Next was to finish the tenon. I had to remove all of the waste between the face and the tenon. I did this by first chopping down along the grain, then paring the pieces out (notice the 1/8″ chisel here–remember how I said that the width of your smallest chisel is important?):
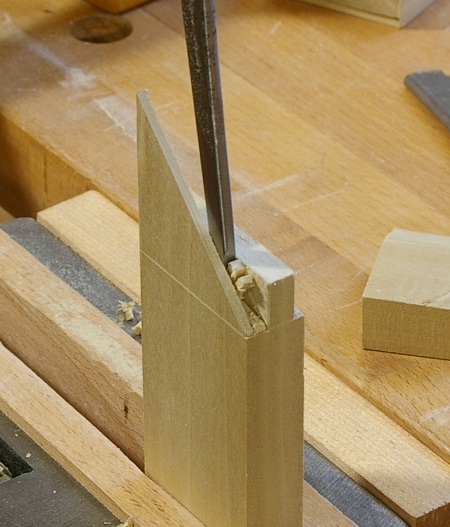
I also needed to remove the ends of the tenon to make the length fit the mortise. I used the same technique, but I was also able to make partial sawcuts, which helped a lot.
With the tenon finished, I turned back to the mortise. I first sawed down the cheek of the miter, where the tenon piece’s face fits. I cut only down to the knife line that marked the miter, and then I used the miter-sawing technique above to remove the piece. A little paring and cleanup was necessary with a chisel and my rabbet plane, but this time, it all fit together perfectly:
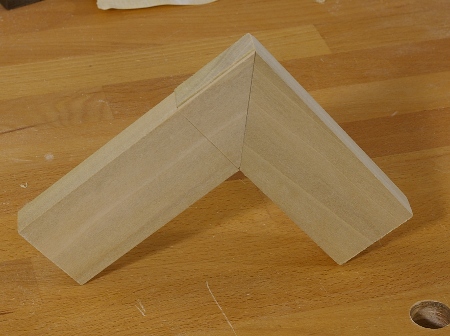
Yeah, oops about that shoulder line again. The end of the mortise piece sits a little proud of the end. You can plane this off. I suppose that for a full frame, you’d want to cut the pieces with the mortises slightly longer than you need, so that you can measure your overall width from the inside and plane off the excess. Or maybe not, I’m not sure.
It’s unlikely that I will use this joint in a project soon, but it’s nice to have around. But other than the lack of a suitable application, I really should get a smaller mortise chisel if I’m going to be working in thin frames like this. I really pushed the limits of what I was able to do with my W. Butcher 9/32″ chisel. If it were any wider, I would not have been able to fit the mortise and tenon inside the space available with the face and its buffer area factored in. So maybe I’ll be on the hunt for yet another pigsticker now, a 3/16″ or similar. (Sigh.)
