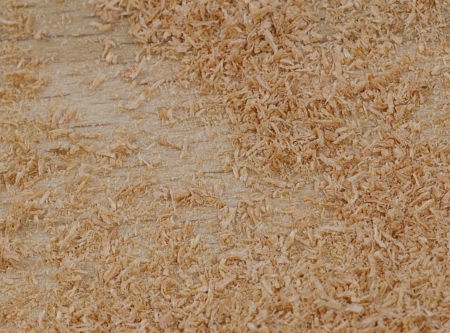
I’m not terribly interested in photographing sawdust and shavings as an art form, but I was interested in doing it because I wanted to see if my saws were really doing things the way they were supposed to. Being in the ever-so-fun milling stage of the nightstand 2 projects, I’ve made a lot of sawdust so far.
Normally I wouldn’t write about the mundane process of purchasing and transporting some wood for a project, but after some thought, I noticed that I really haven’t talked much about how I’ve gone about that process. Then, I realized that I actually hadn’t done any halfway serious wood shopping in a few years. I’d gotten the beech for the stool and first nightstand projects through a group purchase off of craigslist, and a fellow BAG dropped it off at my house (thanks again, Kirk!), and the rest of it was either really cheap home center softwood or some stuff I’d gotten long ago in this initial purchase (wow, is that ever a blast from the past–I was still living in my Inner Sunset apartment then!).
I’d also gotten another piece of beech somewhere between those two, which marked the first time that I’d used my roof rack for that purpose. We’ll get back to that rack in a second–it goes along with this post. I’ve seen a few posts from other folks regarding wood transport (including some crazy(?) stuff like bicycles), but not many, which probably indicates that a lot of people have trucks. And for those of you wondering, yes, I may do all of my work by hand, but when I need to move some wood around, you can believe that I’m not going to do it by wheelbarrow or drag it on the sidewalk. [Edit: Turns out that was wrong about that last method, but that’s another story.]
Let’s go back and start with the wood selection. My design was for cherry and called for 1.25″ thick legs and 1″ frame pieces, meaning that I’d some 6/4 or bigger stock . Then each nightstand will have drawers, panels, a top, and a shelf, which calls for the usual 4/4 stuff. I had the amount of board-feet and linear feet necessary for 6″ wide stock computed before I went.
But when you go to the lumberyard, you really don’t know what they’ll have. That especially holds true for cherry, where the stock on hand has all sorts of variations in in color, grain straightness, and especially defects. So you have to have a basic plan at what stock you’ll need for your cutting list, but you need to be able come up with a plan B.
And plan B it was. I really didn’t like any of the 6/4 cherry boards that I saw today. However, the 8/4 stock was only 16 cents more expensive per board-foot, and far better-looking. So even though it will mean a bit of exhausting resawing, I bagged a decent-sized one of those for the legs and the frames, and a 4/4 piece for panels and drawer fronts. I may get another piece for the top later, if necessary.
I also got a piece of 4/4 birch for my secondary wood. I don’t know if that was a great idea or not, but I like birch, and it doesn’t cost much.
Now we get to transporting the wood, and it’s where we get back to the story about the rack. Here’s the load of three boards back at my place:
The rack is a Yakima system that I’d gotten off ebay when I had my CRX. Now, if you know anything about these rack systems, you can switch them from one kind of car to another, as long as you’re willing to pay the king’s ransom that Yakima wants for the little clips that will fit your car (essentially, very expensive powdercoated pieces of pressed steel). As a special surprise, I also had to get new crossbars, because the new Civic’s roof is much wider than the old one. Thankfully, I was able to dodge Yakima’s cash vacuum on that one by just getting some 3/4″ galvanized pipe from the hardware store.
Now here’s how the choice of car gets a little tricky. I like my 2-door, mostly to annoy any passengers that may end up in the back seat, but this is one instance where having the 4-door is better. You see, on the 2-door, you place the bars only 18″ apart (unless you pay another arm and a leg for Yakima’s extender kit), but on the 4-door, you put them 32″ apart. A longer spread helps keep the load from rotation forces and keeps boards from springing around so much. To avoid that altogether, you can tie the load down in the front and the back. Because this was a short trip (and wood has a much smaller aerodynamic profile than, say, a canoe), I didn’t need to do that.
So, yeah, had I thought about this when deciding between the coupe and sedan, it would have been a consideration. However, the 4-door had a big problem that I don’t think I could have overcome: You can’t get it in the color you see above. [Edit: Also, new for the 2012 Civic 4-door, you can’t get the EX trim with a manual transmission. This is far worse than the wrong color. But you can still get it with the EX coupe.]
[Note: The Schwarz also has a what is essentially a Civic, and but he’s basically gone the infill route by getting the old Acura version. I have to admit that I miss the hatch of the CRX.]
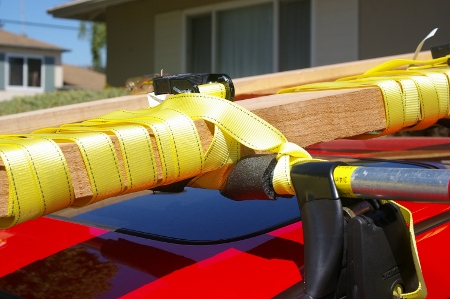
Okay, back to the load. Let’s see how I fasten the boards to the roof. Here is the driver’s side, which has the 8/4 cherry:
I put pieces of foam pipe insulator around the bars, then put the wood on top, and fastened things together tightly with a ratchet tie-down–which is essentially a band clamp. The ratcheting ones let you get the grip good and tight, compressing and locking the board into the foam. This not only takes a lot of slop out of the fastening, but also adds some friction to the surfaces; everything is always in contact with something else, even if you hit a bump in the road (and California roads have plenty of those). The boards were shorter than the length of the car, so I did not need to put a red flag on the end to indicate an overhang (as you would need to do if you let your boards hang out the back of a pickup or van).
These tie-down clamps have really long cords, so you have to do something with the excess. On the driver side, I’ve wrapped them around the board several times, then tied the loose end to the bar. It doesn’t need to be a strong knot because the ratchet mechanism is doing all of the hard work.
On the passenger side, I put the two thinner boards together, but this time, I got lazy and put the loose end of the straps into the car. I wouldn’t do this on a long trip because it makes too much noise:
Once I was finished fastening everything, I gave them a bunch of pretty hard shoves to make sure that they wouldn’t budge.
As far as the capacity of the rack goes, I’m pretty comfortable with these two boards on top of each other, but I don’t know about three. In any case, there isn’t room for much more. The weight limit on the rack and the roof itself is 125 pounds, which translates to around 35 board-feet of this density of wood. There were 23 board-feet on there today. This is just fine for a small-time woodworker like me; it’s just very unlikely that I’d ever need to buy much more wood than this at once, given what I currently do.
But what if I did need to haul more? Would I get a truck? A significantly cheaper option would be to get a trailer. My car’s towing capacity is 1000 pounds.
Shortly after moving into our new place, a combination of old age and hamfistedness conspired to snap off the edge of one of the kitchen drawers.
Clearly, the drawer is nothing special and lacks in the aesthetics department, but when the landlord came over and we talked about what to do about it, we decided that it would probably be easiest just to repair this thing rather than to replace all of the kitchen cabinets (which would be nice, but would require lots of planning and disruption in our lives). So I said that I could make a new front, but he’d have to paint it. He said that would be great and he’d pay me for my work.
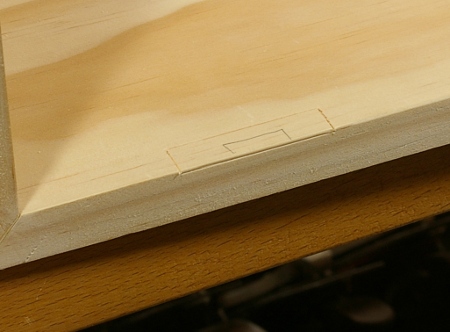
It was straightforward. The front consists of a board with rabbets on both ends and a groove (dado-y-like thing on the original). When I knocked out the old front, I found one possible contribution for its deteriorated state: There were a total of 17 nails holding the sides in. Looking at the other drawers in the kitchen, there were only two per side.
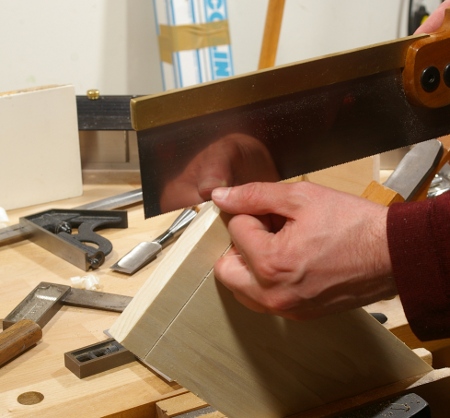
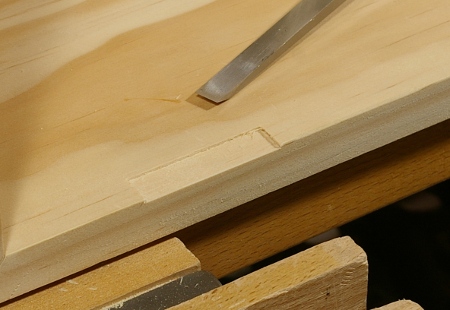
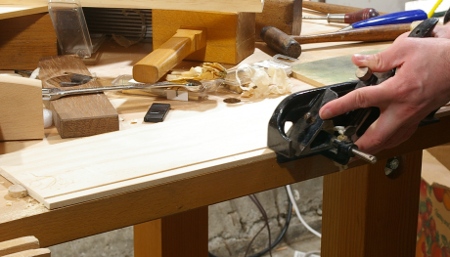
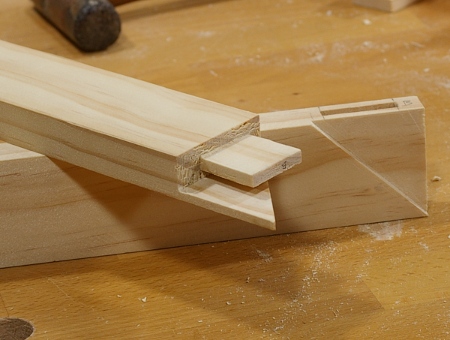
After milling the board (yellow-poplar sapwood–I’m being really extravagant here) to size, I marked out the rabbets and decided just to saw them instead of using a rabbet plane, since these were relatively large and cross-grain:
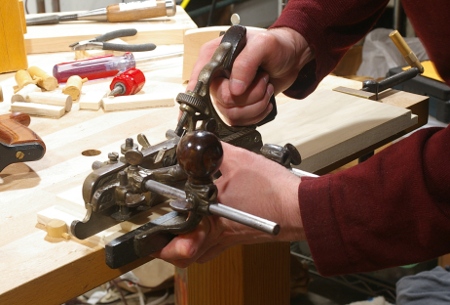
Then I plowed the groove for the bottom panel. This was perhaps the most time-consuming part of the process because I had to fit the longer arms of the #45 to get the fence at the right distance:
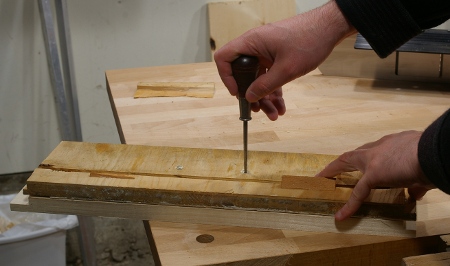
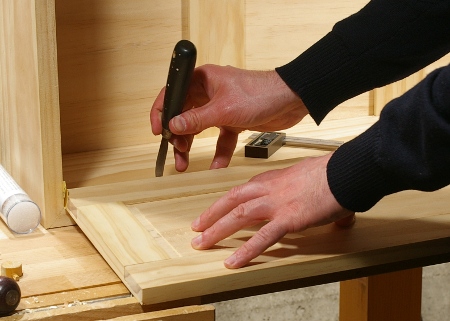
The next step was to mark the holes for the handle. This was a straightforward process of lining up the original on top of the replacement and poking an awl through the original holes:
Now if I’d been paying attention to what I was doing, I would have also drilled the holes at this point. But for whatever reason, I made it hard on myself and forgot to do this until I had the front attached.
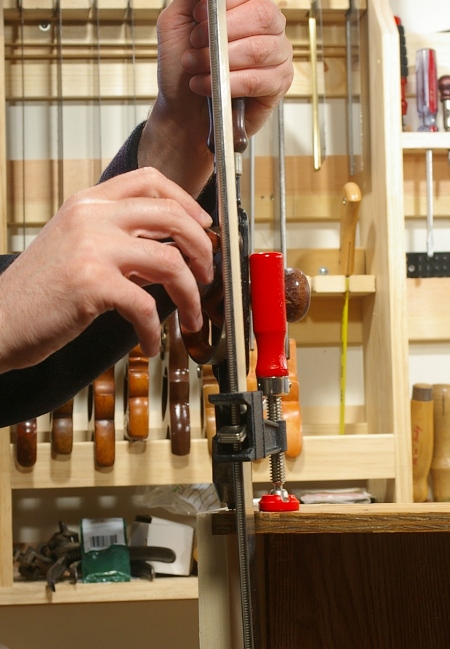
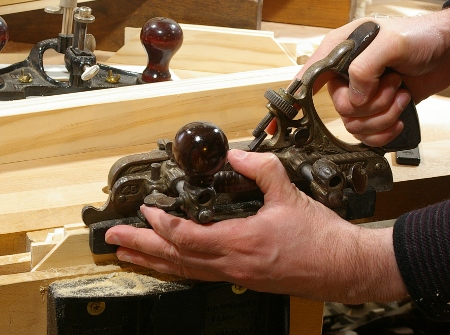
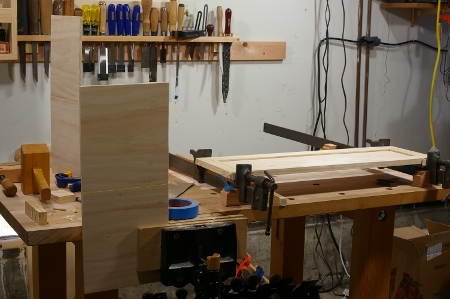
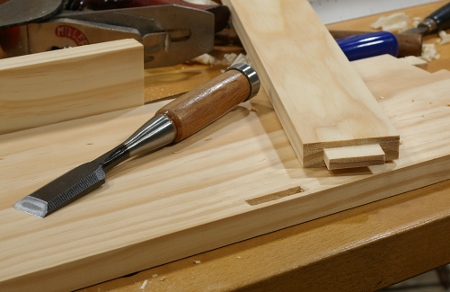
I figured that I’d attach the front with two nails per side, and predrill small holes to reduce splitting and stress. It was a nice application for a Millers Falls #5 (hiding behind the F-clamp in this photo):
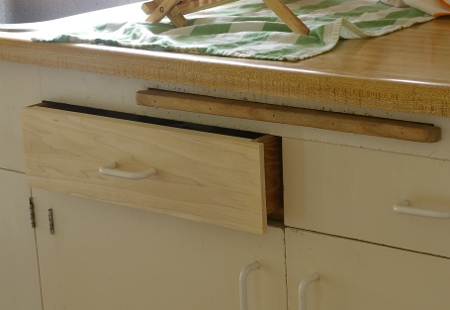
After putting the nails in and (awkwardly) drilling the holes for the handle, I test-fit, shaved a little bit off here and there with my block plane, and it was done:
Now it awaits the landlord’s paintbrush. (Hmm, might be time to clean off that area above the cutting board, eh.)
This was a very quick and cheap fix for a silly little problem. I expect that it will hold for as long as it needs to. Now I can get back to work on more “serious” projects.
My next project will have the same subject as my immediately previous serious furniture project: a pair of matching nightstands. The one I made last year was for the guest bedroom, which is great for the guests, but now we’d like to rid ourselves of some rather horrible (but cheap) graduate school-era stuff in our own master bedroom.
I’ve been agonizing over the design of these things for months now. I knew the project was coming up, but I couldn’t nail down a design. So as time went on, and I worked on other silly stuff such as the tool cabinet, I slowly defined the parameters.
Unfortunately, I wasn’t fast enough. I haven’t been ready to go with this because I didn’t have a completed drawing. In fact, I didn’t really earnestly start with the drawing until last week. So recently, I spent quite a lot of time both by myself and with the “client,” looking over various designs, trying to find a solid direction.
I finally came up with this:
It somewhat inverts the previous plan; there’s going to be an open shelf at the top, and two drawers below. This design also had to “feature something curved,” hence the arched plinth at the bottom (front only; the sides will not be arched).
There are a few elements that will be shared with the earlier design. The front cutaway view shows this in a little more detail:
In particular, this will feature frame-and-panel construction rather than the case construction (and housed joints) that you often find on a piece like this. I don’t know why, but I’ve really come to like frame-and-panel, and my general hope is that the piece will be lighter and maybe use a little less wood as a result. The frame around the shelf is a little daring, as the frame pieces on the sides will reside behind a panel when it’s together, but I don’t think it’s that much of a stretch. Happily, the legs are a bit bigger than the first nightstand, so I will have more room when cutting mortises in corners.
This piece will also be my first opportunity to use a secondary wood. I’ll use it in the internal rails as well as the drawer sides and back. What that wood will be, I don’t know yet, but it had better be cheap.
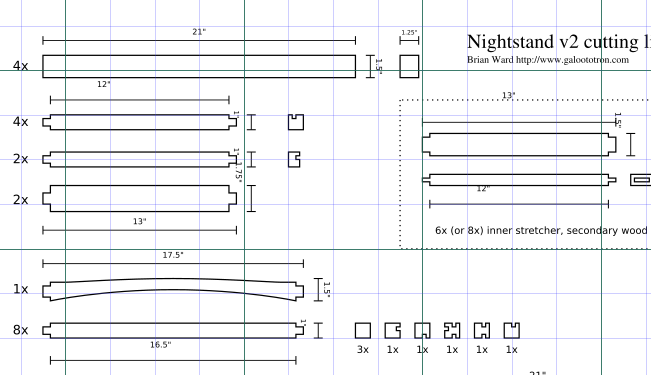
I’ve also been able to complete the cutting list:
There’s a lot of detail here because I really need to know how much wood I’m going to use. All of that detail was kind of brutal to create–I burned hours on this plan and the cutting list. The catch is, though, that most of that time was spent squaring away details of the design and joinery. When you make a drawing like this, you’re really getting a preview of what it’s going to take to build your piece.
As usual, I’m making the new plan available as a PDF file, free of charge (as if anyone would pay for that thing). I’ve also made that link available on the plans page. grrr, annoyances
Next step: Get some wood! The plan is to use cherry, which may seem a little bit pedestrian, but I’m looking forward to it. It’s very enjoyable to work with hand tools and after all of the monkeying around with beech that I did last year, I could use a break.
While gluing up the tool cabinet, I noticed that the joint that wasn’t closing up properly was probably just cut too much. So rather than having to look at a hideous gap in the miter there, I cheated and glued in a little piece of scrap:
After trimming the face, it looked like this, which is probably good enough for me not to notice all of the time:
Hopefully, I’ve got enough practice at this now so that I don’t make this mistake again.
So after the carcase was together, I had to hang the doors. As I noted in my previous post, I’ve never done this before, so I thought it might be a good idea to practice. The Korn book explains how to do it fairly well, so I went through the motions and came up with this:
I’m glad I did a practice joint first, because I didn’t really have a solid picture of how the hinge fit into the mortise relative to the pin and how far the hinge would open. But after doing it, things really became clear. I now also have a better appreciation of the butt hinge and its versatility.
I didn’t take photos of how I made the above test because I felt a little tepid while making it. However, I did photograph the process on the tool cabinet. First, I figured out where the hinges were to go. I decided that I wanted three hinges per door to give it enough strength. Then I looked around at a bunch of doors around the house and looked at the proportions of the hinge placement. I didn’t come up with a formula (next time, maybe), but I determined that two inches from the inside “would not look sucky,” so that’s what I came up with.
To make sure that I didn’t cut a mortise in the wrong place (a favorite habit of mine), I first penciled on a little mark where one would go. Then, after making sure that those marks were actually correct, I scribed in the precise marks:
I used the little Lee Valley miniature marking gauge for the depth and height. The depth was set to the width of the hinge leaf, up to just a little bit shy of the center of the hinge pin–I really should have taken a photo of this. I set the height with the other end of the gauge, to a bit more than the leaf thickness. To get the ends, I scribed the near one first, then scribed the other by placing the hinge in place.
Then I knocked out most of the waste with a chisel. You can do the whole thing with a chisel, but I wasn’t feeling all that precise, so I grabbed my little miniature routing plane to go the bottom:
It seemed to turn out fairly well:
I completed all of the mortises for the inside, then I turned to the door. Again, I carefully penciled in the sides where the hinges were supposed to go. Then I wedged the door in place at a particular spot, and marked the mortise ends from the ones that I’d just made. This is a very similar technique to marking dovetails.
I didn’t have as much registration surface for the router plane on the edge of the door as I had on the carcase frame, so I clamped a couple pieces of scrap to the sides to give me more. This made it an easier job than the frame:
To drill the holes for the hinge screws, I eyed them with an awl. (Nope, I don’t have a center punch yet.)
After drilling the holes, I put in all of the screws, put the cleat on the back, and hung it on the wall. It looked like a cabinet:
There were a few little flubs–for example, I didn’t trust my lines in the mortises enough, and that was a mistake. Fortunately, it didn’t make enough of a difference to matter in the end, and what’s also fortunate is that I hopefully won’t make those errors again.
So it was on the wall, but didn’t have any tools yet. I fixed that yesterday, when I made a little bracket for my Taiwanese planes and added my Veritas low-angle block plane:
So the cabinet is now 1/6th full. I have to make little attachments for the other tools on the inside and the doors.
I’ll do that eventually. I have to get started on other projects now. Between the move and all of the other things that were going on in the past four months (which seemed like an eternity), there were times when I felt like I was trying to nail jelly to a tree. This project felt like it took forever. In reality, it was maybe half that, but I don’t want to have that feeling again.
Having fooled around long enough flattening my workbench, I returned to the tool cabinet project. I was close to being done with all of the components, so I decided to get the doors finished. The doors will consist of two frames, each with a long panel inside, and the first order of business was to make the grooves to house the panel. I started with the easy parts–the pieces where the groove goes all the way though, because I was eager to try out the Stanley #45 I posted about a while back.
This is the first time I’ve ever really used it for a project. It’s a heavy beast, but gets the job done far faster than the router plane that I’ve been using, and because I already had it set up as a 1/4″ plow plane, there wasn’t much fooling around with its adjustments. It even helped a lot for the stopped grooves, because it can cut partway, leaving the final work with the router plane and chisel easier because they have somewhere to track.
With the frame grooves made, it was time to cut the panel to size and fit them. I’d sized the panels slightly thicker than the grooves, so I decided to put rabbets around the edges to bring the rim down to thickness:
As usual, I did the bulk of the work with my #78, and finished it off with my Taiwanese rabbet plane.
Then it was time to test-assemble the door:
That seemed okay, so I made the other door, then shifted my attention to cutting the panels for the cabinet rear. They require edge-gluing, so I decided that it was time for a glue-up party for the panels and one of the doors:
It’s definitely starting to look more like a cabinet and less like a pile of pieces. The tasks that remain are gluing the other door and main cabinet, hanging the doors, and making the tool holders for the inside. This latter part will likely take some time to finalize, since I haven’t actually made up my mind about much of it yet, but that won’t stop me from putting what I have into use as soon as I can. Come to think of it, I’ve never really done doors with hinges, so this could be interesting.
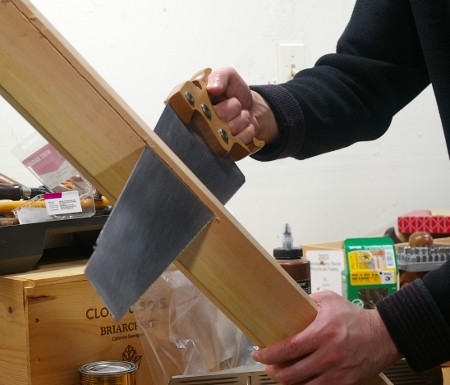
I finished the frames for the doors of the tool cabinet project the other day, meaning that the only wooden pieces that I hadn’t made were the panels for the doors and the rear. Panels, of course, mean that I have to use the frame saw, which is never terribly enjoyable, but since this is pine, it at least didn’t take forever to go through the near-11″ wide board that I used (maybe 20 minutes, not sure).
Cleaning up the newly-resawn panels, however, meant that I had to dig up my low-profile bench dogs and try to get things as flat as possible. And that’s how I eventually lost my mind, because panels have still been a bit fiddly for me because my bench is, how shall we say, “not very flat.” The top had been sagging in the center by quite a bit for some time now. Because the panels I needed to plane are very flexible, it was getting hard to position them to get good contact with the plane.
After whacking away at a panel for a while with my deeply-cambered jack plane, I took the panel off, looked at the corner of the bench I was using, looked at the plane again, and started planing again without the panel:
Then I tried planing the panel again:
Ooh–much, much better. The flat bench let the Taiwanese plane really shine when smoothing those panels.
With these panels flattened, I sat back for a while and thought about the bench. I was expecting horrible tearout when I planed the top, because it’s basically a bunch of little blocks finger-jointed together and edged-glued. (I’m sure they don’t take handplanes into consideration when they make these things.) But to my surprise, there was very little, even with that blade taking out thick shavings.
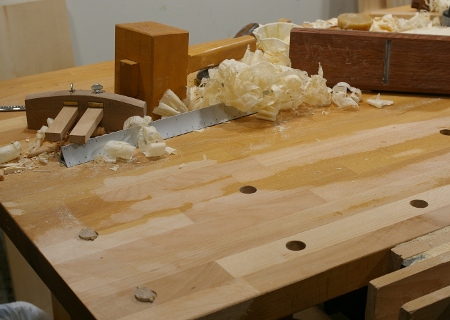
I’d been avoiding flattening the bench because the top isn’t so thick in the first place, anyway. But even though I am considering making a new bench soon, this was just getting ridiculous–the sag was more than 1/8″. I took out the blade of the jack plane, gave it a good fresh sharpening, and set for a really deep cut. Then I cleared all of the crap off the bench and got medieval on the entire benchtop:
When I decided to call it a day, I had a huge pile of shavings, a blade that wasn’t exactly sharp anymore (funny what beech with a lot of glue will do), and a nearly flat workbench. I’d say that it needs a little more work with a fore and/or jointer plane, but after I do that, this should be much less of a headache for the immediate future.
With the tool storage in a somewhat usable state in the new shop, I finally had a chance to restart the tool cabinet project last week. I finished the carcase before the move, so I’m left with the doors and some other odds and ends. I decided to start with the rear, which will have two cross-members to aid with mounting on the wall and internal tool arrangement.
After taking what seemed to be an eternity to size up the pieces, I made the first joint for the members in the back. Then I realized that it was the first joint that I’d made in the new shop, so I took a photo to commemorate the occasion:
That’s the wacky Taiwan-made chisel featured in this post, chosen this time by the ever-reliable “I was actually able to find that one” method. Though this joint was perfect in the end, I can’t say that it went without a hitch–for some reason, when marking out the tenon, I had set my mortise gauge incorrectly and just barely noticed in time. Unlike the saw till, I’ve decided not to use wedged or through joints here.
Okay, so that wasn’t terribly exciting, nor was it difficult. Soon it was time for the cabinet door frames. I made up my mind to use the mitered-face mortise-and-tenon joint for this application. The main reason is that I really would like some practice at this thing, and I’d much rather screw it up on a shop project than something I actually care about. Nevertheless, it seems to be going well so far:
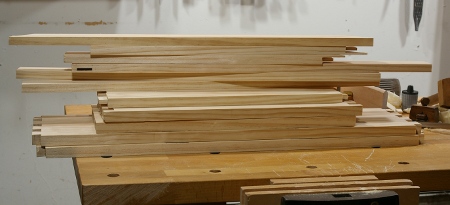
The pile of components for this project is much larger than I anticipated:
I already had to go out to get more wood for it twice. Normally, this would be an incredible miscalculation, but since I can’t say that I’ve actually bothered to calculate, there’s probably another word or two for it that isn’t nearly as nice.
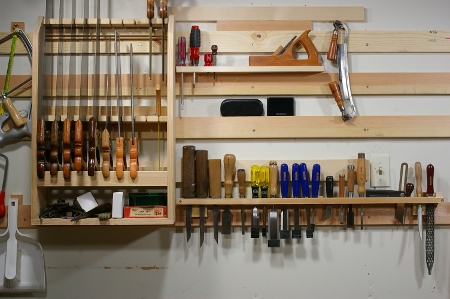
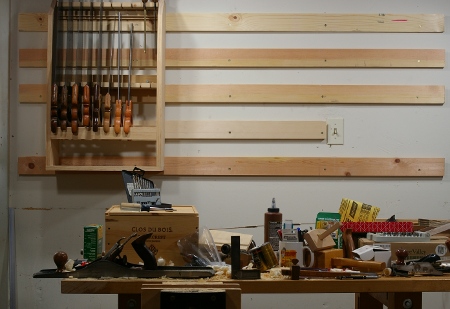
The shop seems to be usable. The intermediate state of the tool wall looks like this now:
The thing at the center top is a sort of shallow shelf-like thing that I made for the french cleats. The scrub plane just happens to fit on top, so I put it there because it seemed like a good idea at the time. The chisel rack is a reincarnation of the lamest tool rack ever built; for some reason, I brought it intact from the old place, and added cleats and screwed stuff into it until it actually fit on the wall. The space to the right is where the tool cabinet will eventually go.
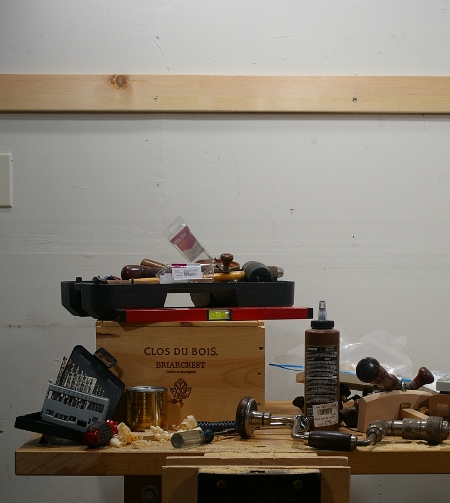
And really, the cabinet can’t come too soon. This is what I’m dealing with on the benchtop right now:
Mind you, this was after cleaning up a bunch of stuff. There are tools in all sorts of weird places around the place and I keep getting nervous that I’m going to knock them over–I don’t have a lot of room to move around.
Oh yeah–thanks to Jasen, who lent me that Narex 3/16″ mortise chisel. For that size, I don’t have any of my own (yet).
[Edit: I didn’t notice at the time, but this is post #200.]
There’s been very little time to get the shop in order since the move. Between the day job, getting the rest of the house looking less of a total wreck, and some mandatory snowboarding last weekend, the only thing I’d managed was to string up the lights. At this point, I have to thank the designers of the compact fluorescent lamp (CFL). I was able to string up five full-spectrum bulbs, each with the brightness equivalent of a 100-watt incandescent bulb, combining for just over 100 watts of consumption and very little heat. The task would have been horrible with anything else because I don’t have the space for a big fixture, and the power situation in the shop is not terribly ideal, anyway.
My first order of business was to get the saw till up, and I decided to use French cleats to accomplish this and other tool-storage tasks. There’s been a lot written about these cleats on other blogs and elsewhere, but most of them talk about making them with the dreaded tbls*w. I will admit that the machine makes this particular task easier, but I don’t use one, so it was off to the races with what I had at hand.
The plan was to use the cheap 3/4″ thick mystery softwood that I’ve managed to collect. I originally thought that I would cut the bevel for the cleats with the chamfer attachment for my Veritas low-angle block plane, but I quickly realized that it cut far too slowly and the attachment wasn’t wide enough for such a large task anyway.
So I grabbed my little rip panel saw to remove most of the waste:
Though awkward (because I couldn’t get a decent angle of attack), it didn’t take that long. Next, I used my jack plane with the deeply-cambered blade to zap and smooth off most of everything up to the lines, and finally, a jointer to go up to the lines. The nice thing about cleats is that you really don’t have to be that precise with the angle.
In retrospect, I should have probably used my drawknife to rough it out, but unfortunately, I would have had no idea where it would have been, anyway.
The first cleat turned out to be pretty painful to make for a couple of reasons. First, I hadn’t secured my benchtop onto its base yet, so the top insisted on sliding all over the place. Second, because I managed to tweak my wrist a little while snowboarding a week before (as I said, you gotta do what you gotta do), sawing was a little painful, as was shoving around those metal planes. The biggest problem was that I just didn’t have full wrist strength.
Before long, the first cleat was made, and it was time to put it into the wall. I’d bought some big 3″ wood screws with Torx heads for this purpose, and I leveled and pre-drilled everything, so putting the screws in was going to be a piece of cake, right?
Well, not exactly; even pre-drilled, driving those screws was a lot of effort and I couldn’t twist my wrist hard enough, nor did I want to. So I dug out my handy-dandy brace driver bit adapter, put a T20 Torx bit in, and promptly realized that I had no idea where any of my braces were. This was just a recurring theme–needing a tool and realizing that it was in one of those boxes around me.
It took a long time to find a brace, but when I did, you can imagine the grin on my face when I pumped those screws into the wall with that thing. And there it was, the first cleat was up (note the Millers Falls 8″ sweep brace with the Lion chuck that I used, lying on the bench):
After securing the benchtop to the base, I made another one that day, but not without discovering a bunch of resin around a knot in one of the boards. (That sure made it easy to saw, let me tell you.)
Taking it up again today, I put up a few more cleats and put up the saw till:
I was thrilled with this development, because my goal for the weekend was in fact to get the saw till up on the wall. That thing is my single-most important tool container. After taking this photo, I made a few more tool holders and put them up.
I even found my drawknife, so I put it up on a cleat to celebrate. Next, I’ll put the chisels up, provided that I can find them.
A week and a half ago, I had the old shop all packed up, and I got some help from some friends to move the whole thing to the new place. In two years of working there, I made the shoe rack, the prototype bookshelf, the saw till, the stool, the nightstand, plus a number of tools and odds and ends. It was my first real dedicated shop; I learned a lot there, and I feel that I accomplished a fair amount there, as well. So let’s take a moment to contemplate the now-empty old shop with an odd-looking photo:
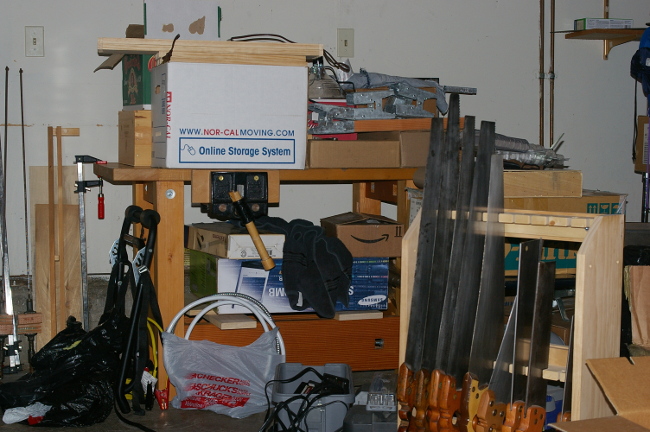
All right, that’s enough of that, it’s time to move forward with the new shop. Unfortunately, the new shop looks like this right now:
In other words, it’s not so much of a shop as is it a mostly-assembled workbench with piles and piles of tools all over the place. Those pieces of wood on the top? The case pieces for the tool cabinet that I might finish sometime in the next two centuries. As opposed to the old shop’s location of a basement-like thing, this is in the garage. I don’t really have a window directly behind the bench, but I do have an entire wall there. The landlord has allowed me to hang french cleats there to my heart’s content, and I will.
So, anyone got any cool ideas on what I should do here?
A huge improvement over the old shop is the wood storage:
In the old place, I had to store all of the wood vertically like the stuff in foreground that I haven’t gotten around to stacking. Now I have a whole length of a wall, and I can sticker it as well.
And hey, there just happens to be a place to hang the frame saw as well.