When you hear Schwarz or someone harping about how a workbench is a three-dimensional clamping surface, you might wonder why they’re so religious about it. One of the big “rules” is that you should have the front legs flush with the benchtop.
Although I am fond of the idea of rule-breaking, they’re often around for a reason. And here’s why this one is a decent ruleguideline:
That just wouldn’t have been possible without this configuration. It made a really unwieldy task (trimming off the edges of the coffee table top) to a very manageable one with just a handsaw.
So it’s not so much religion, more of an admonishment to prevent you from shooting yourself in the foot in the name of form over function.
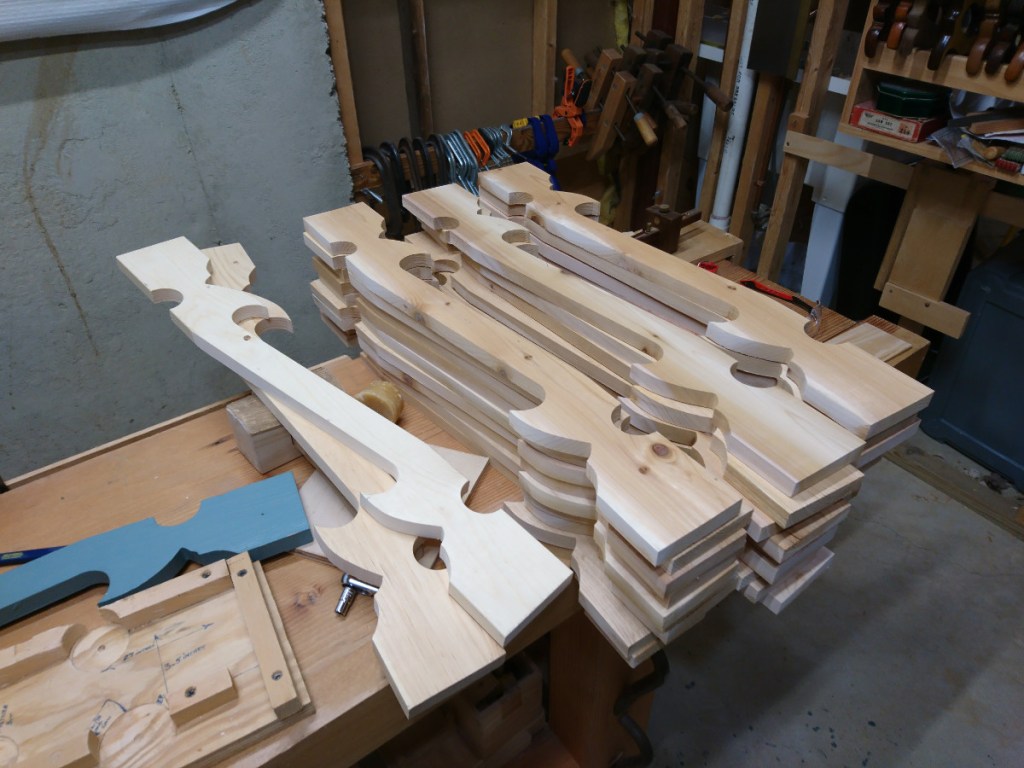
I finally finished all of the deck and porch work that was monopolizing my shop and shop time. Railings, deck boards, trim, and so on–it just never seemed to end. The last bit was making these balusters for the front porch:
Full disclosure: Electrons were shoved around in the making of these. I should write something about that sometime. However, I did cut each board to length by hand, and I finished off the little concave interior curves with a rasp (It was the fastest tool for the job).
It hasn’t been a great month for work on furniture, mostly because I’ve been working on repairing the deck on my house.
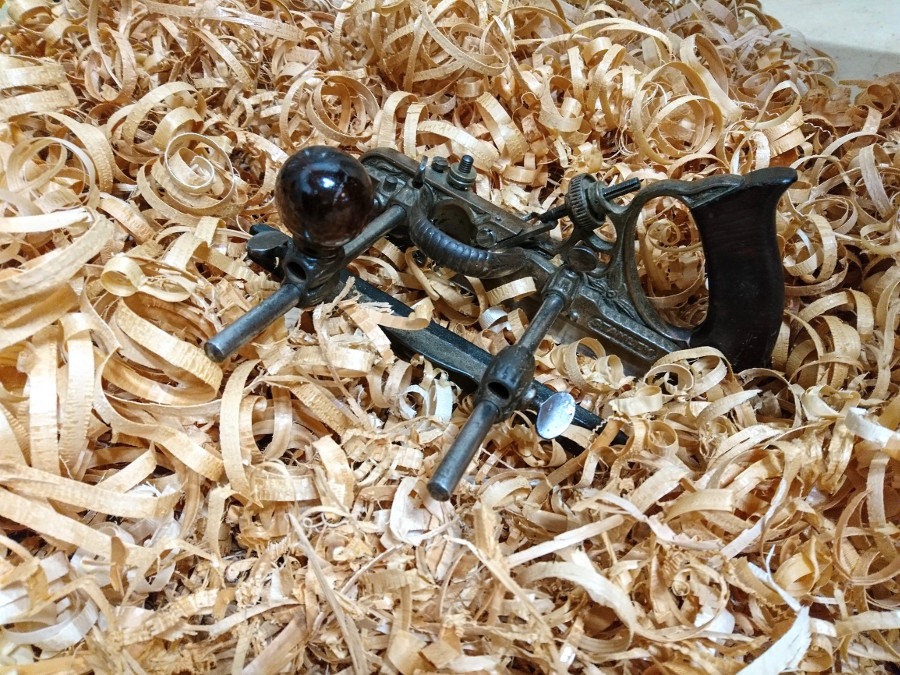
Part of this has involved making new tops for railings, which involved beading and cutting grooves. And this is what you end up with at the end of that last process:
Oh, that Stanley #45. Every time I use it, I feel like I want a tool that is lighter and less finicky to set up.
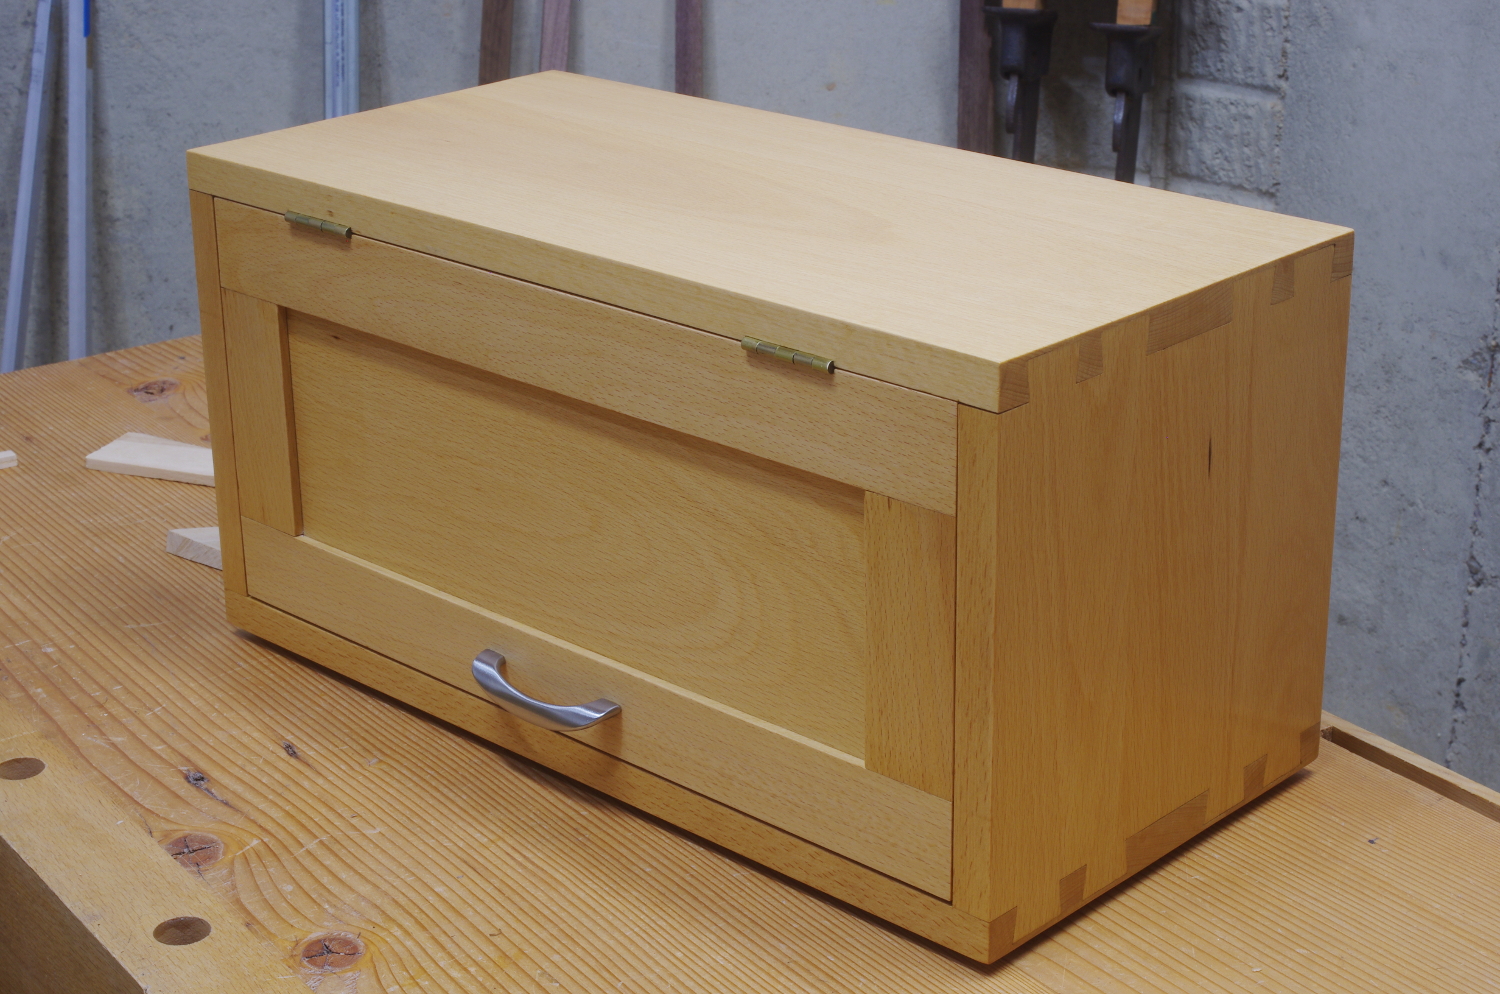
I’m not even sure if I want to post this, but here goes. I just finished a breadbox, which qualifies as the worst woodworking project I’ve ever done. Wonder why? There are lots of reasons, but let’s just get a photo out of the way first:
This project has been languishing for years. How long? I don’t even know anymore. There was a reference to it in a post many years back, three moves ago, probably saying that this was taking an embarrassingly long time. That was at least a few years ago. (I also found a photo from five years ago showing the door frame being made.) The reasons for delay? All obnoxiously stupid:
Couldn’t decide how to do the door
Couldn’t decide how to seal and stop the area around the door
Couldn’t be bothered to find decent hinges
Couldn’t decide on the handle
Couldn’t decide what kind of clasp hardware to use
Couldn’t be bothered to order the clasp hardware
Didn’t remember that I actually ordered the clasp hardware, then spent a year or two absentmindedly trying to decide on the clasp hardware (again)
Didn’t want to finish it
Didn’t remember that it needed to be finished
Any and all other methods of procrastination
That all sounds bad enough, but there are even more reasons. The best I can say is that I made the box and the door very quickly.
And then there’s the quality of work. It’s not great. It looks OK from a distance. Maybe just don’t look too closely. I don’t want to go into the details, but let’s just say that I wasn’t particularly careful here. I can only conclude that I just wasn’t terribly enthusiastic about this albatross of a project.
Despite all of this, it’s better that it’s done and now in service. This was an incredibly irritating monkey on my back.
Oh, I guess there are technical details: Beech, half-blind dovetails for the carcase, mortise-and-tenons for the door, floating panels on the door and rear of the carcase.
Here it is, open (I didn’t even remember to use the same exposure on both pictures, and nope, I’m not gonna go back and redo it):
This might seem like an obvious topic, but I don’t know if I’ve ever discussed it. To be clear, I’m not really talking about species selection here. It’s more a matter of the individual boards that you incorporate into a project and where they end up.
Wood selection might not stand out as one of the most compelling reasons to bother to learn woodworking, but it’s at least an implicit reason. If you’ve ever seen one of those kitchens with the cherry cabinets that were popular about 10-15 years ago, you know what I mean. These typically don’t have any rhyme, reason, or consistency to the boards making up the frames and panels; they often look like they were made up of many different species. It’s the same way with a lot of more expensive factory-made furniture as well. Well, if that doesn’t drive you nuts, the pocket joints will.
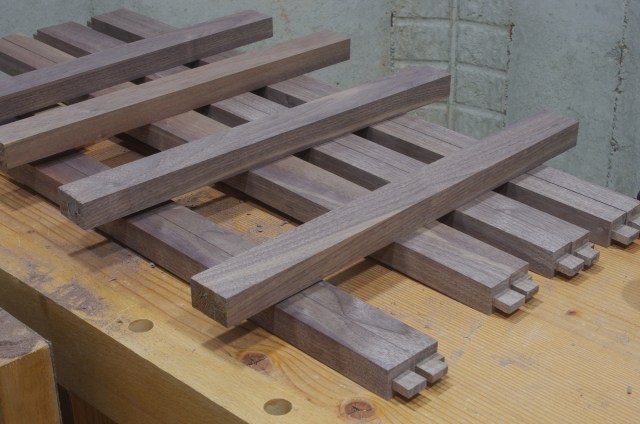
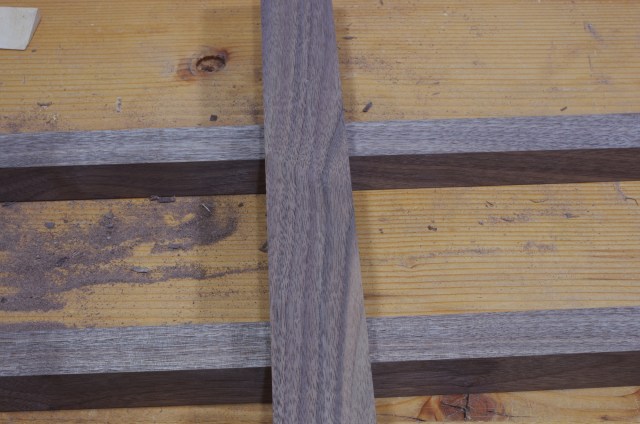
So this relates especially to my current project, the coffee table, which has a frame made of walnut. Like cherry, walnut has a high degree of variability between trees, boards from a tree, and often even within a single board. To try to get everything as consistent as possible, I always try to group pieces according to location and function, then map those groups to boards. The fewer boards, the better. Then you start working on the puzzle of where everything fits. Here’s where I’m at on the frame:
There are two stretchers per side between the legs, and they are paired (bottom layer) in this photo. Between those stretchers will be two inner frame pieces. The boards on the top layer of the photo will each be cut in two make those pieces. The pair on the top will go with the board on the right, the next down is second from right, and so on.
All of these pieces came from the same board, which made it a little simpler in some respects.
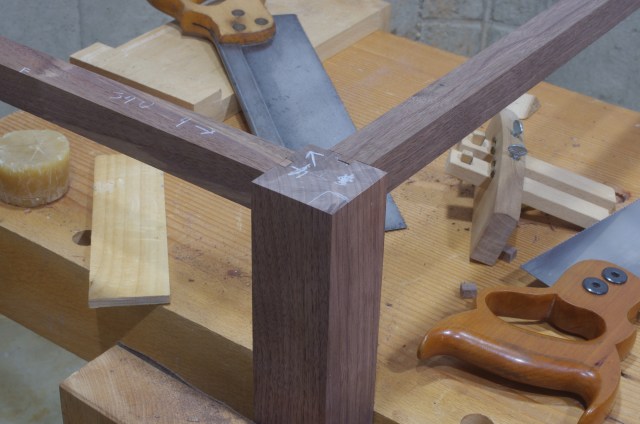
If you look closely, you’ll see that the grain orientation (top side in the photo) of each pair matches, with the rear pair being quartersawn, the next one mostly quartersawn, and the front pairs flatsawn. These are chosen to match the legs. Recall this photo from the last post:
That leg is the trickiest part of the arrangement because it’s riftsawn. But it mostly resembles flatsawn on the left and quartersawn on the right, and the legs on the other ends are definitely in that orientation, so the pairs of stretchers are chosen accordingly. (The other legs are much more straightforward in orientation and have obvious matches.)
In any case, the flatsawn sides oppose each other, as do the quartersawn, making it easier to arrange the legs. And the oddball above is going in the “rear” of the table to keep it mostly out of sight anyway.
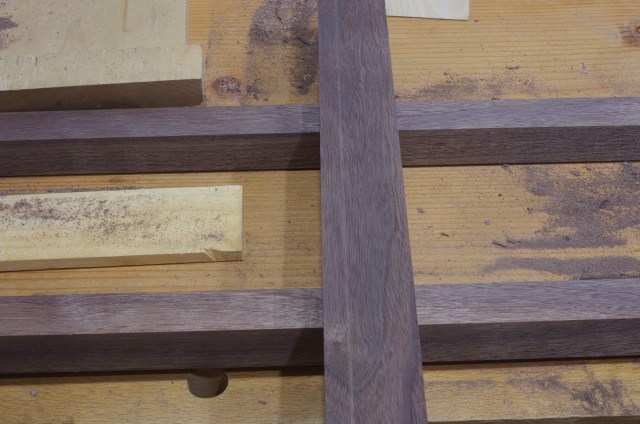
Let’s take a closer look at some of those stretcher pairings, starting with the quartersawn:
And now the flatsawn:
If you look even closer at this one (and the pairing in the post’s first photo), you’ll notice that the horizontal stretchers were cut not only from the same board, but right next to each other. This might seem a little crazy because the upper ones won’t even be really all that visible (the top will overhang, obscuring them), but it’s the kind of thing that I like to be in the habit of doing.
So I guess I spend a lot of time thinking about this kind of stuff. It might even be worth it.
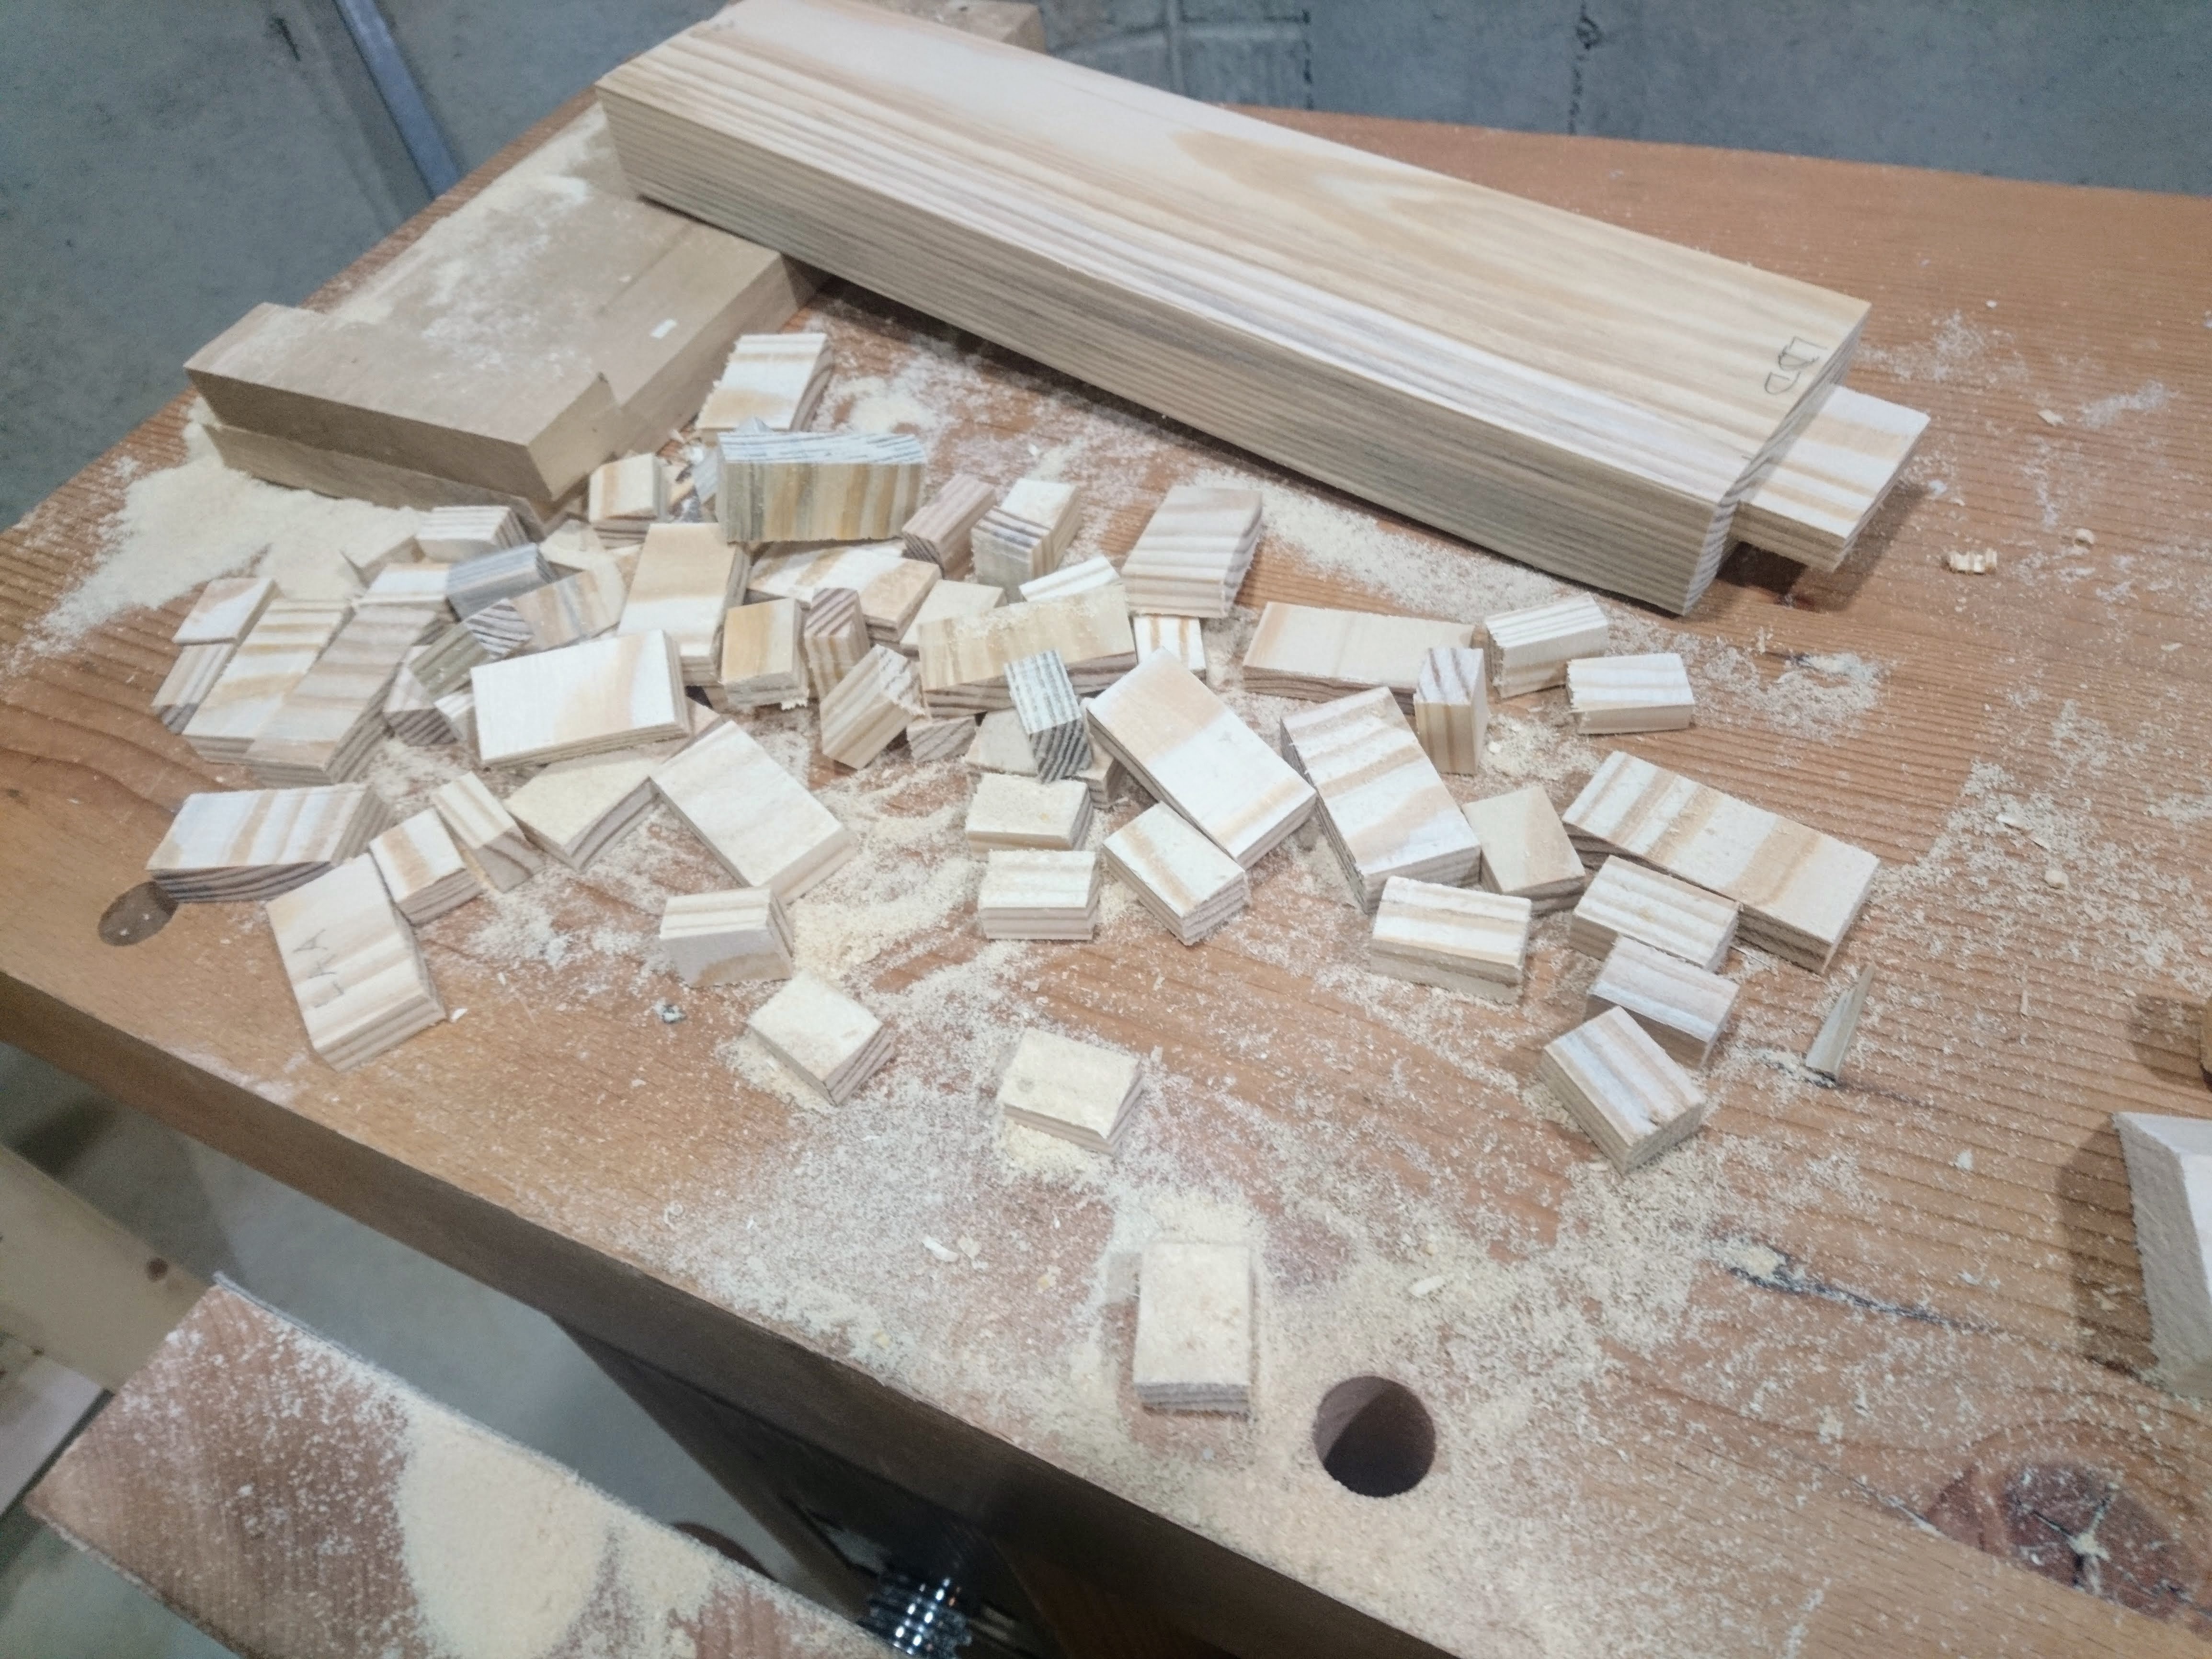
I posted the following photo from my happily-neglected Twitter account a while back and forgot about it:
I’d been busy making a stand out of some southern yellow pine and didn’t take too much time to clean off the bench between making each mortise-and-tenon joint. Perhaps there’s some sort of meaning here. But it could also be just a cluttered pile of cutoffs.
That project is essentially complete, but I’m not too sure. I didn’t make a top for it yet, but I might not need to. It’s just a tall stand for workshop-related stuff and is already in use.
I don’t know if I’ll ever write about that little mini-project. It’s pretty sloppy; I didn’t even bother to uniformly thickness or even mill all of the sides of the boards.
An element of frustration in woodworking will always smack you when you’d rather it not do that. Back around the beginning of the year, I broke the head of my “Thagomizer Jr.” mallet. This was not unexpected. I had not built the thing to last, but rather, did it in a hurry from whatever I had on hand at the time. It was just to get back to work after breaking my original mallet, and it lasted long enough. Still, I was pretty bummed about it at the time, though I’m not sure why. I think I was chopping some mortises and the mallet failure meant that I wouldn’t be getting any work done without a new mallet.
The biggest problem I had when building my first two mallets is that I did not have any appropriate stock in a thickness required for a single-piece head. It turns out that though wood glue is great at tension stress, it’s not quite as hot at the shear stress involved when you laminate a couple of pieces of wood together and smack it really hard. And really, I believe that’s what you want anyway, because a mortise-and-tenon joint would be awful to repair otherwise.
This third time around, however, I realized that I might have something that would work. Back when I was living on the San Francisco peninsula, a friend had a privet removed from their yard, and had the workers leave a sizable chunk of the trunk for me to peruse. Maybe that sounds weird, but hey, free wood. Aside from some slices that we took out of it with a bandsaw, I had a part of it sitting in my garage for years, drying and seasoning. Then I packed it up and had the movers take it when we moved to Maryland. Yeah, I know… that’s kinda weird, too.
And so there it was in my new shop when I was looking around for something, anything that could be used to make a new mallet. Looking it over, it seemed pretty hard, dense, fairly heavy, and just about the right profile for what I needed for a head. Cue the “seems legit” meme.
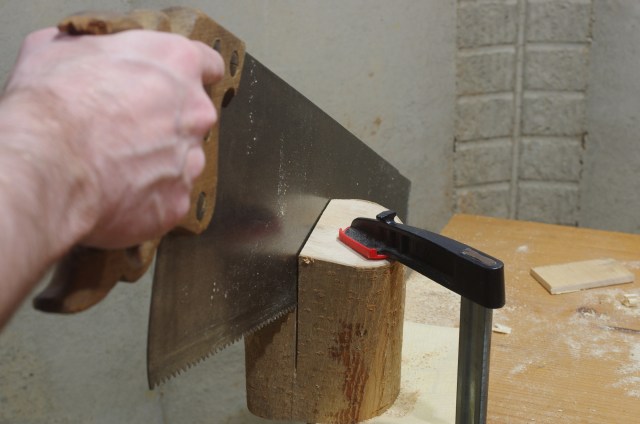
It was awkward to cut, compounded by its irregular shape. I finally managed to clamp it to the bench and saw off an appropriate length:
Crosscutting wasn’t so bad, but I still needed to get the excess material off the sides. Using the clamp again, I was able to rip it:
This was downright obnoxious to rip. I first went at it with my little rip panel saw (it was such a small piece, how bad could it be?), but it was such slow going that I switched to my big saw almost immediately.
After getting good parallel cuts on the top and bottom, and one on the side, I’d had enough and started to work on the slot for the handle. I used a brace and auger bit to get most of the waste out.
Because I had just destroyed the thing I normally use to beat mortise chisels, I grabbed a deadblow mallet and carefully finished the slot. After sawing the ends to the appropriate angles, I used my favorite brutal shaping tool, the Shinto saw rasp, to put a curve on top.
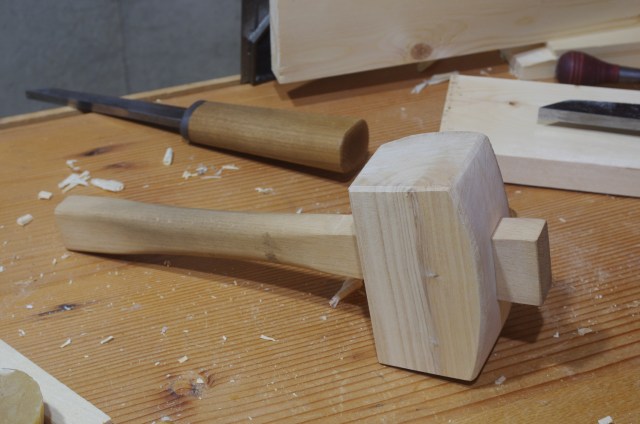
I reused the beech handle from Thagomizer Jr. in the new head, and had what appeared to be a success:
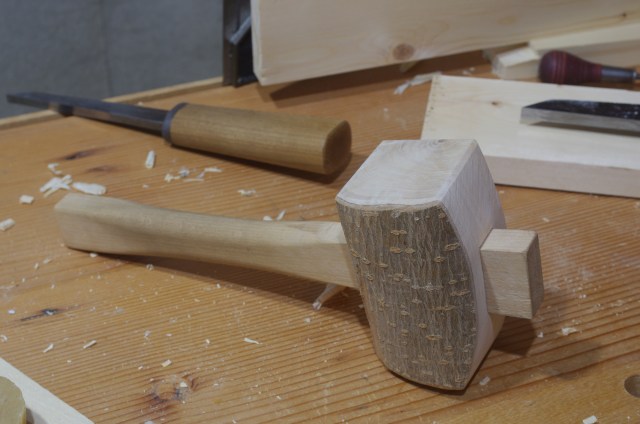
Well, one side of the head still had a waney edge. After looking at it and remembering how horrible it was to rip off the other sides, I decided that maybe I’d just try leaving that side alone:
Normally, I don’t care for any kind of rustic look, but this has grown on me, perhaps because it reminds me of some work that I didn’t have to do.
It’s been a few months now and I’ve cut dozens of mortises with it. So far, it’s performed flawlessly. The weight feels good and the ends have been durable.
If you have some yard wood that you think just very well might have a use, keep this sort of thing in mind. I already have a few ideas for the remaining bits of that privet wood.
I’m attempting to get the galoototron blog back on track. I’ve been active in my new shop lately, but it’s mostly out of necessity and I haven’t had much time to document anything. We’ll see how this goes.
At least a fair amount of the old content that I had here is out there somewhere, and I’ll try to get that imported, but it will take time (if it’s possible). Sorry about that. (The old content is back.)
In the meantime, here’s at least something that I worked on (and with) recently:
Let me introduce you to Joe. He’s a rather talented dude:
At BAGathon 2013, he showed up with this little cabinet that he’d made from a wine box. It’s his “file cabinet,” because it contains files.
Well, there’s almost no idea of Joe’s that I wouldn’t steal, so I decided that this would be a pretty good one for that particular crime spree.
First, let’s take a look at where these wine boxes come from. This is the scene around Greg H’s truck about a minute after he arrived at the same BAGathon:
He’s hiding behind the other Greg. Anyway, it’s always a nice feeding frenzy, as we do enjoy the boxes.
Anyway, so I decided to make my own file box. It took me a few months to get around to it, but I finally decided on this box:
As with all of the wine boxes, they usually aren’t made with terribly good wood, and they’re usually tacked or stapled together. The staples holding the front of this one were a pain in the butt, so I eventually ended up sawing next to them to get the front off:
Then I yanked out the staples and planed the endgrain of the front with some hokey workholding techniques:
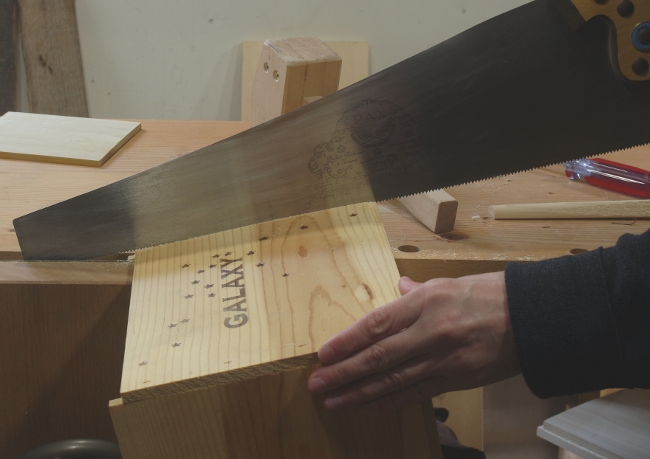
With all of that destruction out of the way, I set out to make slots for the drawer runners. After fussing with a number of saws, I realized that I had a monster hanging from the back of the bench, and used that:
Finally, I cut out the runners from pieces of another wine box and glued them in:
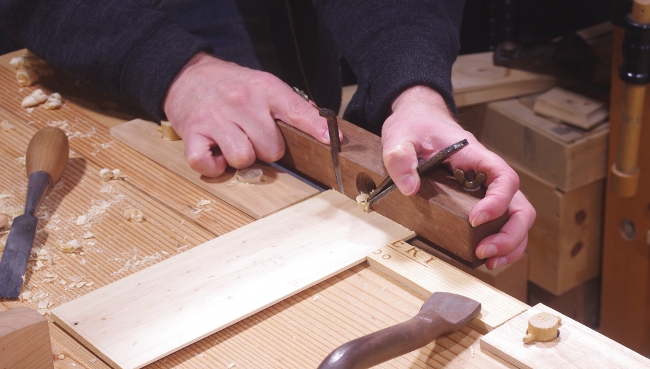
So then I made the drawers (out of the second wine box). You’d think that I would have remembered to take some photos of the drawer-making process, but all I have is this shot of me making the rabbets on the drawer bottoms for fitting into the grooves on the sides:
Oh well, you’ve all seen me make dovetails before, so whatever. What is new here is that the bottoms are segmented, and I used shiplaps on them to prevent gaps, rather than gluing everything up.
When all was said and done with the drawers, I had these, complete with some quickie pulls that I shaped (also made from a wine box, of course):
Now, It may sound like I did this in a few sessions, and that’s not far from the truth. However, the absurdity of it was that after the drawers were made, it took me about a month to get back to the shop to saw off and glue the fronts on, another month after that to find time to make the handles, and then, finally, another month to find time to tack some little strips onto the sides and put some stupid bevels on the edges.
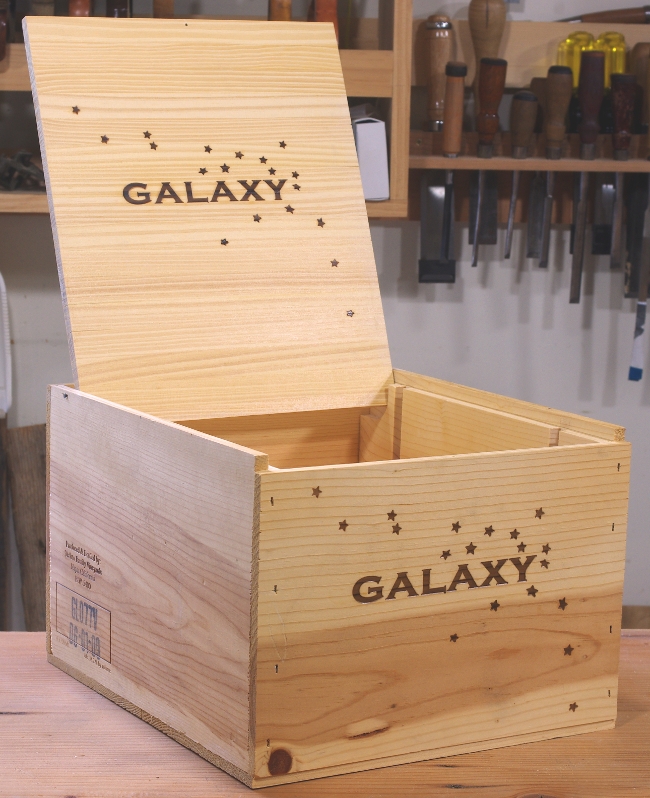
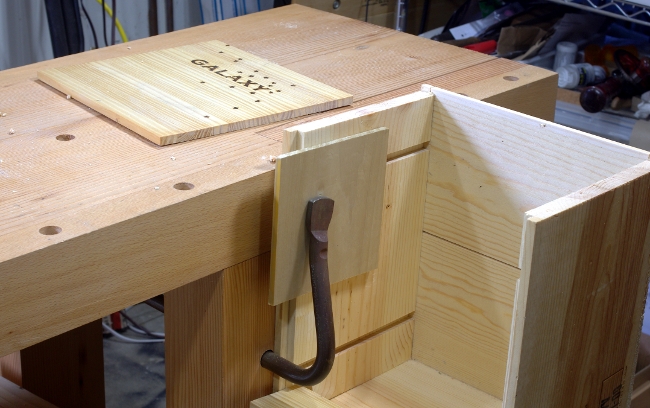
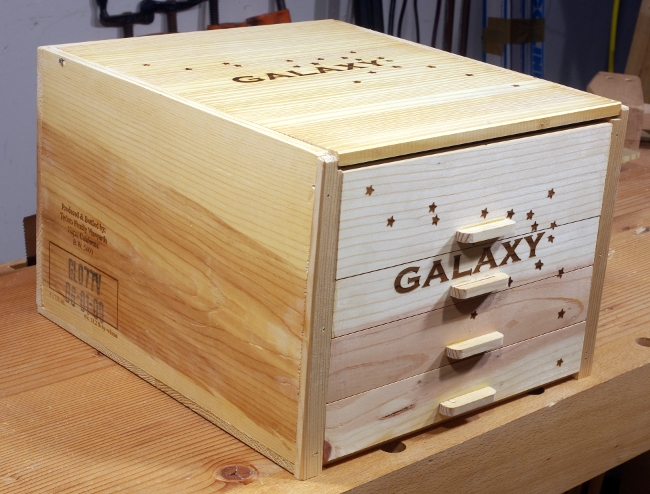
When it was all said and done, I had this:
Joe’s is probably nicer, but mine’s got stars on it! Anyway, the only thing left to do was put some files inside:
Mission accomplished. I should mention that the fudge factor was very high in this project–whatever I could do to work around the self-destructing properties of this wood, I did. Also, I used an obscene number of tools on it. Why did I use my #45 with the 1/8″ blade to make grooves for the drawer bottoms when I could have probably just tacked them on? I don’t know.
Now maybe I can concentrate on making a real piece of furniture again.
In my previous post, I briefly mentioned that I’d filed the plate of a new saw. I have now completed that saw; it’s a large tenon saw.
This particular project has been lagging for a long time. I’d gotten the plate and back from Mike Wenzloff several years ago, but they sat in a box for years. Finally, I filed the plate back in April. It’s 19″ long, and I filed it at 10TPI rip, with zero degrees of rake. Then it sat for a few more months until an informal gathering with some friends in June.
I decided to get started on the handle then. The wood is allegedly “Peruvian Pepper Tree” (Shinus molle); it comes from a piece that a local brought to a BAGathon several years ago and has been bouncing around several subsequent gatherings. I don’t really know if this is actually the wood here or not, but whatever; here’s a photo of the roughing-out process at my friend’s (awesome) shop:
(Later on in the day, I would get to use his Versa Vise. Very nice!)
This wood isn’t the worst thing I’ve ever worked, but it’s certainly got its quirks, namely wavy, reversing, interlocked grain (much to our amusement, as we initially tried to rive it with a froe). It’s about as hard as beech. I found it easiest to smooth it out with a scraper. Even then, I didn’t take a whole lot of care smoothing out the final surface, figuring that it would get dinged up anyway. (This hypothesis was quickly confirmed when I dropped it on the floor as I was just completing the rubout of the finish.)
I was initially going to use a Kenyon pattern for the handle, but decided on a Disston pattern at the last moment because I’ve been very happy with the comfort of the Disston-based patterns I’ve used in the past. I modernized certain parts (as I always do), but left this one mostly alone.
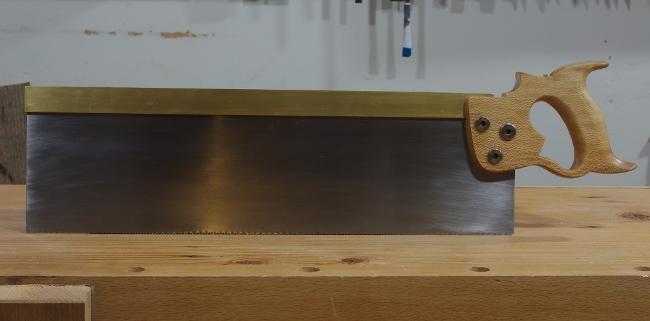
As usual, the finish is varnish. I used about five coats this time. The wood has some strange inclusions, but you can redefine those as “character.” Here’s a closeup of the completed handle.
The saw hardware is my usual (see herewhoops, cross-reference broken for now). Here’s the whole saw:
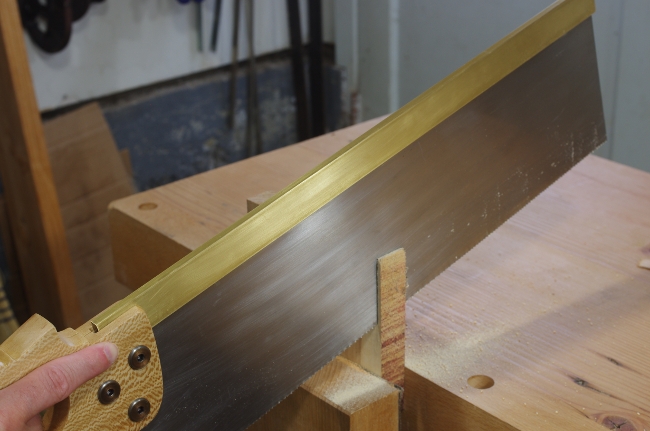
All of this is fine and good, but does the saw work? I picked up a piece of the wood that I like to hate the most (some really hard birch), and checked to see if it could saw straight and quickly:
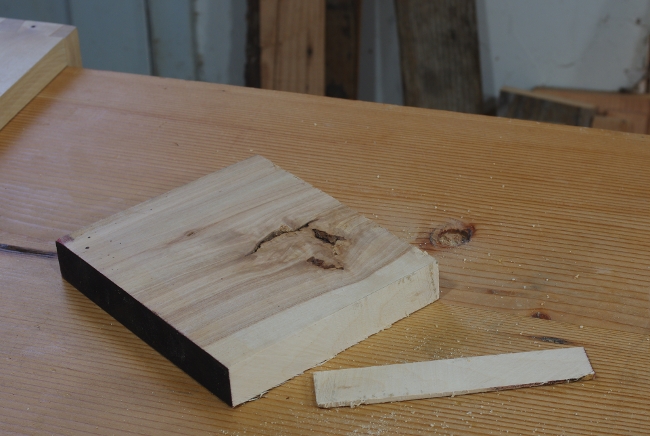
Hey, it wasn’t so bad at all. I came to my senses and switched to a bench hook to finish off this test cut:
Then I tried it on some less horrible woods. It slices through yellow-poplar like butter.
So it’s done. It would have been nice to have had this saw for the big tenons on the workbench project last year, but that’s the way it goes.