
An element of frustration in woodworking will always smack you when you’d rather it not do that. Back around the beginning of the year, I broke the head of my “Thagomizer Jr.” mallet. This was not unexpected. I had not built the thing to last, but rather, did it in a hurry from whatever I had on hand at the time. It was just to get back to work after breaking my original mallet, and it lasted long enough. Still, I was pretty bummed about it at the time, though I’m not sure why. I think I was chopping some mortises and the mallet failure meant that I wouldn’t be getting any work done without a new mallet.
The biggest problem I had when building my first two mallets is that I did not have any appropriate stock in a thickness required for a single-piece head. It turns out that though wood glue is great at tension stress, it’s not quite as hot at the shear stress involved when you laminate a couple of pieces of wood together and smack it really hard. And really, I believe that’s what you want anyway, because a mortise-and-tenon joint would be awful to repair otherwise.
This third time around, however, I realized that I might have something that would work. Back when I was living on the San Francisco peninsula, a friend had a privet removed from their yard, and had the workers leave a sizable chunk of the trunk for me to peruse. Maybe that sounds weird, but hey, free wood. Aside from some slices that we took out of it with a bandsaw, I had a part of it sitting in my garage for years, drying and seasoning. Then I packed it up and had the movers take it when we moved to Maryland. Yeah, I know… that’s kinda weird, too.
And so there it was in my new shop when I was looking around for something, anything that could be used to make a new mallet. Looking it over, it seemed pretty hard, dense, fairly heavy, and just about the right profile for what I needed for a head. Cue the “seems legit” meme.
It was awkward to cut, compounded by its irregular shape. I finally managed to clamp it to the bench and saw off an appropriate length:

Crosscutting wasn’t so bad, but I still needed to get the excess material off the sides. Using the clamp again, I was able to rip it:
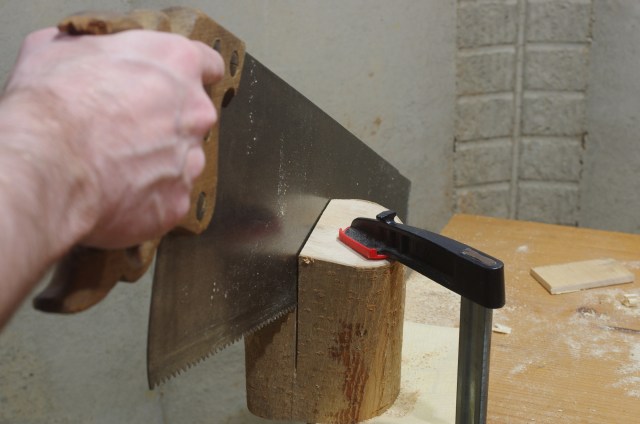
This was downright obnoxious to rip. I first went at it with my little rip panel saw (it was such a small piece, how bad could it be?), but it was such slow going that I switched to my big saw almost immediately.
After getting good parallel cuts on the top and bottom, and one on the side, I’d had enough and started to work on the slot for the handle. I used a brace and auger bit to get most of the waste out.
Because I had just destroyed the thing I normally use to beat mortise chisels, I grabbed a deadblow mallet and carefully finished the slot. After sawing the ends to the appropriate angles, I used my favorite brutal shaping tool, the Shinto saw rasp, to put a curve on top.
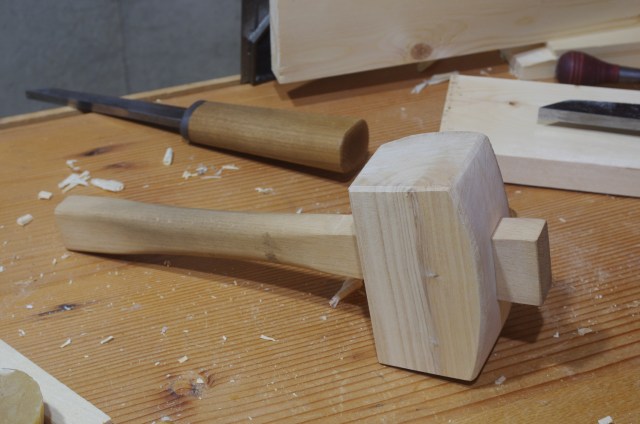
I reused the beech handle from Thagomizer Jr. in the new head, and had what appeared to be a success:
Well, one side of the head still had a waney edge. After looking at it and remembering how horrible it was to rip off the other sides, I decided that maybe I’d just try leaving that side alone:
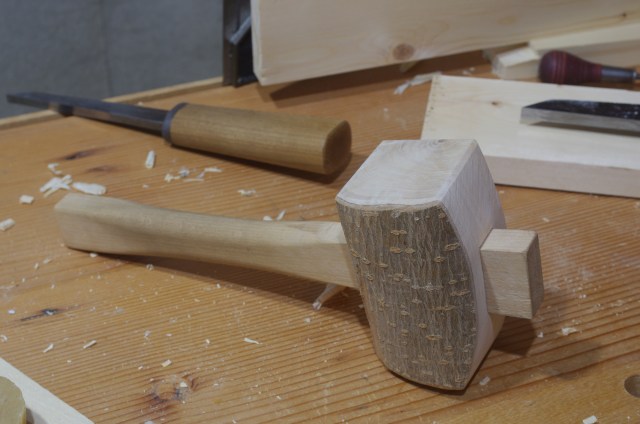
Normally, I don’t care for any kind of rustic look, but this has grown on me, perhaps because it reminds me of some work that I didn’t have to do.
It’s been a few months now and I’ve cut dozens of mortises with it. So far, it’s performed flawlessly. The weight feels good and the ends have been durable.
If you have some yard wood that you think just very well might have a use, keep this sort of thing in mind. I already have a few ideas for the remaining bits of that privet wood.
