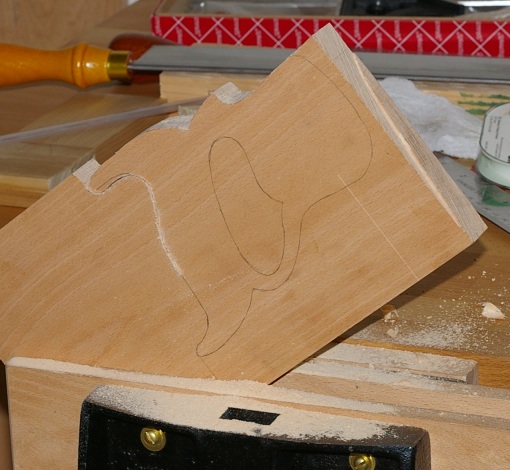
Instead of starting to shape tonight, I decided to clean up the rough saw marks made by cutting out the handle.
That’ll be it for tonight. Somehow I came up lacking in the energy department.
There was some question about “purity” somewhere or other, or in other words, “would I have used a scrollsaw or bandsaw to make this if I had one?” Well, yeah, probably. Remember that Disston wasn’t shy about using machinery to make all of those beautiful early 1900s saws. They weren’t stupid, and they sure had room for some bandsaws.
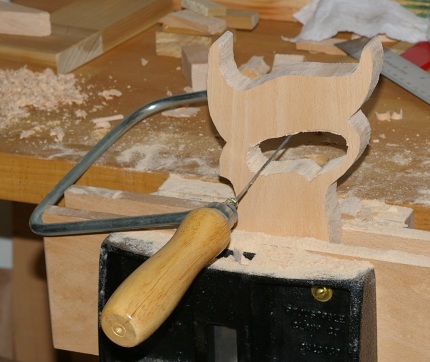
The worst part of making handles seems to be cutting out the handle. I’m still using a coping saw for this. I should probably wax the blade. In any case, beech does not cooperate much.
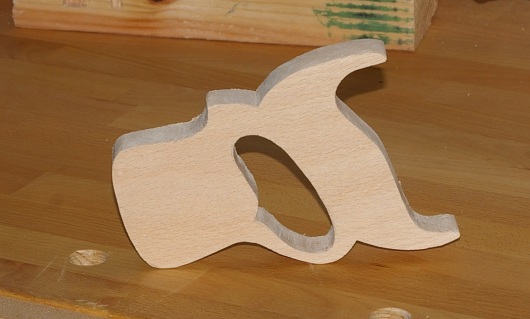
It didn’t take terribly long. The grip is maybe 1/32nd thinner than the original, which is probably okay. I’m not going to bother to even it up tonight. I’ll do that when I go to shape the handle.
The handle on my old beat-up Jackson backsaw looks really sad and has a lot of nasty rot and gunk in it. In preparation for the handles on my other backsaws, I thought it might be a good idea to start with the old one, just so I can continue to mess around with a saw that isn’t worth very much.
I finally got my stupid scanner working and scanned the old handle. Then I used Inkscape to trace the outline, and finally, today, I cleaned it up a little. I got this thing:
This seems reasonable, and the dimensions also appear to be correct. I didn’t try to make it pretty or add extra flair. The “holes” are almost certainly inaccurate, but I don’t care, since I’ll be transferring them from the blade and not the drawing.
It’s a somewhat “urgent” project now. I put new teeth on another one of those cheap Craftsman dovetail saws this weekend, so I have the “urge” to put a real handle on the ones I have. This time I went for 14tpi rip, and I used a worn 5″ x-slim taper to cut the initial teeth. That went a lot faster this time.
The saw works perfectly… as a dovetail saw, that is. This is or is not unfortunate, depending on how you look at it. I wasn’t intending to make a saw that cut as well as this one, I just wanted something that was faster than my current 20tpi dovetail saw. This cuts so well that I might just try it for stuff that I used the dovetail saw on before.
So I’ll probably be getting yet another one of those cheapie saws. This time, I’ll file it to something like 10 or 11tpi rip. That ought to do what I want it to. Except that maybe I wanted to make a panel saw? Eh, I guess it doesn’t hurt to have a few.
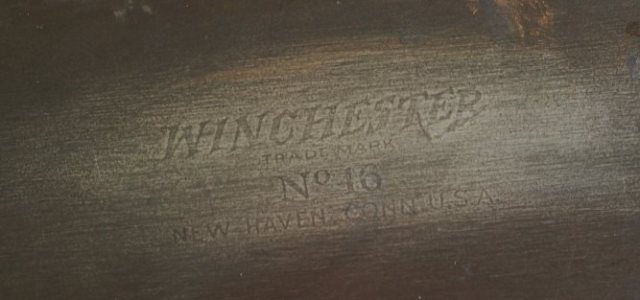
My Winchester No. 16 handsaw has been sitting around waiting for me to do something to it since time began. I’ve had this saw for nearly five years. When I finally decided to do something about it, it was back in March, when I discovered that it was a Winchester:
I didn’t know what to do with it at that point. It’s a mildly rare saw, so one option was to try to sell it for something useful, for example, a pile of Disston D-8s. But the handle was in crap condition, and it had the less-snazzy “Warranted Superior” medallion, so I decided to restore it and keep it as a user. I don’t know when I decided to do that, but it was a long time ago, and as such, I’ve had the blade sitting around, derusted and waxed, waiting for sharpening. I took the handle off, and procrastinated on the refinishing.
About three weeks ago, I decided to do something about it. I finished today:
The saw was filed to 6TPI. That’s pretty coarse for a crosscut saw, so I was originally going to make this a ripsaw to replace my beat-up D-7. However, the handle has that funny notch on the top that would make ripping uncomfortable with two hands, so I figured decided that this would, in fact, remain a crosscut saw. The rake angle is 15 degrees, with the fleam angle at 20 degrees. I had initially filed a 20-degree rake angle, but I screwed up pointing it (of course), so on my second try, I decided that since it was so coarse that I should make it a little more aggressive. It was probably a good idea; it does saw very efficiently. The cut is fairly clean for 6TPI.
I spent about a million years refinishing the handle. It was dented, nicked, and beat up. This photo also shows how the top horn was mangled:
The first thing I did (several months ago) was strip the original finish. At the same time, I cleaned the sawnuts:
And then it sat. And sat. And sat, until about three weeks ago. Even after stripping the original finish, it was still really uneven, so I sanded around the curved parts. For the flat parts, I just skimmed it with a smoothing plane. At this time, I also learned what the wood in the handle was for the first time–American Beech (fagus grandfolia). OK, well, that’s not a big surprise.
Then there were decisions. Should I stain it? With what? I finally settled on few thin coats of a “Colonial Maple” pigment stain. I used a washcoat beforehand. Though it would result in accented nicks and dents, it would even out the flat parts, and who’s going to try to hide the fact that this saw hasn’t been used, anyway?
Finally, I decided to use the same flat-sheen polyurethane that I used on the mallet as a protective top layer. I went from a thin coat to thicker coats, then back down to thin coats for the final one. Several coats were necessary, because the varnish would run down the surfaces that were vertical, depending on the way you held the handle. I did the first coats with the handle held upright, then the later ones held flat. A close-up of the finished handle:
I used a progression of 320 grit sandpaper, #0000 steel wool, 1500 grit sandpaper, and rottenstone, all lubricated with mineral oil, to rub out the finish. There’s still a scratch here and there from the coarse-grit paper (because polyurethane is tough), but overall, it looks nice, and it’s very smooth to the touch.
So the old ridiculous teeth were all filed off, and it was time to put on new teeth. On Thursday, I decided on 14 TPI (teeth per inch), put the saw along with a tooth guide in the saw vise, and set out to rock and roll.
It was not as easy to get the new teeth started as I would have hoped. I tried a small hacksaw at first. That didn’t work out, so I moved to a handsaw file. That wasn’t fine enough, so I finally dug out a set of hobbyist-grade needle files and found one that had sort of a knife-like edge. That worked, but it was slow, because that file sucked. It took forever to get the 140 little notches cut for the teeth, and my hand felt a little funky after doing it, but it was precise, so I was happy, and left it for a while.
On Sunday, I picked a rake angle of 20 degrees, and went to town shaping the teeth. Here’s what it looked like halfway through:
And close up…
After setting the teeth and a jointing, it was time to point the teeth. I chose 20 degrees for the fleam as well.
The result was far better than any crosscut sharpening I’d done before. (I don’t have a closeup, maybe on the next installment.) The best part, though, is the way the saw cuts–smoothly and quickly.
So now I have a workable small tenon saw. I don’t like the gent’s handle, and I do want to replace it with a closed-grip handle, but this is not an immediate need; I want to practice making tenons with it before going into further modifications. I’ll make the handle later.
I’m so happy with the way this has turned out that I’m considering buying a second saw for use as a ripsaw. It would only set me back another $10. Whee…
I’ve had the fantasy of making my own backsaw ever since I heard of someone else doing it. Unfortunately, I have an immediate need: A crosscut tenon saw for, well, cutting tenon shoulders. I do not have time to fool around forever, and I do not want to grind off any more of my current Jackson backsaw.
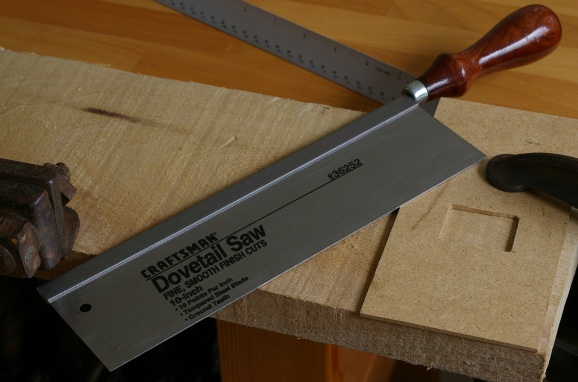
When I was in OSH the other day, though, I noticed that among the usual crud, there was a 10-inch Craftsman-brand “dovetail saw.” It featured the same general dimensions of the tenon saw I’d envisioned. In addition, the blade was moderately-sized–not as thick as a handsaw or the bigger backsaws, but not as thin as a dovetail saw is supposed to be.
I thought, “heh.” The teeth were ground in an absurd way; it was sort of a semicircular-type pattern. Plus, it had wavy set (on a 16 TPI saw!). Gee, thanks for trying, guys.
But it was only $10, and was purported to be made in the USA, so I thought, well, hmm, maybe I can make something of this, since it does have a blade and a back that I wouldn’t need to make and attach. So I bought one, then promptly went to town milling off the teeth with my saw jointer:
(“Fine, smooth finish cuts.” Yeah, sure, buddy.)
Well, at least the first stage seems to have gone fine. Next, I ought to cut new teeth. I’m thinking that I’d like somewhere around 14 TPI. Then I want to make a handle to replace that silly gent’s handle. I’d like to make the handle from beech or cherry. After today’s episode with beech, I’m not sure I want to mess with that so soon again (at least, as long as I do not have a scrub plane), but then again, I don’t know much about cherry’s durability, and these are not large parts that we’re talking about here. Eh, I don’t have to decide tonight.
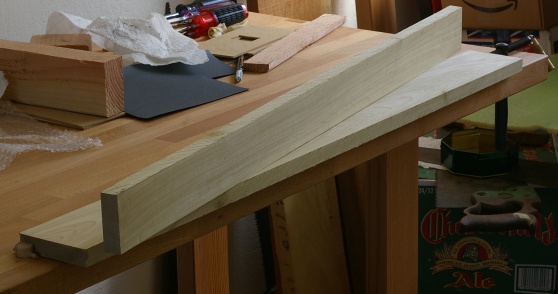
In the last milling episode, my board was now flat on three sides. I needed to rip it to its final width of 2.5 inches. First, I scribed a line around the cut with my marking gauge, then pulled out my now-functional ripsaw. I took the cut a little slowly, not really knowing what to expect. The saw did its job perfectly, guiding itself with the kerf and never wandering:
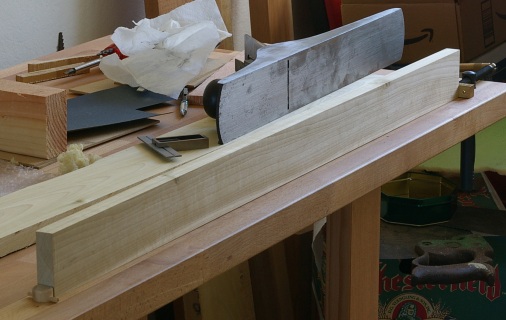
To get the final surface on the edge, I had two choices with my jointer plane: use a shooting board or try it freehand. Since I don’t have a shooting board, and I didn’t want to cobble together some lame setup again, I opted for the freehand method. It was a lot easier than I thought it would be.
That little Lee Valley double square is really handy for checking the edge.
There’s just one thing left to do: saw the end square to final length and plane it smooth. But for the rest of today, I’m going to clean and wax a few tools that seriously need it (like that jointer plane, ugh).
There was no way around it–I was not able to continue with the milling without a ripsaw. I rigged the saw vise to the workbench, then threw the blade from the old dogmeat 26″ Disston D-7 that I’d “cleaned up” (a few months ago) into that vise:
My expectations were kind of low. Though waxed and now rust-free, this blade is badly pitted and slightly bent at one place. It had been a chore just to get the stupid handle off. And the 7 TPI-pattern teeth were a horror story–badly deformed, uneven sizes, previously filed to crosscut profile, fairly wide set… you name it. The pic above is after jointing. Here’s a fuzzy close-up that should give you an idea of how crappy the teeth were:
Using a zero-degree rake angle, I worked my way across the saw, taking just one stroke at a time. I had to make four passes to get all of teeth even, so that’s four strokes per tooth. I ended up with this:
I left the set as it was; the filing had eased it a little.
This sharpening session was much easier than my earlier experiences. There were considerable improvements: I have the workbench now, so the vise was much more secure. The location afforded a lot more light; it was much easier to see the tips of the teeth. And it was much more comfortable to work at that height instead of the previous ridiculous situation of sitting on the floor.
I still had my doubts because the saw wasn’t in great shape to begin with. Of course, this was on purpose, because I wasn’t going to mess up one of my good saws on my first try at rip filing. But whenever you get a new toy, you want to play with it, so I put the handle back on, clamped a douglas fir 2×4 to the bench, and tried it out.
Gee-hose-a-phat. That thing split apart the 2×4 like it was nothing at all. Disston ads used to say stuff like “Zing!” And that’s exactly how it felt.
Unbelievable. Hmm. I have two other ripsaws waiting over there… a monster Disston No. 7, and the Winchester that I described a long time ago. Did I mention that those two are straight and have no pitting? Oooooooh.
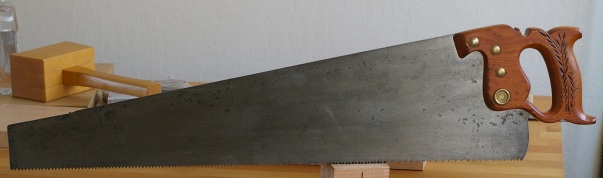
Last week, I finally finished off that Jackson backsaw that I’d been working on since before the dawn of history. Here’s what it looks like when all was said and done:
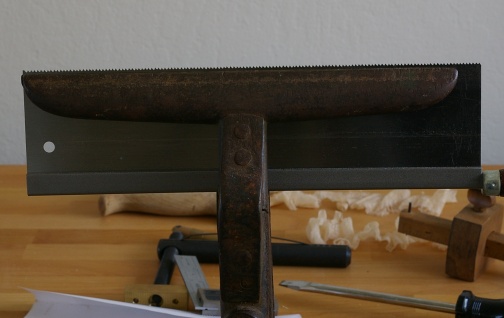
Skipping back a few entries, this is what it looked like before I did any work:
As you may recall from the last episode, I messed up badly and had to reshape the teeth before I got to the final stage of pointing (sharpening/filing the fleam). But finally I got to print out my tricky-dicky PostScript fleam guide and use it properly. Here’s how it looks in use:
All you do is align the file over each line and take a few strokes. This picture was shot after the first half of the teeth were done, so you can see how every other tooth is a little shorter. It evened out very nicely, just as it was supposed to, and when viewed end-on, the “valley” that you’re supposed to see between a crosscut saw’s teeth was there. Fantastic.
The tip of this saw isn’t in good shape. There’s a kink in it, and the teeth are especially uneven there. Because it’s only about an inch and a half of steel, I’m considering taking the moderately drastic measure of hacking off the tip. I likely already would have, except that I don’t have a machinist’s vise yet.
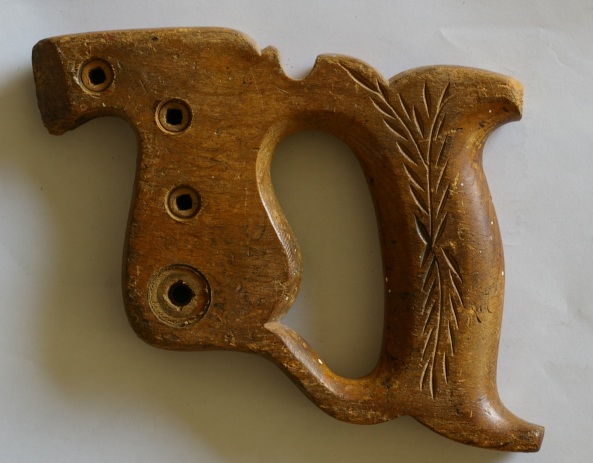
I didn’t do anything to the handle of this saw, either. Unfortunately, it’s shot; it’s soft almost all the way through, making it hard for the sawnuts to get a grip. The sawnuts are also in bad shape. So I just put it back together so that it wouldn’t be too loose. There’s no point in fussing with it any more; if I want to improve the handle, I’ll need to make a new one. (This is not a bad idea, because I like the shape of the handle and have this fantasy of eventually making my own saws.)
Well, so much for the saw’s looks. A more important question is, “How does it cut?” I’m happy to report that it’s great. Due to its somewhat aggressive rake angle and the relatively low number of teeth per inch, there is moderate tearout, but it saws quickly and with very little effort.
For some reason, I don’t particularly expect to use this saw much. It should be fine for cutting smaller boards down to size in a miter box, and for cutting down the shoulders of tenons, but it’s too small for large boards, and because it’s a crosscut saw, it’s useless for sawing down the cheeks or anything else that’s a rip operation. That’s fine, though. My next two saw projects really ought to be full rip and crosscut handsaws.
I’m a little relieved that my two candidates for those two saws are in much, much better shape than this thing when it started out…
I got all “high-tech” on the problem of pointing the teeth in my Jackson backsaw, thinking that I could maybe do something a little differently because I know the PostScript programming language. So I wrote a program to image a fleam angle guide, and spent last night getting my infuriating printer to work.
I couldn’t resist the urge to tweak the program a little while I was at work, so I was really excited to come home, print out the guide and try it out.
Unfortunately, I was in full bonehead mode. I put the guide on backwards and promptly screwed up the shape of my teeth. So I had to reshape and reset the teeth. Not that this was a bad thing; the teeth near the front of the saw were a little messed up. However, the file I was using is now history; I’ll need to get another one or two tomorrow.
I’d mentioned earlier that setting the sawteeth was a royal pain in the ass. Perhaps this was a “happy accident” today, because setting the teeth went a lot faster today due to this setup:
The first thing that helped here is that I printed out my pointing guide with a fleam angle of zero degrees and taped it to the saw, effectively making it a setting guide. This helped out a lot. No more squinting, trying to figure out if I was on the right tooth; just point at the next line, squeeze, and move on.
The other thing (and this is a big duh for me) is that I put the damn thing in the saw vise this time. Why I didn’t earlier is beyond me.