
Several months ago, as I was starting the daybed project, I also decided to do another project in parallel: a stand for some decorative object that’s to go in the living room. I figured that it wouldn’t take much time; it would have three tapered-tenon legs, so all I needed to do was make a quick model to figure out what angles would be appropriate, and just do a little work.
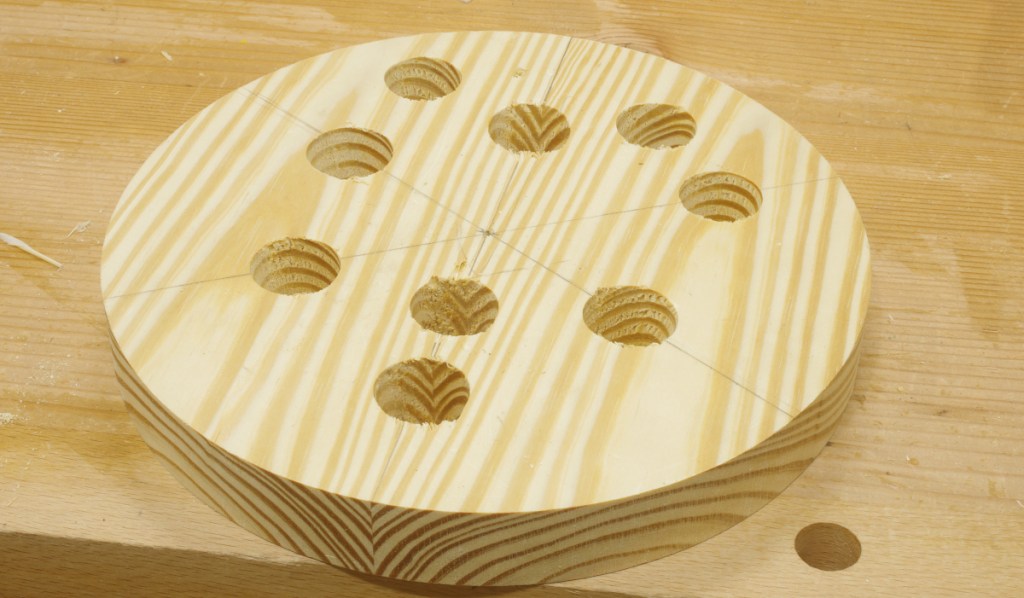
I’d already made the model (leading to this). For the top, I glued up a really nice chunk of yellow pine and sawed it into a disc on the bandsaw. I made the legs and the tapered tenons on those. So all I had to do was ream the mortises and I was as good as done. Shouldn’t take more than a few days, right?
That’s when disaster occurred. For the life of me, I couldn’t keep the angle consistent when reaming with the brace. I failed immediately, reaming too far on the first one. Having ruined the top, I figured that I could learn just what I did wrong, so I tried the other two. I failed at those as well. Then I just tried a bunch more and failed at all of them by hand:
I was just having too much trouble controlling the reamer. It wobbled too much in the brace, and I couldn’t feel anything. Furthermore, because this is on the thin side, I was having trouble making adjustments without overcompensating. If I were more experienced, I might have been able to do it. Then I tried with a power drill. I was able to do some decently using that.
Sitting back, I wondered what I could do about this situation. I’d speculated before that I suspected that the reamer I was using was just meant to go into a chuck on a power tool, and this reinforced it.
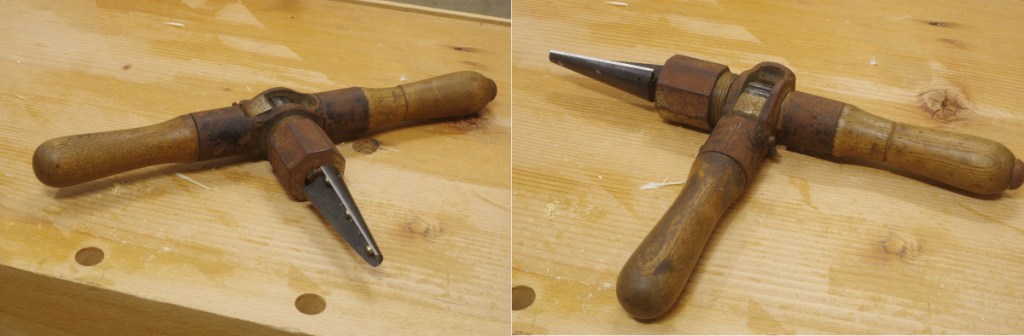
Note: Chris Schwarz says in an old post that this “standard” reamer, sold by Lee Valley, is made in Canada and fits well in a brace. The former is NOT true (maybe it was back then), and as for the latter… maybe it fits better in a Spofford brace? I dunno. The shank is very soft, which caused me a lot of trouble in the brace.
What to do? I figured that I had four options:
- Use a handheld power drill to do it.
- Make the “banjo jig” to do it on my drill press.
- See if I would have better results with a reamer with a square-taper shank that’s meant to go into a brace.
- Sulk.
Door number four is never a bad choice, and I did a fair amount of that (especially considering how nicely the rings were arranged in the glue-up of the top that I ruined), so I thought, well, I’ve never really been too comfortable with my power drill; I’m don’t have the steadiest hands. Perhaps I could make the banjo jig?
But I also thought, well, I like hand work, and I don’t like the idea of another jig lying around. Maybe I could be lame and blame the tool, try a different reamer, one with a square-taper shank? I ordered the Veritas “Pro” Reamer. It was on backorder for a week or so. That became a few weeks. Then the expected date was shifted to January. This was not a cause for optimism. Much sulking ensued. But just as I was thinking, okay, well, time to build the banjo jig, mine shipped around the end of November.
To make a long story short, I am far happier with this reamer. Other than the proper shank, there are two things in particular that I like: First, there is a single blade, which seems to make it easier to control with a brace. Second, the blade is adjustable: You can set how much it protrudes (different amounts for different woods), and you can adjust the included angle slightly with set screws.
Great. My first “genius” idea was that maybe I’d try to use the thing in my T-handle in the “inline handle” configuration (or whatever it’s called; it’s the configuration on the right):
That worked, but it was really slow. So I first went at it with my largest-sweep brace:
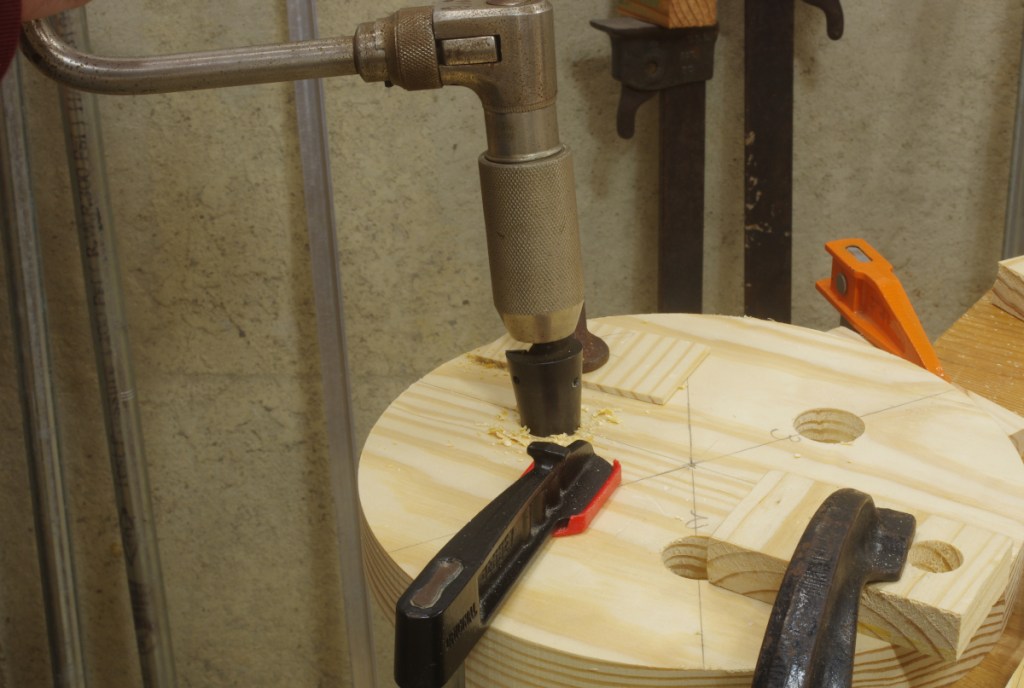
This was quite effective. I was able to get down to near the depth I wanted quickly and at the correct resultant angle. I admit that I did switch back over to the T-handle when almost done to go more slowly when finishing up, but I think I probably didn’t need to do that.
Then it was time to chamfer the bottom edge. It’s weird to do that a curved surface. C.S. did this on a similar project in the ADB with the bandsaw, and I probably should have done that as well. Instead, I first went at it with a block plane chamfer attachment, which did not work terribly well, but got me to a certain point. Then I made this stupid thing to go the rest of the way:
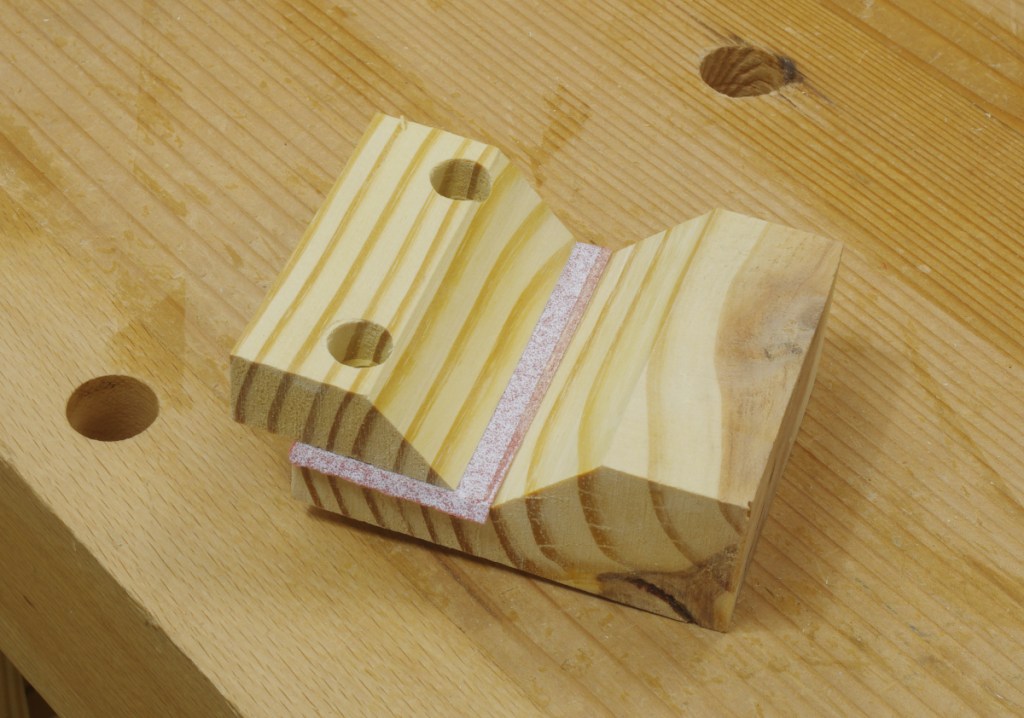
It’s essentially an adjustable chamfer block with a piece of sandpaper clamped down at the bottom. This worked, but not very quickly. It loads up too much. I think it would have gone much faster with 60-grit paper instead of the 110-grit here, but eh. This might work really well with a milled-tooth file wedged down in there. I think I know how to do that, but have no need right now.
In any case, it got done. I glued and wedged in the legs next. This left me with the final cutting task: getting the legs to length. I marked them with the “slide block of wood with pencil taped on” method, but then I needed a good way to clamp the octagonal legs to the bench to actually saw them. I was thinking about making some kind of custom caul, and then I just grabbed the above stupid tool and clamped with that:
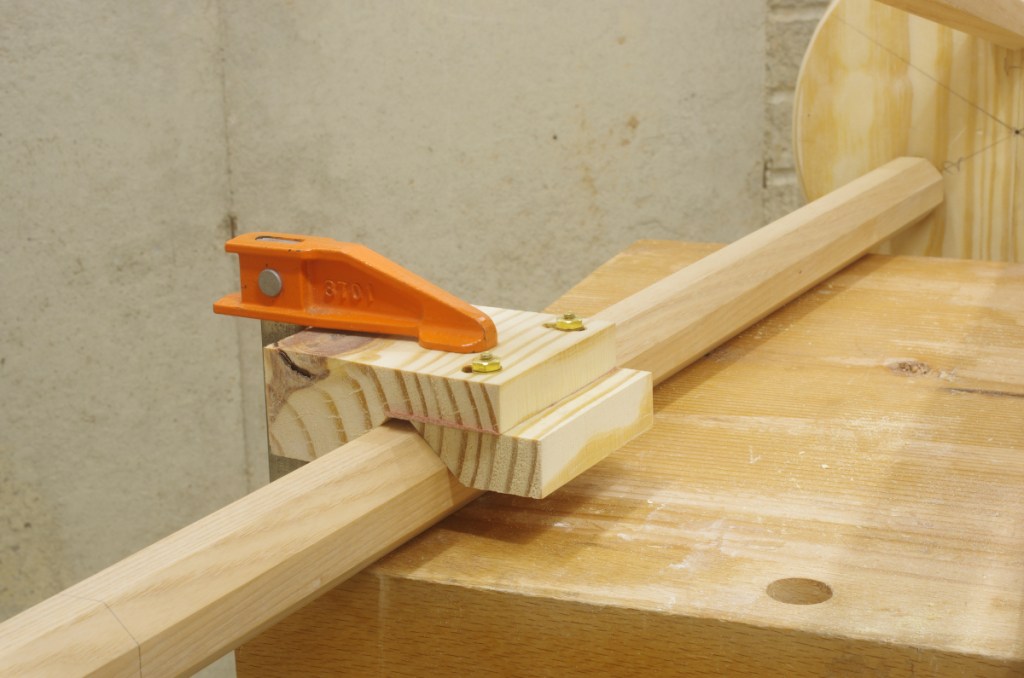
It was far more effective at this task, so the futility was diminished somewhat.
After sanding, I finished it with tung oil. Here it is in its intended location, without the object that will sit on top:
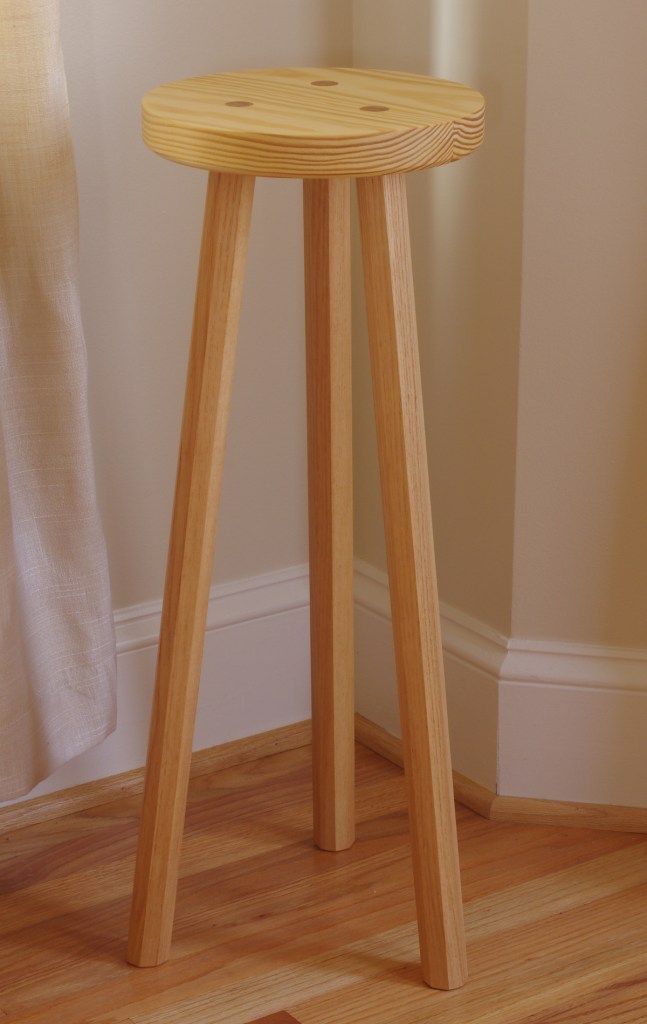
Aside from the top being southern yellow pine, the legs are ash; one of them was seen in this post. A project that I thought would get me a few quick XP instead dragged on without much action for a couple of months. At least I no longer need to sulk over this one.
Additional: I have a plan for that initial ruined top. I do not know when I’ll be able to act on it.
