
I cut the other dovetail joint for the top of the bookshelf and was feelin’ pretty good about it, and I thought that it might be a good time to start on some of the stretcher pieces that will provide the rest of the racking resistance. There will be three of them, two in the back, and one at the front at the bottom that will be a plinth (“kickboard”) piece.
The mortise in the back near the bottom was my first target, and I proceeded immediately to chop in the wrong place. I didn’t realize this until I had been away from it for a while, so when I came back, I extended it upward until it was in the right spot. You can see it here with its matching tenon:
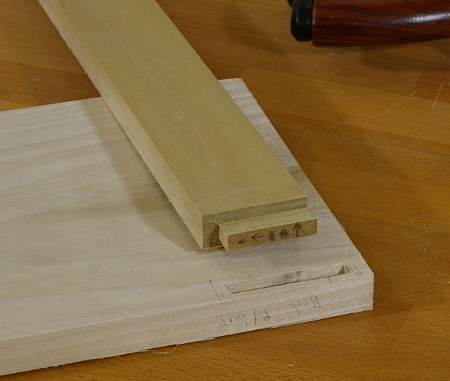
Thankfully, it will not be visible when this project is complete, but I really have to make this lesson count for something.
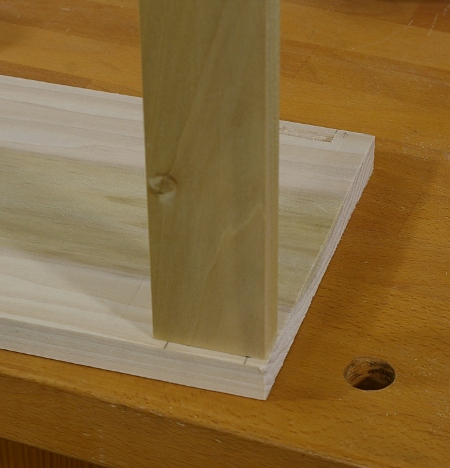
I chopped the mortise on the other side and cut its tenon without a hitch, so I was again feeling pretty good about myself, so I decided to go after the plinth next. And, of course, I went straight out and chopped that one in the wrong place, too. You see, this piece is supposed to be inset a little into the depth of the shelf, not flush with the front. However, I used my already-set cutting gauge to mark where to chop, and I marked it in a position that would have the plinth flush. Argh.
Well, I couldn’t resort to the same old stupid trick to fix this one, because the mortise was the right length, but at the wrong depth. So I thought about it a little, and decided that since I hadn’t cut the tenon yet, I would modify the tenon location instead. And so here’s the hack I came up with:

Yeah, so I just moved the tenon over to one side of the piece. It’s stupid, but it does work, as shown in this fitted view:
I don’t think I’ll be making that mistake again, because I’ll probably do all of them this way from now on. The reason is that I won’t have to change my marking gauge for it. Though I am sort of happy that I discovered a way to deal with this sort of thing, I am not happy that I wasn’t paying better attention in the first place.
But then again, it is called my prototype shelf for a reason. I already have a few modifications in mind when I build larger examples.
I have three more of the mortise-and-tenon joints to make on this project, then some housed joints, and the final (dreaded) part is making and fitting the rear panel.
