Cleaning an Iron and Chipbreaker

Today, I attacked the rust and grime on the chipbreaker (“cap iron”) and iron (“blade”) of that Stanley #6. This is yet another new metal–high carbon steel. Thankfully, this stuff isn’t as hard as the chrome and nickel of the lever caps from yesterday, so I was very happy to be able to take most of the crap off with the mineral-spirit-doused wadding, very fine steel wool, and a razor scraper:

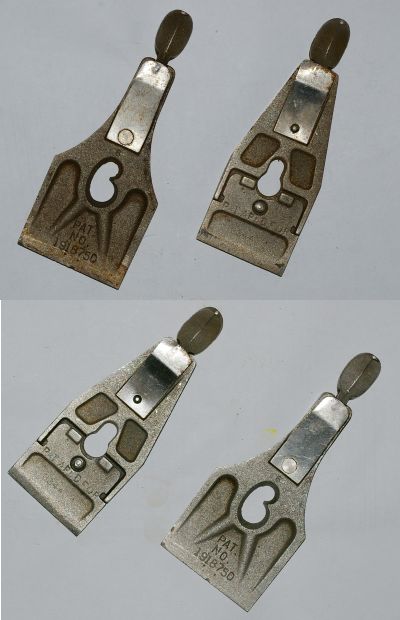
The chipbreaker is on the left, and the iron is on the right. The screw shown here attaches the iron to the chipbreaker. It was very hard to get a good “after” shot here, because the cleaned iron and chipbreaker are very light and somewhat reflective. So I converted that image to black and white to eliminate the weird color reflection.

The reason they reflect is not just because they are very clean, but also because I very lightly lapped them on 600-grit silicon carbide sandpaper. I was very impressed at what this did, but I had to be careful, because I will need to do a quality lapping of the iron when I hone it. Now that I’ve tried out sandpaper on a flat surface like this, it seems more likely than ever now that I will try out the so-called Scary Sharp method for honing blades.

The iron is not very straight, but it is straight where it counts–between the slot and the edge. I’ll lap that and maybe polish the rest, depending on how I feel. It’s definitely going to need quite a bit ground off for a new edge; it’s not straight there, and it’s even a little concave at the very end.

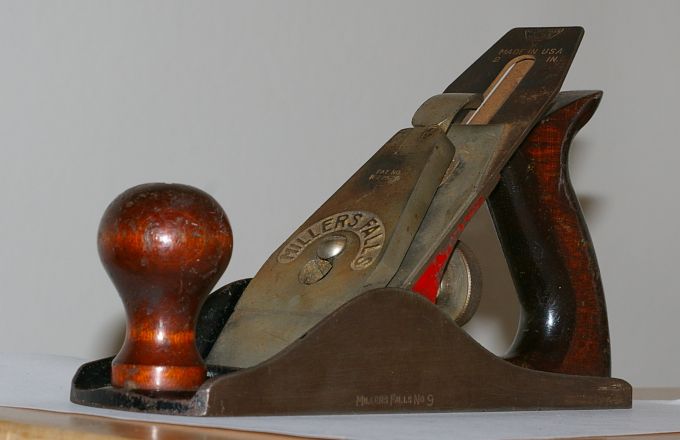
The Millers Falls smoothing plane’s iron and chipbreaker should be even easier than this one, because they’re a lot cleaner. But I still need to get some experience honing and lapping on the Stanley before I get to that plane. Good thing I’m not in a particular hurry.

Cleaning Lever Caps

I decided to clean off the lever caps on the Stanley #6 and the Millers Falls #9 today. This was by no means a fun task. In fact, it was a severe pain in the ass, but there’s a good reason for that.

The MF’s lever cap is chrome-plated, and the Stanley’s is nickel-plated. Both of these are really hard metals that are much more resistant to the agents in metal cleaners. I learned on the intarweb that you generally want to use the same thing for chrome and nickel, went to the auto parts store in order to find some chrome cleaner. I’d read that you don’t want to use a cleaner that includes wax if you’re doing a “hot” chrome piece (like an exhaust pipe). A bench plane’s lever cap doesn’t qualify, so I got one with wax, especially considering that some of the plating was showing signs of cracking.

Here is the before and after:

Because there was so much tarnish and some pitting, I first hit the surface with a “wadded polisher” (basically, fiberglass immersed in mineral spirits) to take off any rust and whatever other crud was on there. Then I nailed them with the chrome polish.

The Stanley cap appears to have lost a bit of its plating to the left of the kidney. Maybe someone took some sandpaper to it once? That surface is much smoother than the rest. It looks OK in the cleaned-up picture, but trust me, the finish on the right and bottom is much more reflective. Note the dark spot right below the logo’s “A.” This is as close to the original as possible (there was a drop of paint there). At least the logo cleaned out nicely.

The Millers Falls cap is in much better shape, but its chrome has started to crack. Basically, all of that discoloration above the arched lettering is a bunch of cracking.

None of this really matters to me. I guess I could spend like a million dollars and have them replated…

The backs of the lever caps saw only light tarnish and no cracking, so they cleaned up very nicely:

Overall, I’m very happy with the progress on these two planes so far. Neither has anything but very light surface rust, so the rest of the parts should clean up quickly. Then they’ll be ready for lapping, and finally, honing.

First Smoothing Plane

My first smoothing plane arrived today, a Millers Falls #9. This plane’s condition is not bad at all:

According to Randy Roeder’s type study, this is a so-called type 3 plane. It has the wartime fittings, including the non-tropical tote and knob, steel depth adjusting knob, and steel handle fasteners. There is no paint in the lever cap lettering recess. However, even though the tote is made of a domestic hardwood, its shape is the same as that of a type 2 plane. Weird, I guess, but it doesn’t really matter.

Dates aside, to put this plane to work, it seems that all I need to do to this plane is lap the sole, hone the iron, tune the chipbreaker, and add a washer to the tote’s fastening screw. I’ll probably do a few other things to clean it up, but it does seem that this tool was definitely worth the thirteen dollars.

Cleaning Brass

Being decidedly against the “patina” look on the tools that I actually want to use, I decided to clean up the brass adjuster and knob hardware on the #6 plane that I bought last Saturday.

Brass is a soft metal that doesn’t really rust; it tarnishes instead, sort of like silver. In any case, I had never cleaned it; all I knew is that people seem to be able to do it. So I used the amazing power of the intarweb to discover that most people use Brasso to clean brass.

Like many cleaners for restoration work, Brasso is one of those really awful poisionous cocktails that you’d rather not touch, smell, or lick. It has silica microabrasives in ammonia to scrape off the crap caked on the metal. I donned latex gloves, turned on all the ventilators, ripped up an old piece of clothing to dab some on, and followed the instructions to rub around a bit.

It works. Here’s a before and after of the hardware:

The tops of the screws really cleaned up. Notice how the Brasso also ripped off all of the rust on the steel rods and otherwise cleaned them up nicely. The cleaning also revealed a lot of dings in the knob’s screw head; this corresponds to all of the dings on the knob that are probably due to a wedding band or something.

Here is a close-up of the depth adjuster:

Notice how well it gets into the more detailed parts like the ribbing and cleans them up. One thing I did discover is that you have to dab a little more Brasso on your cloth if you find that it’s becoming less effective, probably due to some really grotesque chemical reaction.

Encouraged by this result (and having everything set up), I decided to try it out on the brass nuts from my “Warranted Superior” ripsaw:

I used a (newly sacrificed) toothbrush to get into the detail on the medallion. Not too bad there. This was also the first time I took the handle off the saw; I was very pleasantly surprised to find that there was very little rust in there.

Stanley #6 Acquisition

Last Sunday I went to the San Jose flea market to see if it was a place I could pick up any old tools. Also, I hadn’t been to a flea market in years. As a tool source, it was pretty lame. Way too many new (crappy) tools, oodles of old power tools, and a few vendors thinking that you’re a gullible collector and that you’ll pay a million dollars for a beechwood knob on a transitional plane.

However, one guy had a Stanley #6 selling for less than a million dollars. Most of the parts seemed in decent shape (the tote being intact rosewood and the knob in okay shape, a small chip in the nose, but very little rust). Patrick Leach (one of dem dar intarweb experts) says that this isn’t a particulary useful size of plane, but I decided that it seemed like a good enough place to start on learning how to disassemble, reassemble, and use bench planes.

(My general plan is to get Millers Falls smoothing and jack planes from eBay, because these seem less collectible and just as well-made. I have a MF #9 smoother on the way, in fact. But I’d rather first mess up a questionable Stanley from a flea market, especially because I mess up almost everything I do on the first try.)

Turns out that the plane is a fairly humdrum Type 16 made between 1933 and 1941. The lever cap is definitely Type 16; the rest of the features seem to match those for the Type 15, but who knows (and who cares). It’s important to date your plane in order to figure out what you might need to do to tune and restore it. For example, because I know the vintage of the lever cap, I know what it’s made of, and I can look up how to clean up the nickel plating on top of it.

As you might expect, it was pretty grimy. Some bug was living inside of it at one point. When I removed the frog, there were quite a lot of softwood shavings jammed up there in the bed. So it seemed like I’ve got a task ahead of me here, but I’m in pretty good shape because nothing is really broken and there’s very little rust. Keep in mind that I have never ever seen, much less used, a bench plane that’s tuned and sharp. I’ve read about them (I’ve read an awful lot about them, in fact).

One thing that worries me is that the tote is intact and therefore something that I really ought not to mess up (cracked totes are very common). So I’ll try to be very conservative when working with it and the knob.