
Sometimes, you gotta learn the hard way.
I started work on the sawplate by cutting off a bit of the tip so that the hang hole was off and there was a reasonable depth to the blade at the tip. So far, so good–no trouble encountered there.
Then I removed the lacquer from the blade with this clamping arrangement and Norton 3X sandpaper:
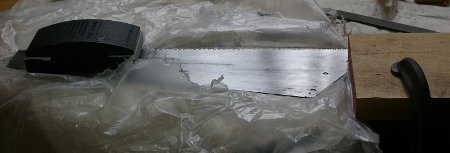
That, too, worked pretty well, and to my surprise, it removed .001″ of the thickness of the blade. That got me thinking that, hey, maybe I could remove some of the steel with this sandpaper, too. Maybe I’d even be able to taper it!
Well, that turned out to be an idiotic idea. Spring steel is still pretty hard, m’kay? After wasting who knows-how-long to remove maybe .0005″, I decided that maybe I’d try drawfiling it:
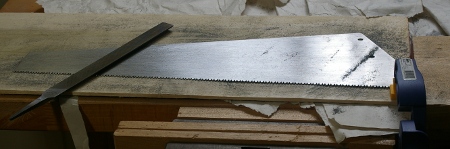
That sort of worked. After expending a ridiculous amount of effort, I’d knocked the plate down to about .032″ (from .035″ originally), and I got the tip of the top tapered down to about .029″ (maybe). I decided to call it finished.
Please don’t try this yourself. It was an incredibly stupid idea, and I’m never going to do it again. If you want a nice blade, I suggest this approach:
- Start with the blade thickness that you want in the first place.
- Use something like a belt sander with Norton 3X belts if you want to taper grind it. (And remember to use proper safety equipment–a respirator mask, safety glasses, gloves, and something that will hold that blade in place with no chance of letting go.) Not that I’ve tried this, but it’s hard to imagine any way that this would be worse than what I did.
Speaking of taper grinding, I discovered something about it when working on this project. There is a fair amount of smoke-and-mirror action going on with some of these old taper-ground blades. Most full-size handsaws seem to go from a full thickness of about .040″ to around 0.030″ along most of the significantly-tapered tapered part of the top, then it drops down to about 0.025″ at the very tip at the top (maybe the last half-inch). So that’s about 25% thinner along most of the top and I can see where that could be helpful in use. But the teeny bit at the very end? Meh. You hardly ever even have that part in the kerf, anyway.
My Pax saw has similar taper grinding as on the old saws except at the very tip. It appears much thicker than the old saws, but measuring reveals that it’s about the same. What’s going on here?
The original saw that I’m copying has less significant taper-grinding along most of the top–its cutting side is about .031″ and it’s ground to about .028″ along the top. That’s about a roughly 10% difference. However, it looks a lot thinner up there, and after a long time, it dawned on me that they’ve rounded off the top of the saw a little to make it look more elegant. It was the same thing with the older saws, and that’s why the Pax doesn’t look like it’s been taper-ground as well, even though it has.
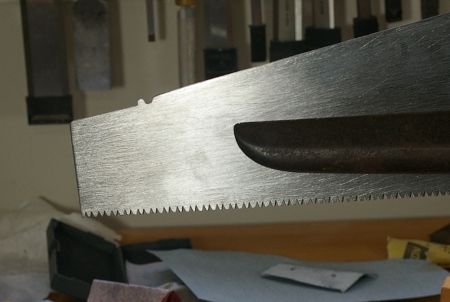
At this point, I was really starting to lose my mind, so I did the same rounding operation on the top of my new sawplate, and guess what? It now looks like it’s been “seriously” taper-ground. Continuing the absurd voodoo practice, I filed a nib onto the thing:
Now I’m almost ready to form and sharpen the teeth. I was originally going to file off all of the teeth and start new ones. However, it seems that the original teeth on this saw were set at 8TPI, which happens to be about what I want on this thing (it also matches the original), so maybe I don’t have to go the whole way.
The handle varnishing is almost done, too.
