
Right on the heels of the leg vise installation, I did the tail vise. I’ve never had a tail vise, but I’ve always wanted one. As it turns out, AJCP&R got me the Veritas quick-release version about two years ago (thanks again!), but it had to sit in its box for all of this time, waiting for this new bench to be made. That day finally arrived.
There’s been a bit written about the Veritas vise, but what I don’t see much out there about how versatile it is if you’re willing to play around with the shape of the chop. For example, although it’s designed to be used in conjunction with a wide front apron, that’s not necessary. In addition, you don’t need a whole 17″ of free space for overhang on the end. I broke both of these rules in my installation and I got away with it.
For those who have never seen the vise hardware, it consists of a the vise itself and a mounting plate that you attach to the bottom of your bench. The mounting plate provides the accuracy you need to keep the vise chop just far enough away from the edge of your bench to slide freely. You’re supposed to place the plate 1/4″ from the chop edge, all the way at the end of the bench. I didn’t do that. I discovered that you can get away with moving it about two inches away from the end of the bench, as long as you don’t obstruct the holes for mounting the chop (and you could even do that a little, if you’re willing to give up a bit of the vise’s travel):

The 1/4″ on the front side, however, is a (mostly) hard and fast rule. Here’s how the vise looks aligned on the mounting plate:
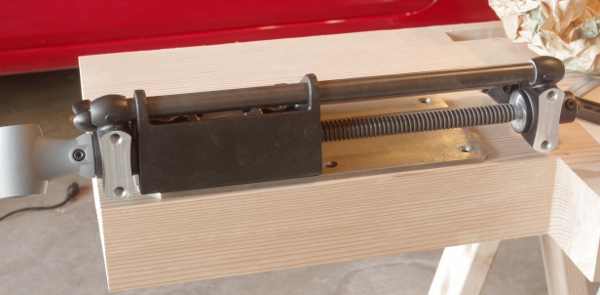
Notice that some of the vise hardware slips underneath the end of the bench. Also, some of the hardware on the other side (near where the leg will go, on the right side of this photo) protrudes in that area. I was able to do this because I decided to make the chop deep enough so that this little bit of hardware could slip behind the leg. You could do even more by widening the chop a bit more, but I personally wouldn’t recommend more than four inches because otherwise, you might put the hardware in the way of holdfast holes or something. As long as you don’t have anything silly up there such as a top stretcher between your bench legs, you should be fine.
OK, so the hardware fits. The next rule to break was the wide front apron. Because I designed this for a deep chop, I was able to make the inside of the chop wide (for the mounting screws), but the outside (the part that goes along the front of the bench) would be just the same 3.5″ beech that I used on the rest of the bench. Here’s a view of the chop upside down:
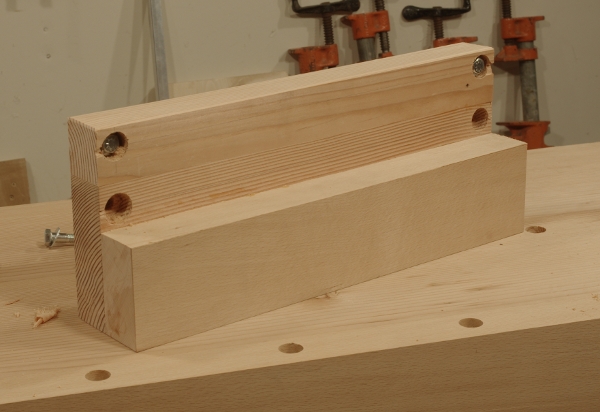
Oopsie on the blowout for the washer holes at the edges, but it hardly matters. At this point in the bench build, I was starting to starve for wood–I had very little douglas-fir of substantial size left. So for the backing piece, I milled and glued up two smaller pieces, and then glued those to the beech.
When it was upright and finished, it looked like this:
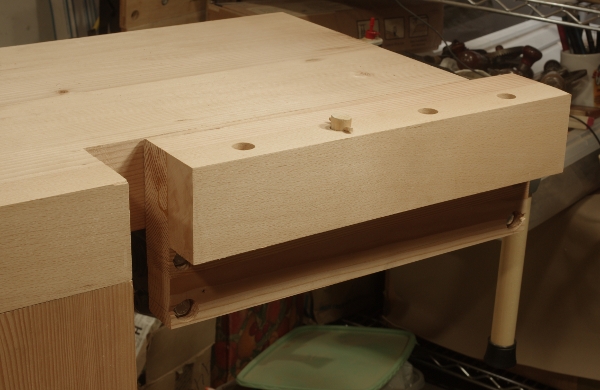
I had sort of a hard time trying to decide where to put the dog holes. In the end, I actually followed Lee Valley’s instructions and put the centers 1″ from the front of the bench. I could put in another row if necessary, but somehow I doubt it will be.
This vise really was a snap to install. You have to be quite careful when installing the mounting plate, but it took me longer to the make the chop with all of the milling and glue.
