
For the last month, I’ve felt so close to finishing the twin-nightstand project that I thought it could all come together at any moment. The final details proved as time-consuming to complete as the rest of the thing.
I’ve been varnishing for maybe a month. When I’d gotten enough onto the cabinets, I took care of two remaining steps before the final rubout. The first was how to attach the tops. I decided to use figure 8 connectors because they seemed like a pretty neat approach. Placing them into the cabinets was relatively easy. First, I marked out a box (with no particular offset):
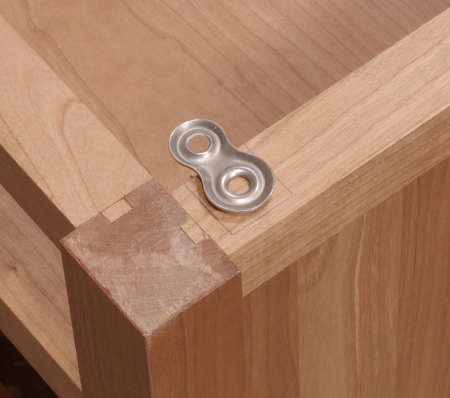
Then I chiseled mostly down to the depth of the connector, using my Veritas mini router plane to go to the bottom:

Then I predrilled a screw hole and did a test fit:
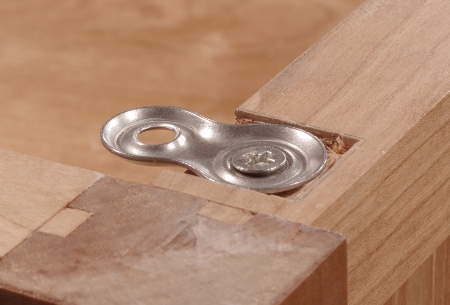
Marking and predrilling the corresponding holes in the tops was a fairly simple matter. However, attaching the tops was more difficult due to the limited space between the shelf and the top. I used a stubby screwdriver, a socket wrench with a driver bit, and practically no vision whatsoever.
The other final task not related to finishing was to cut the legs to height. I didn’t cut the legs to length at the start because I knew there would be some adjusting to do at the end. However, I couldn’t use the ol’ “put the legs under shims, put on a level, flat surface, and mark around” method that’s become popular, because I wasn’t doing a single piece–the nightstands were identical and had to be the same height.
It was easy enough, though. I took a long, thin piece of scrap, marked the desired height to that, then flipped the pieces upside-down (without the tops) on the bench, and marked to that:

It’s a little difficult to see the scrap here because it’s also a piece of cherry, but it’s the thin thing sitting up next to the foreground leg. After making the mark, I scribed around from that mark and sawed off the ends. It worked fine.
Varnishing and sanding between coats was the main time-consumer in the final stages. The cabinets and the drawers got four coats and the tops got five coats. As I have done with the last few projects, I rubbed out the finish with a progression of lubricated #000 and #0000 steel wool only. This was a matte finish again, so I didn’t feel the need to use rottenstone. And really, #0000 does leave a very good finish if you follow the grain most of the time.
So here are the two together:
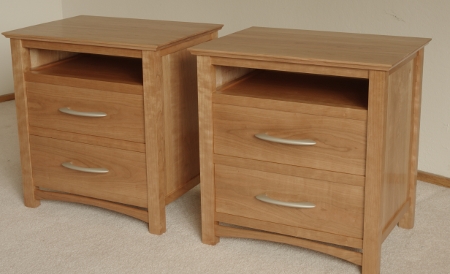
If you look closely, you’ll see that the drawer fronts are carefully arranged for continuity left-to-right as well as a balanced figure. On the left piece, the fronts have “cathedral grain” in the same orientation, and on the right, they have ellipses, also in the same orientation. But it turns out that the board used for these fronts was cut so that the front on the top left was next to the front on the top right, and the same is true for the bottom drawer fronts, so there’s a bit of continuity when you look at them left-to-right. (In the end, this probably doesn’t matter at all because they’re not going to be placed terribly close to one another and no one would notice, so don’t think of this as a sort of profound design choice.)
The handles are “halo” handles from Lee Valley.
A closeup of the right-hand cabinet and drawers:
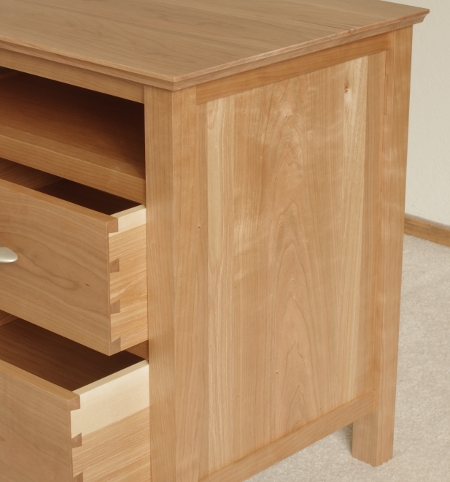
I need to make a note about what’s going on with the woods here. In the side panel, there is a roughly 6″ wide slice of flatsawn cherry stock in the center to give it the central cathedral figure; each side panel has this. On each side of that, there are narrower strips of birch meant to provide contrast as stripes. Then, the outermost strips from the center of the panels are again cherry.
This didn’t quite work out the way I’d planned. I wanted to birch to be slightly brighter and contrast just a little more so that you could see what was going on. It was supposed to be subtle, but not this subtle. However, the grain selection worked, so I’ll take that one.
And then there’s the drawer side fiasco. I said this before, but I’ll say it again: Use something reasonable for drawer sides, not yellow birch. The sides did turn out to look interesting enough, but these were such a nightmare to thickness, surface, and cut tails into that I really don’t recommend that anyone ever do it. Yellow-poplar is a great secondary wood and I should have used that.
But what’s done is done, and none of this is terribly important in the end. What is important is that they are in use now, and the final placement looks like this:
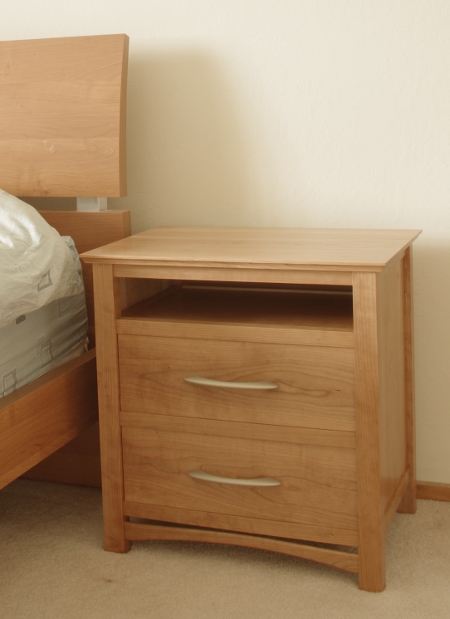
There’s something very important to note here–These pieces do not incorporate as graceful of a design as my first nightstand. They don’t have the elegant, long legs, they don’t have the simple square footprint, and they don’t have the fancy double-arc decoration. Furthermore, they took longer to build because there are more innards.
So is it a step back from a year and a half ago? It would be if form were everything. But these were designed primarily for function, with the form fitting into a context–they flank a somewhat cheap bed that has no particularly graceful features of its own. They are a tad fancier than the bed itself. Eventually, I will build a replacement for the bed, and at that point, I can make the bed do what the nightstands cannot do on their own.
(The function should speak for itself–I had strict instructions to incorporate a large top surface, plenty of deep drawers, and easily-accessible shelves.)
And there’s one more final step forward with these pieces. I kept them in the same room as the first nightstand while I waited for any remaining solvents to evaporate, so I was able to compare them. The craftsmanship is definitely a step up from back then.
As a postscript, I again need to thank Kirk Eppler, who helped out in a couple of ways when I was building these things.
