
Wouldn’t you know it, as soon as I’m ready to post something on dovetails, Leif over at Norse Woodsmith has already done one today. That’s deja-vu in more than one way.
Well, in any case, the story goes something like this: I’ve got some projects on the horizon that use half-blind dovetails, and it turns out that I haven’t gotten around to making one yet. Being the “cautious” guy that I am, I decided it would be good to try out a practice joint to find new and exciting ways to screw up.
So I grabbed a practice through dovetail joint that I’d made in some yellow-poplar long ago, sawed out that joint, and used the shooting board to get the ends smooth. The first step was to get the pinboard marked. I picked a depth for the tails to extend into the pinboard, and marked that on the edge of the board, from the front. Then I set another gauge (well, the other end of the Lee Valley mini wheel gauge) to slightly more than the width of the tailboard, and marked it on one side (only one side is necessary because you don’t cut into the other side). The marks are barely visible in this photo, but you get the idea.
Then I worked on the tailboard, marking the tail length from the gauge setting used for the depth into the pinboard (the line on the top near the back in the preceding photo). There’s nothing special about the tailboard, and it took about as long as tailboards usually take me these days.
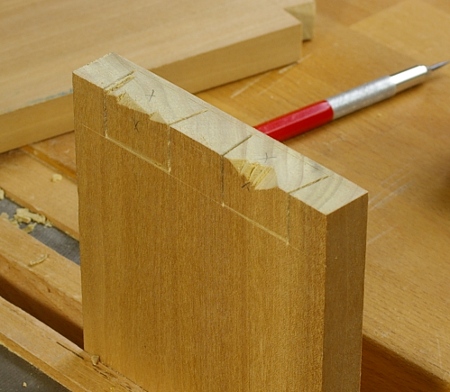
With the tailboard in hand, I marked the pin profile into the pinboard:
I sawed the diagonal between the two initial lines in the first photo in this post. So far, I’d been pretty much following the instructions in Korn’s book, down to putting the Xs on the waste parts. However, for the next part, I decided that I didn’t want to try to drill out most of the waste. First I tried paring across the grain (you can see the diagonal sawcuts in the front of this photo, too):
It didn’t take long for me to realize that this was sort of a stupid idea, so I switched tactics. In other words, I just grabbed the trusty pigsticker and started whacking and prying away:
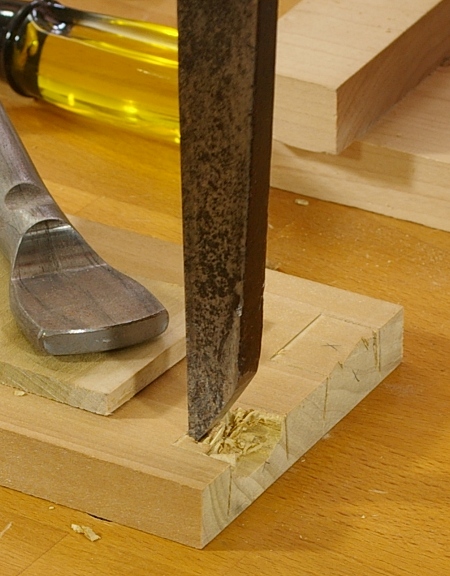
This was highly effective, and got most of the job done quickly. At a certain point, though, you have to switch to paring so that you get smooth, clean lines. It seems that the trick to doing this joint quickly is to be good enough with the big chisel to get as close as possible to the paring step. I was okay at this, but not great. So there’s something to practice.
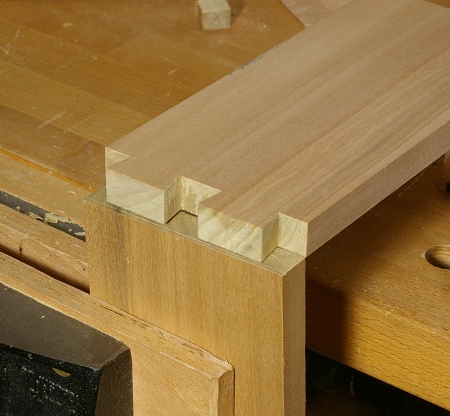
But before long, I’d finished paring (even without a skew chisel or a special dovetail chisel), and I had a finished pinboard:
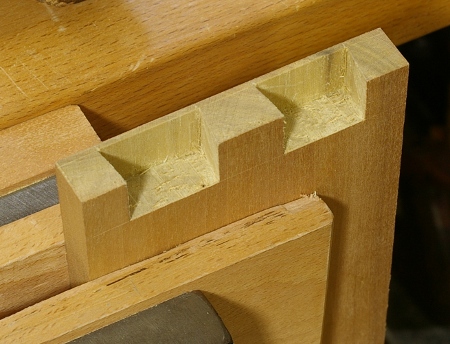
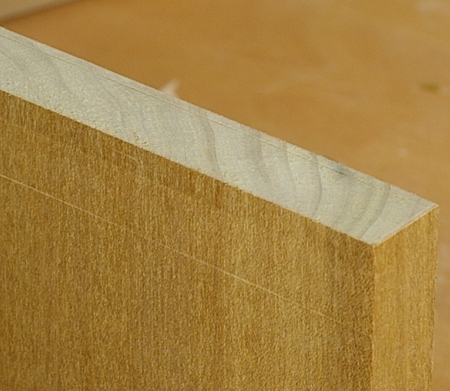
OK, I guess it’s good that this looks like a pinboard, but does it fit? Surprisingly, yes, and with no additional tweaking. I banged the joint together and planed the pinboard flush, and here’s what I got:
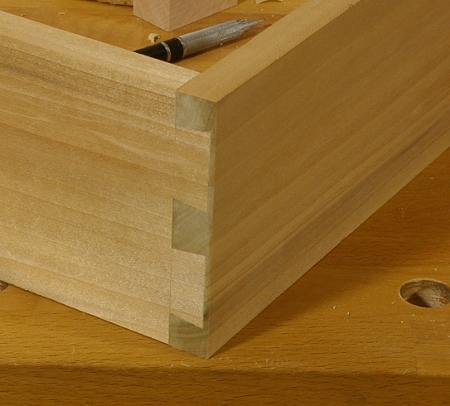
I’m a little uneasy about the way this turned out, because it doesn’t seem like I made any mistakes. My fear is that I’ll make a mistake when doing a project because I didn’t know about it earlier. But then again, I did realize something about half-blind dovetails that I didn’t think about before: You can actually make a lot of mistakes on this joint and still have it turn out fine, because it shows a little more than half of the junctions that a through dovetail does. Be careful in paring down the thin edge near the face, and that’s about it.
