
When I built my workbench, I did not include a sliding deadman because I was tired, lazy, etc. I said to myself that I’d add one when I needed it (or I actually felt like doing it), and just put some grooves inside the front frame of the bench.
I’d been tempted to make it several times over the past few months, but last week, as I was working on the stretchers for the new auxiliary bench, I found myself trying to square off the top of some medium-sized stretchers and not having a very good time of it. I thought to myself that I’d try the old “prop up the other end of the work with something” trick, and that was not at all pleasant.
So it was time. As I mentioned, I’d been thinking about this and had read the description in the Chris Schwarz book, and that had me worried. See, I had only plowed a measly little 1/4″ groove on both the stretcher and the underside of the workbench:
But the benches described everywhere have a triangular-profile rail (or “track”) on the bottom, and Schwarz says to plow a big, deep 1/2″ or so groove in the underside of the top so that you can clear that thing. He also integrates the track into the stretcher at times. I was worried, because I thought that maybe this was going to be a lot of work, or I otherwise screwed up in some massive way–it wouldn’t be the first time. The triangular-profile rail is a really good idea because it keeps shavings, dust, and small children out of a groove.
So in a fit of nervous twitching, I looked for a way around this. I made a rail in a triangular profile, and put a tongue on the bottom so that it would fit into the groove on the stretcher. Here’s a photo of how that looks (along with the deadman, showing the mating profile on the underside of that):
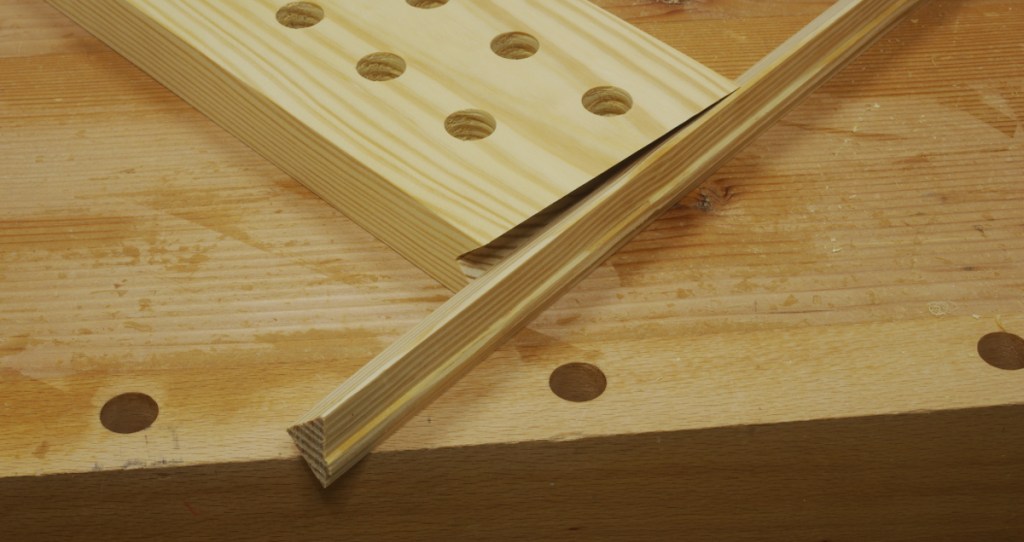
The theory here is that when you install the deadman, you do it in a unit with the rail. This way, only the tongue on the bottom of the rail needs to clear the stretcher when installing. Because this is significantly shallower than the really deep thing on the deadman, it would require far less of a groove in underside of the top.
Much to my surprise, this actually worked. Cutting that tongue on the bottom of the rail was a pain that I’d rather not recount (note to self: just tack the offcuts from the other side to my sticking board next time.).
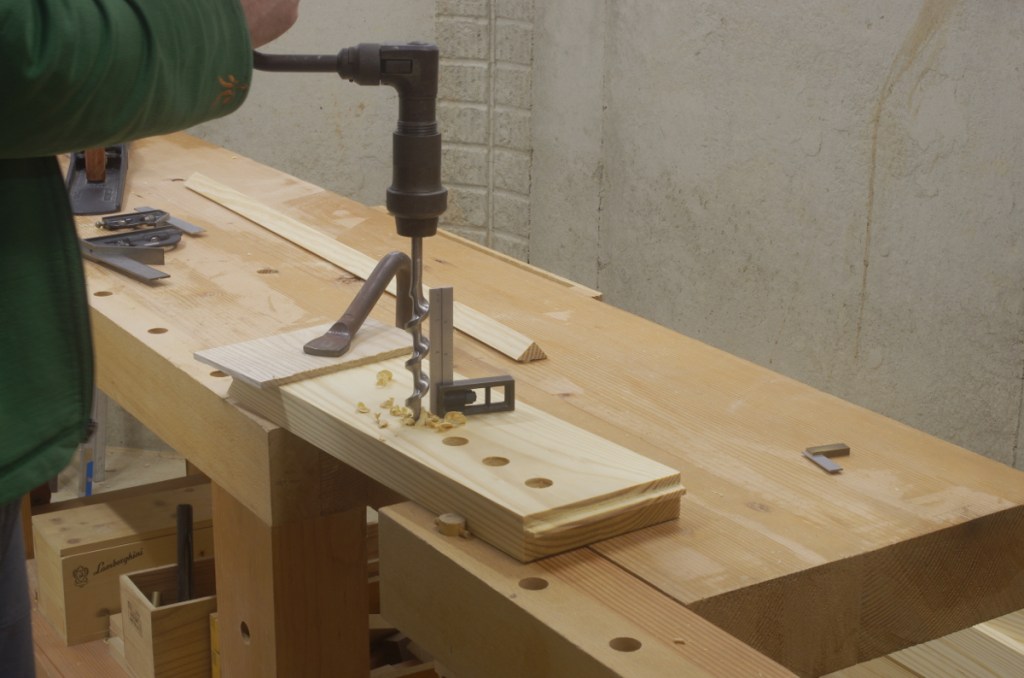
I should mention that though I made the tongue with hand tools, I cheerfully turned to my bandsaw to do the profile on the top of the rail, as well as the channel on the bottom of the deadman. I guess I did all of the holes with a brace and auger bit (despite actually owning a drill press now):
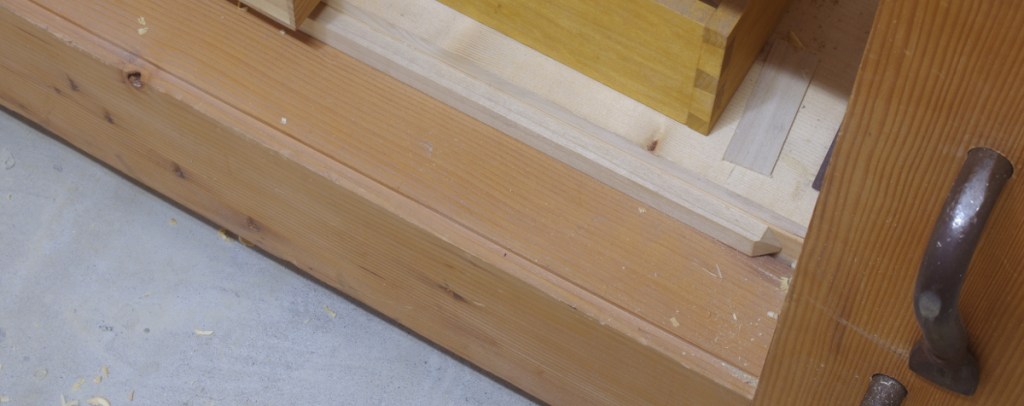
With all of this done, it was time to see if it actually works in practice, and in that respect, it’s certainly an improvement:

There is a lingering question I have, though. In the first Schwarz book, when describing the deadman of the French bench, he says to cut a curve on each side so that you can get a hand between the deadman and a leg when up against a leg. I don’t get this; why would you need to put your hand there? It’s not to facilitate moving the deadman; you can just grab it from the other side and pull it over with zero effort.
In later work (the LVL bench), Schwarz says that a straight board will work but that a straight board is boring. I will admit that the curve makes it look cooler. But I’ve never been very cool. So I’ll leave it as-is until I have a real reason to change it.
