
I made a marking gauge a while back, complete with captive wedge and everything. For a long time, I didn’t have a cutter for its arm, so it wasn’t very useful. Then at some point, I made a cutter out of a section of an old saw, and it was then a working tool. The problem was that I never used it, and after a while, I realized that I never used it because I was always reaching for my gauges with thumbscrews. I guess I didn’t like the captive wedge.
To fix this, I decided to ditch the wedge and retrofit a thumbscrew. I bought all of the hardware necessary and immediately proceeded to bore too small of a hole for the screw insert, and this ultimately ruined the fence part of the gauge. I removed the screw insert, gave up for the day, and sulked:
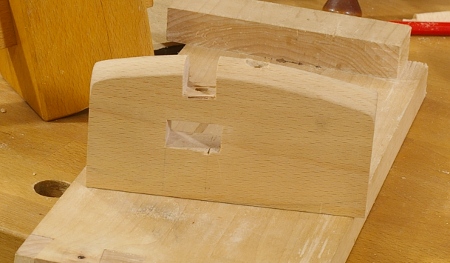
The next day, I milled a new piece of beech to thickness, cut it to size, and mortised a new hole for the fence:
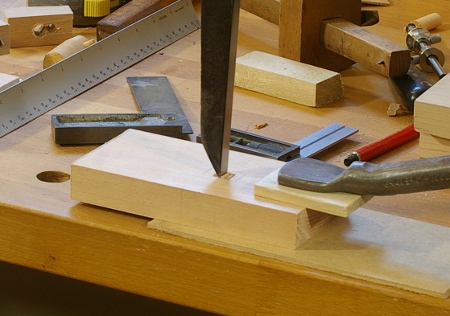
Standard through-mortise procedure applies: Cut halfway through on each side. Easy enough; then I roughed out the fence shape with my new saw (I’m using it more than I thought I would):

I finished the shaping with my saw rasp and some sandpaper–nothing new there.
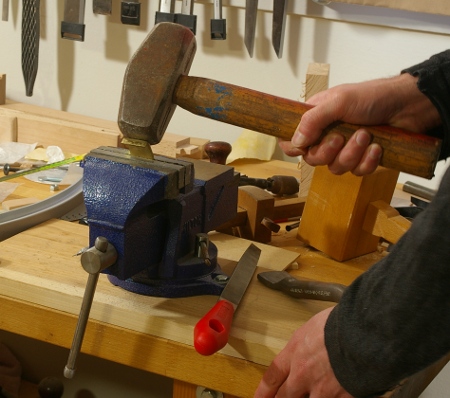
In all of the thumbscrew-model marking gauges I’ve seen (the metal screws, that is), there’s a piece of metal acting as a guard between the screw and wooden parts. I don’t know what to call this, so I’m calling it a “saddle,” because it’s usually a U-shaped thing that fits over the wood.
I cut off a piece of brass from some stock I had lying around, put it in a vise, and smacked it with a hammer to try to form it. I guess I was expecting it to be a lot softer, because nothing much happened when I did that. So I took out my little sledgehammer and gave it a pounding. I don’t know if this is the way you’re “supposed” to do stuff like this, but it worked:
After some filing, it fit perfectly.
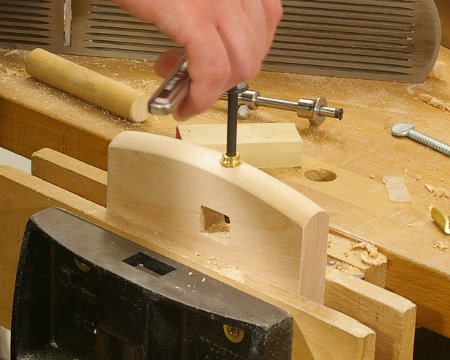
Then I turned my attention to boring the hole for the screw insert. I had already drilled a small pilot hole before shaping, so keeping the bit straight wasn’t a problem, and I’d also learned from my previous hamfistedness that I needed to use a #7 bit, not a #6 bit. Fortunately, I had one:
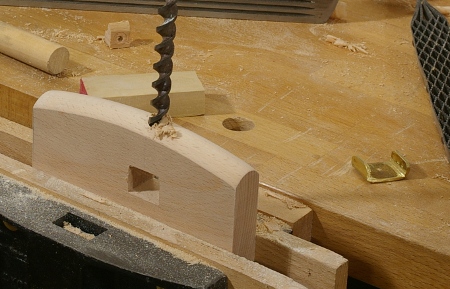
Notice the finished saddle piece at the right here.
After going to the correct depth with the #7 bit, I finished going all the way through with a #5 bit, then I used a large furniture connector driven by a ratchet to drive in the screw insert:
To finish it, all I had to do was hack the thumbscrew to a proper length and put everything together:
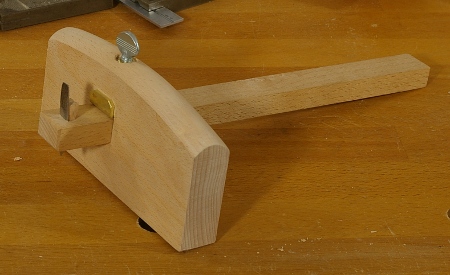
Immediately after putting everything together, I realized that maybe the marking gauge with a thumbscrew and wedged cutter is not as simple of a tool to make as it seems. That’s because there is a limitation of this particular configuration that I hadn’t thought about before, namely, that the cutter can’t be set less than about 3/16″ away from the fence. There are two causes here:
- I put the wedge on the inside of the cutter rather than the outside.
- The saddle introduces yet more buffer space. That wouldn’t have been a problem if I put the saddle on the side, like some other marking gauges, but I didn’t like the fact that the arm had a little play in that configuration.
How interesting! I know how to overcome both of these issues, but I’m not going to bother for this particular gauge. It’s done and ready to use.
[Edit: See this post for how I fixed the second problem listed above. Also, see this post for a more advanced approach to the problem.]Links not available at the moment, but they are the tweaking and panel gauge links, which might not be restored yet.
[Edit: Bob Rozaieski has put up a video of making a French style marking gauge. Check it out here.]
