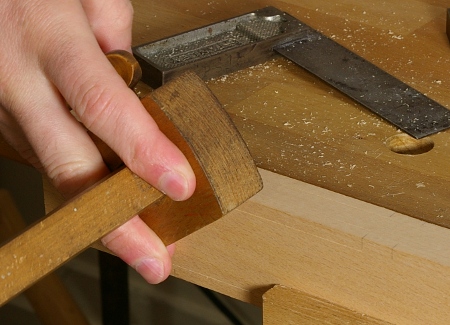
To make the handles into one end of the frame saw, I first marked out the length-wise dimensions with a pencil and the cross section limits with a marking gauge (hard to see in this photo, but they’re there):

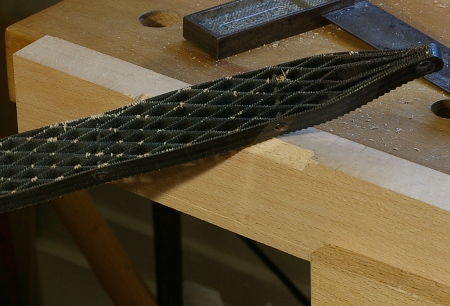
Then I set to work shaping the handles. I used my Shinto saw rasp first. I really like that tool: cheap, innovative, and highly effective.

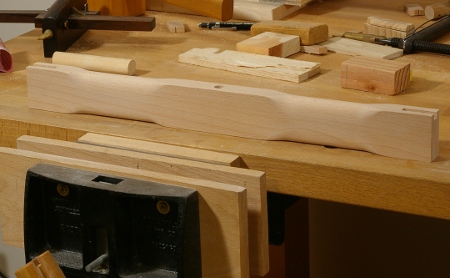
To finish shaping, especially at the edges, I used my Gramercy saw maker’s rasp. Then I smoothed it out with progressive grits of sandpaper on a dowel, starting at 120 grit. Finally, I hand-sanded to 320 grit, and called it ready:

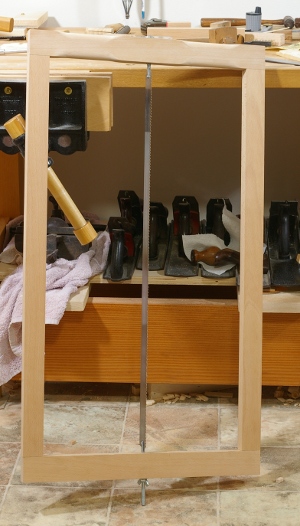
Then I assembled the saw with the newly-waxed blade:

So far, so good. I tried it out and quickly found that I will need to do some version of the trick that others have done to keep the blade square. It does tend to slip around. It also seems like it’s necessary to practice technique, because this thing does have a tendency to slip out of the kerf because the blade is so thin.
And then there’s the issue of workholding. Hmm. Clearly there is more work to be done here.

That’s a very fine looking frame saw! Nicely done!
About workholding…
It depends on the size of the work. For a lot of the typical cabinetry work, drawer parts and such, most folks stand a piece of wood in the leg vice and work from a corner, then flip it and work from the opposite corner.
My last resawing project was for boat lumber, boards up to 12 inches wide and 16 feet long. Obviously, the leg vice wasn’t going to be much use. I came up with a technique of holding the long material with two saw benches. It worked out extremely well. You can see more at this blog posting: http://www.bob-easton.com/blog/?p=475
About blade twisting…
If it gets really bad, you might need to put a slot in one of the cross pieces and draw the end of the blade into the slot … or use blocks on the cross pieces to accomplish the same. I made my saw frame with slots in both end pieces and then cut a blade (from an old Disston) to be long enough to extend into the slots.
Lastly, since we need to reveal our names when posting, how about revealing yours? I’m a strong believer in signing your work, and am often annoyed by people using online “screen names” or no names at all.
Enjoy the saw! Once you tune up a good one, they’re a joy to use and get used very often.
LikeLike
Hi Bob, first, thanks for reminding me about the name thing. For the longest time, the only people who actually read this blog were people I knew in person. But that’s changed, so I put some info on my profile page and I also changed some wordpress settings on this end to change the posting name.
I’ve given a few thoughts to the blade twisting, and I might have a slightly different solution other than the tried-and-true “blocks with slots glued on the end” thing that most everyone does. I’m still not too sure what my needs are here, because I did use the saw again today and it wasn’t so bad.
I had a look at your saw bench technique of holding wood a while back and I do think it’s a pretty good one. I think I will probably end up doing something along these lines.
LikeLike
Looking great! You are going to love using it!
I’ve been thinking about upgrading my rather pathetic rasp assortment and you mention two of the candidates in this post. How do you like the Shinto? What about the Gramercy saw maker’s rasp?
One more thing about the saw and blade slippage etc. Are you giving it enough tension? Mine takes more than I can do by hand – I use a wrench on the wing nut. The blade should produce a clear musical tone when plucked with a fingernail.
LikeLike
Hi Dan, okay, I’ll tell you what I think of both.
The Shinto saw rasp is a very fast way to start shaping operations, and its fine side leaves a decently smooth surface, ready for smoothing out. One interesting thing I’ve found is that you can work across the grain to a certain degree (depends on the wood). I’ve even used it to pare down the edges of boards. The only really significant drawback is that they don’t have a half-round version, so you can’t go too crazy with concave shapes. This isn’t a big deal to me, and it’s hard to argue with the price of this thing, considering how much I’ve used it.
I really like the Gramercy sawmaker’s rasp. It gets in where the Shinto can’t go, and although it’s not as fast, it’s still pretty quick and leaves a good surface. Remember that this particular rasp is safe-cut; teeth on the round side, smooth on the flat, and it’s curved at the end. You may not need these two features, so have a look at their other rasps as well, especially if you want a bigger one, or need one with teeth on the flat side. I have also come to appreciate that the Gramercy is made of stainless steel.
I’ve heard and seen various other rasps and tools do the job, too. On the non-traditional side (that is, not a Nicholson, Auriou, or something like that) I know someone who really likes the float-like Vixen files, and also seems to like those Japanese things that look like Vixen files with segmented teeth.
I’ve been thinking that I might need to use a wrench on the tensioning nut. I’ll try it!
LikeLike